Showing posts with label Eggs. Show all posts

Veggie Stove-top Frittata with Sweet Corn, Tomatoes & Zucchini

There are only a few weeks left of summer, but as the days start to cool and the tans start to fade, we can at least enjoy the lush late-summer produce that's filling the market stalls.

Sweet corn, juicy tomatoes, those oversized zucchini and squash--all ripe, sweet, and bursting with flavor.

This veggie frittata brings all of them together (along with a bit of salty cheese, of course!) for a simple stove-top meal that works at any time of day. I shared this recipe on the TODAY Show this week (along with this spicy green juice that doubles as a fab Bloody Mary alternative!).
0

Potato Chip Scrambled Eggs with Chorizo

Breakfast in Spain tends to be a simple affair of coffee with perhaps some toast and a slice of ham or a flaky pastry. It's a small, low-key kind of meal eaten at home or at a stand-up cafe bar on the way to work, and pales in comparison with the more leisurely lunches and late-night dinners the locals enjoy. It's a discovery that can prove frustrating for jet-lagged American tourists used to starting their days with a hearty feast of eggs or waffles or pancakes or bacon (or all of the above!). 

And so, there is Brunch & Cake, a charming little restaurant in the L'Eixample neighborhood in Barcelona that serves American-style breakfast food with a Catalan touch. It's become a favorite with both the tourists who hear about it from their hotel concierges and the Instagram-loving locals looking for that perfect towering pancake shot.


Eugene and I ate there our first morning in Barcelona, having arrived from Lisbon after midnight the previous night. Tired and hungry, we appreciated the mix of familiarity and local flavor.


It was there that I first tried the genius combination that is eggs with potato chips

Served scrambled with chives and Iberian ham on the side, the dish is a riff on the potato chip fritata created by culinary master Ferran Adrià. Adrià's version was itself a twist on the classic tortilla de patatas (also known as tortilla española), and a genius shortcut that replaced freshly cooked potatoes with crunchy potato chips.

For my homemade version of potato chip scrambled eggs, I start the dish with diced onions and swap in Spanish chorizo instead of the jamón.

I recommend using thick kettle-style chips in your favorite flavor. Plain will be delicious, of course, but think about other flavors that would work well with the eggs. Something spicy with hints of jalapeño or black pepper chips. Or try sour cream and onion, two flavors that also go well with eggs.


Regardless of the chips you use, these might become your new favorite cooking shortcut. Once you try the scramble, think about other ways you can swap in potato chips for raw potatoes. Add to a bowl of soup, mix into a stir-fry, or bake them into a casserole. They could also be fun tossed with mustardy-dressed mixed greens and good oil-packed tuna for a cheater version of a classic Salade Niçoise. Really so many possibilities--message me and let me know if you come across some other fun ideas!


****
Loved this recipe? Here are three other easy breakfast recipes you might like:

And let's connect so you can find out the next time I post! Follow me on Twitter, Instagram, or Pinterest, become a fan on Facebook, or sign up to receive my once-a-week e-mail updates.

Thanks so much for reading!


Potato Chip Scrambled Eggs with Chorizo
Serves 4

Ingredients
2 tablespoons olive oil
1/2 Spanish onion, diced
3 cured chorizo links, sliced (about 1/2 pound)
8 large eggs
1/4 cup heavy cream
5 ounces kettle cooked potato chips (about 2 small or 1 medium sized bag)
1/4 cup loosely packed parsley, minced
Kosher salt, black pepper, and red chile flakes to taste

Directions
Whisk together eggs and cream.

Heat olive oil in a large nonstick skillet over medium heat.

Add the onion and saute for 5 minutes until onions start to soften. Add the chorizo and cook 3-5 minutes until fat has rendered and chorizo is slightly charred.

Add the potato chips, tossing to coat with the onions and chorizo. Add the eggs and lower heat to the lowest setting. Stir continuously until the eggs cook completely.

Divide into plates, and garnish with parsley, salt, black pepper, and chile flakes. Serve immediately.


0

Easy Vanilla Bean-Orange Angel Food Cake

What do you say we break a few rules together?

Angel food cake is usually one of those fussy cakes I prefer to completely avoid. Anything that requires special pans and beating and sifting or other extra steps beyond "dump ingredients into a bowl" is just usually way more than I want to bother with.

And yet...I've also always been a big fan of these sweet and soft white fluffy clouds of cake. At the grocery store, I have a tendency to pause by them, resisting the urge to poke and squeeze them. And left to my own devices, I will eat the entire thing.

I mean...it's basically just air, you guys. Don't judge.

I recently went on a citrus curd-making binge (more about that soon), making enormous batches of passion fruit curd and lime curd for no particular reason other than "I like it."

(Life lesson: that is ALWAYS reason enough.)

This left me with buckets of egg whites that had to be used up, and so the angel food cake came to be!

And though all the recipes said I had to do things like "sift flour and sugar three times" or "use a nonstick tube pan" and "fold in gently one tablespoon at a time," I said "oh to hell with all that!" because I just wanted my cake.

So this is what I did: I do not own a tube cake pan and have no plans to buy one, so I just used 2 9x5 loaf pans.

The loaf pans were nonstick, which is allegedly a BIG no-no, except that if you line them with foil it does double duty of making them not-nonstick AND making it really easy to remove the cake from the pan.

The recipes said I had to sift the flour and the sugar three times, but I was not interested in that, so instead I just whisked them together and poured them into the mixer in a slow steady stream. They incorporated right in without deflating the eggs or boring me to tears.

Awesome!

The one thing I DID do was let the pans cool upside-down. This was easy as I just rested them on cans and jars of peanut butter.

The cakes came out perfectly. One to photograph and share. And another to eat all by myself.

Because it's JUST AIR, you guys...

****
Loved this recipe? Here are four other loaf cake recipes you might like:


And let's connect so you can find out the next time I post! Follow me on Twitter, Instagram, or Pinterest, become a fan on Facebook, or sign up to receive my once-a-week e-mail updates.

Thanks so much for reading! 

Vanilla Bean-Orange Angel Food Cake
Makes 2 9x5” loaf cakes

Ingredients
1/2 teaspoon kosher salt
1 cup cake flour
1 1/2 cups egg whites, room temperature (from about 10 large eggs; do not use boxed or powdered egg whites)
1 teaspoon cream of tartar
2 teaspoons fresh lemon juice
1 1/2 cups granulated white sugar
1/2 teaspoon pure orange extract
1 vanilla bean, scraped OR 1/2 teaspoon vanilla bean paste


Directions
Preheat oven to 350 degrees. Place an oven rack on the lowest rung. Line two 9x5 loaf pans with foil so that it overhangs on the sides. Do NOT grease the pans.

Whisk together flour and salt. Set aside.

Place the egg whites in a the base of an electric mixer and beat at medium speed for 30 seconds just until it starts to look foamy. Add the cream of tartar and lemon juice, and raise speed to high. Beat until egg whites form soft white peaks.

While the mixer beats, slowly add the sugar in a long steady stream. The egg whites will continue to thicken and turn shiny and white. Beat in the extract and vanilla bean seeds, then lower the mixer to the slowest setting and slowly add the flour in another long steady stream.

Turn off mixer as soon as all the flour is in. Use a spatula to give it one or two quick folds to make sure the flour is all incorporated, then divide into the two prepared loaf pans.

Bake 25-30 minutes, or until puffed and slightly golden brown on top.

Remove from oven and cool upside down by balancing edges of pan on two cans or jars.

Once completely cool, remove from pan, peel off foil, and serve.


0

Chorizo, Manchego & Asparagus Frittata

A few years ago, I went to a work event where I won a pan as a prize in a raffle.

While I was a bit bored with the prize at the time, the pan--a shallow 12" round nonstick skillet--has since become one of my favorites for making baked omelets and frittatas.

The only problem was that I never owned a round platter large enough to serve said frittatas, so plating was always a bit of a challenge. I'd usually go with a large rectangular one, and just let the sides of the circle hang off the edge--a clumsy solution at best.

But a few weeks ago, I found the perfect plate in the sale shelf at Crate & Barrel! It's huge, round, and perfectly flat, which is ideal for serving frittatas family style on the dining table. Add a bowl of salad on the side and dinner or lunch is served.

Now my problem is storage. After doing the dishes yesterday, Eugene came out with the platter and asked me where it goes.

"Um...I haven't figured that out, yet," I explained.

Because my perfect big platter is too big to fit in any of the cabinets or shelves where I keep my other ceramics, but too delicate to slide in vertically in the slot where I keep my larger wood platters and sheet pans. I've actually just been leaving it out on the dining table where it inevitably gets topped with a pile of mail and keys and magazines.

I suppose now I'll have to buy a big cabinet to put it in, but then that would mean I'd have to find a bigger apartment to fit the cabinet.

It's really a neverending cycle...

Now this frittata that you see here is anything but imperfect.

The combination of salty, spicy chorizo and manchego is already a classic, but diced asparagus adds a fresh, seasonal touch to the dish. I really like to pile in the fillings and only use enough egg to hold it all together.

Served with a salad or other simple side, an omelet this size will feed about four. Eugene and I usually have half for dinner and then the leftovers become an easy breakfast or on-the-go lunch.

Oh and if you're entertaining guests, you can also cut this into small cubes and serve cold as an appetizer, perhaps with a dot of aioli or pesto on top.

I do this a lot and it's always quick to go, regardless of the hour of day.

****
Love Always Order Dessert? Let's connect! Follow me on Twitter or Pinterest, become a fan on Facebook, or sign up to receive my once-a-week e-mail updates. And if you ever need any entertaining or cooking advice, please don't hesitate to e-mail me. Thanks for reading!     


Chorizo, Manchego & Asparagus Frittata  
Serves 4

Ingredients
1 tablespoon olive oil
1/2 pound Spanish chorizo, diced (use the kind that is smoked and fully cooked, not fresh sausage)
1 bunch asparagus, rough ends trimmed, diced
8 large eggs, slightly beaten
1 teaspoon kosher salt
2 teaspoons smoked spanish paprika
1/2 cup shredded manchego cheese, plus a bit more for sprinkling

Directions
Preheat oven to 350 degrees.

In a large 10-12" nonstick skillet over medium heat, add chorizo and oil, and cook 3 minutes just until some of the fat is rendered and chorizo is a bit crispy. Add the asparagus and saute 2 minutes then spread out evenly in the pan.

Whisk the eggs, salt, paprika, and cheese together, and pour evenly over the asparagus and chorizo.

Place in oven and bake 10-15 minutes until cooked through and slightly puffed. Flip out onto a serving plate and sprinkle with a bit more cheese before serving.
0

Baked Hashbrown Potato Nests (with Asparagus Scrambled Eggs)

Spring is here. I can smell it!

It's still chilly, but something feels a little different out there. I swear it smells...warmer.

I've been keeping the windows open in the afternoons. Letting the crisp fresh air blow in through the drapes, sweeping through with those tiny hints of spring-like sweetness.

I've been reaching for lighter, brighter outfits. I've been leaving my coat open and my scarf at home.

I even noticed the beginning of flowers bursting through the ground in the park where I walk Hudson.

It's here. I'm sure of it.

The world is about to burst with beauty.

Spring to me equals brunch, and with Easter coming up this weekend, I thought it was time to share a fun brunch dish that's perfect for entertaining guests: Baked Hashbrown Potato Nests filled with a Cheesy Asparagus Scramble.

I love having people over this time of year.  It's also the time of year that makes me wish I had a large patio or roofdeck or some kind of outdoor space to entertain in.

But this little dish is just as lovely indoors with the blinds hiked high to let the sunshine in.

These easy hashbrown cups are baked until crisp then filled with soft asparagus scrambled eggs. Top with a dollop of tangy yogurt and a few parmesan shavings, then serve with a mixed green salad.

This recipes is wonderful for Easter brunch or just any lovely day this Spring. You can even go tinier with these and make them into bite-size appetizers!

(The potato baskets can actually be filled with anything. Eugene's dinner last night was hashbrown baskets filled with yogurt, salsa, chorizo, cheese, and sauteed veggies--almost like little taco baskets. So great for leftovers! Btw, here's a great round-up of Easter leftover recipes.)


****
Love Always Order Dessert? Let's connect! Follow me on Instagram at @alwaysalejandra for sneak peeks at my daily life. 


Baked Hashbrown Potato Nests with Cheesy Asparagus Scrambled Eggs
Makes 12 baskets (serves 4-6)
Ingredients
For the nests:
7 medium sized Russet (Idaho) potatoes
Kosher salt and black pepper
1 large egg, slightly beaten
Vegetable oil spray (or vegetable oil)

For the filling:
1 pound asparagus, trimmed and diced into 1/2" pieces
6 large eggs
2 tablespoons water
Kosher salt and black pepper
1/4 cup freshly grated parmesan cheese, plus 12 large shavings of cheese for garnish
1 cup of plain Greek yogurt or creme fraiche

Mixed greens to serve on the side.

Directions
Preheat oven to 400 degrees. Generously grease a standard muffin tin with vegetable oil spray or a cloth dipped in vegetable oil.

Wash and peel the Russet potatoes, dropping them into a bowl of cold water as you do so, so as to prevent browning. Grate them all using either the grating blade on your food processor, or by hand with a box grater, then place in a fine sieve or length of cheesecloth and squeeze out to remove as much excess water as possible (this will keep them crispy).

Mix potatoes with 1 large egg and season with kosher salt and black pepper. Divide potatoes into the muffin tins--about 1/4 to 1/3 cup per tin, then press into the sides to form a small basket. Spray or brush the insides with a bit more oil and sprinkle with salt and pepper. Place in oven and bake about 25 minutes, or until tender on the inside and crisped on the outside and edges.

Remove from oven and run a knife around the edges to release. Let cool slightly, then turn out.

While the potato baskets cool, prepare the filling. Heat 1 tablespoon oil in a nonstick skillet and saute the asparagus for 2 minutes until bright green and just a bit tender. Remove from skillet. In a small bowl, whisk the eggs, water, and a bit of kosher salt and black pepper. Whisk in the grated parmesan and then scramble on low heat until cooked to desired doneness. Add the asparagus back in and divide among the potato cups. Top with a dollop of yogurt and a shaving of parmesan.

Serve with a side salad.

0

Hot Chocolate Protein Shake

Winter mornings make me especially thankful that I work from home. As Eugene bundles up in his layers to head outside, I pull on a warm sweater and fuzzy socks, and wander into the kitchen to make myself breakfast.

My routine lately has included a protein shake like this coconut almond one I shared earlier in the month, but a snap of cold weather last week called for something a bit more. You see, while I don't actually have to go outside, I've found that the temperature in my apartment can be completely unpredictable. Since most people are out during the day, my building occasionally does this thing where it keeps the heat on low.  

Too low.

So low that it is impossible to stay warm--I've tried layers, balancing mugs of hot tea in my lap...even burying myself under the covers with my laptop to work! Finally, I turned to the oven, keeping it blasting all day long as I produce a steady stream of homemade breads, cakes, and roasted vegetables. Late last week, I went so far as to buy a huge pork shoulder that I quickly marinated and shoved in the oven for 8 hours of guaranteed warmth.

And for breakfast, I started sipping this steamy concoction--my hot chocolate protein shake.

Though essentially a very simple chocolate protein shake, the trick is in the heating of the milk, which turns a simple smoothie into a rich, hot beverage. I also mix in an egg, which is gently cooked by the hot milk, and helps to turn the drink into more of a proper meal. I was actually inspired to add the egg after reading a long-ago article about what Marilyn Monroe supposedly ate for breakfast in the morning.

Lovely though she was, I can assure you that my version is much, much tastier.

****
New to Always Order Dessert? Consider subscribing to my RSS feed, follow me on Twitter, become a fan on Facebook, or sign up to receive my once-a-week e-mail updates by filling in your address in the box on the right. And if you ever need any entertaining or cooking advice, please don't hesitate to e-mail me. Thanks for reading!


Hot Chocolate Protein Shake

Ingredients
12oz (1 1/2 cup) whole milk (substitute almond or coconut milk)
1 large pastured egg
1 rounded scoop unsweetened vanilla or plain whey protein powder (optional)
2 tablespoons unsweetened cocoa powder
1/2 teaspoon vanilla extract
1 1/2 tablespoon raw honey or other sweetener of your choice

Directions
Heat the milk in a small saucepan over medium heat just until bubbles start to form. While the milk heats, combine the egg, protein powder, cocoa, vanilla, and honey in a blender and blitz a few times to mix. Gently pour in the hot milk and puree again until very smooth and thick. Taste and adjust sweetener, if desired and serve immediately. 
A banana or a scoop of peanut butter would make wonderful additions!


0

Spinach & Goat Cheese Frittata Ham Cups

Something about Spring and sunny lazy weekend days just begs for easy brunch dishes like this one. This is an idea that has been around for a while, but which I finally wanted to try myself. Most versions that I see of this call for adding the veggies or cheese and then topping with a freshly cracked egg and cooking until set, but I switched it up a bit because I hate runny yolks and I hate egg whites on their own. Ick.

So I decided to turn it into more of a mini-quiche or frittata inside of a ham cup. SO much better! Also quicker, easier, and can be eaten both hot or cold, making them much less fussy when entertaining since you can just make them in advance and serve them up cold on purpose. The ham cup makes them look super cute and impressive--very key when you're essentially just serving people eggs. It's all about the presentation!

Full disclosure--I make these for myself during the week, too, as they make for a perfect grab-and-go lunch during busy weekdays. I actually prefer these cold--I think the flavors come through better and my tongue doesn't get burned as I shove them into my face. You could also make a batch of these on Sunday to enjoy as a quick breakfast during the work-week.

Tip: Have vegetarian or non-pork-eating friends? Simple skip the ham in a few of the wells and pour the batter directly into the greased muffin tin--this way you serve all your friends without having to make different dishes for everyone!

A note on the ham: You can use any kind of ham you'd like (from regular deli ham to prosciutto), but my FAVE for this and all ham-uses is this fancy ham I get from Schaller & Webber, called "Bauernschinken." It's very similar to prosciutto, but smokier and a little thicker--less delicate. If you're in NYC, they sell it on Fresh Direct, so definitely check it out. I order about a pound of it every time I do groceries (much to Eugene's chagrin--he calls it "that expensive ham."). Whatev.


Spinach & Goat Cheese Frittata Ham Cups
Makes 12 ham cups (about 4-6 servings)

Ingredients
12-14 slices ham
8 cups fresh baby spinach (or 2 cups frozen chopped spinach, thawed)
4oz goat cheese (chevre)
9 large eggs
1/2 teaspoon kosher salt
1/2 teaspoon freshly ground black pepper
1/4 cup heavy cream or milk

Directions
Preheat oven to 400 degrees. Spray or brush a muffin tin with oil, then line each cup with a slice of ham being sure to seal it up as much as possible (sometimes it helps to cut the ham slightly). Don't worry if there is overlap on the sides.

Combine fresh spinach with a few tablespoons of water in a large covered pot over medium heat. Let steam a minute or two, or until the spinach is completely wilted (skip this step if using frozen spinach). While the spinach wilts, whisk together the 9 eggs in a large bowl. Drain spinach & squeeze off excess liquid, then add to the eggs.

Crumble the goat cheese into the spinach and egg mixture, then add the salt, pepper, and cream. Stir until combined, then divide the mixture into the 12 ham-lined cups, filling all the way to the top.

Bake for approximately 20 minutes, or until the eggs are puffed and slightly golden on top. Remove from oven and use a fork and knife to carefully remove each egg cup from the muffin tin. Serve immediately, or let chill and serve as a cold dish.

Leftover egg cups will keep well for 3-5 days when wrapped individually and refrigerated.
0

Mini Egg Muffins with Zucchini and Chorizo

These adorable little portable egg muffins take mere minutes to throw together and will last you through the week. Make a dozen or more of them and wrap individually. In the mornings, you can grab one or two as you head out the door. (These are wonderful cold, but if you prefer your eggs warm, you can pop them in the microwave for a few seconds to heat them up.)

Think of the recipe below as just a formula and feel free to improvise. Replace the chorizo with diced ham or leftover cooked chicken or turkey. Replace the vegetables with whatever is in season or on sale; add onions, garlic, chives, or scallions for more flavor. You can even add other spices and herbs to change the flavor. Use different kinds of cheese Experiment with things like chili powder, cayenne, smoked paprika, curry, or Asian five spice to come up with new combinations.


****
New to Always Order Dessert? Consider subscribing to my RSS feed, follow me on Twitter, become a fan on Facebook, or sign up to receive my once-a-week e-mail updates by filling in your address in the box on the right. I also offer pantry and kitchen makeovers, custom menu planning services, group cooking classes, and offer a variety of culinary workshops in the NYC area. Click here to find out more!

And if you ever need any entertaining or cooking advice, please don't hesitate to
e-mail me.
Thanks for reading!

Mini Egg Muffins with Zucchini and Chorizo
Servings: 6

Print this Recipe

Ingredients
10 large eggs
1/2 cup whole milk
1 teaspoon Kosher salt
1/2 teaspoon ground black pepper
1 tablespoon ground turmeric (optional, but adds great flavor, color, and health benefits)
1 tablespoon olive oil
1/2 onion, diced
1/2 cup diced fully cooked chorizo sausage (you can substitute: diced cooked ham, chicken, turkey, shrimp, or other protein)
2 cups raw zucchini, diced into 1/2" pieces (you can substitute an equal amount or mix of another vegetable such as squash, spinach, mushrooms, sweet potato, tomatoes, peas, carrots, kale, potato, etc.)
1/2 cup parsley, roughly chopped (you can also use chives, scallions, cilantro, tarragon, or other herbs)
1/2 cup grated Parmigiano Reggiano (you can substitute any other cheese you'd like)

Directions
Preheat the oven to 350 degrees. Generously grease a muffin tin with olive oil or spray well with oil spray. Set aside.

Whisk together the eggs, milk, salt, black pepper, and turmeric until well combined and light and frothy (about 1 minute). Set aside.

Heat the oil in a medium skillet over medium high heat. Add the diced onion and saute just until soft, about 2 minutes. Add the chorizo and zuccini and saute for 3 minutes. Remove from heat and stir in the parsley. Let the vegetable mixture cool for 1 minute before adding to the eggs. Stir to distribute and add the grated cheese.

Use a ladle to scoop the egg mixture into the muffin cups until each reaches almost to the top. Place in the oven and bake for about 12-15 minutes or until the muffins puff up high and are fully set in the center. Remove from the oven and run a butter knife around each muffin then remove and let cool completely on a plate. Serve immediately or if using later, wrap in plastic wrap and store in the refrigerator for up to one week. (These can also be frozen for longer storage.)

Can be eaten cold, at room temperature, or reheated in a microwave.


0

Tortilla Española

Just as good cold as it is hot, Tortilla Española (Spanish Omelet) is pretty much the answer to all mealtime quandaries. Served piping hot from a still-sizzling skillet, it's a perfect weekend breakfast--savory, filling, and just a little bit fancy.  The potatoes are cooked right in so you don't need an additional side (though I make a personal point of never turning down a few strips of crackly, salty bacon).

For lunch the next day, or maybe even later that same afternoon, you can sandwich a cold thick slice of it between two slices of buttered, toasted bread; pure perfection whether you're pulling it out of a brown bag at the office or a picnic basket on the beach.

That same breakfast omelet is an easy dinner alongside a lemony dressed pile of salad greens and a glass of crisp white wine. When company shows up--unexpected or otherwise--slice the round into 1" cubes and poke with toothpicks for an easy and elegant hors d'oeuvre that I guarantee will be one of the first things to disappear. It also makes for a great potluck dish as it can be made in advance, travels well, doesn't need to be heated, and will appeal to meat eaters and vegetarians.

I grew up eating Tortilla Española on a fairly regular basis. My mom would always make one on the weekends, and I was young when she taught me the trick for flipping it onto the platter to cook the other side. I soon took over the weekend breakfast duties and would make the tortilla for the whole family, serving it whole alongside toasted whole wheat bread and fresh orange juice.

At first glance, the idea of making a Tortilla Española can be intimidating (flipping a half-cooked cake-size omelet?!), but I promise you it's really not that terrifying and have offered three options that you can choose from. Something you may not know about me is that I can be a total klutz; in the past month I have broken no less than 2 glasses, 1 vase, 1 ceramic breadbasket (a wedding gift!), 2 mugs, and a plate. All of this in just ONE MONTH. The first few times, Eugene came over to help clean the broken shards, but after the fourth time of hearing the tell-tale crash and my moaning "oh nooooo!" he just turned up his video game and left me to my own devices.

I tell you this to prove that if a klutz like I can flip an eggy omelet with no major disasters, you can do it too.

The "real" way to make a tortilla involves peeling and slicing the potatoes and frying them individually before making the omelet, but over the years I've found that gently boiling the sliced potatoes is a low maintenance way to achieve the same effect. No splatters to clean up and no babysitting the potatoes when you could be working on other things. (By the way, if you have leftover baked, roasted, or even fried potatoes, you can also just slice into small pieces and proceed with the recipe. It won't taste *exactly* the same, but it's a great way to use up leftovers.)


A few basic tips:

1. Use any kind of potatoes you like, but I've found that low-starch potatoes like Yukon golds work best because they don't turn into mashed potatoes during the cooking process. (Not that a mashed potato omelet is a bad thing. It sounds like a very good thing, actually, but it's not what we're going for here.)

2. Don't bother peeling the potatoes. Seriously. I never peel potatoes (or really anything) unless I really have too. The skin is loaded with nutrients, is completely edible, and doesn't affect the taste in any noticeable way. Save yourself the time and hassle and just give them a quick scrub before slicing.

3. Slice the potatoes as uniformly as possible. You want all the slices to be about the same thickness. It doesn't have to be perfect, but the more similar they are, the better. Some people like super thin slices; I usually slice them about 1/2" thick. There is no wrong way--just do what you prefer.

4. Remember that you're not looking to caramelize the onions, just soften them a bit. You want the pure, slightly spicy, flavor of the onion to come through, not the sweetness.

5. Make extra. I always use at least a full dozen eggs and a large skillet when making my tortilla, and recommend you do the same. The leftovers keep for about a week and as I described above, are great hot or cold. Grab a slice for a quick breakfast when running out the door, pack slices for lunch, or serve a piece to your kids when they get home from school. That said, if you only have a few eggs and a potato or two, you can still make a quick small one--it's a great snack or lunch when you're in a pinch.


****
New to Always Order Dessert? Consider subscribing to my RSS feed, follow me on Twitter, become a fan on Facebook, or sign up to receive my once-a-week e-mail updates by filling in your address in the box on the right. I also offer custom menu planning services and offer a variety of culinary workshops in the NYC area. Click here to find out more!

And if you ever need any entertaining or cooking advice, please don't hesitate to
e-mail me.
Thanks for reading!


Tortilla Española

Ingredients 
3 lbs potatoes, such as Yukon Gold, scrubbed and patted dry but not peeled
1 large Spanish onion or 2-3 medium yellow onions
12 large eggs
1 tablespoon smoked spanish paprika
1 teaspoon freshly ground black pepper
1 tablespoon Kosher salt

Fill a large pot with 3 quarts of cold water and season with kosher or sea salt. Slice each potato into 1/2" thick round slices and drop into pot of cold water. Once all potatoes are sliced and in water, place pot over high heat and bring to a boil until potatoes are fork tender.

While potatoes come to a boil, cut the onions in half and slice into thin half moons. Whisk the eggs in a large bowl with paprika, black pepper, and Kosher salt.

Add 2-3 tablespoons of olive oil to a 10"-12" nonstick skillet with 2" sides and heat over medium-high heat. Add the onions and saute just until translucent. Add the onions into the egg mixture. Drain the potatoes and add to the eggs.

Add a bit more oil to the pan and pour in the egg and potato mixture, distributing it evenly. Cover and let cook over medium heat for about 15 - 20 minutes or until cooked around the edges and set. Run a spatula all around the edges and jiggle the pan to make sure the omelet isn't stuck. You now have three options:

Option #1: Take a large platter and invert it over the pan, covering it completely. Place an oven mit-clad hand over the bottom of the plate and with your other hand firmly on the skillet handle, flip the omelet onto the plate. Then place the skillet back on the stove and slide the omelet back in so that the top side is now on the bottom. (This is the traditional way to do it. There is a small risk of egg and oil spillage, but it's minor and with practice won't be a problem at all.)

Option #2: Place a large platter on the counter and holding the skillet over it tilted at a 45degree angle, use a large spatula to slide the omelet onto the plate leaving the top part on top. Then invert the skillet over the omelet, place your (oven mit-clad) hand on the bottom of the plate, and flip the omelet onto the skillet. (This works best if you have a skillet with sloped sides that allow for easy sliding.)

Option #3: forget the flipping! Just turn on your broiler and slide the skillet with the omelet under the broiler for about 10 minutes to let it finish cooking. (This is both the easiest and least authentic.)

If you chose one of the flipping options, let the omelet continue to cook for another 5-10 minutes or until set. Some people like the inside of the omelet to be a little runny, but I don't so I let it cook until it's well done.

Flip onto a plate and let set for 10 minutes before serving. Can be served hot or cold. You can also adapt this recipe by adding sliced cooked chorizo, manchego cheese, spinach, kale, garlic, pimentos, or any number of additions.
0

Pizzagaina (Italian Easter Ham Pie)

Pizzagaina (aka: Italian Easter Ham Pie, Pizza Chena, Pizza Piena)

My beautiful friend Katie sent me an email a few weeks ago suggesting that I make and write a post about Pizzagaina, the Italian meat and cheese pie traditionally eaten on Easter Sunday to celebrate the resurrection of Jesus and the gift of salvation. As soon as I got her message, I agreed because Pizzagaina is an AMAZING dish that can be enjoyed by all regardless of nationality or religion (just ask my Jewish Ukrainian husband who has been eating it daily for the past week!).

Filled to the brim with a variety of meats, eggs, and cheese, it's truly a celebratory dish that stands in marked contrast to the more modest meals traditionally consumed during the previous 40 days of fasting and sacrifice (Lent).  It's definitely not an everyday dish, but rather one that is meant to be enjoyed during this joyful season, in the company of friends and family.

Slice of pizzagaina

First, a little language lesson: The name Pizzagaina (pronounced "pizza jay-nah") is actually an Italian American adaptation of the original name Pizza Chena, which in itself is Neapolitan dialect for "full pie." The pie is also known in some families as "Pizza Piena" (piena meaning "full" in standard Italian) or simply Italian Easter Ham Pie. Those of you who also speak Spanish, will recognize the similarity to the Spanish word for full, which is "llena."

Apart from the different names, there are as many variations of this dish as there are Italian families.  Some families prefer a chewy, bread-like crust, while others go with a more standard, flaky pie crust. Some people layer their meat in sliced, while others used diced cubes. The variety of meats and cheese can also vary depending on tastes and availability. The recipe that I give you here is by no means meant to be the definitive version; but it's a good basic version, which produces a stellar pie, and which will still allow you to customize it as you'd like. Below I've added my notes and recommendations on each aspect of the dish, along with suggestions for making it your own based on your budget, tastes, and what's available in your neighborhood.

pizzagaina crust

The Crust:  I recommend a standard yeasted pizza dough crust, which is easy to work with and stands up well to the heavy filling. I provide directions for making your dough from scratch, but if you prefer, you can also use premade pizza dough purchased from the freezer section of the grocery store or even bought directly from your local pizza parlor (a lot of places will sell you a couple pounds of their dough if you just ask).

If you want a flaky dough, simply use an equivalent amount of your favorite pie crust. (If you opt for the latter, you can top the pie with a  lattice crust or even add a decorative cross with extra dough on top of the top crust.)

two pounds of meat

The Meat Filling: You're going to need about 2 pounds of a variety of meats. The choice is totally up to you. I used about a 1/4 pound each of Genoa salami, pepperoni, capicolla, hot soppressata, and a 1/2 pound each of Black Forest ham and mortadella. Feel free to pick your favorites or go by what's on sale or available in your neighborhood. If you'd like, you can also use a portion of cooked hot Italian sausage (out of the casing) to make up the 2 pounds.

One thing I definitely recommend is to use a combination of both mild (like ham and mortadella) and heavily spiced (like capicolla and pepperoni) for a more interesting and balanced flavor. Traditionally, this dish is made with pork products, but I'm sure cured beef like bresaola or bastirma would also work nicely. Depending on your budget and what is available to you, you can also get creative and use things like Taylor ham (pork roll) or diced smoked sausage.

Pizzagaina

The Cheese: Traditionally, Pizzagaina is made with an Italian cheese called "basket cheese" (also "Easter Cheese"). This cheese is often sold in regular grocery stores in neighborhoods with a high Italian-American population (like where I grew up in New Jersey) and Italian specialty stores everywhere else. It is named because of the way it is made and sold, inside a little basket. The cheese itself is very mild, and used as a binder in recipes like this one. As this can be difficult to find, you can simply use ricotta (preferably fresh) as an easy substitute. Other possible options include 
farmer's cheese, mascarpone, or quark.

For the sliced cheese, I use a 1/2 pound each of mozzarella and provolone (I like the latter because it adds a little sharpness to the mix). As this is such a heavy wet dish, I recommend using either a dryer mozzarella (one that doesn't come packed in water), or fresh mozzarella that you've allowed to drain for a few minutes before slicing. Do not use mozzarella di buffala or burrata. You can also replace a portion of the sliced cheese with grated parmigiano or pecorino, and mix that into the egg filling.

pizzagaina cooling in the springform crust

Finally, the baking dish: I make my pizza in a round springform pan with high 3" sides. I like that this pan allows you to easily release it from the mold once it's cooled so that you can serve on a pretty platter. You can also bake this in a square or rectangular baking dish and simply serve it in the pan. Once again, the choice is totally up to you! 

Oh and one last thing! Once you follow this recipe, you'll see that essentially what you're making is a filled loaf of bread. A technique which can easily be adapted to other (and perhaps slightly healthier) variations. You could, for example, make a vegetarian version that replaces the meat with a variety of grilled vegetables, or stir in some savory sauces like pesto or tapenade for additional flavor. Or you can use a variety of ground meats. The possibilities are really endless; I hope that you find this recipe just as inspiring as I do!

P.S. Want to see more step-by-step photos? Visit the pizzagaina photo album I posted on the Always Order Dessert Facebook page, and feel free to leave any questions you may have about this recipe (or any other!) on the wall, and I'll get back to you right away! xo

pizzagaina for Easter


****
New to Always Order Dessert? Consider subscribing to my RSS feed, follow me on Twitter, become a fan on Facebook, or sign up to receive my once-a-week e-mail updates by filling in your address in the box on the right. And if you ever need any entertaining or cooking advice, please don't hesitate to e-mail me. Thanks for reading!

Pizzagaina (Pizza Chena, Italian Easter Pie)
Serves 12-14; If you'd prefer, you can simplify this dish even further by using pre-made pizza dough for this recipe (you'll need 2 pounds), or for a flaky crust, substitute your favorite pie crust recipe and proceed from there.

Dough
2 1/2 teaspoons active dry yeast (1 packet)
1 tablespoon granulated white sugar
2 cups warm water (about 115 degrees F)
1 tablespoon Kosher salt
6-8 cups all-purpose flour
3 tablespoons olive oil, plus more for greasing bowl

Filling
13 large eggs
2 pounds of a variety of your choice of Italian charcuterie/salumi (such as genoa salami, mortadella, capicolla, pepperoni, ham, prosciutto, soppressata, etc.)
1 teaspoon ground black pepper
1 pound fresh ricotta or Italian basket cheese
1/2 pound mozzarella cheese, thinly sliced
1/2 pound provolone cheese, thinly sliced

Equipment: One 10" by 3" round springform pan  (A 9x3" springform will also work, but you may have a little extra filling or dough leftover)

Directions

First make the dough:
In the base of a stand mixer, combine 1 package of active dry yeast with 1 tablespoon sugar and 2 cups warm water. Whisk well to dissolve and let stand 2 minutes.

Add the tablespoon of Kosher salt and 6 cups of all-purpose flour, to start. Use the dough hook on your mixer to mix together, increasing speed as the flour is incorporated and a dough starts to form. Add the olive oil, and continue to knead at high speed in the mixer, adding more flour 1/4 cup at a time until the dough is smooth, springy, and not sticky. The dough should form a kind of a tornado within the mixer as it kneads--coming away from the sides entirely, but still connected to the bottom. If it still sticks to the sides of the bowl, add more flour. If it comes off the sides and bottom completely, add an extra tablespoon or two of water. Let knead in the mixer for 5 minutes.

Prepare a large clean glass or metal bowl by drizzling olive oil in the bottom.

The dough with be smooth and able to be handled when ready. Remove the dough from the mixer and form into a smooth ball. Place into the oiled bowl, turning once so that the oil coats the top and bottom. Cover bowl loosely with plastic wrap and place in a warm, draft-free place to rise until doubled in size--about 2 hours. [Note: I always place my rising dough inside my (turned off) oven, allowing just the heat from the pilot light to keep it warm. Other good spots are inside a (turned off) microwave.]

Prepare the filling:
Make four hardboiled eggs by placing 4 uncooked eggs in a small saucepan and covering with tap water . Place over high heat and bring to a boil. Let boil for 1 minute, then turn off heat, cover pot, and let sit for 10-15 minutes. Drain out the hot water and replace with cold water, letting the eggs cool for 5 minutes. Tap the eggs against the counter and peel. Slice each egg and set aside.

Prepare the meat by stacking the various meats into small piles, and using a sharp knife to dice into 1/2-1" size pieces.  Set aside.

In a large bowl, whisk 8 large eggs well until frothy. Whisk in the black pepper and the ricotta or basket cheese until well combined. Use a wooden spoon or spatula to gently stir in all of the cut meat pieces, mixing until all are evenly distributed. Set aside.

Assemble:
Preheat your oven to 350 degrees F, and grease the inside of your springform pan with olive oil or nonstick baking spray.

Once the dough has risen, poke it down to release the air bubbles. Sprinkle some flour on a clean work space, and transfer the dough to the floured surface. Cut the dough in half, returning one half to the bowl, and focus on the other half. Shape into a ball, and then use a rolling pin to roll out the dough into a large round (about 11 or 12 inches in diameter). If the dough keeps shrinking back, let it rest for a few minutes before trying it again.

Gently fit the rolled out dough over and into the prepared springform pan, tucking it into all sides. The dough should overhang about 1 to 2 inches around the top.

Use a large spoon to pour in about 1/3 of the egg and meat filling, spreading it evenly. Top with about 1/3 of the sliced eggs and 1/3 of the sliced mozzarella and provolone cheeses. Continue in this order until all the filling, eggs, and cheese have been added (or until the filling reaches the top if you're using a smaller pan).

Grab the second half of the dough and place on the floured work surface, and roll out a second 10-12" round.  Lift this dough round over the filled pan and cover it entirely. The dough should overhang about 1" on all sides. Use a knife or kitchen shears to trim off anything longer than 1", and then pinch together the top and bottom doughs well until sealed, then roll up evenly around the pan to create a rim.

Whisk the final egg in a small bowl along with a 1/4 cup of water. Use a pastry brush to brush the egg wash over the entire pie.

Bake in your preheated 350 degree oven for 60 to 70 minutes, or until the crust is golden brown. Remove from the oven and let cool in the pan for 30 minutes before releasing the spring and removing the outside ring. Transfer to a serving plate and let cool completely. Can be enjoyed the same day, or chilled up to 2 nights in the fridge before serving cold or at room temperature.

Pizza can be stored in an air-tight container in the fridge for up to one week, or slices can be individually wrapped and frozen.
0

Bagged Lunch Ideas: Egg Salad w/ Caramelized Shallots & Chives


Like a wacky sitcom neighbor who pops in unannounced, summer has been arriving in New York in tiny sporadic bursts these past few weeks. It's too soon, people cry, as they pull off the jackets and cardigans they cautiously grabbed before leaving the house that same morning. The train ride home each night is either a mass of huddled girls shivering in prematurely ambitious shorts or steaming commuters, fanning themselves with their coats bundled in a pile on their laps.

The excessively hot days--today it's already hit 90!--make me sleepy, and when I finally get in the door and drop my piles and bags and heels on the floor (yes, the floor), the last thing on my mind is standing in front of my stove for an hour. Instead, my cravings these days have turned toward the cool and salad-like. I made this herby tuna salad one day, and a similar version with showers of lemon zest another (my mercury levels are likely through the roof at this point). There were two nights of simply pan-fried chicken breasts served on a big mess of greens with this embarrassingly easy Caesar dressing.


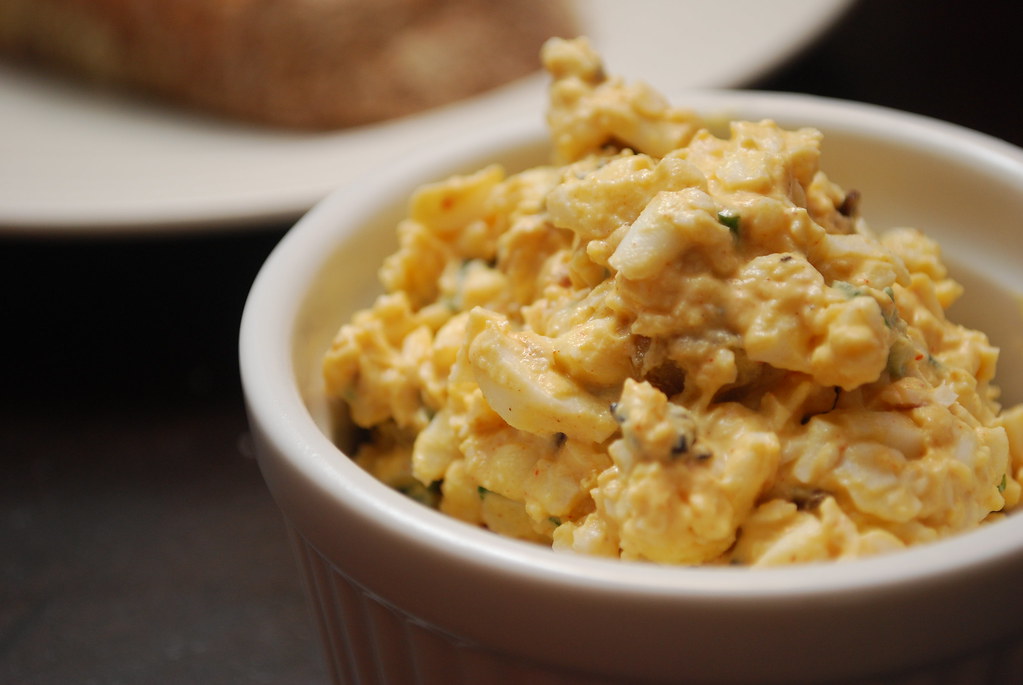
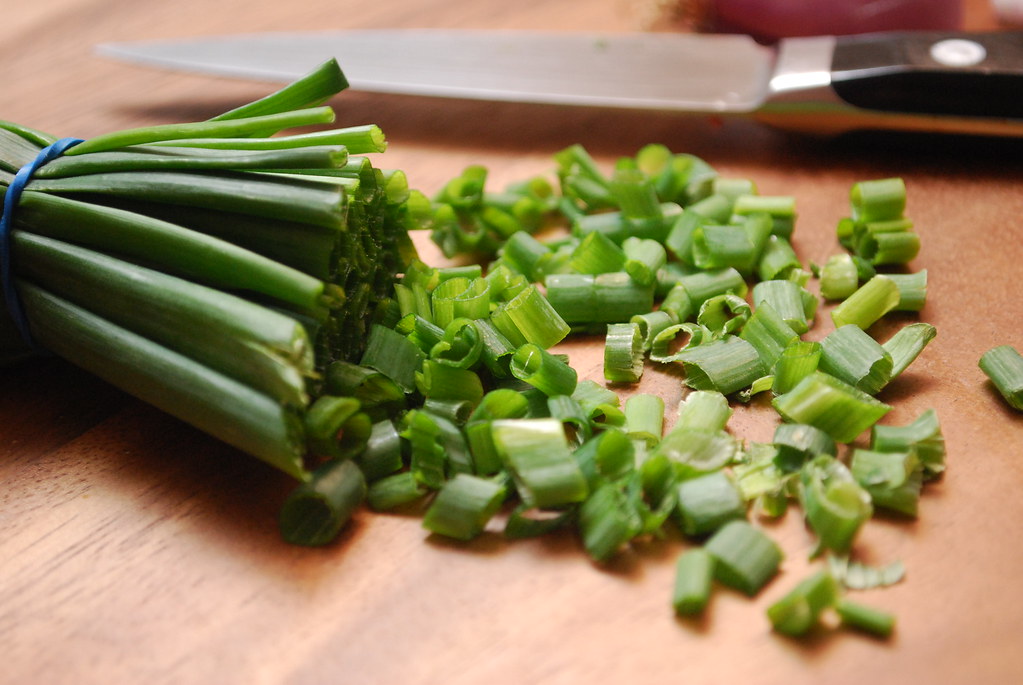
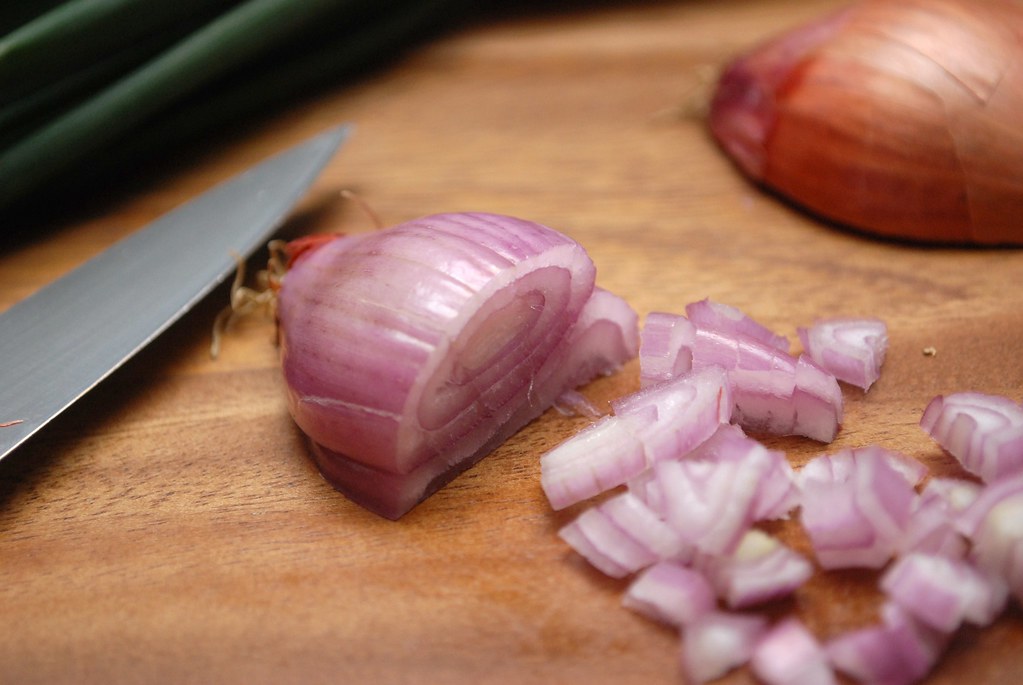
Last night, I just wanted egg salad. That's egg salad my way, with diced caramelized shallots, finely chopped onion chives, and generous dashes of both cayenne and smoked Spanish paprika. The resulting salad is simultaneously smoky, creamy, and spicy, with tiny bits of sweet. If you *really* want to make it my way, let the shallots caramelize just a bit too long until they're a little crisp. Let them hit that cusp just before burned, for a little extra smoke that I find irresistible.

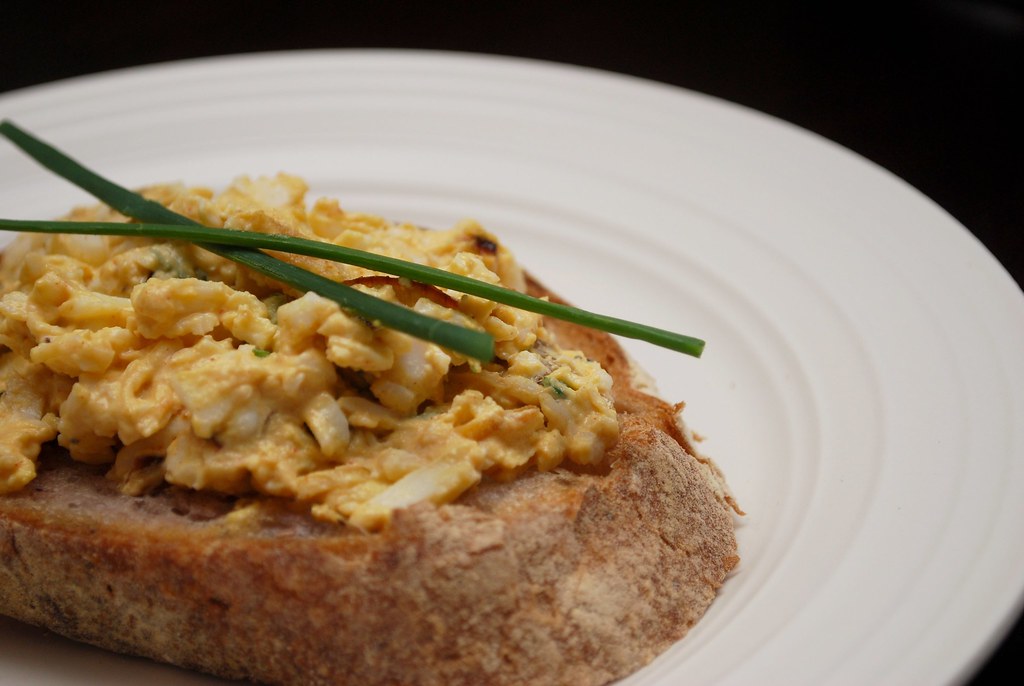
Eugene likes his egg salad on big slices of freshly baked olive bread from the farmer's market. I take it straight up, spoonful after spoonful right from the bowl I make it in. It's my favorite bagged lunch, and so I always make just enough so that I can bring a few scoops with me to work the next day. Occasionally, it's all I can do to not eat it for breakfast! ;)


Everyone has their own methods and tweaks for making an ideal egg salad, but below is my style. To get the eggs fluffy and evenly sized, I grate them on the larger side of a box grater. If I'm making a lot of egg salad (usually for a brunch party), I just toss them into my food processor with the largest grating wheel in place. As impatient as I am, I also find it's best to wait until the next day to have it. An evening in the fridge does wonders for the texture and flavors, which is why it's an ideal dish to prepare to bring to work the next day.

No matter how many eggs I start with, I always find myself wishing I'd made more. This recipe calls for 8 eggs and makes enough for dinner for two, plus one more lunch tomorrow (you guys can fight over it!). It can, of course, be easily doubled or halved.

A Tip: If you prefer it in sandwich form for lunch, just pack it in a container with the two slices of bread in a separate baggy or wrapped in paper, and assemble the sandwich at the office. This will keep the bread from getting soggy (and you can keep the bread room temperature while you refrigerate the eggs).


Now tell me, how do YOU like your egg salad?


Egg Salad with Caramelized Shallots & Chives
Makes about 3 cups.

Ingredients
8 large eggs
1 large shallot, diced
1 tablespoon butter
1/2 cup mayonnaise
1 teaspoon smoked spanish paprika
1/2 teaspoon cayenne
Kosher salt
Black Pepper
1/4 cup onion chives, chopped


Place eggs in a medium saucepan and cover with cold water. Place over high heat just until the water reaches a rapid boil. Turn off heat and let cool to room temperature (about 10 minutes). Shake pan gently to crack shells and place under cold running water for about 15 minutes (refilling with fresh cold water every so often).

While the eggs are cooking, heat a heavy-bottomed skillet over medium heat. Add the butter and the shallots and saute until caramelized (about 7-10 minutes).

When the eggs are cool, peel and grate using the large side of a box grater. Combined in a large bowl with mayonnaise, paprika, cayenne, salt, and pepper. Fold in the caramelized onions and chopped chives.

Serve immediately, or chill in the fridge. Can be made up to 24 hours in advance.
0

How to Eat Soufflé


I used to make something I called Sugar Soufflé. I didn't really make it so much as I collected handfuls of sparkly mica-flecked rocks from under the back porch, placed them all into a pile, and imagined that they were a delicious airy concoction that tasted of vanilla, marshmallows, and melted butterscotch ice cream. I served this odd, tasteless dish to my brother and the neighbor girl who was forced to play with my 6-year-old weirdness. Though the reality of Sugar Soufflé was disappointing and, well, rock-like, the fantasy was acutely delicious. I can still just about picture how good it tasted in my head, and I suspect I've spent the proceeding two decades searching for a flavor that would match that which I'd imagined so long ago.

My first soufflé certainly ignored many of the basic principles of souffle-making. Outside of the imagination, rocks are typically too heavy to keep aloft among the delicate peaks of a stiffly beaten meringue. Puree, however, works perfectly. A few months ago, I read a great little post by one of my favorite food bloggers, Zen Chef, who wrote about how he--in a pinch--transformed a half-melted carton of Ciao Bella passion fruit sorbet into a restaurant caliber dessert. As an undying fan of passion fruit, I always have a carton of that particular sorbet in the freezer (or icy and melty on a table near me) and decided that perhaps it was time to put this recipe into action.


Half-way through an episode of Lost, I bopped up from the couch and went into the kitchen where I started mixing and beating and sugaring my way to my very first passion fruit sorbet. It looked perfect. Light and with an airy rise a full inch above the rim of the ramekin, this souffle was impressive. But there was just one problem; it didn't taste like much. Maybe it was the eggs or the sorbet, but the passion fruit flavor was lost among the egginess and all I tasted was something that tasted like a sweet, airy omelet. It wasn't *bad* per se, but it wasn't at all what I expected.

My boyfriend and I each finished one souffle, and the leftovers were wrapped and placed in the fridge. "Maybe I'll eat it for breakfast," I told him.


But then I forgot about it.

Two days later and the (now totally collapsed) souffle was still sitting in the fridge. Craving something sweet, I finally pulled it out and scooped it into a plate. Topped with a dollop of unsweetened whipped cream and a handful of berries, I sat down on the couch to eat what I expected would be a passable treat. OH. MY. GOD. was I wrong! It was...incredible! I can't even describe how transformed this cold, fallen souffle tasted. It was as if the passion fruit had suddenly woken up and bathed itself in a silky caramel-tinged custard. With the mild whipped cream and the tartness of the berries, this was pure delight. I offered Eugene a bite who agreed that this dessert had come a long way since the sugary omelet of a few days past.


I ate it slowly, not wanting the goodness to end, and not until I near the end did it finally hit me. Sugar Souffle!! This was precisely the flavor I'd been imagining all along.

The recipe for the original souffle came from here, but if you really want to taste what my childlike imagination conjured all those years ago, I suggest you let them cool, cover with plastic wrap, and keep in the fridge overnight. The next day, top with some berries and a big plop of whipped cream. I think you'll like...

12
Back to Top