Showing posts with label Fried. Show all posts

Asparagus and Goat Cheese Quinoa Patties with Smoked Salmon and Lemon Yogurt Sauce

goat cheese, asparagus, and quinoa patties with lemon yogurt and smoked salmon

I recently received a review copy of Heidi Swanson's gorgeous new cookbook, Super Natural Every Day, and was excited to try out some of the recipes. The book itself is seriously beautiful--dreamy photographs, heavy matte paper, and lots of simple, inspiring ingredients.  It's vegetarian, which I admit something that I usually shy away from in terms of cookbooks, but I really like her way of presenting ideas and techniques that I can then incorporate into my own cooking.

My plan initially was to actually follow some of the recipes to the letter (itself an exercise in restraint since I usually suck at reigning in my improvisational tendencies--can any of you relate to that?), but that idea quickly went out the window. You see, while leafing through the book, I came across her recipe for "Little Quinoa Patties," with goat cheese, garlic, and herbs, which totally caught my eye. I go wild for all kinds of savory patties, cakes, and fritters, and just so happened to have a log of goat cheese in the fridge and some quinoa in the pantry. Perfect!

goat cheese, asparagus, and quinoa patties with lemon yogurt and smoked salmon


Only problem? The recipe didn't seem to actually match the description! I read the entire recipe and ingredient list multiple times, but there was no goat cheese listed anywhere in the ingredient list or directions. In fact, what the recipe actually calls for is Parmesan or Gruyère; both of which are made from cow's milk. (I totally even Googled to double-check this as I wasn't positive about the gruyere, but yeah, both from cows.)

So...my guess is that the recipe originally called for goat cheese and then was altered during the editing process, or perhaps it was just a editing error? Whatever happened, I can tell you that by this point I was in love with the idea of quinoa patties made with goat cheese, and decided to forge ahead with that idea anyway, using Heidi's recipe as a guide for the proportions.

scoop of quinoa pattie mix


I first made two cups of red quinoa in low sodium chicken broth (you can use water, but I like that it infuses a little more flavor), and while still hot, I added them to a large bowl in which I'd already placed about 4 ounces of creamy goat cheese, some hot red pepper flakes, a pinch of thyme, and two finely minced garlic cloves. I stirred gently, allowing the heat from the quinoa to melt the cheese and infuse the mix with the aroma of the fresh garlic and thyme.

I remembered that I had some asparagus that needed to get used soon, so I diced it up into tiny pieces, and sauteed it quickly on a very hot pan for just a couple minutes. I tossed the asparagus with lots of freshly cracked black pepper and sea salt and stirred it into the quinoa. Just like in Heidi's recipe I added 4 beaten eggs and whole wheat breadcrumbs (well, whole wheat Panko, actually since it's what I had on hand).

DSC_0634


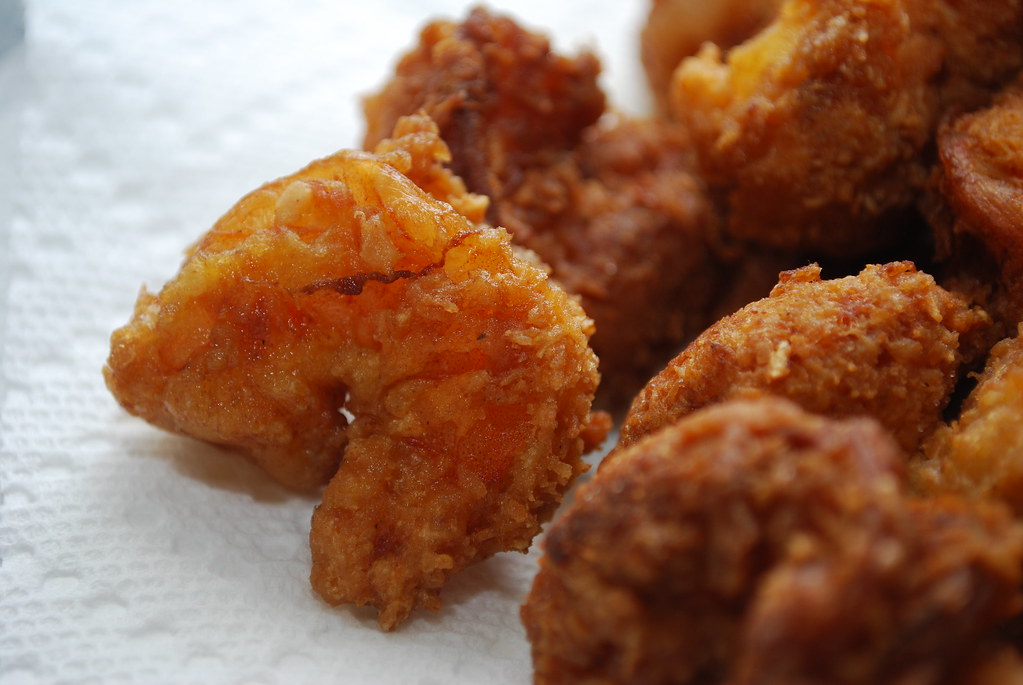
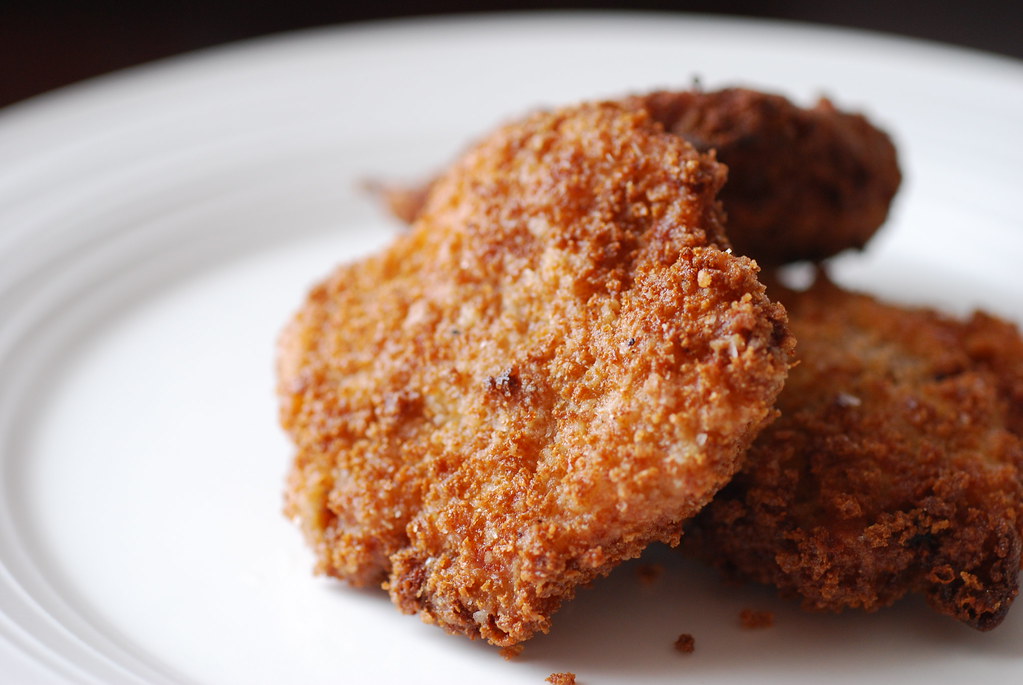
Instead of forming patties with the mix as indicated in the original recipe, I used an ice cream scoop to scoop out even sized amounts that I plopped right into the hot oil. I use this method for all kinds of cake frying as it's easier, quicker, and much less messy. I let each scoop cook for about a minute before squashing it down with the back of my spatula (oiled to prevent sticking), and then let them crisp up another couple minutes before flipping.

I wanted to serve these with something, so I made a simple yogurt sauce--just Greek yogurt, lemon juice, lemon zest, and sea salt--and served the cakes for dinner topped with the sauce and a thin sliver of this really, really good smoked salmon I bought last weekend.

DSC_0630


These made a fantastic dinner (I had 4 patties; Eugene had 6), with enough leftover for today's lunch. The mix keeps well in the fridge overnight so you can prepare that much in advance and then cook them just before serving. I think these would also make a wonderful appetizer for a dinner party (you could even make them into smaller, meatball-sized patties and serve them as finger food).

I'm going to try another recipe from this book later this week, but until then, I'm just happy for the inspiration it gave me to try something a little different. Because honestly, that's what I really think cookbooks are all about.

goat cheese, asparagus, and quinoa patties with lemon yogurt and smoked salmon

****
New to Always Order Dessert? Consider subscribing to my RSS feed, follow me on Twitter, become a fan on Facebook, or sign up to receive my once-a-week e-mail updates by filling in your address in the box on the right. And if you ever need any entertaining or cooking advice, please don't hesitate to e-mail me. Thanks for reading!


Asparagus and Goat Cheese Quinoa Patties 
w/ Smoked Salmon & Lemon Yogurt Sauce
Very loosely inspired by Heidi Swanson's "Little Quinoa Patties," p. 121 Super Natural Every Day. This recipe can also be made with leftover quinoa, but I recommend heating it up a bit before adding to the cheese so that everything melts easily. If you don't have (or like) quinoa, you can also make this using cooked white or brown rice, bulgar wheat, or cous cous.

Ingredients

For the patties:
4 oz goat cheese
2 garlic cloves, finely minced
1 teaspoon thyme leaves, preferably fresh
1/2 teaspoon red pepper flakes
juice and zest of 2 lemons, divided (one for the patties, one for the yogurt sauce)
2 cups hot cooked quinoa
1 pound asparagus, diced into 1/2" pieces
1 tablespoon olive oil
Kosher or sea salt
freshly ground black pepper
4 large eggs, lightly beaten
1 1/2 cups whole wheat bread crumbs (Substitute gluten-free breadcrumbs or a mix of almond and coconut flour if you can't do wheat!)

1/4 cup coconut, grapeseed, or canola oil for frying

For the yogurt sauce:
3/4 cup plain Greek-style yogurt (such as Fage)
juice and zest of 1 lemon (as noted above)
1/2 teaspoon sea salt

8 oz thinly sliced smoked salmon, cut into small pieces (about 1" by 3")

Directions:
In a large bowl, combine the goat cheese, minced garlic, thyme, red pepper, and juice and zest of 1 lemon. Add the hot, cooked quinoa on top and stir gently, letting the heat from the quinoa melt the cheese. Stir until quinoa is fully coated. Set aside.

While the quinoa cools, prepare the yogurt dressing, by whisking together the 3/4 cup of yogurt, juice and zest of the second lemon, and 1/2 teaspoon of sea salt. Whisk until loose and smooth, adding more lemon juice or salt if necessary. Set aside.

Heat 1 tablespoon of olive oil in a skillet over medium-high heat. Add the diced asparagus and saute quickly for 2 minutes. Season generously with sea salt and freshly ground black pepper, then fold into the quinoa and cheese mix.

Add the beaten eggs and the bread crumbs, and stir until thoroughly combined. Let the mixture sit for 5 minutes. Meanwhile, heat 1/4 cup of coconut, grapeseed, or canola oil in a large skillet over medium-high heat. Once the oil is hot, use an ice cream scoop or large spoon to drop even-sized scoops of the quinoa mix into the oil. Be sure to not crowd your pan leaving 1 to 2 inches between each scoop. Let cook for 1 minute, then use a spatula that has been oiled or sprayed with nonstick spray to press down on the scoop and flatten it into a pattie. Let cook for 2 to 3 minutes or until golden and crisp on bottom side, then flip and cook for an addition 2 to 3 minutes. Once crisp and golden on both sides, remove from the hot oil and place on a paper-towel lined platter to drain. Repeat with the rest of the batter.

Assemble the patties
Top each patty with a dollop of the yogurt dressing and one small piece of smoked salmon. Serve immediately.
0

The Healthy Way to Deep Fry


I know some people shy away from frying food, but the truth is that when done correctly, frying is actually not as unhealthy a cooking method as you might think!

Back when I was in high school, my friends and I took a public speaking class where we each had to give presentations. I (big surprise) did a cooking demo, and showed the class how to make a homemade egg cream. My friend Nick, who at the time was working part-time in the kitchen of a pizza parlor, gave a demo about the "healthy" way to deep-fry that was probably one of the most useful things I ever learned in high school.

First, you should understand what actually happens when you drop a piece of food into the hot oil. All food, as you know, contains water. So whether it's a chicken wing, a shrimp, or a piece of broccoli, there is naturally occurring water inside of it. As soon as you drop it into the hot oil, that water is converted into steam (from the heat). As you know, oil and water don't mix, so this steam comes out of the food and forms a kind of barrier that prevents the oil from penetrating it.

In those seconds when that steam is surrounding the food and keeping the oil out, the food is quickly browning and creating that crisp delicious exterior that we love about fried food. This crust then takes over protection duties, and keeps the oil out while the rest of the food continues to cook on the inside due to the high heat. (Think of it like a mini oven inside the crisp exterior.)


The magic ingredient to make this all run smoothly? Temperature. Specifically, a temperature between 350 and 375 degrees F. (about 177-190 Celcius).

That's why whenever you read a recipe for a fried dish it's going to tell you to fry it at this temperature; because this is the perfect temperature in which this process can take place. Any hotter than 375, and the steam will evaporate quickly, the exterior will crisp and brown too fast, and the food on the inside won't cook completely. Any lower than 350, and exterior of the food won't be able to develop in time to protect the inside before the steam evaporates, so you'll end up absorbing way more oil (and calories) than you would have if it were cooked properly.

Makes sense, right?

I remember being totally fascinated by this explanation when I was 17, and 10 years later, I still think about it every single time that I fry. (Actually, I should probably send Nick this link as soon as I post it. I wonder if he even remembers this!) And in case you're skeptical of something I learned from another 17-year-old, I'll note that this same lesson was essentially repeated by my chef instructor when I went to culinary school a few years later.

So that said, there are some other things to keep in mind when frying. Here are my tips (please feel free to add your own in the comments):


1. Use a heavy-bottomed pot that will help retain the heat from the burners and conduct it evenly. If the pot is too thin, the oil will heat up too fast and the food will burn. I usually use my dutch oven or my cast iron skillet. If I'm only frying a couple things, I'll use a smaller saucepan (seen above). If all my wedding registry dreams come true, I'll soon have some even better pots that I can use.

2. Get a thermometer. Seriously, you have to do it. They're 10-20 dollars and will give you that much more confidence when dealing with the oil. You can also use them for candy or jam making if you're so inclined.

3. Use clean oil to fry. I know some people like to strain their oil and reuse, but I'm not really a fan of that because the properties of the oil break down a bit each time you use it. Reused oil is more likely to smoke and burn your food. It can also absorb flavors that will ruin the taste of your food. (If you feel bad throwing it out after one use, you can look for centers that recycle used cooking oil.)

4. Man the controls. Sometimes I feel like I'm flying a plane when I fry. The reason? You need to use the burners to regulate the temperature of the oil. When you add food to the pot, the heat will drop quickly, so raise the flame to get it back where you want it. If it gets too hot, lower it. (If you own a deep fryer, this is moot, but I know most of you don't.)


5. Don't add everything to the pot at once or the temperature will drop. This isn't like boiling. You can only fry a few things at a time; how many determines on the size of what you're cooking and how big your pot is. Fry them in batches; it'll still go quickly.

6. Fried leftovers don't reheat well, but if you must, I suggest you freeze them and then reheat in a 400 degree oven for about 5 minutes. Don't even think about microwaving them.

7. Salt *after* you fry. Salt will pull moisture to the food's surface and make it splatter when you add it to the oil. It will also lower the smoking point of the oil. Adding it to the food after it's fried will prevent this.

8. Use a good metal or heat-resistant silicon slotted spoon to take things out of the oil, and sift out any bits of breading or food after each batch. Never use wooden utensils; they tend to retain moisture which will make your oil splatter and spit. Plastic will melt.

Finally, what kind of oil you cook with is up to you. Personally, I only ever use virgin coconut oil (which I buy in bulk from this store) or grapeseed oil, both for health and taste reasons. Coconut oil is one of my absolute favorite things to cook with, and I may delve into why in a future post.


But for now, you're ready to fry! Here are some recipes you can now guilt-lessly (well, almost!) try:

Fried Macaroni & Cheese

Sweet Carrot Zeppole

Smokey Jalapeno Poppers

Arancini di Riso
0

Pan-Fried Eggplant Salad with Garlic Yogurt Dressing


Eggplant dusted with flour and fried crisp in olive oil has always been one of my favorite appetizers. Served over mesclun greens and topped with a garlicky yogurt dressing it makes for a quick lunch or even a light dinner. I made this for lunch last Saturday after all the craziness with the interview and the photographer and it couldn't have been easier. Eugene also had the brilliant idea to add a dollop of hummus to the eggplant slices; a touch which I absolutely recommend.

When preparing eggplant in any kind of quick-cooking method such as frying, it's best to salt the fruit (yes, fruit!) to eliminate the natural bitter juices and excess moisture, which gives it a stronger and more firm texture after cooking. To salt an eggplant, slice it as directed in your recipe and sprinkle liberally with kosher or course salt. Let the salted slices sit until the liquid starts to bubble to the surface (I also like to like with paper towels above and below or leave the slices in a colander over a bowl). This typically takes about 20-30 minutes. Rinse the slices well (to remove the excess salt and bitter juices), and then pat dry with paper towels. You can then proceed with the recipe as directed.

For a longer explanation and tutorial on salting eggplants, read this post I wrote last year on the subject (it also features a recipe for a warm eggplant ricotta bake). It takes a little bit longer, but I think it results in a crisper and sweeter final dish.


Pan-Fried Eggplant Salad with Garlic Yogurt DressingThis will serve two to three as a lunch or light dinner. It can also work as a salad or appetizer course before an entree for 4-6.

Ingredients
For the eggplant:
1 globe eggplant (the conventional dark purple eggplant most often found in US grocery stores), sliced, salted, and rinsed (click here for more info on salting eggplants)
1.5 cups whole wheat or all-purpose flour
1 tablespoon Kosher salt
1 teaspoon ground black pepper
Olive Oil for frying

For the dressing:
1 cup plain Greek yogurt
3 cloves garlic
1 teaspoon kosher salt
1 tablespoon freshly squeezed lemon juice

5 cups loosely packed mesclun greens or baby spinach

To make

1. In a wide shallow dish, sift the flour, salt, and pepper until evenly combined

2. Gently goat each eggplant in the flour, using the eggplants natural moisture to adhere the flour. Set aside on a parchment paper lined cookie sheet.

3. In a large heavy-bottomed skillet, pour olive oil to coat the bottom and come up the side about 1/4 inch. Heat over medium-high heat until hot and slightly glistening (the oil will look like it is trembling slightly)

4. Fry the eggplant slices in batches, making sure not to crowd the pan. Fry until golden on each side, then remove and let drain on a paper towel-lined tray.

5. In a food processor or blender, combine the Greek yogurt, 3 garlic cloves, salt, and lemon juice. Blitz until well blended and the garlic is completely processed. Pour the dressing into a serving dish.

6. To serve, arrange the salad greens on a large platter and top with the slices of fried eggplant. Drizzle a bit of the dressing on top, plus more on the side.
5

Sweet Carrot Zeppole


The pizzeria we passed every afternoon sold the zeppole I loved. Only a dollar fifty for six, they were fried to order then tossed into a brown paper bag with a heaping scoop of powder sugar.

I ate these too often, shaking the hot bag as I walked down the sidewalk home from school, feigning interest in football and pop bands just to have things to say to these kids whose passions were so different from my own loves of books and hamsters and extra-terrestrials.

Amidst the awkwardness I clutched my bag tightly, wishing I was home and alone with my messy nuggets of sugary fried dough and the next chapter in whatever book it was that week.

I tried, though. I offered them one, hesitantly tilting the steaming greasy bag in their direction until they shook their heads and recoiled, hands self-consciously smoothing down the sides of their little cheer skirts like women twice their age. Already possessing curves where they still had angles, I use to marvel at the way the fabric fell primly over the straight hips and imagined they way it would twist and flare out inappropriately over my own. Their refusal felt like judgment, leaving me simultaneously relieved and rejected as they flittered off to paint each others faces.

At home alone I delighted in the discovery of a seventh fritter added carelessly or secretly by the large-bellied grump behind the counter. Young enough to eat without guilt and thoughtless abandon, the little puffs would disappear quickly, while I, too, disappeared from my room into the pages.


Some weeks ago, I was consumed with the sudden desire to recreate them at home. Somewhere between the stove and the refrigerator, inspiration struck and I started mixing in things I didn't expect. The results were these orange snowballs you see above. Unlike the traditional zeppole of my youth, these fritters are redolent with autumn spices and sweet ground carrots. A cross between funnel cake and carrot cake, they are surprising and playful. Dust them delicately with sugar and serve while still practically too hot to touch. Make them for breakfast or forget dinner tonight and eat these instead. Warm cider and a novel, I think, would make a fitting companions.


Sweet Carrot Zeppole

Ingredients
2 cups unbleached all-purpose flour, plus additional if dough is too wet
1 1/2 teaspoons baking powder
2 teaspoons kosher salt
1 teaspoon cinnamon
1/4 teaspoon freshly grated nutmeg
1/4 teaspoon ground cloves
1 vanilla bean (optional)
2 large eggs
1/3 cup granulated white sugar
2 tablspoons bourbon or dark rum
1/3 cup heavy cream
2 cups shredded carrots
coconut or vegetable oil for deep frying
confectioners sugar for dusting


1. Pour about 4 inches of coconut or vegetable oil in a medium dutch oven or pot with a heavy bottom. Set on medium heat with a thermometer in place to check the temperature. The oil will be ready for deep frying when it reaches 350 degrees. (should take about 10 minutes)

2. Sift together the dry ingredients (flour, baking powder, salt, cinnamon, nutmeg, and cloves).

3. In the base of your electric mixer or by hand, whisk together the eggs and sugar. Split the vanilla bean in half and scrape in the seeds. Whisk until incorporated. Add the bourbon or dark rum and the heavy cream and beat quickly until incorporated.

4. Gently mix in the dry ingredients and mix well until fully incorporated.

5. Fold in the carrots. The dough should be wet, but still stiff enough to scoop and hold a loose shape in the oil. If it's too watery, sprinkle in some additional flour until it thickens slightly.

6. Check the oil with a candy/deep fat thermometer and see if it has reach 350 degrees. If so, use a cookie scoop or spoon to drop round spoonfuls of the batter into the hot oil in batches (about 2 tablespoons each), being careful not to crowd the pot. Let fry for about 2-4 minutes, or until the fritter is golden on all sides.

7. Remove the fritters from the hot oil and let drain on paper towels while you continue frying the rest.

8. Serve immediately, dusted with confectioners sugar.

Cook's note: The fritters should be eaten immediately, but the batter can be prepared up to 2 hours in advance and kept refrigerated in an air-tight container.

6

Fried Macaroni & Cheese

fried mac n' cheese
One Sunday a few mornings ago, Eugene asked me to make him pancakes. So I did. Sort of.

We'd had a kind of macaroni and cheese dish the previous night. A somewhat virtuous recipe I made on the fly by mixing a variety of fancy cheeses and sauteed bits of prosciutto into a creamy bechamel. This I poured over whole wheat rigatoni and baked for 20 or so minutes until it bubbled and crisped at the edges. It was rich and satisfying and left us both a bit woozy. So much so, that the rest of the evening was lazying about on the sofa with little more than the occasional contented sigh passing between us.

That next morning, (that aforementioned Sunday) I walked into the kitchen and practically automatically pulled out the now-chilled dish of leftover pasta. With barely a thought, I pulled down a bag of my new favorite whole wheat panko breadcrumbs and an egg. I set up my bowls (one for flour, one for egg, and one for Panko) and a plate on the counter. Then, using my hands, I carefully scooped up little handfuls of pasta and squooshed (yes, squooshed!) them into patty shapes. Once they'd all been dredged and egged and breaded, I fried them in a cast-iron skillet with about an inch of hot oil until they came out crunchy and golden.

Not exactly pancakes, but no complaints either. Would you complain about crispy breadcrumbs on the outside and creamy cheese goodness on the inside? Eugene ate four. I ate one. OK. And a half...

I probably won't be making these again any time soon (because , uh, it's deep-fried cheesy pasta), but if you have some leftover "mac n' cheese" (or heck! even leftover Alfredo) I definitely urge you to give it a try. I didn't take the time to write a recipe for this, but Paula Deen sure did! Here's her version (with my adaptations).

****
New to Always Order Dessert? Consider subscribing to my RSS feed, follow me on Twitter, or sign up to receive my once-a-week e-mail updates by filling in your address in the box on the right. And if you ever need any entertaining or cooking advice, please don't hesitate to e-mail me.


Fried Macaroni & Cheese
Adapted from a recipe by Paula Deen

Ingredients
Coconut or canola oil, for frying
Leftover macaroni & cheese (or other creamy cheese-based pasta), chilled in the refrigerator overnight
Flour, for dredging
salt & black pepper, to taste
1 egg, lightly beaten
Whole Wheat Panko breadcrumbs, for dredging

To make:

Heat about 2 inches of oil in a medium cast iron skillet over medium heat until it reaches 350 degrees.

While the oil heats, use a spoon and your hands to scoop out 1/4 cup sized spoonfuls of the macaroni and cheese. Use your hands to mold into round patties and set on a wax paper-lined plate. Repeat with all the leftover pasta.

Pour about a cup of flour into a shallow pan. (Note that this amount will be determined by how much leftover pasta you will be using). Season with salt and black pepper. Pour panko into a second shallow pan and the egg into a third.

Take each patty and gently dredge in the flour mixture. Dip in the egg until fully coated. Let the excess drip off before dredging in the panko breadcrumbs making sure to full coat the patty. Set aside and repeat with the remaining patties.

Once your oil has reached 350 degrees, fry the patties 2-3 at a time for about 1-2 minutes each side until they are golden and crisp. Remove to a paper towel-lined tray and let drain for a few minutes before serving.

Serve immediately. (Leftovers can be frozen and then reheated in a 400 degree oven for 5 minutes.)
.
6
Back to Top