Showing posts with label Good Ideas. Show all posts

Better TV: 5 Money-Saving Ways to Reduce Food Waste

Want to know something a little bit scary? In the US, an average family of 4 wastes about 20 pounds of food a month or about $2300 a year.

That's like every family throwing out 80 hamburgers or 2 DOZEN boxes of cereal a month.

So crazy, right?!

I was on The Better Show this week sharing some of my favorite tips to help reduce food waste AND save a lot of money in the process.

Check out some of my favorite tips from the show below! (And click here to watch the full clip once you're done reading!)

1. Redecorate the Pantry

Head to the Container Store or Bed Bath & Beyond and get yourself a set of stackable bpa-free plastic containers or glass jars (these are my favorite!). By transferring all your dry goods--cereals, grains, flours, crackers--from flimsy boxes and bags to durable containers, you'll help them last weeks and even months longer!

2. Become a Grocery Day Prep Cook

Restaurant chefs all have someone to prep their ingredients so that all they have to do is cook. We may not have that luxury, but it really only takes about 20-30 extra minutes on grocery day to prep ALL your ingredients for the week, making it easier to get dinner on the table and to keep from wasting all those expensive veggies and meats.

Here's how it works:
As soon as you get home from the store, take a few minutes to chop up those onions, peppers, and veggies. Wash and dry salad greens. And divide chicken breasts into baggies with marinade. Once the week begins, all you'll have to do is toss a few things in a pan and dinner will be ready in minutes with NO extra mess.

Easy, right?

Try it just once and I promise you'll be AMAZED by how much easier life gets, and how much healthier you'll be eating. No more wasted food and veggies!

3. Create a Reverse Grocery List
This is the tip we didn't get to on the show, but it's one of my favorites!

Help keep track of what's in your fridge by posting a list of everything that's inside right on the fridge door. Whenever you use something, cross it off. This way, you'll easily see what you have left and what needs to be used up.

No more forgotten packages of chicken breasts lost in the back of the fridge!

4. Make DIY Grab & Go Snacks

All those individual plastic yogurt containers and small bags of chips may be convenient, but they create a TON of waste.

Buy bulk containers of yogurt, apple sauce and other favorite snacks, and portion them into small reusable containers for healthy grab-and-go snacks without the waste.

Not only is it better for the environment, you'll also be saving money since bulk is always cheaper!

Click here for my favorite DIY yogurt cup recipe.

5. Store Herbs & Asparagus Like Cut Flowers

Here's an easy and fun trick to help your herbs and veggies like asparagus last up to 10 DAYS longer.

Take them out of the plastic bags and store them upright in small containers filled with water--just like a bouquet of flowers! Keep these in the fridge and take them out to use as you need them. The water keeps the herbs and veggies fresh and bright green. No more gross wilted herbs!


****
Love Always Order Dessert?
Let's connect! Follow me on Twitter or Pinterest, become a fan on Facebook, or sign up to receive my once-a-week e-mail updates. And if you ever need any entertaining or cooking advice, please don't hesitate to e-mail me. Thanks for reading!   
0

Inspired Living: How to Create a Vision Board that Works!

A few weeks ago, I told you a bit about how I used a vision board to help me get out of a place where I felt stuck, and to move towards creating the career--and life--of my dreams. It almost seems silly that a simple collage could be so instrumental in creating such a massive transformation, but I assure you that it works.

Here's a bit more about why that is, and a few steps to help you create a vision board that works.

First up, let's talk a bit about what a vision board is NOT.
  • A vision board is NOT a wishlist. 
  • A vision board is NOT a to-do list. 
  • A vision board is NOT witchcraft or some kind of magic spell.
A vision board IS a visual representation of the dreams and goals we want to achieve in our life. It's less about stuff we want, than it is about who we want to be in this world.

For example, a photo of a pile of money can either represent just that--a lot of money--OR it can mean that I've reached a point in my career where I'm compensated generously for work that I genuinely love and enjoy. The first is cool, but the latter is definitely much more satisfactory in terms of using my God-given talents to achieve a whole and fulfilling life.

When crafting your vision board, I urge you to keep this idea in mind. Go beyond the simple material wants and think big picture. It's ok to start by listing the material things you wish you could have (and even including a few of them on your board), but use them as a jumping off point to dream bigger!

I find that a good way to do this is to ask yourself the following question:

"What would make me feel proud to 
overhear someone say about me?"

  • "She's a millionaire." OR "She's so good she's worth the big bucks."
  • "She has huge 6-bedroom mansion." OR "I love visiting her home; it's always so comfortable and full of love." 
  • "They're such a good-looking couple." OR "You can tell they really love each other."

This approach is important because it will help you see beyond what's in front of you and really push yourself to achieve your maximum greatness. It's also key because it allows flexibility in the process.

Say you want to improve your career situation. For you right now that might mean a promotion to the next level in your company. But if you focus intently on that promotion, it doesn't allow for the possibility that perhaps there is actually a bigger, better job waiting for you at a completely different office. Or maybe you miss the reality that in your heart you would actually be happier striking out on your own and starting your own business.

Specific, clear goals are definitely important, but I think it's also important to focus more on the feeling these goals will help you achieve--this way you will remain open to all the other opportunities that you have yet to even dream of.

How do vision boards work?

I believe there are few things that make vision boards so effective, but this is the easiest (and least "woo woo") explanation:

By taking the time to create a vision board, you are getting in touch with your intuition. In our fast-paced world, we don't always take time to really stop and think about the things we want to achieve in life. We ignore our gut feelings. We even forget about the things that makes us happy. As we grow, we change and often our desires change with us, but yet we keep barreling forward without even stopping to make sure we're still heading in the right direction. Or we divide our attention between so many things we think we should be doing that it's impossible to make any measurable progress in the ones that really matter ("jack of all trades; master of none").

Creating a vision board basically forces you to focus. It's a way of "checking in" with yourself, and figuring out what your real dreams and desires are. And once you know them and see them pasted clearly before you, your outlook and energy and attention shifts and points you in the right direction so that you can see and accept the opportunities that are meant for you.

So here's how you make a vision board:

You need:
  • A large piece of poster or foam board. You can also use a large bulletin board if you want something a bit more fluid. There are computer programs and apps that allow you to create "virtual" vision boards online, but I think it's really most effective when you engage the creative, almost child-like aspect of physically cutting and pasting. It works your brain in a way most of us aren't used to and brings forth new ideas.
  • Glue or pushpins to affix your images. I think rubber cement or Mod Podge work best. Elmer's makes the paper wrinkle and glue sticks tend to lose their stickiness and cause the paper to fall off after a few months. 
  • Magazines. Definitely use your favorite magazines (for example cooking or yoga magazines), but also pick up ones you don't usually read--they'll give you more images to choose from and you never know where your best ideas will come from. Grab magazines randomly at the supermarket, or take old ones from your kids or friends. O Magazine is usually great for words. Children's magazines usually have wonderful illustrations. You can also tear up old art books, or even search online for images that strike your fancy.
Choose your images:
As you leaf through the magazines searching for images, it's great to go in with a plan and include images representative of the goals you know you want, but also tear out pictures that just give you pleasure or that cause some kind of pleasant, visceral reaction in you.

If it catches your eye, cut it out--you can always toss it later, but there is probably a reason why a particular image spoke to you; you just don't know why yet!

Also remember to include words. I'm a writer and words are important to me, so I have quite a few on my board. You may only need a couple. (You can also just write with a marker directly on the board.)

My Latest vision Board
Crush on your board
Paste the images onto your board in a manner that pleases you. That's important. It's not about art or creating perfection, but when you look upon the board it should make you feel good. You should have the desire to look at the board over and over again. I want you to fall in love with your board and what's on it. Fall in love with the idea of you at your greatest good.

I know I've created a good board when I find myself sneaking peeks at it throughout the day, the same way you might look at someone you have a crush on (or a cake you're dying to eat).

If anything on the board bothers you or makes you feel unpleasant, rip it off and put something else there. Everything about that board should make you feel happy and energized.

White space
I like to leave some white space on my board. It gives the eyes and mind a places to rest, and also allows room for growth. If you come across something later on that you'd like to add to your board, you can add it. Or perhaps the surprise will simply manifest in your life without you even expecting it!

Displaying your vision board
I keep my board in my bedroom propped up on my nightstand. It's both the last and first thing I see each day.  Occasionally, when I'm writing or trying to figure something out, I'll bring it into another room with me and just stare at it for a while. I kept my last vision board on the wall in my kitchen (it's actually still there as a reminder of all the amazing things that came true).

I also recommend taking a picture of it that you can keep in your phone. This way you can glance at it during the day when you need a boost of positivity. Or it'll give you something to pray on when you're stuck in a long line or a waiting room.

A final note: Some people prefer to keep their boards private, but I'm actually all for sharing it--especially with people who love and support you. Why? Because you never know who can help you achieve your dreams! So go ahead--put it out there! Let the world know what it is you want. All that positive energy in support of your dreams can only ever be a good thing.

In fact, if you'd like, you can send me a picture of it. Maybe I'll share some on a Pinterest board or in a Facebook album so we can all support each other.


I hope this has inspired you to create your own vision board. If you have any other questions about how to make one, how/why they work, or about my own experiences, feel free to ask in the comments and I'll answer! And if you'd like to share a picture of your vision board with me or the blog community, email it to me at alejandra@alwaysorderdessert.com. I promise not to post or share it without your permission.

0

20 Thanksgiving Cooking Questions Answered in 20 Words or Less

1. How do I fix lumpy gravy? Pour it into a blender or food processor and process until smooth. Or pass through a fine sieve to strain out lumps.

2. How do I keep my pie crust from getting soggy? Brush the bottom crust with beaten egg white or partially bake it before pouring in your filling.

3. What size turkey should I buy for my dinner? Calculate about one pound per every adult in attendance. If you have a small oven, consider roasting 2 smaller turkeys side-by-side.

4. What's the difference between turkey "stuffing" and "dressing"? Technically, dressing is stuffing that's cooked outside of the turkey, but it's really just regional/cultural semantics.

5. What's your top Thanksgiving tip? Roast the turkey upside down. It protects the breast from overcooking and the juices from the dark meat will seep down and keep it moist. 

6. How do I keep pumpkin pie from cracking? Underbake it slightly. Just bake until the filling is barely set in the center, but firm on edges.

7. How do I defrost a turkey at the last minute? Submerge the whole turkey (still in the packaging) breast-side down in cold water. Change water every hour. Turkey will defrost this way at rate of 30 minutes per pound.

8. Can you roast a frozen turkey? Skipped #7 on this list, eh? It's OK! It's a little tricky, but possible. Click here for directions on how to roast a still-frozen turkey.

11. What's the best way to reheat cold turkey? Best and tastiest is in the gravy. Slice turkey and simmer until hot in a skillet with gravy and some broth or water. 

10. What happens if we start to carve the turkey and it's still raw inside? Discreetly take it back in the kitchen, cut it into pieces & spread on a baking sheet to finish roasting.

9. I don't own a roasting rack. Any DIY alternatives? Scrunch a bunch of foil into a 3-foot snake, then coil it into a ring. Or use a few clean empty tuna cans. Or a few whole potatoes.

12. How do you fix dry stuffing? Pour on some stock or broth (or water), cover with foil, and pop in the oven for a bit.

13. What's an easy basic gravy? Saute 1/4 cup of turkey fat or butter and 1/4 cup flour. Pour in 4 cups hot broth. Whisk until gravy-fied. Season.

14. Can I bring a pie as a carry-on? You can! Pies, cakes, and other "solids" can go through security. Booze, gravy, jam, cranberry sauce, and other "liquids" need to be checked.

16. What happens if I have a major last-minute cooking disaster? Chuck it & don't mention it. Nobody will know. Unless the disaster is the turkey. In that case, confess; pour more wine. 

15. My cranberry sauce always comes out too watery; how do I fix that? Let it reduce longer on the stove. Remember it will thicken as it cools. Also "loose" cranberry sauce isn't necessarily bad. [Ed Note: Here's my favorite cranberry sauce recipe.]

17. My sister is gluten-free and I planned desserts for her, but totally forgot about the gravy. How do I thicken gluten-free gravy? Use cornstarch or arrow root powder.

18. What's an easy side-dish I can make with little time and even less skill? Chop up a bunch of your favorite fresh vegetables, toss them in olive oil & kosher salt, and roast for about 20-30 mins in a 400 degree oven.

19. What's the quickest way to sober someone up so he can drive home? Don't you dare even try it. Call him a cab, have another guest drive him, or let him sleep on your couch tonight.

20. What kind of music should we play during dinner? I love warm autumn-type music. Classic jazz/swing standards, a few quirky songs off the Charlie Brown soundtrack, and a little bossa nova.

Got more questions? Email me, find me on Facebook, or Tweet me on Twitter (@nandita). I'll be checking in sporadically today and most of tomorrow to help out with any last-minute Thanksgiving questions you may have!
0

20 Cooking Questions Answered in 20 Words or Less

Back in my previous job, we used to do a thing called something along the lines of "Crazy Dirty Sex Questions Answered in 20 Words or Less."  I always thought it was a super clever concept to answer a bunch of questions so quickly and succinctly, and so I'm borrowing the idea and creating a food version through which I can answer your cooking questions in 20 words or less. [And yes, I know it should actually be "fewer," not "less," but I'm going with quip-y and recognizable over grammatically correct.]

Want your questions answered pithily in my next article? Email me and I'll add them to the queue!


1. Which side of the foil are you supposed to cook on?
Technically the shiny side, but the difference is negligible so don't worry about it.

2. What's the best way to melt chocolate? Chop it (or use chips) and melt in the microwave for 30 second intervals, stirring each time until completely smooth.

3.  I purchase eggs from a farmer and they are often irregular sizes. How do I properly weigh or divide them for use in baking? Crack and whisk together, then measure. 1 large egg equals 3 tablespoons or 70g or 2.5oz of beaten egg. 

4. Why does my pound cake deflate when I take it out of the oven? Possible reasons: Over mixing the batter, irregular oven heat, opening the oven door during baking, or expired baking powder. [Ed. Note: Read more about how to prevent collapsing cakes here.]

5. What's the best way to improve knife skills without taking a course? Look up an onion chopping tutorial on YouTube and practice with a full bag of yellow onions. (Freeze the diced onions.)

6. Which herbs and spices are OK to buy dry? Which are better fresh? As a rule, go dry for spices and fresh for herbs. Oregano is the exception. It's better dry.

7.  Which part of the green onion (scallion) is supposed to be used—the green or the white or both? For garnishes use only the green; for cooking use both green & white up to about 1” from the root.

8. If a recipe calls for wine, is it best to choose a dry wine?  Use exactly the same kind of wine you would pair with the meal if drinking it.

9. What’s the best method for cooking a burger indoors at home without a grill? A cast-iron griddle or grill pan. Only flip once and never press. Open the window to air out inevitable smoke.

10. Why do shrimp turn red when cooked? Embarrassment. Just kidding. Actually protein bonds that appear blackish in raw/live shrimp release & reveal natural red carotenoid pigments underneath.

11. Is "wild caught" salmon really healthier than "farm raised"? Yes. More usable omega-3 fats, significantly fewer antibiotics/pesticides, natural carotenoids--no synthetic pigments added for color. More environmentally responsible.

12.  My wife prefers well-done steaks. How do I cook a quality steak to the well-done stage without drying the meat out? Sear it quickly on the stove in a cast-iron skillet; transfer to 400 degree oven w/ meat thermometer until steak hits 145 degrees.

13.  What are good ideas for winter salads that have more than just lettuce and tomatoes? Grain salads (farro, wheatberries, quinoa). Peppery/hearty greens (arugula, watercress, upland cress, kale). Citrus & onion salads. Roasted vegetable salads.

14. Is it true that eggs that have never been refrigerated don't actually need to be? It's true! Fresh, unrefrigerated and unwashed eggs can be stored at cool room temp (around 75 degrees) for a week or two.


15. How do you say hanger steak in Spanish? (I live in Venezuela and would like to know how to buy/order it.) "Solomillo de Pulmon," though local dialects vary. The French word "onglet" is also pretty universal.

16. What is the best way to protect my dried goods from little critters?  Buy fresh, sift, then transfer to large glass jars with tightly-sealing screw-top lids or rubber gaskets. (like Mason/canning jars)

17.  How can I safely defrost my eggs if my bum refrigerator keeps freezing them? Let sit at room temperature for 30-60 minutes. Or place in a bowl of warm (not hot) water for 5-10 minutes. [Ed. Note: My fridge does this too, and I hate it!]

18.  For more delicate baked goods, such as macarons and souffles, what is the best way to adjust for minor altitude (3000 ft in my case)? It's trial-and-error, but try reducing sugar by 1 tablespoon & replacing w/ same amount of flour. Increase baking temp by about 15-25 degrees F. 

19. How long does it take to preheat an oven? All ovens vary, but on average about 15 minutes to preheat to 350 and 20 minutes to preheat to 400.

20. How do I keep hard-boiled eggs from turning green near the yolk? Cook them gradually. Place eggs in cold water, bring to a boil, turn off & let sit for 10 minutes.


0

15 Easy Back to School Breakfast Ideas

A few days ago I got a message from a reader, Amber, who was looking for some healthy on-the-go breakfast ideas to serve her kids who are heading back to school this week. Though I don't yet have children of my own, the ideas came rolling out because, when it comes to simple, healthy meals, children really aren't that different from adults. The spices and portions may vary, but for the most part, these recipes will work just as well for adults as they will for the kids. 

Mornings can be crazy. Even with a lot of planning, that's just what happens when you have to get multiple people of different ages and personalities ready and off to different places in a short amount of time.  And because of that, I understand why the idea of skipping it, buying something at the drive-thru, or reaching for a box can seem appealing. Any additional thought or energy--even just a couple minutes--can seem impossible at that time. But it's important to recognize that those options will ultimately do more harm than good; processed options are loaded with sugar, sodium, unhealthy additives, and empty calories that won't do much to keep you (or the kids) functioning at your best. This is incredibly important if you're feeding children because while we may need the food for energy, they need it to continue the growing and developing process.

That's we're these recipes come in. Easy and totally from-scratch recipes, these recipes can all blissfully be prepared in advance--most in just a matter of minutes! Grab a few moments on a Sunday afternoon and prepare a couple of these options. You'll be set for breakfast for the week, saving you time and money.

Another idea? Whenever possible, be sure to get the kids involved in the planning and preparation of these dishes.  Not only is it great quality time, but getting kids in the kitchen early is the absolute best way to encourage a lifetime of healthy eating and cooking. Start them off with a few simple tasks--garnishing or washing vegetables, then increase the duties as their skill and interest develops. I still have very clear memories of making salad dressings as a little girl; my mom would tell me the basic proportions and then let me add whatever I wanted to the blender and often, the combinations where great. I once added a whole cucumber to a vinaigrette and we ended up with a wonderful cucumber dressing. I was probably about 6 when I came up with that and I have no doubt that those tiny first successes are what drove my current passion.

An added bonus for parents of picky eaters? Letting them help with the cooking will also make them more interested in the dishes--and consequently less likely to toss them away or turn them down come eating time.

Check out the 15 easy breakfast recipes below and be sure to share your own ideas in the comments! (Click each photo to read more & get the recipe.)

1. Breakfast Power Truffles

Shaped like little balls of candy, these homemade breakfast truffles pack tons of nutrition in an adorable little package.  Loaded with protein, fiber, dates, nuts, seeds, good fats, and tons of vitamins, minerals, and antioxidants, these no-cook treats will keep everyone fueled from the morning rush all the way through to lunch. These are made with peanut butter, but if your child is allergic or your school doesn't permit peanut butter on the premises, you can easily substitute sunbutter (made with sunflower seeds) or almond butter instead.

Like all the best time-saving recipes, these power truffles can be made in advance and will keep well in the refrigerator for several weeks. You can even get the kids involved by asking them to help you shape and roll the truffles (it's like play-doh, but totally edible!). Grab a few in the morning or leave them out as a healthy afternoon snack. If you're looking for a homemade from-scratch alternative to processed protein or "nutrition" bars, these are a great option; grab a few on the way to the gym or toss some in your bag for recovery on the way home.

2. Mini Egg Muffins
This easy take on the classic frittata is made in muffin tins for instant portion control (and to make them easy for little hands to handle). Just as good cold as they are hot, these can be individually wrapped and grabbed out of the fridge while everyone is running out the door. My version is packed with diced zucchini, yellow squash, herbs, onions, grated cheese, turmeric, and just a tiny bit of chorizo for flavor, but you can customize these to your liking.

I've included the basic formula in the recipe and the rest is up to you--add leftover cooked chicken, diced ham, spinach, cherry tomatoes, anything you'd like! These cook up quickly and will keep well in the fridge all week long. Serve one or two for breakfast, or pair these with a salad for an easy and nutritious lunch. (These are also a great idea for those on low-carb eating plans!)

3. Homemade Yogurt Cups

There is no need to spend money on overpriced yogurt cups full of sugar and preservatives. (Not to mention the waste caused by tossing out those plastic cups each morning.) Customize your own to-go yogurt cups by layering plain yogurt in small mason jars.

Start by filling the bottom with plain yogurt (a thick Greek yogurt is a great option) then let kids pick out their favorite all-fruit preserves or honey. Add sliced almonds, shredded unsweetened coconut, cocoa nibs, or low-sugar granola, spices (like cinnamon or nutmeg) and seal up the jars. The lids will make everything stay put and can be resealed in case of leftovers. These can be made up to two days in advance, and letting kids participate in making them or adding the toppings is a great way to both spend time with them, and instilling good habits of cooking good, healthy food for themselves.

Bonus Ideas: Swap out the yogurt for cottage cheese or ricotta. Or make a savory version topped with slow-roasted tomatoes (like #4 on this list), herbs, or even a dollop of pesto and some crumbled bagel or tortilla chips for crunch. 

4. Homemade Chewy Granola Bars

Let's be honest, most commercially available granola bars are little more than glorified candy bars! Packed with sugar, fats, and tons of unhealthy additives, they're not anything you want to serve to growing and developing bodies (or, for that matter, already grown and developed ones!). Step away from the processed "treats" and prepare a batch of these chewy and easily customizable homemade granola bars.

Made with nuts, oats, seeds, raw honey, and lots of other good stuff, these are a great alternative that you can feel good about giving to your children (or eating yourself). These also work well as an after school snack and are great to keep in your purse or car for emergencies. These will keep well for at least a month; for ease, individually wrap them and keep in your fridge or an air-tight container at room temperature.

5. Tortilla Española Slices (Spanish Omelet)


This traditional Spanish egg and potato dish is a wonderful on-the-go breakfast idea because while it can be eaten hot, it's actually best served cold or at room temperature. The layers of potato, egg, and gently caramelized onions make it a firm and easy hand-held breakfast.

In my recipe, the skins are left on the potatoes before slicing; this increases the nutrients in the final dish. You can also add sauteed mushrooms, baby spinach, red peppers, or other vegetables you may have in your fridge. Let the dish cool completely overnight in the fridge, then slice into triangles or squares for easy grabbing in the morning. If you'd like, you can even tuck a pieces between two slices of hearty, whole-grain bread to keep active bodies fuel-packed throughout the morning.

6. Banana Breakfast Ice Cream

You might be wondering what ice cream is doing on this list of healthy breakfast ideas, but here's the secret: this is really just pureed fruit! Bananas, frozen and pureed, develop a wonderful creamy texture that is practically indistinguishable from ice cream!

With this in mind, I added peanut butter for protein and good fats (you can use sun butter or almond butter, if you prefer), plus some unsweetened cocoa powder (loaded with antioxidants), and just a touch of honey for sweetness (the ripe bananas are actually very sweet naturally so the honey just enhances that). Pureed together and then frozen over night, the result is a creamy, scoopable "ice cream" that's totally acceptable for breakfast! This may not be an everyday treat, but it would be especially good for one of those hot August or September mornings.

7. Egg Salad w/ Caramelized Shallots and Chives
Egg salad might not seem like a traditional breakfast idea, but it's actually a perfect solution. Best eaten cold and made in advance, you can prepare a large batch of it then serve it spread on toasted whole grain bread, on a whole wheat bagel, or in a small cup with a spoon for a to-go option.

This version adds a touch of natural sweetness with caramelized onions and smoked paprika, but feel free to keep your version plain. To lighten the dish, replace half the mayo in the recipe with plain Greek yogurt; it'll infuse a little extra protein and some healthy live active cultures into the mix.


8. Chocolate Banana Nut Smoothies

This is my own go-to breakfast on those busy weekday mornings, and it's one I know the kids will love. Creamy and thick, it's practically a milkshake, but made with almond milk, unsweetened cocoa, ripe bananas, and peanut butter, there is nothing but goodness in this class.

This is one smoothie that keeps very well for a few days so you can make a big batch and then portion out in individual to-go cups or even mason jars (just shake a few times and then unscrew the top for drinking; close it up again to prevent spills of leftovers once the kids get out of the car).

Want to up the health factor? Add some raw kale and/or spinach to the blender; the color and flavor will disappear, but the nutrients will remain. (Fun stripey straw is totally optional!)

9. Black Bean and Corn Breakfast Burritos
Scrambled eggs are quick, but in the mornings when time is tight even that might seem like too much. Skip the scramble with this easy make-ahead burrito featuring black beans, steamed corn, and cheese. The bean and corn filling can be prepared well in advance and rolled into whole wheat or corn tortillas the night before and wrapped in plastic wrap or parchment paper.

In the morning, pop them in the microwave for a few seconds to melt the cheese and you'll be ready to go with a filling and protein-rich breakfast that will satisfy lots of appetites. These are actually pretty good cold, if you'd like! (This recipe has a little bit of a kick, but if you or your children are sensitive to heat, just skip the jalapeno peppers and hot sauce; the flavor won't be affected.)

10. Whole Wheat Blueberry Almond Muffins

Muffins, even these yummy whole grain ones, aren't the best option for breakfast as protein really is key in the mornings, but if you're short on time or in the mood for a treat they can certainly be delicious! And when made with good flours, nuts, and lots of fruit, they're not too bad.

They're also a fun option on weekends or if you have company coming over. These are made with a mix of whole wheat flours and are loaded up with lots of fresh blueberries (frozen blueberries would also be great in these). Feel free to substitute raspberries, strawberries, or even cranberries if that's what you prefer! (The crunchy sugar and almond slices on top are key!)

Other easy breakfast ideas:

11. Use apple slices instead of bread to make peanut butter (or sun butter) sandwiches.
12. Baked oatmeal squares that can be made in advance and reheated just before serving (love this recipe)
13. Cold pancakes! (Make a few extra pancakes and freeze them; in the morning, drop into the toaster and serve wrapped in a napkin as you're running out the door.) This whole grain cinnamon pancake recipe is one of my favorite healthy versions and these buttermilk blueberry pancakes are a wonderful classic recipe.
14. Quick quesadillas: layer cheese and sliced ham, turkey, or chicken between two whole wheat or corn tortillas. Nuke in the microwave for 30 seconds, then cut into corners and serve. If you'd like, you can add a little bit of salsa between the tortillas.
15. Banana wraps! Spread peanut butter on a whole wheat tortilla and wrap it around a whole banana.


What do you think about these ideas? And what are your favorite on-the-go breakfasts? (For kids or grown-ups!) Tell me in the comments.


*****
Did you enjoy this post? Pin it or share with your friends on Facebook to spread the love!

0

DIY Yogurt Cups

This isn't really a recipe. It's an idea. It's a very good idea.

I've recently started making my own homemade yogurt cups. I take a small mason jar and fill it about 3/4 of the way with thick, whole, plain Greek yogurt. I use Fage. It's my favorite and I've tried the other brands of "greek-style yogurt" but for some reason, they just don't measure up. But if you have another favorite brand of plain yogurt, then by all means do that.


I then add a couple spoonfuls of all-fruit preserves or homemade jam. Not too much; I just want to add a touch of sweetness. My current favorite is plum; I got a jar of homemade plum jam on my trip to Vermont last month and I'm in love. I can't wait until prune plum season as I want to make myself a huge batch of it.

I top it all off with sliced almonds (though any nuts will do). Sometimes I add a bit of unsweetened shredded coconut, too. Then I close the jar and pop it in the fridge.

That's all! A homemade yogurt cup, ready to go! Fruit on the top, not on the bottom, and so much better. Leftovers can be easily stored (not as easy when I have leftovers in one of those Fage single cups), and I save money by buying the large container of yogurt, then portioning it out into smaller servings.


By the way, when it comes to dairy, it's full-fat or nothing for me. None of this skim or light or 2% nonsense. Not only is it more satisfying, but the fat in the milk is where the majority of the nutrients reside (this is a fact). Skim and other light dairy products are so devoid of nutrients that the FDA actually requires dairies to add synthetic vitamins A and D to make up for what is lost when the fat is removed. I'll take the natural God-given nutrients over anything cooked up in a lab, please!


****
New to Always Order Dessert? Consider subscribing to my RSS feed, follow me on Twitter, become a fan on Facebook, or sign up to receive my once-a-week e-mail updates by filling in your address in the box on the right.
0

Inspired Living: 10 Kitchen Lessons

Today I thought I'd share a few tips and ideas that I live by in the kitchen. I hope one or two (or all!) of these inspire you to try something new. xo
 
1. Moisturize! Whenever you get a little extra oil on your hands, whether it be olive, coconut, or anything else, don't rinse it off! Take advantage of that gorgeous liquid and rub it right into your skin. It's great for your hands, arms, legs, elbows, knees. Keeps your skin soft and is the best moisturizer. This goes for the men, too! Men never seem to moisturize enough. (Especially not mine.)

2. Always buy extra lemons. Seriously. You can never have too many lemons! Squeeze them into your morning water, your tea, your cocktails. Squeeze them over fish, over chicken, over berries, use instead of salad dressing, zest the rind into anything you can. Use them to decorate the water in a vase of flowers or just pile a bunch into a bowl for a pretty and bright centerpiece. Use them to clean your fingernails and get the garlic smell (really, it's an aroma!) out of your hands. Put a drop on your face to dry a pimple. Add a few to the laundry to brighten your whites. Mix the juice and rind with sugar and olive oil and scrub your knees and elbows and the rough parts of your feet. Squeeze some into your hair and go out in the sun like an 80s teenager. Drop one down the disposal to freshen it up. And if you still have leftovers (seriously?) make lemonade. Make a LOT of lemonade.

3. If you can't remember when you last replaced the baking powder, just throw it out and buy a new one. The $2 you spend replacing it are well worth what you save in NOT ruining a cake or batch of cookies full of expensive butter, chocolate, spices, sugar, and flour.

4.  Whenever you spot an empty ice cube tray lounging about your kitchen, fill it with water and put it in the freezer. If you use an ice cube, refill the empty spot. Even if it's 2 AM and you were just going to get a glass of water before padding back to bed. You'll be glad you did when you go to make a cocktail and find that there are plenty of icy cubes waiting to clink into your glass.

5. Don't worry too much about expiration, sell by, and "best by" dates on labels and packages. Keep in mind that those are estimated dates, which vary based on a number of different circumstances, and which are purposely skewed to favor the manufacturer, not YOU. Use your God-given senses--taste, smell, sight, touch to determine if the food is still OK. If the milk looks good, smells good, and tastes good, it doesn't matter if the carton says it "expired" yesterday. Trust yourself, not things written on boxes. In fact...

6. Trust yourself, not things written on boxes by people trying to sell you stuff. Most words on boxes don't hold a lot of meaning, or are purposely put there to make you think something is cleaner, healthier, safer, more "green," than it really is. Realize that words and phrases like "natural" and "healthy" and "good source of whole grain" and "fat-free" and even "organic," don't necessarily mean that it is good. Really read the box, look at the ingredients, look up words if you have to. If you don't know what a word means (or can't even pronounce it), wait until you can look it up and find out what it is to decide if it's something you want you or your family to eat.

7. Hide the marshmallows. Trust me on this. I have no problem with keeping a few indulgent treats around, but it's better when they're hidden away and out of sight. You'll forget about them most of the time, and then that moment will come when you really need...something...and that's when you'll remember about that jar of Nutella tucked in the back of the cabinet or the Halloween candy in the freezer. And they'll seem like a discovery, a prize. Like even more of a treat than you could have imagined and exactly what you need at that moment. Hide them now, and surprise yourself later.

8. Spice up your eggs. Scrambled eggs are a good, solid, easy meal at any time of day. But there is no reason to keep it boring! In fact, they provide a great opportunity to experiment. Take a look at your spice rack and sprinkle in a little something fun! Add some turmeric for bright color, a subtle kick of flavor, and tons of health benefits (turmeric is a fantastic anti-inflammatory!). Or add cayenne for a little heat (and to ramp up the metabolism). Add smoke with paprika or cumin or chili powder. Add freshness with thyme. Sweetness with nutmeg or cinnamon (yes, seriously. You do it with french toast, right?) Add sesame seeds or za'atar or sumac or curry. Pull out that spice that you bought to make that ONE dish 3 months ago and then never used again and add it to your eggs. They're a blank canvas. Start painting.

9. Use Unsalted Butter. Unsalted butter gives you control. It lets you decide how much and what kind of salt to sprinkle on your buttered toast or sauteed veggies or grilled corn. It lets you regulate the salt in your baking. Even better, it's much more likely to be fresh because without salt, butter spoils quicker and there is nothing to mask the rancidity. Another bonus? Since it's less popular, some stores will actually charge less for the same amount and same brand of unsalted butter than they do salted!

10. Double It. Anytime you make anything that requires a little more effort than usual, double it. If you make a lasagne, make 2. If you're making stuffed shells, double the recipe. Make a bigger pot of soup, a double-batch of tuna or egg salad or rice or mashed potatoes. You're already peeling and chopping and dirtying up the pots, so take advantage and make a little more. Half is for dinner tonight, the other half is for the freezer. Then next month or next week or later this summer, when you're too tired or sick or hot or just having too much fun to stop and cook, all you have to do is open the freezer and pick out an already home-cooked meal. Your future self will thank you!


****
New to Always Order Dessert? Consider subscribing to my RSS feed, follow me on Twitter, become a fan on Facebook, or sign up to receive my once-a-week e-mail updates by filling in your address in the box on the right. I also offer custom menu planning services and offer a variety of culinary workshops in the NYC area. Click here to find out more!

And if you ever need any entertaining or cooking advice, please don't hesitate to
e-mail me.
Thanks for reading!
0

Kale Pesto for Quick Summer Meals


There is something to be said for having a few substantial dishes at the ready on hot summer days. Especially in my apartment where, as much as I love to cook, the kitchen sometimes gets so hot that it's completely unbearable to do anything more than assemble a quick salad or grab a bottle of cold wine from the fridge.

One of my recent discoveries in the world of quick summer meals has been kale pesto. Similar in process and appearance to the more traditional kind, this version replaces basil with raw kale.  I've mentioned before that I'm always looking for ways to add a little more kale to my diet. I tuck big frilly pieces of it in sandwiches and burgers, and dehydrate them for a quick snack, but I think this latest use might just be my new favorite!

Eaten raw, kale has lovely bittersweet flavor that works beautifully in combination with the garlic, cheese, and fruity olive oil. If you're fond of bitter greens and vegetables like escarole, dandelion greens, endive, or broccoli rabe, you'll probably appreciate this.

The final pesto is gorgeous, bright emerald green with lots of powerful flavor that you can then adapt to a number of recipes. Toss with cooked pasta, use as a spread on sandwiches or burgers, dollop on top of a soup as a garnish, or whisk into a vinaigrette for a quick salad dressing. For lunch today I made a quick chickpea salad, thinning the pesto with a little vinegar and coating the chickpeas with the sauce. After an hour of chilling in the fridge, it was perfect. (I'm actually sitting here eating spoonfuls of it right from the serving bowl as I write this post.) If you're caught entertaining last-minute guests, the pesto works great as a topping for crostini or pita chips.

Traditionally, kale is made with pine nuts, but I usually add whatever nuts I happen to have on hand. The idea is to add a little bit of crunch and natural sweetness, plus some protein and healthy fats. Almonds are actually my favorite and they're the ones I recommend below (around here they're also cheaper than pine nuts, which is an added bonus). You could also substitute walnuts, pistachios, hazelnuts, or really just about any nut you like. 

The pesto becomes even easier when you plan ahead!

On Saturday I made a large batch of kale pesto and portioned it out into muffin tins that I'd swiped with a little bit of olive. I popped the muffin tray into the freezer and let it solidify for about an hour. When it was ready, I used a butter knife to loosen each little pesto "muffin" and then put them all into a large zipped freezer bag.

Now whenever I want a quick meal, all I have to do is grab one of the little pesto muffins [yeah, I'm just going to keep calling them that] and defrost it. I've found that 1 minute on the defrost setting in the microwave is all I need to get it back to room temperature. If you don't have, or prefer not to use, a microwave, you can also just leave it on the counter for 20 minutes or so. Or if you're working with a hot dish, like cooked pasta or some kind of meat, just add it right in; the heat of the food will be enough to warm it up.

The batch below made enough to fill 8 standard size muffin tins. You can, of course, adjust the recipe according to your tastes by adding more or less nuts, skipping the cheese, more kale, adding red pepper flakes, etc. There is so much that you can do!


****
New to Always Order Dessert? Consider subscribing to my RSS feed, follow me on Twitter, become a fan on Facebook, or sign up to receive my once-a-week e-mail updates by filling in your address in the box on the right. I also offer custom menu planning services and offer a variety of culinary workshops in the NYC area. Click here to find out more!

And if you ever need any entertaining or cooking advice, please don't hesitate to
e-mail me.
Thanks for reading!


Kale Pesto


Print this Recipe
Ingredients
2 teaspoons Kosher salt
1/2 cup chopped almonds (can also use pine nuts or walnuts)
3 large cloves garlic, peeled with ends trimmed off
1/4 cup Parmigiano-Reggiano
1/2 pound raw kale, stems removed, coarsely chopped
1/2 cup extra virgin olive oil
Freshly ground black pepper
1 tablespoon lemon juice

Directions
Combine the kosher salt, almonds, garlic cloves, and Parmigiano-Reggiano in the base of a food processor. Pulse repeatedly until all ingredients are coarsely chopped.

Add the kale, olive oil, and lemon juice and pulse again until it reaches a fine grind, but not quite a puree. If necessary, add a bit more olive oil to loosen it up.

Turn out into a bowl and stir a few times to loosen up. Season with freshly ground black pepper. Can be used right away or frozen.

To freeze, simply portion into 1/4 to 1/2 amounts and pack into the wells of a muffin tin (can also use an ice cube tray for smaller portions). Let freeze for one hour before removing and storing in a large freezer-safe zipped plastic bag or container. Will will keep well for at least 6 months.
0

Kitchen Tip: How to Keep Bread Fresh Overnight

DSC_1345
I love freshly baked bread--whether artisan loaves from the bakery, or ones I make myself. But with just the two of us in the apartment, it's rare that we're able to finish an entire loaf of bread in just one day. It's a shame because we know that by day 2, that awesome bread will have lost a lot of its charm. I've tried multiple ways to store fresh bread--inside a paper bag, wrapped in plastic, in a cloth bag, even in a pillowcase! The results were never perfect as the cut side usually ended up hard and stale, while the crusty part ended up soft and kind of chewy.

But not too long ago I learned a pretty cool trick. To keep a crusty loaf of bread fresh overnight, store it cut-side down on a wooden cutting board. The bread's natural crust will keep the exposed bread fresh, while the cutting board will protect the side that's been cut. I've been doing this lately, and have been amazed by how well it works.

I've found that this only works really well a maximum of 2 nights, but that's usually enough for us to finish off a small loaf. Anything past that, I toast the bread and use as crostini or croutons.
0

Inspired Living: Toss 5 Things

Ever since getting back from the honeymoon, I've been feeling a bit suffocated in our apartment. Between the boxes of wedding presents, the as-yet unpacked suitcases filled with summer clothes, the Christmas tree which (sigh...) is still up, and the boxes of craft supplies and decorations left over from my wedding planning, there just really isn't much room to breathe.

I love our apartment. It's a quirky pre-war with loads of charm, and by Manhattan standards, it's actually quite large (especially, thankfully, the kitchen). But the storage space is nonexistent, so as hard as I try, I never have anywhere to put things. I love books and so there are stacks of books in every room--including the kitchen and bath. I love vintage hats, so there is a wall full of hats. I love to cook and so my pantry and cabinets are overflowing with ingredients and pots and gadgets. Things that in most houses would be tossed because they never get used, but which in this home can't be since I really do actually use them all the time.

But something has to give. It's going to be some time until we can afford to buy a house (that is, unless my inevitable rise to food superstardom comes sooner than I've planned), so I need to learn to work where I am with what I have.

And that means I need to edit.

Yup...this is pretty much exactly what I look like while I clean. And that's Eugene with his car back there.

Inspired by one of my favorite bloggers who recently resolved to throw out 50 things from her apartment, I decided to create my own challenge. With my ADHD, I knew I needed something more focused to keep me on track. Something small where I could instantly see a result. So I decided that I would start by tossing at least 5 things from every drawer in my bedroom dresser.

I started with my bras, underwear, socks. Then moved on to jeans, pajamas, and tops. When I was through, I was left with a fairly sizable pile of clothing to either toss or donate, and my drawers became more useful to me since I could actually open and close them without a fight (amazing!). Thrilled, I moved on to my office bookshelves and continued the job, removing at least 5 books from each shelf. By the end of that I had a pile of about 40 books that I will now either sell back to Amazon or donate to charity.

And like this I've continued, picking a drawer, a box, a cabinet, a purse--any kind of surface or container with stuff in it, and finding 5 things that can go. No matter how small the surface, I've found that each time, I've always found 5 things I don't need, and more often than not, I've gone above and beyond that goal. My kitchen is next, and it's the one I'm simultaneously most excited and worried about; it certainly is the room that needs this the most.

It's a small step--just 5 things, but I can honestly say that I'm starting to feel better. I can breathe easier. I can think clearer. Slowly I'm reclaiming my home (and my head) from all the stuff.

So I'm sharing my challenge and inviting you to take part. Pick a drawer. Toss 5 things. Then leave a comment here so that I can cheer you on.

xoxo

Alejandra

0

Inspired Living: 5 Fun Ways to Spice Up Your Cooking Life

As much as I love to cook, there are some weeks when even I find myself stuck in the middle of a total kitchen rut, with energy for little more than rifling through the take-out menu drawer. Inspired by the many "spice things up in the bedroom" articles that cross my desk as part of my (not-at-all-food-related) day job, I decided to create a similar list of quirky tips to help put the fun back in the other oh-so-important room in your house:

1. Make a Culinary Wish (list)
Sit down one day and write down anything (and everything!) that you've ever wanted to try making. Think dishes from restaurants you'd love to recreate at home, or something you love, but which has always seemed too daunting to try. (My own list includes things like "learn to bake fluffy and buttery homemade croissants" and "buy a real truffle and shave over scrambled eggs.") Don't edit yourself when making the list by worrying about cost or skill; just add every crazy and delicious thing you can think of--the details will work themselves out later. When you've got it all down, post the list somewhere conspicuous like the fridge or a pantry door where you're sure to spot it regularly. Whenever you start to feel a little bored or uninspired with cooking, take a peek at the list and pick one wild thing that really excites you...then give it a try!

2. Schedule a Play Date
Set aside one weekend a month where the cooking is just for fun...and just for you! If you have a family, arrange with your husband (or wife) so that they take care of food for themselves and the kids, or keep a back-up plan in place (read: phone number to the local pizza parlor)...then just play! Make whatever you want--an elaborate cake, homemade bread, a vegetarian meatloaf, liver pate...the sky is the limit! Don't worry about having to feed anyone or perfecting anything; just enjoy the time cooking. It it comes out fabulously, you can celebrate! If not, throw it in the trash and grab a slice of pizza with the kids. You just might surprise yourself!

3. Become a "Cheftestant"
Make your own "Top Chef" style challenges. On the popular cooking shows, the chef contestants are always being challenged to make delicious dishes with quirky obstacles. This could be a tight budget, having to buy all the ingredients in a 99 cent store, using only food of a certain color, or inspired by a particular film. Take a tip from those shows and create similar challenges for yourself. If you have friends or relatives who also love to cook, invite them to join in on the fun by setting a challenge for everyone to follow on the same weekend or even just within the same month. Then get creative and see what you come up with. You can host a potluck to share all the crazy dishes, or just share your pictures and results via a blog or e-mail chain. When you realize how much you can do when you let your creativity take over, you might find yourself a little more inspired on the other days of the week.

4. Talk to Strangers
In the market the other day, a woman asked me if I knew how to cook with a vegetable she had just noticed. She had no idea that I'm a food blogger and writer, but she saw me looking at them too so she gave it a shot. I gave her a couple ideas on how to prep the vegetable (sunchokes, in this case) and gave her my favorite recipe for a sunchoke soup. It might seem random, but why not follow that lady's lead and ask your butcher or another shopper at the store who is buying the same thing you're buying how they usually prepare it? If you go to a farmer's market, the farmers will usually be happy to talk to you about ways to use their produce. Or if you're in a small cafe or restaurant that you frequent, ask the owner or chef if he's willing to share the recipe for that dish you always order. You never know what you might find out!

5. Go Back in Time
Try to remember the first dish you successfully ever made by yourself. That could be a batch of back-of-the-box sugar cookies made with your mom looking over your shoulder when you were a little girl, or some simply sauteed chicken cutlets your second semester of college. Mine was a light and airy microwaved lemon pudding cake that I found in one of my mom's 80s "Microwave Cookery" books when I was about 10 and just starting to get curious about the kitchen. Whatever you early dish was, think back to the way it felt to make it, and (this part is key) make it again! Try and track down the original recipe (I spent a while hunting in my parent's house to find the exact sticky microwave book), or come up with the best approximation that you can. The mere act of thinking about that dish--and making and tasting it again--could be just enough to waken the excitement that the kitchen once held.

Your Turn: What tricks or ideas do you have for getting out of a kitchen rut?


****
New to Always Order Dessert? Consider subscribing to my RSS feed, follow me on Twitter, become a fan on Facebook, or sign up to receive my once-a-week e-mail updates by filling in your address in the box on the right. And if you ever need any entertaining or cooking advice, please don't hesitate to e-mail me.
 
Thanks for reading!

(photo credit in this post only: iStockphoto.com)
0

Cucumber Cooler


The temperature has been barreling past 100 degrees the past few days here in New York and it's quickly become the only thing people are talking about.

"Hydrate, hydrate, hydrate," the news anchors keep reminding us and I'm happy to oblige.

For the past few months, this cucumber-infused water has become a constant in my refrigerator. I prepare it at night and then sip it throughout the day. Delicious, cool, and crisp, it makes every glass feel like a spa day.

You can customize this however you like based on whatever you have at home. I love to add slices of fresh ginger to mine.


Cucumber Cooler

2 cucumbers
2 liters filtered or bottled water
Juice of 2 lemons
1 handful of fresh mint, optional
1 ginger root, sliced

If you have a juicer, you can simply run the two cucumbers through the juicer and reserve the cucumber juice. If not, puree the cucumbers (in a blender or food processor) then strain and reserve the liquid. (You can toss the solids into a salad.)

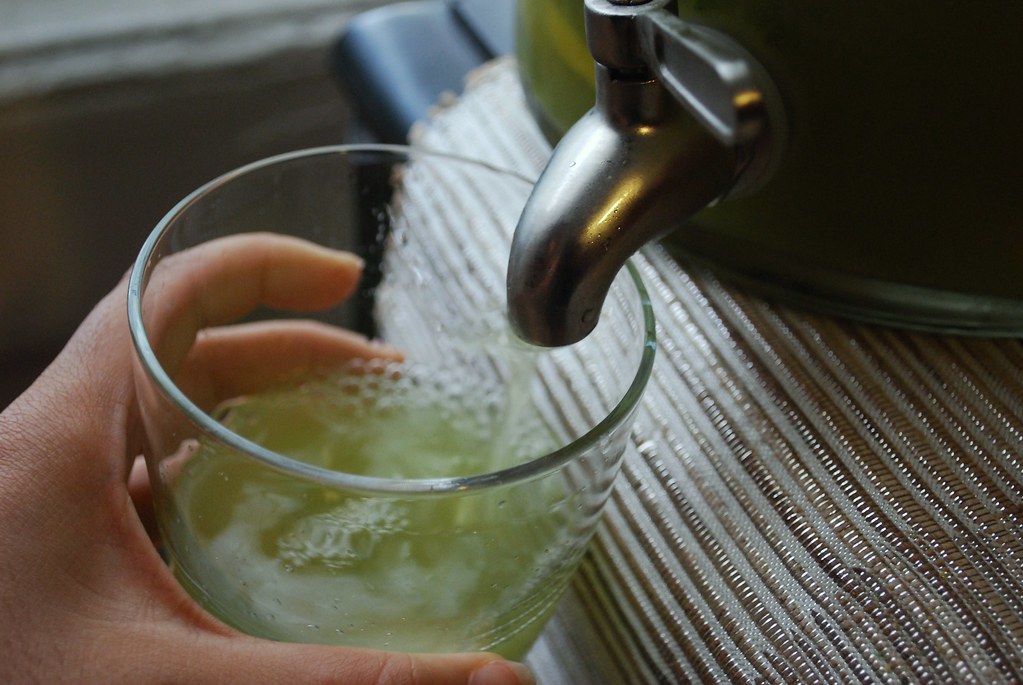
Combine the cucumber juice with the water, lemon juice, and fresh mint or ginger root, if using. Pour into a large container (I use an old-fashioned beverage dispenser with a spigot that I keep in my fridge for easy serving.) and refrigerate overnight or for at least 4 hours.

Before serving, use a spoon to stir up the ingredients (the solids in the drink will settle after a while) and serve. Lasts 1-3 days (you can refresh it by adding more water).


0

Like the Census...but Delicious!

Hey all!

I've been jazzing up the content here on Always Order Dessert to give you more of the recipes and articles that you find most interesting. To better achieve this, I realized I need to hear from you, my awesome readers, about the subjects that would be helpful to you!

I'd love it if you could take a couple minutes right now to fill out this really brief survey. It only takes about 2 minutes to fill in (it's mostly multiple choice), but will really help me a lot. And I'll be sure to repay you back tenfold with delicious recipes and exciting content. Good deal? ;)

Just click this link to get started:
http://www.surveymonkey.com/s/MCRR7C8

xoxo

Alejandra


P.S. If you have any questions about it, feel free to email me at alejandra@alwaysorderdessert.com or message me on Twitter @nandita.
0

We Brunched & Swapped (a clothing swap party recap)

Guys, I can now tell you this with 100% certainty: clothing swaps are awesome! And clothing swap brunch parties--with cocktails and delicious food--are double-awesome.

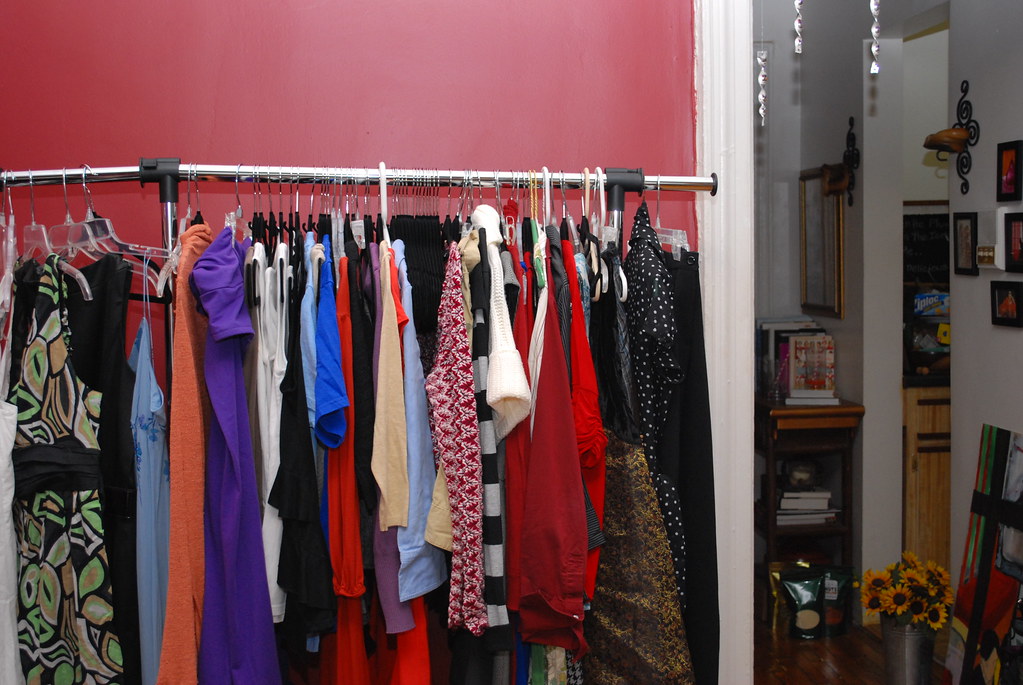
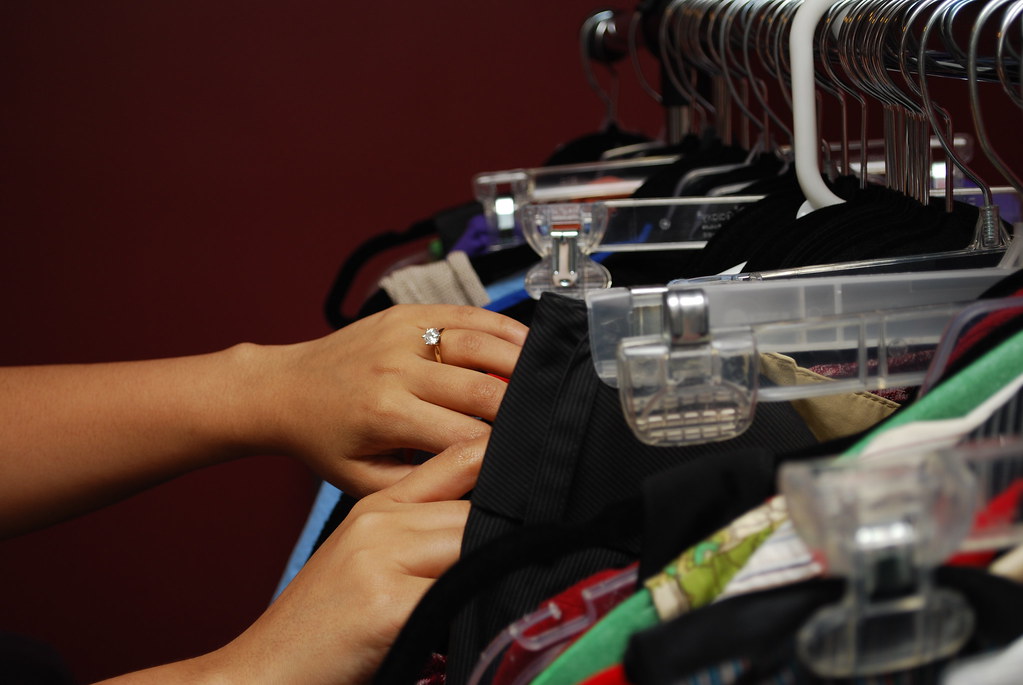
As you may know, I hosted a groovy little clothing swap brunch party on Saturday in my apartment. I invited a random mix of friends and family to join and asked them each to bring along all the clothing, shoes, and accessories that they no longer want (or fit into). I set up racks and hangers so we could display the clothing just like in a chic little boutique. The plan was to get all the girls together, offer them lots of champagne and delicious food, and then set them loose to “shop.”

And the plan worked!

To eat (because this *is* a food blog), I prepared a brunch buffet with a selection of sweet and savory items: a baked spiral ham with a brown sugar glaze, fresh steamed green beans tossed with thinly sliced shallots in a mustard vinaigrette, a big salad of mixed greens with a homemade dressing of lemon juice, garlic, shallots, and olive oil.

A cheese plate, of course, with big bunches of grapes, slices of freshly baked baguette, goat cheese with lavender and fennel pollen, and a small wheel of brie. I made a traditional Tortilla Espanola (Spanish Omelet) with potatoes, onions, and a dash of smoked paprika. I also made a lemony chicken salad that I served over a bed of mixed greens.


I bought some of my absolute favorite par-baked croissants from Fresh Direct and baked them just before the guests arrived so that they would be hot and buttery right out of the oven. [These things are delicious and a regular in my home! If you live in New York and use Fresh Direct, I urge you to try them out immediately!]

I love flavored butters, so I whipped together a stick of softened unsalted butter with a pinch of salt and a 1/4 cup of honey. This made a sweet honey butter that was lovely on walnut raisin rolls.


Every good brunch needs fruit, so I set out a bowl of strawberries and sliced up a cantaloupe. I also put out some snacks and candy in little bowls around the room: dried chili mangos, dried edamame, fruit chips, strawberry licorice twists, chocolate covered pretzels, and raspberry slices.

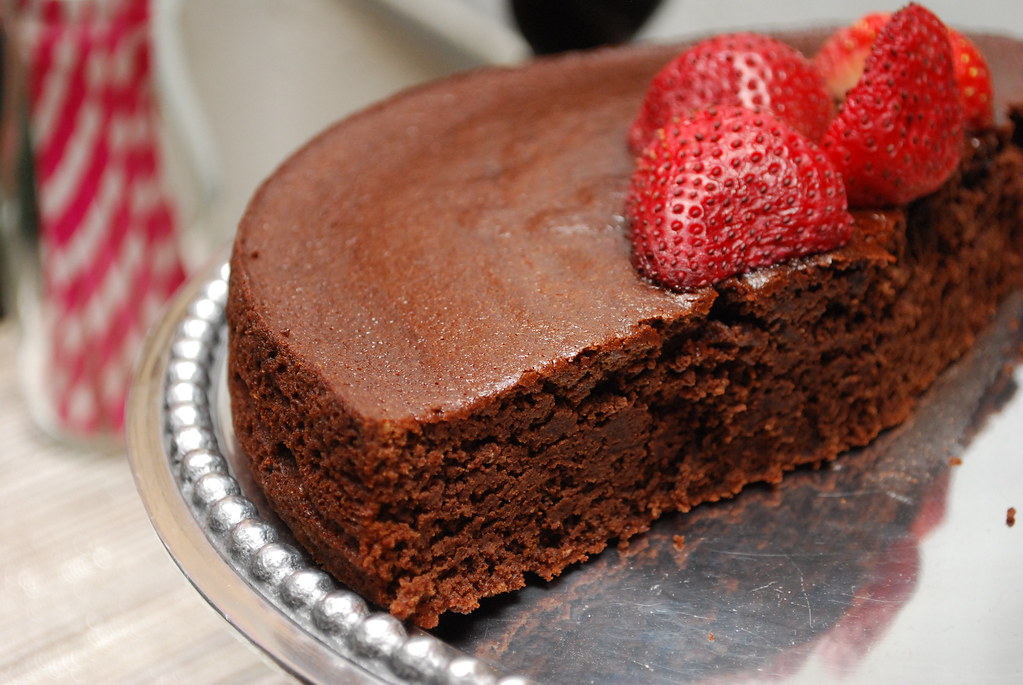
For dessert, I made a flourless chocolate almond cake (using this recipe, but subbing almond flour for the hazelnut meal). It’s rich and chocolate-y, and also gluten free so that my friend Vanessa could partake.

(And partake she did; even taking home three slices after the party!)


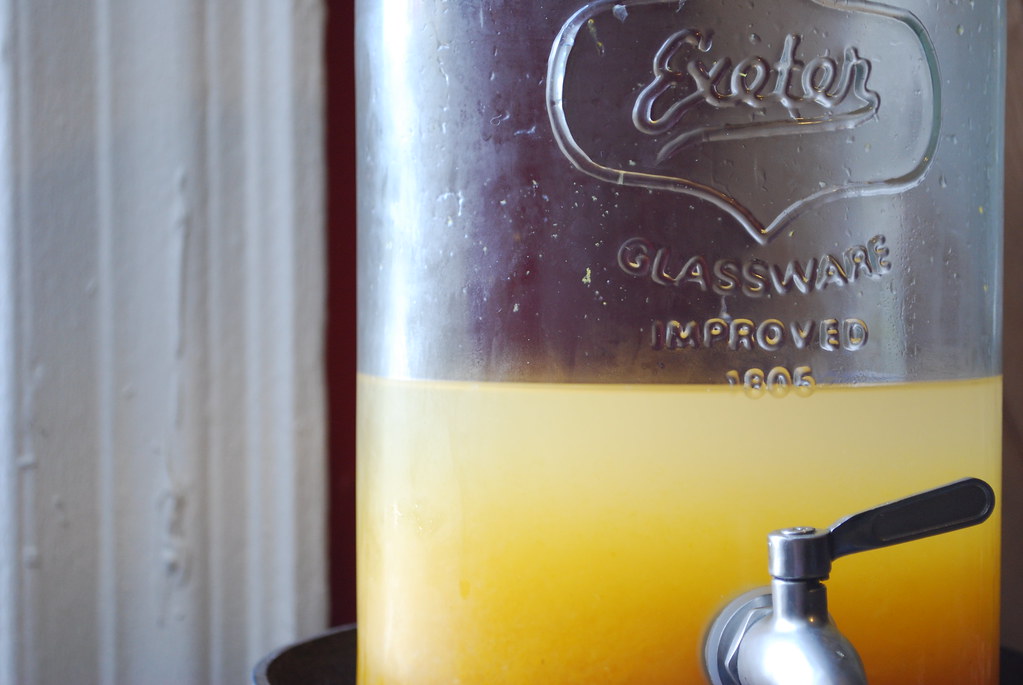
To drink, I had several bottles of rose and sparkling wine chilling in the fridge. I also prepared a huge batch of Passion Fruit Lemonade (my new favorite summer drink) that I served in the mason jar beverage dispenser I was raving about last week.

The nonalcoholic lemonade was paired with a boozy (and pink!) punch. I ran out of gin so I just made this recipe using vodka instead. It was just as delicious, although I may have been a little heavy handed with the vodka (not that I had any complaints!).

I provided the racks and the hangers, and just let the girls arrange their clothing wherever. I originally planned to hand out tickets to keep things fair, but in the end I just asked everyone to remember how much stuff they brought and to stick to that number when selecting stuff to take home.

That worked perfectly, and we had so much clothing leftover that there was enough for everyone to really just take as much as they wanted!

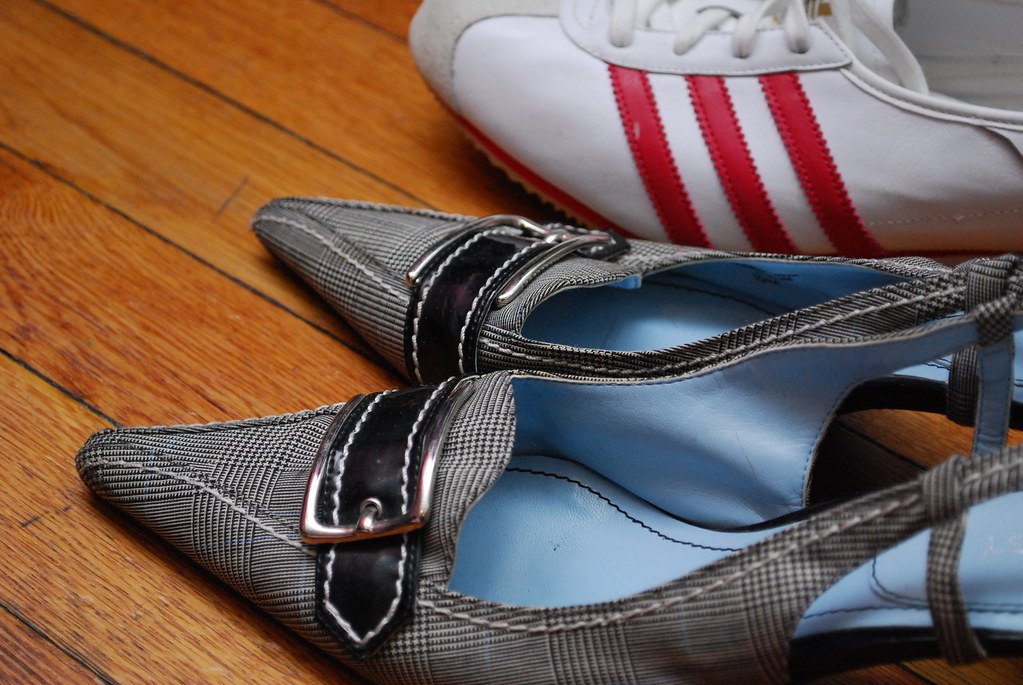
Most of the girls seem to make out very well! Lara, my friend and fellow blogger, got some gorgeous shoes, some jewelry, a few cute dresses, and an awesome little terrycloth romper that I still insist she should pair with roller-skates. ;)

Fellow blogger/writer Stephanie and my coworker Aryanna both got some great dresses (and Steph got the coolest hat!) My mom (yes! I invited my mom) got herself a dress to wear while accompanying my dad to the Emmys last night along with several other pieces.

My future mother-in-law, Tatyana, also made out like a bandit with several dresses, shirts, and some jewelry. As did my future aunt-in-law, Yelena, and future cousin-in-law, Michelle, (the latter of whom scored a really great pink leather purse that will be fabulous for the spring/summer).


I got several dresses, a few pairs of shoes that I can't wait to wear, and some sweaters (a couple of which used to belong to Tatyana who also got one of my former dresses; Eugene noted that seeing his mom and future wife wearing each other’s clothing might prove “confusing.”)

Once everyone had their final selections and had settled back down in their chairs, I jumped up and started hawking some of the unclaimed goods [“How about this sweater? This would be fantastic for a cozy afternoon at home! Or this little slutty dress from Frederick’s of Hollywood? Vanessa try on this hooker dress!”] until every single item had gotten a thorough consideration.

(For the record, Vanessa did try on the hooker dress and she loved it. Also for the record, the hooker dress originally belonged to my mom!)


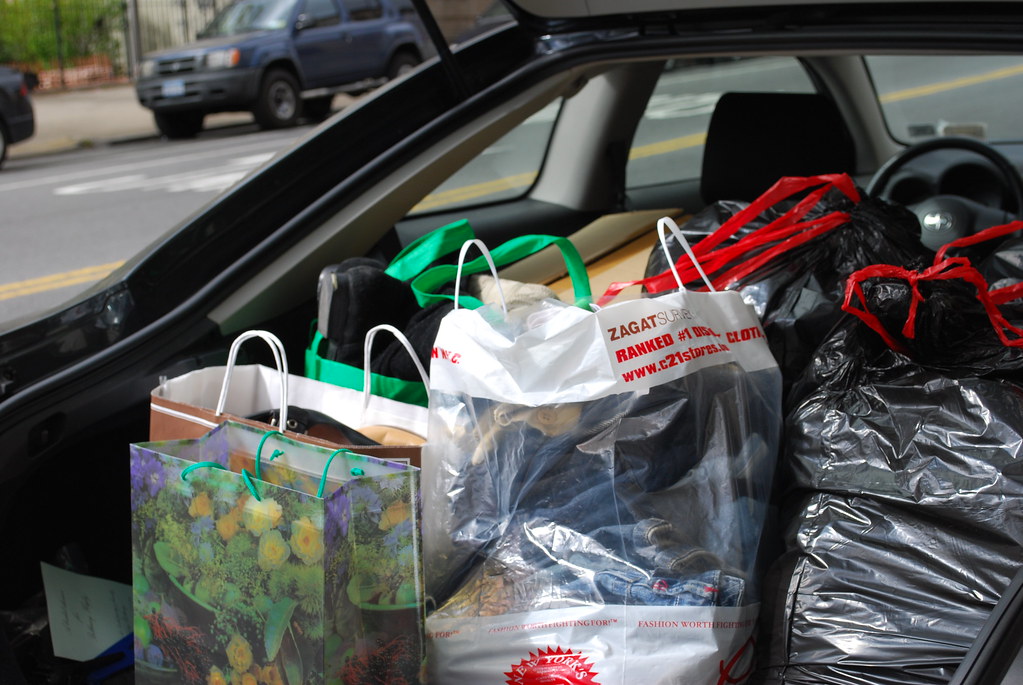
After the girls went home, I packed up all the leftover clothing, shoes, and accessories (6 huge bags worth) and Eugene and I drove it all over to Housing Works where the goods will be sorted and sold and the money will then go to benefit homeless New Yorkers living with HIV/AIDS.

Actually, that's totally a lie. After the girls went home, I ate a plate of leftovers and passed out on the couch. The NEXT DAY, I packed up all the clothing and (with Eugene's help) brought it over to Housing Works.

Good times, clean closets, new clothes without spending money, and a big donation to charity. Have you ever heard of a more perfect win-win-win situation?

Tomorrow I’ll go into more detail on how you can throw your OWN clothing swap party. I highly recommend it!


****
New to Always Order Dessert? Consider subscribing to my RSS feed, follow me on Twitter, become a fan on Facebook, or sign up to receive my once-a-week e-mail updates by filling in your address in the box on the right. And if you ever need any entertaining or cooking advice, please don't hesitate to e-mail me. Thanks for reading!
0
Back to Top