Showing posts with label Greek. Show all posts

DIY Yogurt Cups

This isn't really a recipe. It's an idea. It's a very good idea.

I've recently started making my own homemade yogurt cups. I take a small mason jar and fill it about 3/4 of the way with thick, whole, plain Greek yogurt. I use Fage. It's my favorite and I've tried the other brands of "greek-style yogurt" but for some reason, they just don't measure up. But if you have another favorite brand of plain yogurt, then by all means do that.


I then add a couple spoonfuls of all-fruit preserves or homemade jam. Not too much; I just want to add a touch of sweetness. My current favorite is plum; I got a jar of homemade plum jam on my trip to Vermont last month and I'm in love. I can't wait until prune plum season as I want to make myself a huge batch of it.

I top it all off with sliced almonds (though any nuts will do). Sometimes I add a bit of unsweetened shredded coconut, too. Then I close the jar and pop it in the fridge.

That's all! A homemade yogurt cup, ready to go! Fruit on the top, not on the bottom, and so much better. Leftovers can be easily stored (not as easy when I have leftovers in one of those Fage single cups), and I save money by buying the large container of yogurt, then portioning it out into smaller servings.


By the way, when it comes to dairy, it's full-fat or nothing for me. None of this skim or light or 2% nonsense. Not only is it more satisfying, but the fat in the milk is where the majority of the nutrients reside (this is a fact). Skim and other light dairy products are so devoid of nutrients that the FDA actually requires dairies to add synthetic vitamins A and D to make up for what is lost when the fat is removed. I'll take the natural God-given nutrients over anything cooked up in a lab, please!


****
New to Always Order Dessert? Consider subscribing to my RSS feed, follow me on Twitter, become a fan on Facebook, or sign up to receive my once-a-week e-mail updates by filling in your address in the box on the right.
0

Sour Cherry Almond Frozen Yogurt: A Story & A Recipe

The ice cream shop at the Bergen Mall was the only thing that made the mall trips bearable. My brother and I called it the "boring mall." Unlike the other malls (it was NJ, so there were several), which had playgrounds and toy stores, this one catered almost exclusively to adults and, well, old people. But the ice cream was good, and a few hours spent hiding inside a rack of dresses while my mother shopped was ultimately not that bad a price to pay for giant scoop in a sugar cone.

The shop was located at the far side of the building, down a long hallway that smelled of cinnamon pretzels and old lady perfume. Inside, an icy painter's palate of flavors awaited us. I raced in and paced up and down the display, reading the nameplates that distinguished each flavor before settling--like I always did--on a Pepto Bismal-pink blend of strawberry ice cream studded with real bubblegum pieces.

It was a flavor that required careful, methodical eating, for the ice cream had to be consumed slowly to avoid swallowing the gum, which I spit out and collected into a small sticky mountain. When the ice cream was gone, I'd pack my mouth with the wad of gum, and chew and chew until my jaws could no longer take the exercise.

That Saturday (like all the other Saturdays), I was anxious to get my cone. Patience never coming easily to me, I wandered off the line leaving my mother and brother behind to keep my place. I strode over to the counter and leaned against the cool glass, systematically breathing and wiping off puffs of breath-fog. A few feet away, a man in a fudge-colored apron dipped his sinewy arm into the buckets pulling up scoop after scoop. I was so focused on watching him that I barely noticed the tall man that standing behind me until the counter guy looked up from his scooping with a bright smile of recognition.

"Hey man," he said to the visitor. The newcomer was blond and wore his long hair pulled back into a low ponytail; his long, dark raincoat dusted the floor as he moved.

They engaged in a complicated handshake that had clearly been devised many years earlier, and I listened in as the tall one leaned toward his friend behind the counter.

"Did you get the drugs?" he asked quietly. The guy behind the counter nodded, "Yeah. It's cool."

I stiffened. Did he say drugs?!?

It was the height of the "D.A.R.E to keep kids off drugs" era, and the word jumped out at me like an angry lizard.

I looked around nervously, wondering if anyone else had heard the exchange, but the other customers simply continued to move along the line without any concern.

I was clearly in this alone.

The guy behind the counter slipped his friend a chocolate cone and sent him off with a casual half-wave.

"I'll see you later," he called as the other one walked outside, his odd coat fanning out behind him.

And that's when I figured out what they were doing. The man behind the counter must have been hiding "the drugs" in the ice cream!

I was terrified. My mother, my brother, everyone that ate the ice cream would be drugged, and there was no way for me to stop it.

I tried to think of a way to tell my mother, but the word itself was too terrifying for me to pull out of my throat. I stayed quiet as she handed me my bubblegum cone and led us back into the mall. I followed nervously beside her, holding the cone an arms length away from my body. At the crosswalk, my mother looked down and saw the uneaten ice cream dripping and melting all over my hand. A trickle of pink drops trailed along on the ground behind me.

"Alejandra!" she cried, attacking me with a handful of napkins. "Why did you ask for ice cream if you weren't going to eat it?"

"I am eating it," I lied, poking my tongue out as closely as I could without actually touching it.

"For the love of God," my mom sighed, exasperated, but too busy guiding us safely across the parking lot to do much more about it.

The ice cream continued to drip and melt as we walked to the car, and I knew that time was running out. A stream of scenarios ran through my head, all ending in death caused when "the drugs" seeped through my eight-year-old hands and into my bloodstream. (My news-obsessed father used to let me watch John Stossel on 20/20; this was exactly the kind of story he'd feature on the show.)

A few steps away I realized there was really only one thing left to do to save myself. Certain that neither my mother nor brother was looking, I flicked my hand over and tilted the remaining ball of ice cream right off my cone and watched as it fell onto the asphalt in big fuchsia splat.

My mother turned around and I braced myself for the imminent lecture feeling strangely relieved; a time-out would not be fun, but it was definitely better than drugs.


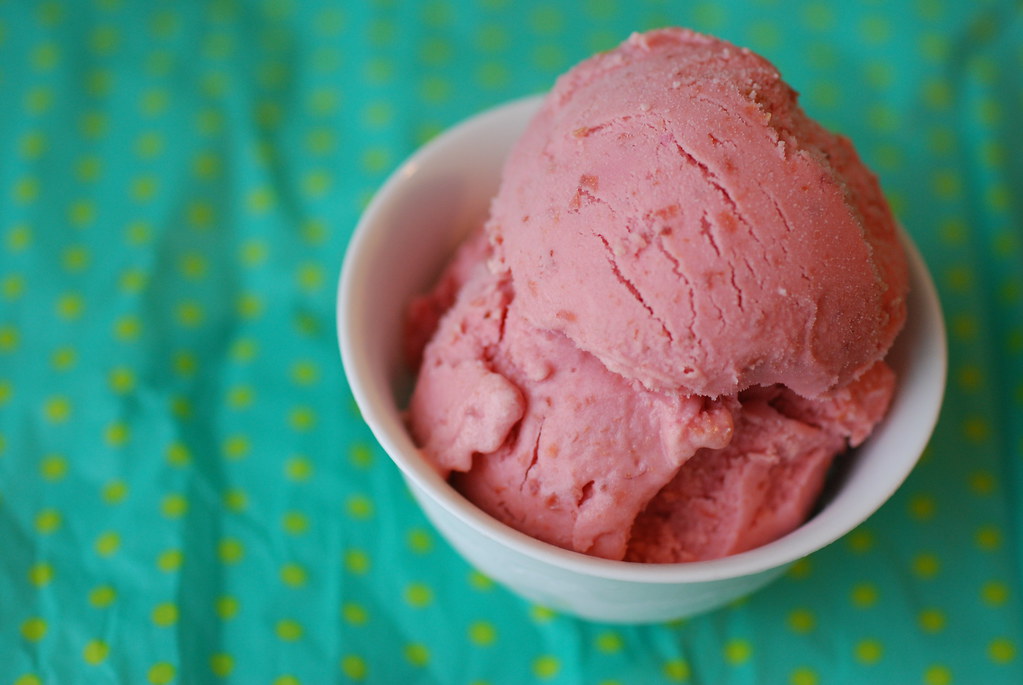
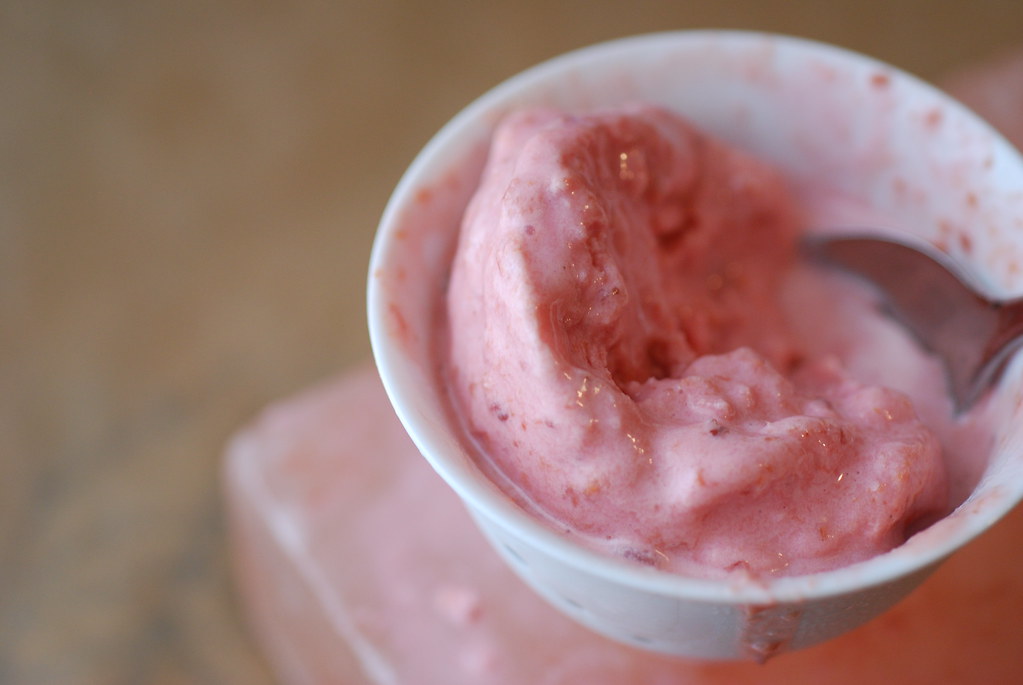
This recipe for sour cherry almond frozen yogurt contains neither bubblegum nor drugs (both of which I lost the taste for many years ago). The color, though, is almost the exact same shade of that one I let drip all over my hands when I was eight. Unlike the bubblegum ice cream, this one contains no sketchy or artificial ingredients (except for that little splash of rum, of course).

The pink comes from the sour cherries, which are reduced with a bit of sugar and a pinch of salt (for that synergistic effect). I chose sour cherries because I made the frozen yogurt a few weeks ago when they were still in season and plentiful at the farm stands. Sweet cherries are lush right now so they might make more sense; just reduce the sugar by a few tablespoons to keep it from being too sweet. And be sure to select a good and tangy Greek-style yogurt.

Note: I pitted my cherries and then placed all the pits in a little pouch made out of cheesecloth. I steeped these along with the cherries so that they would get that extra hint of almond-like flavor. Not necessary, but adds a nice touch.


Sour Cherry Almond Frozen Yogurt

Ingredients
3 cups sour cherries, pitted with stones reserved
3/4 cup sugar
1 teaspoon Kosher salt
1/4 cup water
1 (generous) cup of plain Greek yogurt (such as Fage, I use the full fat kind)
1 tbsp rum (I used a homemade vanilla-infused rum, but plain will suffice)
1 tbsp pure almond extract


Combine the pitted cherries, sugar, salt, and water in a small saucepan. If desired, wrap the reserved pits in a length of cheesecloth and add to the mixture (this will impart a little extra natural flavor). Head the cherries over medium heat until the sugar dissolves and the cherries release their juices. Stir occasionally.

Remove the cherry mixture from the flame and discard the pits. Let the cherries cool to room temperature before pouring into a food processor and processing until smooth. Add the Greek yogurt, rum, and extract and process for another minute until completely smooth and combined. There will still be little pieces of cherry skin in the mix, but that's OK.

Pour the mix into a bowl and cover with plastic. Place in the fridge and let cool for at least one hour.

When you are ready to make your ice cream, pour the mix into the base of your ice cream maker and churn according to manufacturer's directions.

Store in an air-tight container in the freezer for up to one week.
11

Orange-Hazelnut Baklava Recipe


Sahara market doesn’t look like much from the outside, but once you’re in the doors you’ll swear it’s doubled in size. Barrels of spices, nuts, and marinated olives crowd an entrance that gives way to shelf after shelf of unfamiliar (but so exciting!) grocery items. The aroma is distinct and intoxicating—a mix of freshly baked bread, grilled meats, and spices. Generous containers filled with milk cheese and yogurts sit in the refrigerator cases at front, up where the owners operate a modest Halal take-out.

While we were growing up, my father occasionally stopped at the nearby Arab market to pick up food for lunch or dinner or some meal in between. He was a fan of the falafel platters, both for taste and nostalgia. With each bite he’d recount the similar falafels he practically lived on as a young actor living in Greenwich Village. The story added just the perfect amount of romance to the already incredible platters; savory, lemon-sized falafel balls drizzled in tahini and served alongside generous portions of hummus, tabbouleh, and cucumber salad.

The best thing about dinner from the Arab market was that the meal didn’t end with the entrée. Just at the moment when I scraped up the last spoonfuls of creamy hummus and the hint of sadness that the deliciousness would soon be over started to set in, my father would reach into the store bag and pull out a second, smaller container. Inside, sitting in a small pool of honey syrup, were two perfect triangles of baklava.


My mother rarely ate sweets. My brother was disgusted by the whole meal, preferring the plastic-wrapped treats found on the regular grocery store shelves. But my father and I relished every single bite of that baklava. He ate his one small bite at a time, all the while gingerly holding it about a foot away to keep the drops of honey off his chin and shirt. I, on the other hand, ate mine with my fingers, peeling off each thin layer of phyllo and consuming it before moving on to the next. I started with the light and crispy top layers dusted with green-hued crushed pistachio, and worked my way down. The slices grew sweeter and stickier, until I finally reached the thick layer of crunchy ground walnuts near the bottom. The last few sheets of phyllo are still my favorite, having absorbed the most syrup. I sucked on them, then used my fingers to wipe up and final bits of syrup that may have dripped onto the plate.

A few weeks ago, on one of those lucky free days off work, I came across a package of frozen phyllo leftover from some long ago cocktail party. Though I’d originally meant to turn it into some kind of fancy canapé, I never quite got around to it and figured that I might as well experiment. I had time, afterall, and there was no one around to catch me if I messed it up. And that’s how I decided to make my own baklava.


I promise that though it might seem terrifyingly complicated, making baklava really is rather straightforward. My baklava isn’t exactly traditional—I based my recipe on the one printed on the side of the box, but used hazelnuts and almonds instead of the classic walnuts and pistachio. Since I love orange, I added a bit of zest to the nut mixture and used more zest and orange juice to make a heavily citrus-scented syrup that paired beautifully with the hazelnut.

I loved my baklava and so did my father, who excitedly drove into the city to pick up the portion of the batch I’d saved for him. I learned quite a bit while making it, too, and will include these notes here. I think that the next time I make it I might try and play around with the flavors—perhaps adding dried pineapple and coconut for a tropical flavored treat or mixing in some chocolate with the hazelnut. Once you have the technique down, you’ll see how easy it is to play with.


A few tips:
  1. Make sure you set up all your ingredients and everything first. The phyllo is easy to work with, but is delicate and dries up quickly. You’ll need to work fast for the best results so make sure you’re organized and all set to assemble before you start
  2. The point when you add the syrup to the baklava will determine your results. To keep your pastry crisp and not soggy, make sure the syrup and pastry is at opposite temperatures when you combine them. Meaning that either the pastry should be crackling hot (with a fully cooled syrup) or the syrup should be hot off the stove (with fully cooled pastry). As long as both aren’t at the same temperature, you’ll be fine. 
  3. If you can find it, freshly made phyllo (available at Mediterranean and Arab markets) is the best, but frozen phyllo works too. For best results, take it out of the freezer and let defrost in your fridge for a day or two before you use. This way it will be completely defrosted and pliable. 
  4. Don’t stress about small tears or slight overlaps. These are inevitable when working with such thin delicate sheets. Just straighten as best you can, brush with butter, and keep going. Your pastry will have so many sheets of phyllo on it that a few tears or bumps will be indiscernible in the finished pastry. 


Orange-Hazelnut Baklava
Makes 16 servings

Ingredients

For the pastry:
1 pound frozen phyllo pastry sheets, defrosted
1 pound unsalted butter
2 cups ground hazelnuts
1 cup ground almonds
3 tablespoons light brown sugar
4 pieces Zwieback toast, crumbled (you can replace with ¼ cup plain bread crumbs)
1 tablespoon cinnamon, preferably Vietnamese
1 teaspoon orange zest, finely grated
½ teaspoon ground cloves
½ teaspoon ground nutmeg
1 teaspoon kosher salt

For the syrup:
3 cups water
2 ½ cups sugar
½ cup honey
5 large strips of orange zest
2 large strips of lemon zest
1 vanilla bean, split
2 whole cloves
1 star anise

To make:

Preheat oven to 350 degrees. You will need a 9” square pan.

First clarify your butter. Cut the 1 pound of butter into small pieces and melt in a medium saucepan over medium-low heat. Simmer until it forms a white froth and is completely melted. Skim off the foam and discard. Reserve the clarified butter.

In a large bowl, combine the hazelnuts, almonds, toast or breadcrumbs, sugar, orange zest, cinnamon, cloves, nutmeg, and salt. Mix well until all the spices are evenly distributed.

Unroll your phyllo and use a knife to cut the rectangle of pastry sheets down about 6 inches so that it is a just slightly larger square than your baking pan (adjust according to your phyllo and pan).

Re-roll and put away the extra small part you just cut off as you won’t be using it for this.

Lay the phyllo out and cover with a damp towel while working to keep from drying out. Place nine sheets of phyllo on the bottom of your pan, brushing each one with the clarified butter before laying the next sheet.

Sprinkle the top sheet with the nuts mixture, then top with two buttered sheets of phyllo. Continue alternating nut mixture and two sheets of phyllo, being sure to butter each sheet, until you finish the nut mixture.

Place the remaining sheets of phyllo on top, buttering each one including the final layer.

With a sharp knife, cut the Baklava in half across, then turn and cut in half again. Cut each quarter in half diagonally both ways until you have 16 equal sized triangles. Use the clarified butter to brush over the cuts to seal them.

Bake in the 350 degree oven for 30 minutes then lower the heat to 300 and continue baking for 45 minutes to one hour, or until the pastry has puffed up slightly and taken on a slight golden hue. It will also pull away from the sides.

While the pastry is baking, combine the water, sugar, honey, citrus peel, and spices in a medium saucepan and bring to a boil. Let simmer for about 15-20 minutes to infuse the syrup and let it reduce a bit. It should take on a slightly golden color.

Let cool completely before pouring over the hot Baklava. (Or let the Baklava cool completely before pouring on the hot syrup.) The syrup pastry will crackle a bit when you pour on the syrup. Add just a small portion at a time so that it has a chance to sink in. Please note that you probably won’t need all the syrup (I had about a cup left).

Let the syrup-covered Baklava cool at room temperature for a minimum of four hours before serving. Can be stored covered with parchment or wax paper and plastic wrap at room temperature for 2-3 days. Can also be stored in the fridge but it will likely get a bit soggy.


7

Easy Homemade Pita Bread


I spent my college years interning in the PR departments of a number of different non-profits and publishing companies. My sophomore year I got a job in the media relations office of one of the major teacher’s unions. I absolutely loved that job. My work was interesting and our bosses were fantastic—clever, charismatic, and a lot of fun. In the middle of the summer, the union held their annual meeting and we (the interns) were flown out to New Orleans where we each got our own executive suite and a generous per diem. The work was minimal and we spent most of that week going out for drinks with our bosses and having lavish dinners at some incredible New Orleans restaurants.

It was, needless to say, the ultimate internship. But I would be lying if I said that it was not without some annoyances--or one annoyance, to be more exact. She was one of the PR reps and she was good at one thing—driving everyone around her crazy, from our bosses to the mailroom guys. We interns especially hated her because she was constantly passing her work off on us and then taking the credit. Fortunately she was also prone to getting sick, and could usually be counted on to miss at least one or two days of work a week due to such brilliant excuses as “my closet pole collapsed today so I have to stay home and put away my clothing” or “my wrist is sore.”

We all used to share stories about her during lunch and when she wasn’t around (which was often). One afternoon, our boss revealed the nickname that she and a lot of the other veterans had for her. They called her Pita, because she was such a Pain In The A**. We giggled at this and quickly adopted it among our own conversations.

It’s been quite a few years since then, but I’ve never forgotten Pita and I always think of her when I hear the word. It’s a fact of life that all offices seem to have one or two Pitas on staff. They can be impossible to deal with, but can certainly be entertaining to commiserate over (especially during lunch!). Why not whip up a batch of these delicious pita breads to share with your nice coworkers. They’re wonderful plain, filled with salad or meat, or toasted and dipped in hummus. Unlike dealing with the office Pita, baking these is a breeze.


Pita Bread
Makes 8 pita bread rounds

Ingredients
2 ½ cups bread flour
1 ½ teaspoons active dry yeast
1 teaspoon kosher salt
1 teaspoon granulated sugar
1 teaspoon extra virgin olive oil
1 cup warm water


To make:
Place your baking stone or tile on the lowest rack of the oven and preheat as high as it will allow (around 500 degrees)

1. Whisk the yeast, sugar, and water together and let sit for 5 minutes until the yeast starts to froth.

2. Sift the flour and salt together and pour into the base of your electric mixer with the dough hook attached.

3. Pour in the olive oil and water/yeast mixture and knead using the dough hook. It will come together. Continue kneading for 5 more minutes until the dough is smooth or elastic. You might have to add a bit more water or flour to get the right consistency. Once it is ready, turn out onto a flour surface and form into a ball. Place in a greased bowl (use olive oil), turn once to coat and cover with a clean towel. Let rise for one hour or until doubled in bulk.

4. Punch the dough down and divide in to 8 equal pieces. Shape each piece into a ball and use a floured rolling pin to roll out to about 1/4-1/2 inch thick. Place on a baking sheet lined with parchment paper and cover with oiled plastic wrap. Let rise again for 20 minutes.

5. When ready to bake, gently lift each round and lay on your baking stone. You can do about 2-3 at a time. Shut the oven door and let bake for 3-6 minutes or until puffed up with just a hint of color. Use a spatula or tongs to remove from the oven and repeat with the rest of your dough. Wrap in a warm, clean dishtowel until serving to keep warm.
13
Back to Top