Showing posts with label Ice Cream. Show all posts

Homemade Horchata Ice Cream (No Eggs)

This month marks the start of summer, which is my favorite time to get inspired in the kitchen. The gorgeous weather, lush summer produce, and lazier days make it the ideal season for casual entertaining and sharing with friends.

This month is also the start of my sponsored partnership with Carolina® Rice!

Carolina® is a brand I grew up with and have eaten my entire life (I can’t remember ever not seeing at least a bag or two of it in our pantry growing up!), so I’m really excited for this opportunity to work with them. Each month for the next six months, I'll be sharing a new easy party recipe made with a different variety of rice.

From sweet desserts (like today's Homemade Horchata Ice Cream recipe!) to savory entrees and sides, I hope these recipes will inspire you to use a classic ingredient like rice in new and creative ways your friends and family will love.

But for now — back to dessert!

What is Horchata?
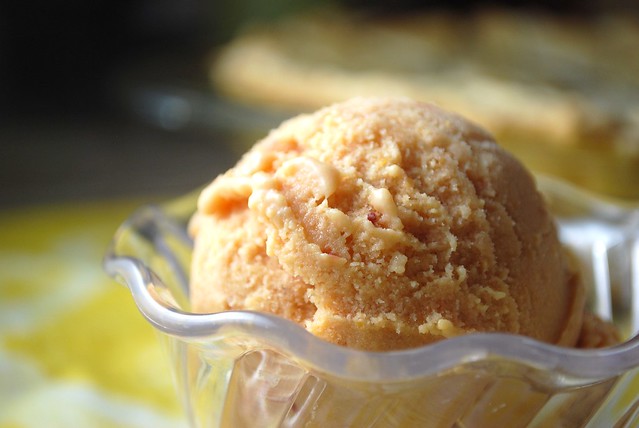
This Horchata Ice Cream Recipe is inspired by the cinnamon-spiced rice horchata beverage that's popular in Mexico. Horchata (pronounced or-CHAH-tah) is a refreshing sweetened non-dairy milk made from a mix of water and rice, nuts or seeds, that is sometimes sweetened and flavored with sugar and spices. It’s served chilled, and is a favorite drink during hot-weather days. The starchy creaminess of the beverage makes it a perfect pairing for spicy dishes.

Horchata originated in West Africa, where it was made with tiger nuts (or chufa, in Spanish), then was brought to Spain by the Moors. Tiger Nut Horchata is still very popular in Spain! Eventually, the beverage made its way across the ocean to what is now Central and South America, where it is most often made with toasted rice, and the Caribbean, where it's made with a mix of rice and sesame seeds. Then, after some time, variations of the beverage migrated up and around the United States, where it can be found everywhere, from taco trucks to trendy coffee shops.

It's not something many realize, but every time you order an almond milk latte, splash oat milk into your morning smoothie, or pour rice milk over your morning cereal, you're essentially taking a sip of a beverage that people have been drinking around this earth in one form or another for centuries!

How to Make Horchata Ice Cream without Eggs
While traditional horchata is made strictly with water, for this ice cream recipe I’m using the same technique of toasting and infusing the rice and cinnamon into dairy milk instead. This will give us the nutty flavor of toasted rice, with the lush creaminess of whole milk and heavy cream.

Basically the best of both worlds!

A lot of ice cream recipes use eggs to create a custard, but the natural starches in this rice ice cream recipe already thicken the milk mixture into a lovely silky pudding, without having to add eggs or other thickeners. It’s easier, and I think also helps the toasted rice flavor really shine through.

When my husband tasted my first batch of this, he commented that it almost tasted like frozen rice pudding!

Note that this recipe does take a bit of inactive time because you have to let the rice steep and then chill. It’s all very straightforward though, and doesn’t require you to hang around in the kitchen very much.

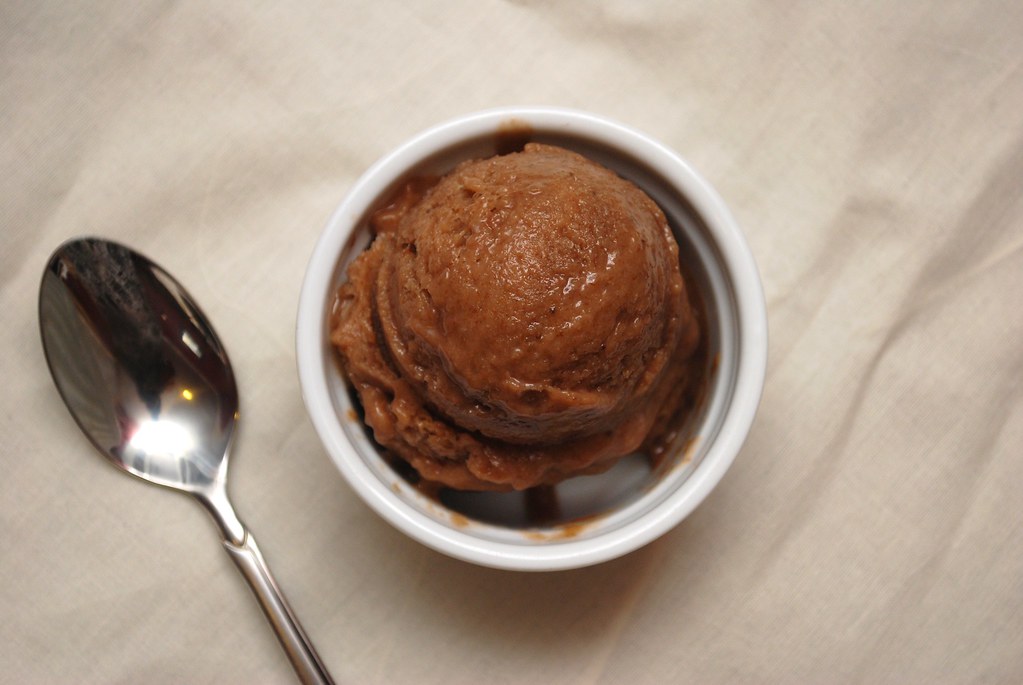
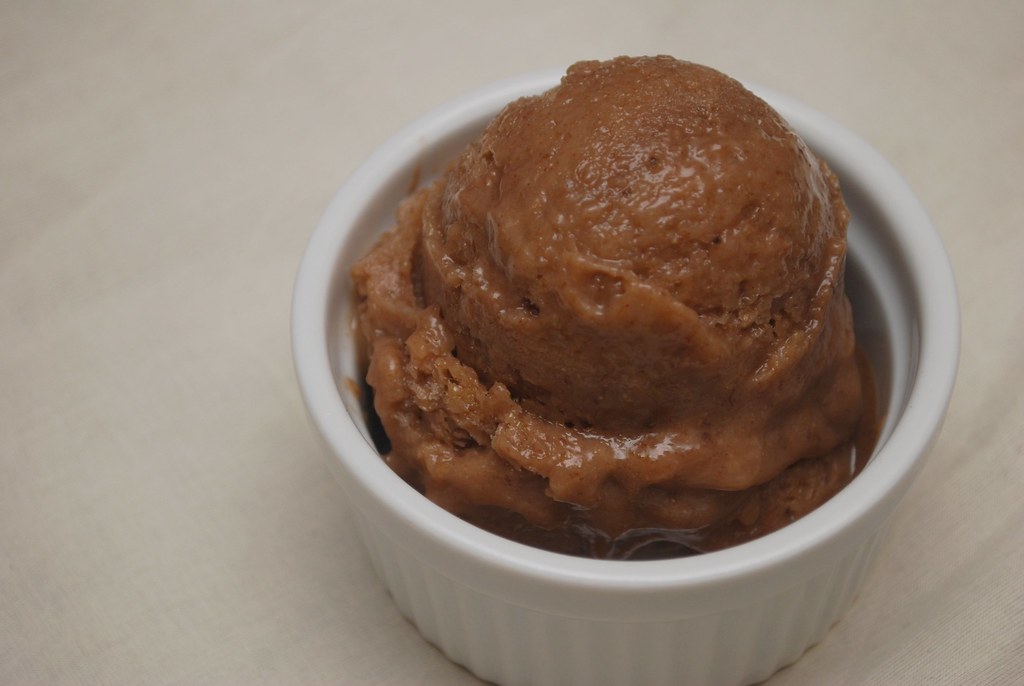
Serve this Horchata Ice Cream recipe on its own, sprinkled with cinnamon, or even drizzled with dulce de leche! Horchata Ice Cream is also the perfect dessert to serve with tacos!

Homemade Horchata Ice Cream Recipe (No Eggs)
Yields: about 1 quart
Active time: 1 hour
Inactive time: 8 hours

Ingredients:
1/3 cup Carolina® Extra Long Grain White Rice
2 tablespoons butter
4 cinnamon sticks (*if you are able to find Mexican canela sticks, use those instead, as they have incredible flavor)
3 cups whole milk
2 cups heavy cream
1 cup granulated sugar
1 tablespoon vanilla extract
1/4 teaspoon almond extract (optional)
2 teaspoons ground cinnamon
1 teaspoon kosher salt

Directions
Melt butter over medium in the base of a heavy-bottom pot (such as a Dutch oven) and add the rice. Use a spoon to stir regularly for 3-5 minutes, just until the rice is toasted and smells slightly nutty.

Add the milk, heavy cream, sugar and cinnamon sticks, and bring to a boil, then reduce heat to low and let simmer gently for 10-15 minutes, stirring regularly until the rice is tender. Remove from heat; stir in the vanilla extract, almond extract, ground cinnamon and salt, and let steep at room temperature for 30 minutes.

Remove the cinnamon sticks and transfer the mixture in batches into a blender, pureeing until very smooth.

Place a fine mesh sieve over a bowl, line with cheesecloth, and pour the pureed milk and rice mixture through, using a spatula to push it through and press out as much liquid as possible.

At this point, the mixture should be creamy and slightly thick, enough to coat the back of a spoon. If it is not, return it to the stove and simmer gently while stirring for 5 minutes.

Chill the strained mixture for at least 1 hour and up to overnight. Process the chilled mixture in your ice cream maker according to manufacturer’s instructions. Ice cream will have a loose soft-serve texture at this point. Transfer to an airtight container and freeze at least 4 hours before serving.

Serve sprinkled with cinnamon, if desired.
0

Mango Saffron Ginger Ice Cream

About once a year or so, I take out my ice cream maker and use it obsessively for a couple weeks, before storing it away and not thinking about making ice cream again for months and months and months.

This years binge resulted in a few batches of sorbet (like this Simple Cantaloupe Sorbet), a straightforward mango ice cream (for Eugene, who prefers his ice creams straightforward), and this very NOT straightforward Mango Saffron Ginger Ice Cream for myself.

0

Simple Cantaloupe Sorbet

This Simple Cantaloupe Sorbet recipe is about as easy as it gets. Just pop a few things in a blender, puree, freeze in your ice cream maker and boom! Sweet and refreshing sorbet that tastes just as good (or maybe even slightly better!) than the fruit itself.

0

6 Amazing Ice Cream Sandwich Ideas You Have to Try

Ice cream sandwiches have come a long way from those plain chocolate cookie and vanilla ice cream treats so many of us enjoyed as kids. Simple cookies have been replaced with everything from salty crackers to baked goods to fresh fruit.

And the ice cream options? Even more incredible!

I'm so excited to have teamed up with Walmart this month to put together this epic ice cream sandwich guide for you featuring six fun ice cream sandwich ideas. From kinda fancy dinner party-ready treats to ones the kids will love, there is something here for everyone.

0

Chocolate Ice Cream with Italian Cherries

I know that ice cream doesn't seem like the most obvious dessert during winter (because...brrrr), but I love it. There's just something super lovely and satisfying about digging into a dish of ice cream regardless of what the weather is doing outside.

0

Salted Sweet Corn Ice Cream

A quick note: I originally shared this post and recipe for Salted Sweet Corn Ice Cream back in 2011 on Real Simple magazine's website, but after a redesign a few years ago, the article and recipe were deleted. With summer sweet corn season around the corner, I've decided to share it again here. I know the flavors might seem a little unusual, but I promise--they're amazing!

My husband and I have a favorite restaurant that we return to again and again on those evenings when we’re craving a night out, but don’t want to risk the chance of a bad meal at an untried spot.

We love this place for their big strong drinks, savory seafood dishes, and salty chips. The only problem? Their desserts are terrible! Seriously, seriously bad stuff. From chalky flourless cakes to stale churros, we’ve worked our way through the entire dessert menu in vain, each time with the hope that perhaps this dish will be good.
0

Blueberry Chocolate Espresso Sorbet

Berries and chocolate have long been an amazing combination (hello chocolate-covered strawberries!), and the combo is no less awesome when turned into a smooth and cool sorbet.
This Blueberry Chocolate Espresso Sorbet is the ultimate summer treat, with a killer combination of bright berries, rich cocoa, and just a hint of jolt from espresso.

I know you might think espresso seems like a weird addition, but trust me...it just works!

A bit of vodka in the recipe will keep the sorbet lovely and scoopable, but if you prefer, you can absolute skip it (though it will then be a bit harder to scoop after the first day).

I love pairing this with rich dark chocolate brownies and a handful of fresh blueberries on top.

Enjoy!
 

****
Love Always Order Dessert?
Let's connect! Follow me on Twitter or Pinterest, become a fan on Facebook, or sign up to receive my once-a-week e-mail updates. And if you ever need any entertaining or cooking advice, please don't hesitate to e-mail me. Thanks for reading!    


Blueberry Chocolate Espresso Sorbet

Ingredients
1 pint blueberries
1/2 cup water
2 1/2 cups espresso
1 cup granulated sugar
1/3 cup cocoa powder
1/2 cup semi-sweet chocolate chips
1 ripe banana
1 teaspoon vanilla extract
1 tablespoon vodka
1/2 teaspoon kosher salt

Directions
Combine the blueberries and 1/2 cup water over medium heat. Let simmer until the berries burst and become syrupy (about 5 minutes). Remove from heat and let cool.

In a separate saucepan, combine the espresso, sugar, cocoa powder, and chocolate chips. Let simmer, stirring occasionally until sugar and chocolate are melted.

Pour coffee mixture into a blender with banana, vanilla, vodka, and salt, and puree until very smooth. Cover, and chill at least 4 hours or overnight until very cold.

Pour chilled mixture into your ice cream maker, and churn as directed. 5 minutes before end of churn, add the cooked blueberries. Transfer to a container, cover, and freeze at least 4-6 hours until set.
0

Fresh Strawberry Sorbet with Dark Chocolate Chunks

Hey, summer!

I'm loving life these days. Few things make me happier than sun and heat and being near water, and I'm just soaking it all in as much as I can with a delicious balance of work and play.

Last week I was up in Vermont cooking for a fabulous yoga retreat, and came back with a mile-high stack of new recipes and photos to share with you. Among them was this gloriously easy Fresh Strawberry Sorbet with Dark Chocolate Chunks.

It has just 5 ingredients (!!) and is the easiest thing ever to make--basically, just puree and churn! 

Make it now, when the strawberries are extra glorious. I swear it's like eating chocolate-covered strawberries by the spoonful.

This sorbet is based on an easy method from the River Cafe in London. The trick is to puree a whole lemon (rind and all!) with the strawberries and sugar. It adds gorgeous brightness and a hint of floral to the final sorbet. I often think sorbets are just way too sweet, but this one is absolute perfection.

You do need an ice cream maker for it (I use this one from Cuisinart which is less than $50!), but if you don't have one, you can also freeze the puree in popsicle molds to make delicious ice pops!

****
Love Always Order Dessert? Let's connect! Follow me on Instagram, Twitter or Pinterest, become a fan on Facebook, or sign up to receive my once-a-week e-mail updates


And if you ever need any entertaining or cooking advice, please don't hesitate to e-mail me

Thanks for reading!     

Fresh Strawberry Sorbet with Dark Chocolate Chunks
Makes about 1 3/4 quarts

Ingredients
2 large whole lemons, washed
2 cups granulated sugar
2 pounds strawberries, hulled and washed
1/2 teaspoon kosher salt
1 cup dark chocolate chunks

Directions
Take one whole lemon and chop it up, removing the seeds, but keeping everything else (the peel, pulp, and juice). Add all that to the food processor along with the sugar, and puree until very smooth.

Juice and zest the second lemon and add to the food processor (discard the pulp, seeds, and pith from this one).

Add the hulled strawberries and salt, and puree with the lemons and sugar. Pour puree into your ice cream maker, and churn according to directions. Add the chocolate chunks during the last 5 minutes of the churning process.

The sorbet will be soft-serve texture at this point. Transfer to an air-tight container, and freeze at least 4 hours or until firm.


0

Mini Coconut Ice Cream Rum Cakes

It's no secret that, when it comes to cake, my absolute favorite kind ever is rum cake. Nothing compares to the moist, golden cake soaked through with that boozy, buttery syrup.

I'm always looking for an excuse to enjoy it. Best vacation souvenir? Rum cake! What to serve at Christmas dinner? Rum cake! Birthday coming up? Definitely rum cake!

I regularly make my own homemade rum cake from-scratch, but I am also a fan of purchased rum cakes.

Anytime I'm at TJ Maxx, you can usually find me raiding the food aisle for rum cakes. They keep forever and are great to have around for last-minute gifts or cravings.


They are also wonderful for creating other desserts, like trifles, easy tiramisu-style layered desserts, or quick homemade ice cream cakes!

These ice cream cakes were a bit of a summertime inspiration when I realized I could use the little tins the cake came in as a mold for mini ice cream cakes.
 
Seriously...so adorable!
Moist coconut rum cake, layered with ice cream, shredded coconut and topped with your favorite sundae toppings--absolute heaven!

Seriously such a perfect fun-in-the-sun summer dessert, and really simple to make!

You start off with the cake: I chose coconut rum cake for this recipe, but you can really play around--I bet a lime cake would be amazing with a citrus ice cream, or a boozy bourbon cake with butter pecan! Then layer in the ice cream and freeze until solid.

Unmold it just before serving and go wild with the toppings.

The perfect way to end your next summer party!

Mini Coconut Ice Cream Rum Cakes
Yields 2 mini ice cream cakes (multiply as desired!)

Ingredients
3 4oz rum cakes in tins, or use giant muffin tins as your mold
1 pint coconut ice cream, softened
1/2 cup grated coconut
whipped cream, maraschino cherries, and sprinkles, for garnish

Directions
Remove cakes from plastic wrap and set aside. Rinse and dry the rum cake or muffin tins, then line with heavy duty plastic wrap arranged so that it hangs over the sides of each well.

Cut cakes into smaller pieces and press into bottom of tin to create one even layer, about 1 1/2" thick. You'll need about 1 1/2 cakes per tin, or use slices from a full-size cake to create the layers.

Scoop in about 1/2 cup ice cream, and use a spoon to smooth into an even layer, 1 1/2" thick.

Repeat with other tin, then sprinkle both with grated coconut. Cover and freeze for at least 6 hours, or until very firm.

Insert a butter knife between edge of tin and plastic wrap and gently pull the cake up (don't be afraid to force it--you can always reshape it a bit once it's out of the tin.) Peel away the plastic wrap and arrange on a serving platter.

Top with whipped cream, maraschino cherries, and sprinkles (or any of your favorite toppings!), and serve immediately.
0

Honey Lavender Ice Cream

I brought a container of this homemade honey lavender ice cream over to my parents' house on Sunday. We got together to celebrate a belated sort of Father's Day because last weekend I was in Vermont for my women's retreat and my brother was in Cape Cod at a wedding so my poor dad was left child-less on his special day.

But no matter, because we made it up to him this weekend, which I think is probably even better because while all the other dads were celebrating last weekend, this weekend was 100% his.

(At least, that's how we sold it to him.)

I've actually been planning to make this ice cream recipe since I saw the movie It's Complicated a few years ago. I love everything about that movie, but especially the fact that Meryl Streep's character is a chef and baker who makes ice cream when she can't sleep. In one of the scenes, she serves the Steve Martin character a croque-monsieur followed by a scoop of her honey lavender ice cream and he goes wild for it. "I must make that!" I thought when I saw it.

But then I sort of forgot about this for a little while until last month, when Eugene and I went to New Mexico for my friend's wedding. The ceremony (Freaking gorgeous! My video of it is here.) took place on an organic lavender farm called Los Poblanos. Everywhere you went there were little scented soaps and lotions from Los Poblanos, and in one shop I found a little bag of culinary lavender that I immediately knew was destined for ice cream.

I love floral sweets. It's why I'm drawn to Middle Eastern and Indian desserts (like this Lebanese Milk Ice Cream and these Lavender Lemon Shortbread Cookies), which are usually scented with rose water and orange blossom syrup. And it's why I pick out honeys and teas and other treats with bright flowery undertones. I know it's not for everyone, but I can't get enough of it.

My parents and Eugene all really enjoyed the ice cream. Our neighbor, John, who owns a wonderful bakery in New Jersey near the town where I grew up, came by and also really liked the ice cream (though he did call it "bougie.") Upon seeing everyone enjoying it, my brother, Gabriel (who usually shuns all sweets that are not cannolis made by John),  asked for a taste.

Which...he promptly spit out.
"It tastes like flowers!" he shouted.
"It's honey LAVENDER ice cream!" I explained, "lavender is a flower!"

"I just thought that was like a pretty name you made up for it," he replied.
Whatever, Gab.

I should also add that shortly after this, I was taking the above photos of the ice cream, and he asked me, "What do you do with all these photos of food you're always taking?"

Me: "I'm a food blogger!"

Gab: "Oh, yeah. That blog thing." 

Me: "Thanks, Gab."

Can't win them all, I guess!

I served this ice cream on top of a berry crumb dessert that I'll share with you later this week, and thought the honey and lavender was absolutely perfect with the berries. This is an ice cream that is just made for summer berry pie.

****
Loved this Honey Lavender Ice Cream recipe? Here are three other ice cream recipes you might like:
 

And let's connect so you can find out the next time I post! Follow me on Twitter, Instagram, or Pinterest, become a fan on Facebook, or sign up to receive my once-a-week e-mail updates.

Thanks so much for reading!


Honey Lavender Ice Cream Recipe
Ingredients
2 cups whole milk (choose non-homogenized milk, if available)
1 1/2 cups heavy cream
1 1/2 tablespoons lavender buds, crushed
1/2 teaspoon sea salt
1/2 cup honey


Directions
In a small saucepan, combine the whole milk, heavy cream, lavender buds, sea salt, and honey. Heat on medium heat just until it starts to simmer, then remove from heat and let cool slightly. Transfer to an air-tight container, and let chill in the refrigerator for at least 3 hours, up to 24.

Once chilled, pass the mixture through a strainer to remove the lavender buds. Whisk the ice cream mixture a few times and then pour into your ice cream maker, freezing according to manufacturer's instructions. The ice cream will be soft-serve texture once it runs through the ice cream maker; to get a more frozen texture, place in an air-tight container and freeze for at least 4 hours before serving. Ice cream will keep well in freezer for about two weeks.
0

Brown Sugar Passion Fruit Ice Pops

It is no secret that I'm a little bit in love with all things passion fruit. There is just something about the flavor that screams summer and vacation and Puerto Rico and the beach and all those wonderful things to me. Over the years on this blog I've made passion fruit sorbet and cocktails and lemonade and souffle and even passion fruit candy! I've also done many more things with it that I haven't even mentioned (I'm sorry!), but which were all just as good.

A couple weeks ago, while doing the shopping for one of my cooking classes, I found a bunch of my favorite frozen passion fruit puree on sale at the grocery store. I snapped up a couple packages of it (OK...more than a couple. Like maybe five.) and brought them home--the icey bag hitting my bare legs as I lugged the packages back to my apartment.

I've really been into the idea of making ice pops lately, but besides my mocha fudge pops, I've actually not had much success creating anything super exciting. I did have one spectacular disaster involving pineapple, cilantro, and lime that caused a bit of a ruckus, but not in a good way.

But I figured that passion fruit is pretty tough to mess up as long as you stay simple, so that's what I did.

I decided to combine the passion fruit puree with turbinado sugar (aka "Sugar in the Raw"), which has been my favorite lately due to its gorgeous crunchy crystals and that delicate taste of molasses. Some water, a little squeeze of lime, and a LOT of patience, and voila! Brown Sugar Passion Fruit Ice Pops!

I also found out that the leftover juice makes a delicious juice. And cocktail mixer. Add a little bit of rum to the mix, pop on a big hat, and you're ready for summer.

If you're into passion fruit, I definitely recommend giving these ice pops a shot. Note that the turbinado sugar turns the mix a little bit of a deep orange-y brown, which I found quite lovely. It reminded me of that Crayola crayon color, Burnt Sienna. Gorgeous!


****
New to Always Order Dessert? Consider subscribing to my RSS feed, follow me on Twitter, become a fan on Facebook, or sign up to receive my once-a-week e-mail updates by filling in your address in the box on the right. 

Brown Sugar Passion Fruit Ice Pops
The yield depends on the size of your molds. This made about 6 standard ice pops.
Print this Recipe

Ingredients
2 cups frozen passion fruit pulp, defrosted (that's about 1 standard package)
1 1/2 cups turbinado sugar ("sugar in the raw")
2 cups water
Juice of 1 lime

Directions
Combine all ingredients in a medium saucepan over medium heat and stir until sugar is full dissolved. Let cool completely at room temperature. Once cool, whisk a few times to remove any separation, and then pour into ice pop molds.
Let freeze for at least 4 hours before unmolding.
0

Dark Chocolate Mocha Fudgsicle Pops

There was a period in my life when I ate a LOT of Fudgesicles. It started my senior year of college after I got back from Italy, got my own apartment, and discovered the many joys of online grocery shopping.

It was August, which is a most unpleasant month to be in Washington, so I was often filling up my online shopping cart with treats I could rely on to stay cool. Ice cream, bottles of homemade-style limeade, and all kinds of -sicles, which I started substituting for breakfast on my walks to work or class or wherever I was headed during that sticky, humid summer.

The Fudgsicles were filling and kept me cool, which made up for the the inevitable hoots and hollers (or should I say "hollas") brought upon by the Freudian implications of my chosen breakfast treat.


After a few years, a few moves, and the desire to eliminate Franken-ingredients from my diet, I stopped buying them, opting for homemade ice creams or artisan gelatos to sate my cravings. But a few days ago, as the summer temperatures started to rise, I suddenly got the urge to bite into that unique combination of fudgey, icey, chocolateyness. (All words. Promise.)

So I got to work making my own version of homemade Fudgesicles, using a dark chocolate cornstarch-based pudding as the base, and kicking up the darkness of the chocolate with some freshly brewed espresso. I used a combination of both good unsweetened cocoa powder + semisweet chocolate chips for a rich, not too sweet chocolate flavor.

The espresso blended well with this combo and I deepened the flavor even further by using turbinado sugar, which added just a hint of molasses to the mix. The result is a dark and creamy mocha fudge pudding pop; a grown-up version of the classic treat, just perfect for the sticky days of summer.


I used little baking cups as a mold for most of my pops, but I also got the idea to try making little one-bite pops using the flexible silicone star ice cube tray I bought at the Wilton tent sale last month.  This mold, which I purchased on a whim in the flurry of tent sale shopping, has proven to be one of my favorites. It's great for making star-shaped ice cubes, but I think it's even better for making truffles and candy and tiny fudge pops. These things are adorable and they're fun to keep in the freezer to satisfy quick cravings. I really recommend it!

I admit that since making these, I've gone back to enjoying the occasional fudge pop for breakfast. It's basically just a cup of coffee...right?


****
New to Always Order Dessert? Consider subscribing to my RSS feed, follow me on Twitter, become a fan on Facebook, or sign up to receive my once-a-week e-mail updates by filling in your address in the box on the right. I also offer custom menu planning services and offer a variety of culinary workshops in the NYC area. Click here to find out more!

And if you ever need any entertaining or cooking advice, please don't hesitate to
e-mail me.
Thanks for reading!


Dark Chocolate Mocha Fudge Pops
Print this Recipe

Ingredients
2 1/2 cups whole milk
1/2 cup sugar (I used turbinado sugar, aka "Sugar in the Raw"; you can also use regular granulated sugar, but I love the extra touch of molasses in the raw sugar.)
1/2 teaspoon of Kosher salt
1/2 cup unsweetened cocoa powder
2 ounces semisweet chocolate, chopped (you can also use chocolate chips)
1/2 cup freshly brewed and chilled espresso
3 tablespoons cornstarch
1 teaspoon vanilla extract

Directions
Combine milk, sugar, salt, cocoa powder, and chopped chocolate in a saucepan over medium heat, whisking gently until all sugar is dissolved, cocoa is incorporated evenly, and chocolate is melted. Continue to stir just until it hits a simmer and keep stirring until very smooth and even.

In a separate container, whisk together the cornstarch and chilled espresso until smooth to create a slurry. Pour into the chocolate milk mixture and keep whisking until the mixture starts to thicken. Continue to cook on very low heat for 3 minutes, stirring continuously.

Remove from heat and whisk in vanilla extract, let cool at room temperature for 5-10 minutes, then transfer pudding to your pudding molds (Popsicle molds, Dixie cubs, flexible ice cube trays, etc.) and freeze for at least 3 hours before unfolding and serving (for hard molds, dip the bottom of the tray in hot water for 20-30 seconds to release).

Will keep well in the freezer for about 1 week.
0

On Honey Milk Ice Cream and Jersey Cows

For the past few weeks, I've been daydreaming about making a batch of honey ice cream. Not just any kind of honey ice cream; I specifically wanted something really simple--no eggs or custard or complicated flavorings--just good milk, cream, and honey, churned in the ice cream maker until frozen. Perhaps with a touch of vanilla bean dancing in the background of it all.

Having recently signed up for a dairy co-op that delivers fresh raw milk and cream, pastured eggs, and other farm delights to my New York City door once a week, I knew I wanted to use my new dairy bounty to create this ice cream. The milk I used comes from a Jersey cow on a nearby Amish farm and was delivered to my door less than 24-hours after it was milked and strained. Golden, with a subtle, grassy undertone, the milk is rich, creamy, sweet, and tastes like springtime.

And the cream…oh man, the cream is thicker than anything I've ever seen. The texture is gooey and dense, reminiscent of Devon double-cream. A spoon stuck into it stands up straight and tall, and when I lift it out, the cream clings on, even if I hold it upside-down. The light cream is a little bit looser, but even this is more like a thick yogurt than any cream I've ever purchased at the grocery store. So sweet and luxurious on its own that you don't even need to add sugar. A dollop on top of a bowl of berries or stirred into a mug of hot chocolate or coffee feels absolutely decadent.

This is just pure heavy cream, right from the Jersey cow. Amazing, right?

Before signing up for this service, I did quite a bit of research and learned that Jersey cow milk is about the best you can get. High in protein, vitamins, and minerals, grass-fed Jersey cow milk is the most nutritionally rich milk available (also good is milk from Jersey's cousin Guernsey). By comparison, the majority of US industrial dairies (the ones that produce the milk most commonly found at the supermarket) use Holstein cows, which are efficient for corporate production as they are able to produce massive quantities of milk, but unfortunately the quality is very thin, watery, and much less nutritionally rich even before it goes through the pasteurization process.

Just in terms of numbers, Jersey cow milk is about 6% butterfat (hence that gorgeous, thick cream), while the average Holstein cow's milk is only about 3%. While you might think that this is a benefit (low-fat, right?) it's actually not, since it's the fat in milk that helps your body absorb the vitamins, calcium, and protein that most people drink milk for in the first place. The cream is actually the part that contains vitamins A and D, both of which are fat-soluble. Without Vitamin D, the body can only absorb less than 10 percent of dietary calcium.


So when you drink fat-free milk, you're essentially just getting sugar (aka lactose) and not much else, something which even the US government acknowledged and then tried to rectify by legally requiring industrial milk producers to artificially fortify their skim and 2% milk with synthetic versions of vitamins A and D, something which I personally don't want in my body. (There is actually some debate about the possible toxicity of these particular synthetic vitamins, though that's a whole 'nother story.)

[Want to verify this? Grab a carton of grocery store skim milk (any brand, even organic ones) and check the ingredients. It'll say something along the lines of "Fat Free Milk With Vitamin A Palmitate And Vitamin D3"; A Palmitate and D3 are the synthetics. Click the names to find out more about each one and you'll learn, among other things, that synthetic Vitamin D3 is used in large quantities for rat and possum control. Yup.]

But I digress. My point is that when you really think about, it's kind of silly to go through all that trouble when the stuff that comes from the cow is already pure perfection! And honestly, at the end of the day, this just tastes so much better than anything I've ever gotten at the store.

Another thing whole Jersey cow milk is especially good for is ice cream. The naturally luscious texture of the milk and cream means that you don't need to add things like eggs or cornstarch to get that thick, custardy kind of ice cream texture. Yet more proof that when you start with real, whole ingredients, you're already more than half-way towards a stunning dish.


Creamy and cold, with a pleasing honey flavor throughout, this honey ice cream recipe is as simple as can be and produces an ice cream that is just perfect served with a bowl of fresh berries, or on top of a simple piece of cake. Whether you pick something bold and sweet or soft and floral, use a honey with a flavor that you already love on its own, and I guarantee you'll love the results.

P.S. If any of you are in the NY/NJ area and are interested in trying out the dairy delivery service I mentioned, shoot me an email and I'll give you the details.


****
New to Always Order Dessert? Consider subscribing to my RSS feed, follow me on Twitter, become a fan on Facebook, or sign up to receive my once-a-week e-mail updates by filling in your address in the box on the right. I also offer custom menu planning services and offer a variety of culinary workshops in the NYC area. Click here to find out more!

And if you ever need any entertaining or cooking advice, please don't hesitate to
e-mail me.
Thanks for reading!

Honey Milk Ice Cream
As this recipe has few ingredients, make sure you start with the freshest milk available in your neighborhood. If you have access to raw milk direct from a farmer, I really recommend using that. Otherwise lightly-pasteurized local milk from a nearby creamery is your next-best bet (often available at Farmer's Markets, farm stands, or well-stocked grocery stores like Whole Foods).

Ingredients
1 1/2 cups fresh whole milk
1 1/2 cups fresh heavy cream
1/2 vanilla bean, split
1 pinch sea salt
1/2 cup honey


Directions
In a small saucepan, combine the whole milk, heavy cream, 1/2 vanilla bean, sea salt, and honey. Heat on medium heat just until it starts to simmer, then remove from heat and let cool to room temperature. Transfer to an air-tight container, and let chill in the refrigerator for at least 3 hours, up to 24.

Once chilled, remove the vanilla bean (you can rinse and use for other recipes) whisk the ice cream mixture a few times and then pour into your ice cream maker, freezing according to manufacturer's instructions. The ice cream will be soft-serve texture once it runs through the ice cream maker; to get a more frozen texture, place in an air-tight container and freeze for at least 4 hours before serving. Ice cream will keep well in freezer for about two weeks.
0

Honey Peach Frozen Yogurt

After peach cake and peach pie, I was craving something a bit lighter that would better highlight the peaches in their natural state. Inspired by the breakfast ice cream I made a few weeks ago, I decided to make another version of it, this time starring peaches. Fresh fruit-topped Greek yogurt with a drizzle of honey is a regular breakfast of mine, so I figured the same idea would work as a frozen treat.

To make this, I simmered together some diced peaches (with the skins on--I  rarely peel fruit or vegetables that can be eaten whole; it's easier, healthier, and makes little-to-no difference in the final dish) with local honey and a bit of peach nectar (you can also use apple juice) just until the peaches cooked down a bit. I pureed the mixture and then let it chill before mixing with some thick Greek yogurt (full-fat, please!) and a touch of vanilla extract. I could have honestly just stopped there and been left with a delicious and thick peach smoothie.


0

Banana Ice Cream for Breakfast

I used to live in Washington, DC, where the summers are sticky, hot, and gross. My apartment was only a 10-minute walk from my office through a lovely part of town, but all summer long I found myself dreading the way that a few minutes in the stifling summer heat would transform me into a red-faced mess with frizzy hair and rivulets of perspiration chasing down my neck.

At my wits end one morning, I opened the freezer in search of something to help keep me cool. That's when I spotted the Popsicles. Icy cold, sweet, refreshing. I grabbed one and my keys, and headed out.

It was perfect! Down the street I walked, Popsicles in hand, smiling and feeling like a kid with my bright orange treat. It was still hot, but somehow not as awful. All summer long I walked to work this way, arriving at work with slightly sticky fingertips and bright pink (or purple or yellow) lips.

Since moving back to New York, I haven't had to deal with an unpleasant commute. My apartment is less than a block from the train that lets out directly beneath my office (just like a Senator!). I LOVE that my commute is so easy, but there are definitely times when I think back to those sticky DC mornings and miss the excuse to start the day with a frozen treat.

Last summer, I read about a neat trick that got me very excited. Ripe bananas, frozen and pureed, taste just like ice cream! The natural fats and sugars in the banana keep the fruit creamy even when frozen without the addition of any other ingredients.

I was fascinated! I tried it at once, quickly pureeing a few frozen bananas I'd had sitting in waiting for the next batch of banana bread. It was fantastic.

This original article suggested this as a healthy dessert, but remembering my Popsicles, I've taken it one better. Ice cream for breakfast! We all eat bananas at room temperature, so why not, right? Add a bit of peanut butter for protein and a little cocoa for flavor and it's a perfect way to start the day!


Breakfast Banana Chocolate Ice Cream
Makes about 2 cups ice cream (depending on size of bananas)
Prepare this the night before so you can enjoy it in the morning. A scoop of this on the way to work will make any day feel indulgent. (And how much would a kid love this?!)

Ingredients
4 ripe bananas
3 tablespoons creamy peanut butter (can substitute almond or soy nut butter)
1 teaspoon unsweetened cocoa powder

Peel and slice the bananas into small chunks. Spread on a tray and freeze overnight or for at least 4 hours.

In a food processor or blender, combine the frozen banana pieces, peanut butter, and cocoa. Puree until smooth. Eat right away (it will have a soft-serve like texture), or refreeze for 2 hours to give it a more scoopable texture.

Store in freezer in an air-tight freezer safe container. Can be made up to 48 hours in advance.
0

Jalapeño Ice Cream


A few weeks ago, my friend Rose e-mailed me with an unusual request. She wanted to know if I could help her track down jalapeño ice cream here in the city. "Or," she added, "perhaps you know how to make it?"

"I have no idea where to buy it," I told her, "but I can definitely figure out how to make it." Even as I typed, I was envisioning little green jalapeños steeping and bobbing in a saucer of cream.

The idea of a jalapeño-flavored ice cream might seem a bit odd on paper, but if you think about it for a bit, the idea starts to make sense. Anyone who has ever taken a bite of anything a bit too spicy will know that the most commonly offered remedies are dairy products: a glass of milk ordered at the Mexican restaurant, the dollop of sour cream on a bowl of chili, or a ramekin filled with blue cheese dressing planted in the center of the buffalo wing platter. Serious cooks (or trivia fanatics) may also know that a spoonful of sugar or a drizzle of honey is a smart way to quell the culinary flames brought on by a loose top on the cayenne spice jar.


Taking these factors into consideration, the idea of a cool and creamy ice cream laced with the grassy heat of jalapeño peppers really seems quite fascinating!

Like with most recipes, I decided to look back into my archives to see what's worked in the past. Custard ice creams, rich with copious egg yolks, are popular, but of all the frozen treats I've ever made, my favorite is still the Lebanese milk ice cream which uses cornstarch in it's base.

Essentially a frozen pudding, the texture is thick and velvet-like and it scoops beautifully. And because there are no yolks in the batter, the flavor of the ice cream really has a chance to shine through sans competition. The kicker is that it's quick, and virtually fool-proof--a bonus for those of you who have had trouble with custards breaking or curdling.


For flavorings, I used 3 jalapeños, one vanilla bean (I buy them inexpensively in bulk from this online shop), and a 1/4 cup of molasses; the latter which brought out the naturally earthy and muddy tones of the jalapeño in a way that I never expected.

Honestly, it was the addition of molasses which made me fall in love with this recipe and what has me craving another bite as I type this. Unfortunately, i don't have any ice cream left in my freezer. I packed up the entire batch I made, surrounded it with ice packs, and handed it off to Rose and her boyfriend Mike who made the trip here expressly to pick it up.


And the reason for the request? It was their anniversary, and Rose wanted to surprise her guy with this treat, which had caught his eye in a magazine ages ago.

I think it goes without saying that this ice cream is an acquired taste. As Rose described it to me in her e-mail the next day, "It was really interesting and complex - starting off on one note, and ending on another (hot!) one! It was like mind-trick ice cream, because it felt so cool but tasted so hot."

If the above appeals to you. If you're into spicy cocktails and keep a bottle of hot sauce at your desk (I always do!), well then I say go, run, make it now and tell me what you think!


****
New to Always Order Dessert? Consider subscribing to my RSS feed, follow me on Twitter, become a fan on Facebook, or sign up to receive my once-a-week e-mail updates by filling in your address in the box on the right.

And if you ever need any entertaining or cooking advice, please don't hesitate to
e-mail me.
Thanks for reading!


Jalapeño Ice Cream

Makes about 6 1/2 cup servings
This egg less ice cream uses cornstarch to form a creamy, almost velvet-like base. Depending on how spicy you would like it, you can adjust the number of jalapenos in this recipe. Don’t skip the molasses because that brings out the earthy tones of the jalapeño (trust me on this!)

Ingredients
1 1/2 cups heavy cream
1 1/2 cups whole milk
3/4 cup sugar
1 teaspoon salt
3 fresh jalapeño peppers, split in half
1 vanilla bean, split in half
1/4 cup molasses
3 tablespoons cornstarch
A few drops green food coloring (optional)

Combine the heavy cream, whole milk, sugar, and salt in a medium saucepan. Add the molasses, jalapeños, and vanilla bean. Place over medium heat and heat just until bubbles start to form (it happens quickly so stay with it), stirring to dissolve the molasses and sugar. Remove from heat, cover, and let cool to room temperature.

Once the cream mixture has cooled, use a sieve to strain out the jalapeños (and any accompanying seeds) and vanilla beans, and return the strained cream mixture to a saucepan. Use a measuring cup to scoop out about 1/2 cup of this mixture (doesn't have to be exact) into a separate bowl or cup and whisk in the 3 tablespoons of cornstarch to form a slurry. Pour the cornstarch slurry back in with the rest of the cream and return to the stove.

[If a green tint is desired (totally optional!), this is the time to whisk in a few drops of green food color.]

Over medium heat, cook the cream mixture while stirring constantly in one direction until the mixture thickens. Continue to let it cook for an additional few minutes, tasting it occasionally until you can no longer detect the taste of cornstarch. Once the starch is completely cooked and the mixture is thick enough to coat the back of a spoon, turn off the heat.

Pour the mixture into a large bowl and press a piece of plastic wrap against the surface (this will help prevent a skin from forming on it while it cools). Chill in your refrigerator for 3-4 hours until completely cool (you can make this up to 24 hours in advance).

Freeze in ice cream maker according to manufacturer's instructions. Once it's the consistency of soft-serve, pour into an air-tight and freezer proof container and freeze for at least 4 hours (again, overnight is also OK) before serving.

The ice cream will keep in a sealed container in your freezer for up to 2 weeks.
0

Passion Fruit Sorbet (& an announcement!)


The morning after we got back from vacation (which, I admit is now officially about 3 weeks ago), Eugene decided to run out to the store to pick up a few supplies for the weekend.

"Make me a list," he said, as he hopped around trying to put on a sock.

I grabbed my BlackBerry and wrote him a list of things I figured we'd need: eggs, buttermilk (for pancakes), turkey ham, salad greens, whole wheat bread, calamine lotion (for my UV rash), lemons, frozen passion fruit puree, and "anything else that looks good." I sent it to his e-mail and he glanced at it before leaving.

"Calamine lotion?"

"Just check if they have it!" I whined, scratching my incredibly itchy arms.

"And frozen passion fruit?"

"Yeah, it should be in the freezer with all the Spanish stuff." (::scratch scratch::)

He looked at me uncertainly, but grabbed the keys and headed out.

About 30 minutes later, he was back with two heavy bags. "They didn't have calamine lotion," he said as he dropped them on the floor in the kitchen.

"And what about the passion fruit?" I asked, scared to get my hopes up.

"Oh yeah," he said. "They had that. I got two different brands since I didn't know which you'd like."

At this, I quite literally jumped up with joy. "Oh BOY!!! Oh BOY! This is fantastic!"


I dug around in the bags until I found the two flat frozen packages of golden pulp. As anyone who has ever strained fresh passion fruit pulp from the fruit by the teaspoon can attest, having actual cups and cups (and cups!) of the stuff makes one feel very, very rich.

Coming home from vacation absolutely sucks. I mean there are just no other words to describe how terrible it feels to come back from a blissful week on a perfect little hot and sunny island to the melting sludge and biting wind of late winter in New York City.

But, I've learned that a healthy supply of tart and creamy passion fruit sorbet really does helps a lot. One spoonful (ok...ok...about 7 spoonfuls) of this sorbet eaten straight out of the ice cream maker, and I felt like I'd been whisked back to sunny Vieques (minus the security lines and the terrifying puddle jumper flight).

This sorbet could not be easier to make, and scoops up absolutely beautifully. It's also very affordable. About two dollars for the passion fruit puree, plus the water and sugar that you probably already have at home, will give you 4-5 cups of sorbet. Compare that with the $5 Ciao Bella and Whole Foods and everyone else charges for their tiny pints, and you've got some major savings.

So major in fact that I have no plans of EVER buying those tiny pints again! (I actually announced these intentions on Twitter the other day, much to the chagrin of the Ciao Bella twitter person who tried to convince me otherwise.)

Speaking of passion...

Most of you have already heard me blabbing on and on about this on Twitter and Facebook but in case you haven't, we have some news. Eugene and I are super happy to announce that we're engaged!!!

Awesome, huh? Eugene asked me to marry him on a Wednesday a few weeks ago under a star-filled evening sky in Vieques. It was beautiful and romantic (and actually quite funny as there was a nosy--albeit adorable--English sheepdog named Zach who absolutely insisted on sticking his face in Eugene's as he was down on his knee proposing).

Like most girls, I'd daydreamed and wondered about this moment for years, and was thrilled when it finally happened. Since then, we've been very silly and giddy about the whole thing; I have a little dance that I like to do every now and then, and we love calling each other fiance and fiancee--it doesn't get old!

You know how much I love to plan parties, so I can imagine you know how excited I am to plan our wedding and (even more importantly!) our new life together. I've only just started thinking about things and we haven't set a date yet, but we do know three things for sure. It will definitely be next winter. It will definitely be in New York. And I will DEFINITELY be making my own cake.

I plan to document the planning and ideas here (and am also open to suggestions and recommendations!), so I hope you won't mind listening in. I promise I won't go all 24/7 wedding blog on you though...that's just so not my style. ;)

Anyway darlings, wish me luck! And in the meantime...I hope you enjoy this delicious sorbet!

***
Loved this recipe? Here are three other passion fruit recipes you might like:

And let's connect so you can find out the next time I post! Follow me on Twitter, Instagram, or Pinterest, become a fan on Facebook, or sign up to receive my once-a-week e-mail updates.

Thanks so much for reading! 


Yup! That's the ring! ;)


Passion Fruit Sorbet
Makes 4 1/2 cups

1 and 3/4 cups granulated sugar
2 cups water
2 1/2 cups frozen passion fruit puree, defrosted.

In a small saucepan, combine sugar and water and bring to a boil stirring until sugar is dissolved. Remove from heat and let cool completely.

Add in passion fruit puree and combine well. Pour into the base of your ice cream machine and freeze according to manufacturer's instructions. Transfer to an air-tight container and freeze for an additional 4 hours (or overnight) before serving.

Store in air-tight container in the freezer for up to 2 weeks.

Ingredient Note: Frozen Passion Fruit puree can be usually be found in the freezer section of most major grocery stores or latin markets, sometimes labeled by its Spanish name "Maracuya" or "Parcha." Goya and La Fe are two major manufacturers and a package typically sells for 2-3 dollars.
28
Back to Top