Showing posts with label Puerto Rico. Show all posts

Quenepas

I think I was nine the year I went to Puerto Rico with my dad for his friend's son's christening. My mom and brother stayed home for reasons I can't remember, so for a couple weeks it was just the two of us, exploring the island and eating.

Like me, my father likes to snack and feast, and thinks about his next meal midway through the current one. He gladly handed dollar bills out the car window to panhandlers on the highway selling plantain chips and bags of cucas--these hard round cookies about the size of my palm that tasted of ginger and shortening (with a hint of exhaust). They're the kind of cookies you gnaw on instead of chew, and I could gnaw through a bag for the better part of an afternoon while driving across the island.

8

Puerto Rican Style Roast Chicken

I grew up with a Puerto Rican mom who firmly believed that all meat should be marinated before cooking. At least for a few hours, preferably overnight, and sometimes even longer. It produced dishes that were always richly flavorful with juicy, well-seasoned meat. This went for everything from simple chicken breasts to more elaborate large cuts like pork shoulder. Even delicate cuts of fish or shrimp spent a few minutes soaking in something delicious.

0

Pickled Ramps Escabeche (Puerto Rican Style Picked Ramps)

I was 20 minutes late to meet a friend for lunch last week. We've been friends since college, so he knew well enough to order a cocktail to sip until I arrived.

"Oooh, what's that?" I asked as I finally arrived, tossing off bags and sunglasses and waving the waitress over to put in my own drink order.

It was a martini. Served cold and garnished with pickled ramps instead of the usual olives.

"I've been all about the pickled ramps lately!" I exclaimed.

I know ramps are an annoying sort of thing to write about. They only grow in some parts of the country and even then only for about 5 minutes (give or take). But when you try them? You get it.  The look and texture of a scallion or spring onion, they're garlicky and grassy and majorly flavorful. I like them whipped into salad dressings or chopped in with the greens. I saute them and add to omelets and pastas and all sorts of other simple dishes.

This year was the first time I pickled them, and I chose an easy recipe by Puerto Rican chef José Enrique, who prepares them escabeche style.

Escabeche is a simple olive oil and vinegar pickling sauce that's served a lot in Puerto Rico (and much of the Caribbean). It's common with fish, plantains, and now...ramps!

Make a big batch to keep in a jar in the fridge. You can add them to your salads, as a garnish on top of grilled meat or, yes, in an ice-cold martini!

Like this recipe? Try my Easy Soy Sauce Vegetable Pickles or these Quick Pickled Red Onions!


Puerto Rican Style Pickled Ramps
Adapted from a recipe by Jose Enrique, Saveur

Ingredients
1 pound ramps, rinsed and patted dry, root ends trimmed
1/2 cup olive oil + more for drizzling
1/2 teaspoon kosher salt
3/4 cup white wine vinegar
1/4 cup honey
3 whole bay leaves
1 teaspoon whole black peppercorns


Directions
Heat a heavy skillet over medium-high heat (cast-iron works perfectly). Drizzle with olive oil and arrange the ramps on the skillet, cooking a few minutes on each side until charred. Sprinkle with kosher salt, then transfer to a glass jar or bowl.

In a small saucepan, combine the olive oil, vinegar, honey, bay leaves, and peppercorns. Bring to a boil, then reduce heat and let simmer 5 minutes. Remove from heat and pour the hot vinegar sauce over the ramps. Cover and let cool completely before serving or refrigerating. 


0

Puerto Rican Tembleque (Coconut Pudding)

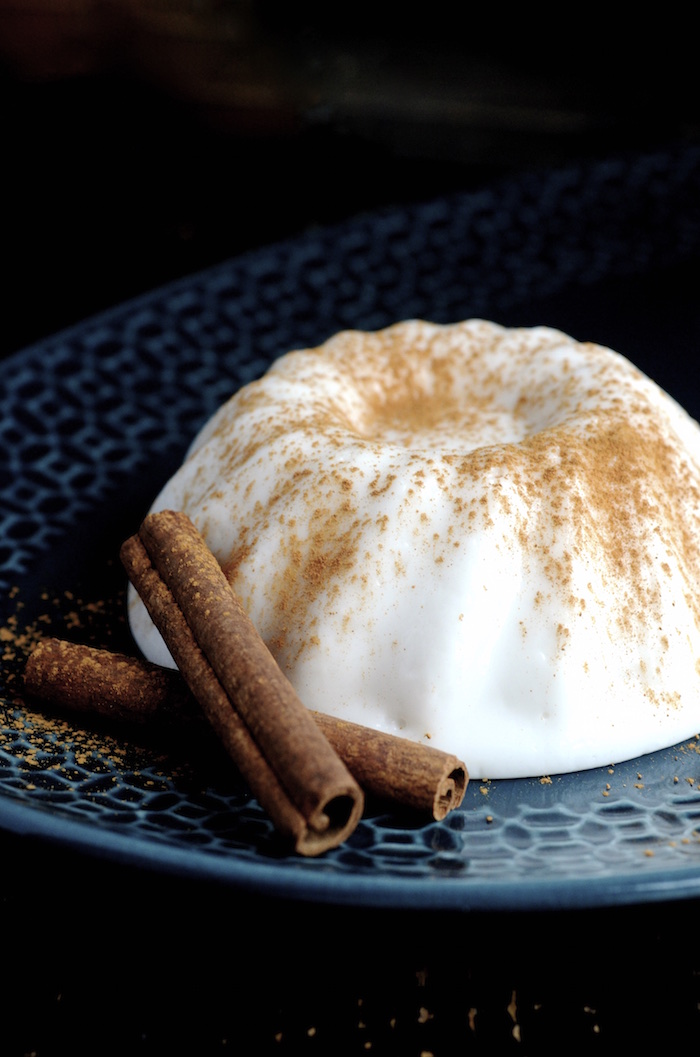
Tembleque was my favorite dessert growing up. Tembleque is a Puerto Rican recipe for a jiggly coconut milk pudding similar in texture to pannacotta or jello.

I actually think that there has never been a more perfectly named dessert than tembleque, which in Spanish roughly translates to "wobbly" or "trembling," and is what this pudding does when you give it a tiny shake.

It's sweet and creamy and rich with coconut flavor, though it's actually completely vegan and dairy-free, made from coconut milk and cornstarch, rather than gelatin. It's perfect for entertaining since there are few who can't enjoy it.

0

My ebook: The Puerto Rican Christmas Table

I'm so thrilled to share my brand new (and very first!) eCookbook with you. It's called The Puerto Rican Christmas Table, and it features 40+ classic Puerto Rican holiday recipes, restyled for modern kitchens all in a beautiful, full-color digital format perfect for your laptop, iPad, tablet, or mobile phone! 

You can click here to purchase and download the book (only $7.99!), or scroll down to read a bit more about how it came to be!

I have a tendency to do things on a whim.

It’s how I started Always Order Dessert nearly 7 years ago. It’s how I subsequently quit my job and turned that blog into a career.

And, it is how this book came to be.

The eCookbook
The Puerto Rican Christmas Table eCookbook
A couple months ago, I thought it might be a nice idea to pull together a few of my favorite Puerto Rican Christmas recipes to share in a small free PDF. I was thinking maybe 3 of the ones already on my blog with 1 or 2 new ones, all repackaged as a cute little document to go along with my holiday cards.

I started thinking about what could go in it, and that's when the trouble started...

The wheels in my head started turning (as they tend to do), and those 5 recipes grew to 10, then 20, then 30, and on and on. Within about 24 hours that "cute little PDF" turned into a full on 100-page digital cookbook!

And so, the marathon began. About 5 weeks, many (so many!) late nights, hours of research and testing, daily grocery store trips, 1 broken camera, an actual trip to Puerto Rico, and I can’t even tell you how many dirty dishes later, and I’m proud to finally share this eCookbook with you!

The recipes in this book are mostly ones that I grew up with. Classic side dishes like arroz con gandules and mofongo; desserts like tembleque (jiggly coconut pudding) and budin de pan (caramelized bread pudding); and classic entrees like pernil (roast pork) and pavochón (Puerto Rican style roast turkey).

There are also some new and totally not traditional twists, like my Pigeon Pea Hummus.


All New Recipes
Sample pages from the eCookbook

Slightly more than 80% of the recipes in the book are totally brand new and not found on this blog.

The ones that are also on the blog have all actually been retested, tweaked, and updated based on years of comments from you fine readers.

For example, my popular from-scratch rum cake recipe, which on the blog calls for you to create a separate homemade pudding mix, has been rewritten so that you only need one simple recipe--no extra steps!


Fresh Ingredients & Simple Techniques
Puerto Rican Pernil, from The Puerto Rican Christmas Table eCookbook
What do I mean by "restyled"?

It means that I took classic, well-loved recipes, and shook them up a bit. With very few exceptions, I replaced processed ingredients with fresh ones (for example--canned milk is replaced with fresh milk or cream), and eliminated unnecessary steps.

I also introduced the use of modern appliances like blenders and food processors to make somethings super quick and simple!

I'm so happy with the way this book turned out, and I hope that you will enjoy it. Whether you grew up eating Puerto Rican food, have enjoyed it on vacation, or are completely new to the cuisine, I think you will find plenty of recipes and ideas to stir up your imagination.


Click below to purchase and download now!
Add to Cart


0

Puerto Rican Mofongo Stuffing

I originally posted this as part of a round-up of favorite Thanksgiving recipes, but felt it deserved its own post. This is one of my favorite Thanksgiving side dishes. A standard on just about every Puerto Rican table, it definitely knocks all those other classic Thanksgiving dressings out of the water.

Puerto Rican mofongo stuffing is a plantain-based dish with lots of garlic, sofrito, and a generous handful of crispy pork cracklings or slab bacon.

The flavorful stuffing can be cooked inside the turkey or simply prepared on the stove and served alongside the the bird as a side dish.

In Puerto Rico, where this recipe originated, mofongo is eaten as a side dish or even a main course throughout the year, often topped with stewed seafood (shrimp is my fave), grilled meat, or even crabmeat.

It's incredible, and something that I think you should definitely try this year!

Want more Puerto Rican Christmas recipes? Check out my eCookbook: The Puerto Rican Christmas Table with 40+ recipes and full-color photos. Click here to learn more!

****
Love Always Order Dessert?
Let's connect! Follow me on Twitter, Instagram, or Pinterest, become a fan on Facebook, or sign up to receive my once-a-week e-mail updates. And if you ever need any entertaining or cooking advice, please don't hesitate to e-mail me. Thanks for reading!   


Mofongo Stuffing (Fried Green Plantain Stuffing)

Ingredients
6 Green Plantains (you want really green ones with almost no sign of black)
Coconut or vegetable oil for frying
6 strips, thick-sliced slab bacon
3/4 cup sofrito (recipe follows)
1/3 cup olive oil
1 cup chicken broth, as needed
Kosher salt
Black Pepper

For the sofrito:
1 medium yellow onion
1 red bell pepper
6 cloves garlic
1 teaspoon smoked paprika
1/2 cup crushed or pureed tomatoes
1 teaspoon cumin
1 cup roughly chopped cilantro with stems
1 cup roughly chopped parsley with stems


1. Fill a 5 qt pot with 4 inches of oil. Heat oil to 375 degrees for frying (use a deep fat themometer)

2. Peel the plantains and slice into rounds on the diagonal so that the slices come out somewhat oval shaped (much the same way you would slice a baguette).

3. When the oil hits the right temperature, fry the plantain slices in batches for 3 minutes each. Remove with a slotted spoon and let drain for 2 minutes (don't turn off the heat). Use the bottom of a glass or the side of a rolling pin to smash each fried plantain down. The plantain should squash into a flattened patty.

Fry the flattened plantains again for 2 additional minutes until golden brown. Remove with a slotted spoon and let drain.

4. Dice the slab bacon and saute in a hot skillet until crisp. Remove the crisp bacon and reserve.

5. Prepare the sofrito: in a food processor, combine all the ingredients and process until smooth. (Note: The leftover condiment can be used as a base for stews, to marinate meat, for Spanish rice, or to saute with egg scrambles.)

6. In a large bowl, use your hands to knead and break up the plantains. Add the 3/4 cup sofrito, the fried and crisped bacon, 1/3 cup of olive oil and stir. Add the chicken broth in slowly, 1/4 cup at a time as you combine everything. The stuffing should be moist but not mushy. Add salt and black pepper and test for seasoning.

This can be served immediately, stuffed inside a turkey or chicken, or it can be refrigerated overnight and then reheated for 15 minutes in a 350 degree oven (add a little more chicken broth if you choose to reheat in the oven).

0

Puerto Rican Arroz con Gandules (Rice with Pigeon Peas)

arroz con gandules
Whether on the island or in the US, Puerto Rican holiday tables will usually feature this popular rice dish: arroz con gandules.

This easy and savory rice dish is made with a base of smoked ham (or bacon), homemade sofrito, and a generous sprinkling of Latin spices.

The golden yellow color comes from achiote seeds--these can be easily found online or at most Latin grocery stores. Pigeon peas are also easily found with other Latin or Caribbean canned beans (Goya is a popular brand).

I like serving this with a sprinkle of spicy, vinegary hot sauce on top (something like Tabasco works really well!)

P.S. Want more Puerto Rican Christmas recipes? Check out my eCookbook: The Puerto Rican Christmas Table with 40+ recipes and full-color photos. Click here to learn more!

****
Love Always Order Dessert?
Let's connect! Follow me on Twitter, Instagram, or Pinterest, become a fan on Facebook, or sign up to receive my once-a-week e-mail updates. And if you ever need any entertaining or cooking advice, please don't hesitate to e-mail me. Thanks for reading!  


Arroz Con Gandules
Serves 4-6 people as a side dish

3 tablespoons olive oil
1/2 cup sofrito (recipe follows)
1/2 cup diced cooked ham, chorizo, or diced bacon
2 cups long-grain white rice
4 cups water
2 teaspoons kosher salt
1 teaspoon ground coriander
1 teaspoon paprika
1 teaspoon garlic powder
1 teaspoon cumin
1 teaspoon ground achiote (a color booster with slight flavor, can be found in the latin grocery aisle or hispanic neighborhood market, optional)
1 15-oz can gandules (pigeon peas--most common brand is Goya or Jibarito, ideally the brown "dried" version although the green will do)

For the sofrito
1 medium yellow onion
1 red bell pepper
6 cloves garlic
1 teaspoon smoked paprika
1/2 cup crushed or pureed tomatoes
1 teaspoon cumin
1 cup roughly chopped cilantro with stems
1 cup roughly chopped parsley with stems


To make:
First, prepare the sofrito: in a food processor, combine the onion, bell pepper, garlic, smoked paprika, tomatoes, cumin, cilantro, and parsley, and process until smooth. (Note: The leftover condiment can be used as a base for stews, to marinate meat, for Spanish rice, or to saute with egg scrambles.)

Heat olive oil in a large Dutch oven. Saute 1/2 cup of the sofrito and ham or bacon for 2-3 minutes. Add the rice, water, spices, and gandules. Bring to a boil and let boil for 3 minutes.

Cover, lower the heat to medium-low and let cook for 35-40 minutes. Do not lift the lid while the rice is cooking or the rice will come out too soggy.

When finished cooking, uncover and stir once before serving.
0

Chocolate Coquito

Chocolate + coconut is basically my idea of perfection as far as sweets are concerned. So, understandably, this Chocolate Coquito recipe has swiftly become my new favorite.

Yup...chocolate coquito. 

I mentioned yesterday that I'd be sharing some flavor variations for coquito--the traditional Puerto Rican version of eggnog made with a mix of milks, coconut, and rum.

It's a sweet, rich, and boozy beverage typically served in Puerto Rican families during the Christmas season (which in Puerto Rico starts immediately after Thanksgiving and stretches all the way through to Dia de los Reyes (the Epiphany) on January 6.

They really know how to do Christmas right on the island...

While I will be spending the holidays here in New York, I always try to make sure to include a little bit of tropical flavor in my celebration.

My chocolate coquito recipe is similar to the original, but with the addition of a thin dark chocolate ganache made with coconut milk. The combination is incredible!

Creamy, thick, with the perfect balance of coconut and chocolate.

This is a strong beverage, best sipped in small quantities (similar to how you'd drink a dessert wine or sweet liqueur), so I like to serve it in small shot glasses along with a truffle or dark chocolate to enhance the chocolate flavor.


P. S. Want more Puerto Rican Christmas recipes? Check out my eCookbook: The Puerto Rican Christmas Table with 40+ recipes and full-color photos. Click here to learn more!


****
Love Always Order Dessert?
Let's connect! Follow me on Twitter or Pinterest, become a fan on Facebook, or sign up to receive my once-a-week e-mail updates. And if you ever need any entertaining or cooking advice, please don't hesitate to e-mail me. Thanks for reading!    

Chocolate Coquito (Puerto Rican Chocolate-Flavored Coconut Eggnog)
Makes about 15 small servings

Ingredients
1 1/2 cups canned coconut milk (full-fat)
1 cup bittersweet chocolate chips (darker the better, so use the highest cocoa percentage you can find)
1 (14oz) can sweetened condensed milk
1 (15 oz) can cream of coconut (such as Coco Lopez, Goya--the same sweet stuff you use for pina coladas!)
2 cups Puerto Rican rum (light is best for this recipe)
2 teaspoons vanilla extract
2 cinnamon sticks

Directions
Make the ganache: Combine coconut milk and chocolate chips in a small saucepan over low heat. Whisk continuously until melted and completely combined. Remove from heat and let cool on the counter to room temperature (consistency should be that of a thin sauce--if it hardens, which may happen in cold weather, warm it up just a bit while stirring to loosen it up).

Make the coquito: Combine ganache, condensed milk, and cream of coconut in a blender and process until smooth. Pour into a large pitcher or pot, and add the rum and vanilla, and whisk vigorously until evenly combined (it should look like thick chocolate milk). Transfer into bottles (I usually use the empty rum bottles), add the cinnamon sticks, and chill in the refrigerator for at least 2 hours or until very cold.

Serve straight in small cordial glasses or on the rocks in larger glasses. This recipe can be made a few days in advance and will keep well in the fridge for about 1 week to 10 days. Just be sure to shake the glass vigorously before serving!

This also makes a great gift!

Click here to try my Basic Coquito Recipe and my Coffee Coquito Recipe

Variations:

 ***Want to make it a little bit less strong? To cut the rum, replace the desired amount of rum with equal parts ice cold coconut or whole milk.

***For a non-alcoholic or virgin coquito, cut out the rum, and replace it with one cup ice cold coconut or whole milk and one cup ice cold filtered water.


0

Coffee Coquito (Puerto Rican Coffee-Flavored Coconut Eggnog)

I first shared my recipe for Puerto Rican Coquito (aka our traditional coconut "eggnog") two years ago, and it's since become one of the most popular recipes on this blog. I love that because it's also probably one of the recipes that means the most to me since it's something that's been a part of my life for as long as I can remember.

If you haven't tried it yet, I definitely urge you to give it a shot--especially if you love coconut or rum (or both!).

It's rich and creamy, and absolutely perfect for the holidays.

But this year I'm sharing a couple fun coquito flavor variations that I recently started making!

Today we're starting off with my recipe for Coffee Coquito--it's every bit as delicious as the original, but with an irresistible coffee twist. If you're a fan of coffee-flavored treats (think coffee ice cream, milk shakes, or even a totally decadent Frapuccino)--then I think you'll love this.

This easy coffee coquito recipe starts off with the same ingredients as the regular coquito, but with the addition of a cup of strongly-brewed black coffee that's been chilled.

You can use regular coffee, or try a flavored variety (I think either coconut or vanilla coffee would be perfect in this!) and just brew it a little stronger than usual.

To make, simply blend all the ingredients together, and chill for a few hours. (Coquito is best when served very, very cold.)

I love this served in small mugs with a little sprinkle of cinnamon on top. It's the perfect festive treat for a Christmas breakfast or brunch, or a twist on the after-dinner coffee!(It also makes a great gift idea!)

Want to try other coquito flavors? Click here for my basic Puerto Rican Coquito Recipe and my Chocolate Coquito Recipe.

Enjoy and Merry Christmas!!

****
Love Always Order Dessert?
Let's connect! Follow me on Twitter or Pinterest, become a fan on Facebook, or sign up to receive my once-a-week e-mail updates. And if you ever need any entertaining or cooking advice, please don't hesitate to e-mail me. Thanks for reading!    

 
Coffee Coquito Recipe (Puerto Rican Coffee-Flavored Coconut Eggnog)
Makes about 15 small servings

Ingredients
1 (12oz) can evaporated milk
1 (14oz) can sweetened condensed milk
1 (15 oz) can cream of coconut (such as Coco Lopez, Goya--the same sweet stuff you use for pina coladas!)
1 cup strongly-brewed black coffee, chilled (if you can get a coconut or vanilla flavored coffee--that would be even more delicious!)
2 cups Puerto Rican rum (light or dark)
2 teaspoons vanilla extract
1-2 tablespoons instant espresso powder (optional)
2 cinnamon sticks

Directions
Combine evaporated milk, condensed milk, and coconut cream in a blender and puree until smooth. Pour into a large pitcher or pot, and add the coffee, rum, and vanilla, and whisk well until evenly combined.
Want to make the coffee flavor even stronger? Add 1-2 tablespoons of instant espresso powder as this point, and whisk in. Skip it if you prefer a lighter flavor.
Transfer into bottles (I usually use the empty rum bottles), add the cinnamon sticks, and chill in the refrigerator for at least 2 hours or until very cold.

Serve straight in small glasses (you can garnish with a bit of cinnamon, if desired) or on the rocks in larger glasses. This recipe can be made a few days in advance and will keep well in the fridge for about 1 week to 10 days. Just be sure to shake the glass vigorously before serving!

This also makes a great gift!

Click here to try my Basic Coquito Recipe and my Chocolate Coquito Recipe

Variations:

 ***Want to make it a little bit less strong? To cut the rum, replace the desired amount of rum with equal parts ice cold coconut or whole milk.

***Can't drink or don't like rum? Substitute a flavored vodka (I suggest coconut or vanilla!)

***For a non-alcoholic or virgin coquito, cut out the rum, and replace it with one cup ice cold coconut or whole milk and one cup ice cold filtered water.
0

Cremita de Maiz (Puerto Rican Breakfast Cornmeal Porridge)

I just got back last night from a week in Mexico where I was covering the Cancun-Riviera Maya Food & Wine Festival, as well as checking out some (STUNNING!) restaurants and hotels in the area for an article I'm writing.

The trip was incredible, naturally--it's hard to go wrong in that gorgeous country! But I admit that the 2nd day was...a little rough.

I'm still not sure if it was the result of the first night's admittedly overindulgent tequila tasting dinner or something else, but I spent most of Tuesday feeling queasy and feverish, unable to stomach anything but some bread and a tiny bowl of sopa alfabeto from the hotel children's menu. We had an event that night, but I wisely decided to bid the group farewell and turn in for the night, hours before the sun even set.

I woke up the next day feeling much better, but still cautious about what I ate. (And let me tell you--there are few things more frustrating than having to be cautious about what you eat when you're on an eating trip in Mexico!)

I skipped over the indulgent hotel buffet--which included Mexican women in frilly dresses making tortillas by hand, an assortment of braised meats and salsas to serve over freshly fried tostadas, and an expansive array of sweet pastries--and instead sipped a mug of hot mint tea and nibbled on a piece of bread.

It seemed like the safest option, but what I really wanted...what I really craved to soothe my delicate stomach, was this creamy breakfast from my childhood.

I have dozens of memories of sitting at the kitchen table on cold mornings with a plate of cremita de maiz--essentially a sweet Puerto Rican breakfast cornmeal porridge similar to oatmeal or farina.

The cremita was warm and sweet, and best served with a generous pat of butter that invariably melted and skated off to the side of the dish during the walk from the stove to the kitchen table.

We ate this on those snowy days before school or on chilly weekend mornings, when my mom would whisk it up on the stove then top with a burst of cinnamon. I used to add more butter and a shake of salt, already in love with the contrast of salty-sweet on my tongue.

My mom often meant for us to eat this quickly so that we could get on with our day, but to me it was more than a simple breakfast. I loved how the sunny yellow cream would settle onto a plate when left alone for a few minutes, quickly forming a thin pudding skin over the hills and valleys left by the serving spoon.

I was just as fascinated with the texture as the flavor, much to my mom's chagrin. She'd hurriedly urge me to just eat it so that we could leave for school or the store or errands she'd planned for the day, but I found it difficult to resist, poking at the cream with my finger to make it jiggle just a bit without piercing the skin.

Now as an adult, I can make it and take my time--poking and playing with it all I want. It's creamy sweet comfort that would have been perfect during those iffy mornings in Mexico, but which I can assure you are just as lovely even on days when you're feeling at your best.

****
Love Always Order Dessert? Let's connect! Follow me on Twitter or Pinterest, become a fan on Facebook, or sign up to receive my once-a-week e-mail updates. And if you ever need any entertaining or cooking advice, please don't hesitate to e-mail me. Thanks for reading! 


Cremita de Maiz (Puerto Rican Cornmeal Breakfast Porridge)
Serves 2

Ingredients

2 cups whole milk
1 teaspoon kosher salt
2 tablespoons unsalted butter, plus more for serving
3 tablespoons granulated white sugar
1/3 cup finely ground cornmeal
1/2 teaspoon vanilla extract
Ground cinnamon, for serving

Directions
Combine the milk, salt, butter, and sugar in a medium saucepan over medium heat and stir gently just until the milk starts to bubble. Lower the heat to the lowest setting and add the cornmeal, stirring continuously with a whisk until the porridge thickens--about 10 - 12 minutes. (Note that it will continue to thicken as it cools.)

Remove from heat, stir in the vanilla and divide into two dishes. Sprinkle with cinnamon and serve immediately topped with additional butter.  (If you'd like it thinner, stir in an additional half cup of warm milk.)


0

Puerto Rican Pernil with Crispy Skin

The traditional centerpiece of the Puerto Rican Christmas Eve (or "Noche Buena") table, is Pernil--a marinated pork shoulder that's roasted slowly in the oven until the meat is tender and the skin on top is crackling and crisp.

All families have their own perfect pernil recipe--the simplest seasoning the pork only with garlic, salt, and oregano. Others use popular store-bought spice mixes (like "adobo Goya") or slightly more complicated marinades, but at the heart of it is a simple roast that requires little effort on your part while the oven does all the work.

The word "pernil" derives from the Spanish word "pierna" or leg. It's also the Catalan word for ham, since the dish was originally prepared using a fresh ham. Pork shoulder, however, is more readily available and affordable, and has since became the more popular cut to use for the dish.

The fattiness of the pork shoulder also lends itself well to the long slow roasting, and turns out a better end product than the ham.

There will always be purists who will argue that a true pernil can't be made with pork shoulder, but I've never seen them turn down a plate of this deliciousness.

When it comes to flavor, I like it bold. I'm not into subtle on my plate (or really in any part of my life), and tend to skip over the ones that just taste like plain roasted pork. I want a good hit of garlic. I want the brightness of cilantro. I want a touch of acid from the citrus.

And damn it...I want there to be enough salt to bring all of those things out!

Growing up, I actually never really liked pernil. It tasted dry and boring to me, and I never understood the rabid enthusiasm other guests felt for it. I always turned it down in favor of the other Puerto Rican dishes on the table--the pasteles and tostones...or maybe just the rum cake.

And then a few years ago, I decided to give it a shot, experimenting with my own versions of the classic recipes. The process is similar to what I do with my Thanksgiving turkey or roast chickens. It's a technique I learned from my mom, and one of the best ways to infuse meat with maximum flavor while preserving moisture.

Here's what I do: I skip the roasting rack and put the pork right down on the pan where the bottom can braise in the flavorful juices.

I make a thick, wet paste of spices and citrus juice with massive amounts of garlic--8 or 10 big cloves. I add a full bunch of cilantro.

I pass the stale store-bought "adobo" spice mixes in favor of fresh individual spices--ground toasted cumin, smokey paprika, dried oregano.

And salt. A teaspoon of kosher salt per pound seems to work about right. 

I also think patience is key. Some pernil recipes only call for 3 or so hours in the oven, but low and slow is best, letting it go 5, 6, even 7 hours. You end up with skin that crackles and meat that is tender, moist, and dripping with dressing. Impressive results that belie the amount of effort it takes.

I serve mine on rice, doused with hot sauce and topped with a pile of quick pickled red onions. The perfect winter meal.

Want more Puerto Rican Christmas recipes? Check out my eCookbook: The Puerto Rican Christmas Table with 40+ recipes and full-color photos. Click here to learn more!
 

****
New to Always Order Dessert? Consider subscribing to my RSS feed, follow me on Twitter, become a fan on Facebook, or sign up to receive my once-a-week e-mail updates by filling in your address in the box on the right. And if you ever need any entertaining or cooking advice, please don't hesitate to e-mail me. Thanks for reading!


Puerto Rican Pernil Recipe
Serves 7 - 10 people when accompanied with sides

Ingredients
1 5-8lb pork shoulder, bone-in
1 cup sour orange juice (from seville oranges) OR 1 cup tart grapefruit juice OR 1/2 cup each orange and lemon juice
2 tablespoons vinegar
1/4 cup olive oil
1 medium yellow onion, quartered
8-10 large garlic cloves, peeled and crushed
1 1/2 cups chopped cilantro
1 large red bell pepper, seeds and center ribs removed
2 tablespoons ground cumin
2 tablespoons dried oregano
2 tablespoons paprika (sweet or smoked spanish)
5-8 teaspoons kosher salt (1 teaspoon per pound of pork)
2 teaspoons ground black pepper
2 cups water

Directions
Rinse pork shoulder under cold water and then pat very dry. Place skin-side up in a large roasting pan, right on the pan (not on roasting rack). Use a knife to cut slits into the skin and fat.

Combine the orange juice, vinegar, olive oil, onion, garlic, cilantro, red bell pepper, cumin, oregano, paprika, salt, and pepper in a blender or food processor and puree into a smooth paste.

Use your hands to rub the pork shoulder with the paste on all sides, pouring into any crevices and into the slits cut in the skin. Use all of the marinade. Cover pan with plastic wrap and let marinate a minimum of 2 hours and up to 2 days.

When ready to cook, remove from refrigerator and let sit at room temperature 30 minutes to take off some of the chill. Wipe off excess marinade from the skin of pork and pour water into bottom of pan so that it goes up about 2 inches on the side of the pork (leave the extra marinade in the pan).
(Note: depending on the size of your roasting pan, you may need more water--feel free to add as much as you need to get the liquid up to 2" in the pan! You can also use broth or a mix of both.)
Preheat oven to 325 degrees. Cover roasting pan tightly with foil or pan cover and place in oven on lowest rack to bake for 4 to 7 hours or until very tender. (Smaller roasts cook less when larger roasts take more time. It's very difficult to "overcook" as long as you keep the heat low, the roast covered, and the liquid in the pan--you can even go down to 300 degrees if you want to be safe.)

Once meat is tender, remove foil from pan and let broil about 5 to 10 minutes, or until skin is crisp and crackling.

Transfer pernil to a serving platter.  Serve pernil along with reduced pan juices, and a rice dish such as arroz con gandules, boiled yuca, or plantains

0

How To Make Homemade Coconut Milk (from a fresh coconut!)

Coconut milk is one of my favorite ingredients. I usually buy it in bulk and use it in everything from smoothies and desserts to savory recipes like curry or light broths. Even though I use it, I admit that I'm not really a fan of the funky additives you can find in store-bought coconut milks. I bought an extra coconut the other day to use in a photo shoot, and while wondering what to do with it, I remembered my mom telling me stories about how my grandmother used to make coconut milk from scratch to use in her Puerto Rican dessert recipes.

It's a really easy process and takes mere minutes--especially now that we have access to the beautiful modern convenience that is the food processor. The results are especially lovely, with a strong and natural coconut flavor and aroma that is much different from the canned version.

NOTE: In this post I'll show you how to make the milk starting with a whole coconut, but you can also skip ahead and use a bag of unsweetened dried coconut, then begin from the food processor step!

Here's how you do it:

Start off with a fresh coconut. You want to use the brown "mature" coconuts, not the "young Thai" version. Choose a coconut that feels heavy for its size. You should also be able to hear the liquid sloshing around inside when you shake it. Also be sure to test the "eyes" by pressing on them; they should be hard without any give.

Once home, use a nail or screw to break through the eyes and drain out all the water inside--reserve this as you'll be using it in the recipe. You can then break the coconut open and remove the hard hairy brown outer shell. (Here is a great tutorial on how to open a coconut.)

The meat on the inside should be white with no yellow or moldy spots. Use a vegetable peeler to remove and discard the thin brown skin and cut the peeled meat into small chunks.

Combine the chunks of coconut in a food processor with the reserved coconut water plus two cups of boiling filtered water. (You can also use a strong blender or Vitamix for this step. No "Magic Bullets," please!) It's important that the water be very hot as that will help extract as much fat as possible from the coconut meat.

Puree the coconut and water for about 5 minutes. The coconut meat should be finely ground and frothy once ready.

Pour this into a fine sieve or a colander lined with a cheesecloth set over a large bowl.

Press down hard with a spatula or the back of a spoon to squeeze out all the liquid (I also just use my hands).

Once you have removed all the liquid, set the sieve with the shredded coconut aside (you can use this as-is in baking recipes or dry it to make homemade coconut flour).

The leftover liquid is your homemade coconut milk! You should have about 2 1/2 cups or so, depending on how moist your coconut was.

Use it right away, if desired, or transfer to a jar and store in the refrigerator for up to 3 days. Note that the lack of additives or emulsifiers will also mean that the coconut milk will separate in the fridge with the fat solidifying on top--this is a good thing! It's natural! You can heat it up slightly and stir it back together to use or just pop in a blender to emulsify into a creamy milk again.

And remember: Don't have a fresh coconut? You can also make coconut milk using frozen coconut or shredded dried coconut (the unsweetened kind) and follow the process from the food processor step.

****
New to Always Order Dessert? Consider subscribing to my newsletter, follow me on Twitter, become a fan on Facebook, or sign up to receive my once-a-week e-mail updates by filling in your address in the box on the right. If you're in the NYC area, be sure to check out my NYC dinner party style cooking classes. Thanks for reading!


0

Polvorones (Puerto Rican Almond Shortbread Cookies)

Every year, my dad commissions me to make an assortment of treats for him to give out to his work colleagues. This started a few years ago, back when I was still living in Washington, DC, when he asked me to make him a bunch of homemade sweets to fill gift tins.

That year I made an assortment of white and dark chocolate peppermint bark, coconut macaroons, espresso chocolate truffles, and spiced nuts, which I then packed up and brought to NJ with me via Amtrak.


Since then, I've made everything from Italian rainbow cookies, from-scratch rum cake, and even some fancy quince and frangipane tarts that were a big hit, but a big pain in the but to make.

This year he wanted to go with Puerto Rican themed treats and asked me to make 20 bottles (11 liters total) of coquito and 20 bags of polverones, which are a kind of buttery almond shortbread originally form Spain, but now popular throughout Latin America.

The name comes from the word "polvo" which means "dust" in spanish, and which references the powdery sugar that covers the cookie, as well as the trademark crumbly texture of the cookie itself. You may know these as "Mexican Wedding Cookies" or even "Russian Tea Cakes." There is also a Middle Eastern version with basically the same recipe, but where the treats are shaped into crescents instead of circles. 

The reason this cookie is so popular is because it's incredible easy to make, and it keeps well--so it can be made in advance (ideal for celebrations and gift-giving). (Also, it's delicious! Buttery, crumbly, melts in your mouth, with just a touch of crunch from those almonds. Amazing!)


My version here is made with almonds, because they're my favorite, but you can also make them with pistachios, walnuts, pecans, macadamia nuts, hazelnuts, or really just about any nut (or combination of nuts) that you'd like. I actually made a pistachio version to offer on the dessert table at my wedding earlier this year (more about that next month).

Anyway, I hope you enjoy these cookies! In case you'd like to give these as a holiday gift, I've included a free printable PDF for the labels below.

xoxo

Alejandra

P.S. Want more Puerto Rican Christmas recipes? Check out my eCookbook: The Puerto Rican Christmas Table with 40+ recipes and full-color photos. Click here to learn more! 


CLICK HERE TO DOWNLOAD FREE PRINTABLE PDF LABELS FOR DIY GIFTS


****
Love Always Order Dessert?
Let's connect! Follow me on Twitter, Instagram, or Pinterest, become a fan on Facebook, or sign up to receive my once-a-week e-mail updates. And if you ever need any entertaining or cooking advice, please don't hesitate to e-mail me. Thanks for reading!  


Polvorones (Puerto Rican Almond Shortbread Cookies)
Makes about 2 dozen

Ingredients
1 cup unsalted butter, room temperature
1/2 cup granulated white sugar
1 teaspoon vanilla extract
1 teaspoon almond extract
1/2 teaspoon kosher salt
2 cups flour
1 cup coarsely ground almonds
1/2 cup powdered sugar, for dusting cookies

Directions
Preheat oven to 325 degrees. Line a baking sheet with parchment paper.

In the base of a mixer, beat together the butter and sugar until light and fluffy--about 3 minutes. Add the extracts and salt, and beat for another 30 seconds. Lower the mixer to the lowest setting, and slowly add the flour letting it mix until it is all completely worked in. Add the almonds and let mix until completely incorporated.

Use a cookie scoop or your hands to form round balls out of the dough, each about 1 tablespoon in size. Arrange on the cookie sheet 1 inch apart. Once you have filled the cookie sheet, place it in the refrigerator to chill for 15 to 30 minutes. Once chilled, place in the oven and bake for about 20 minutes, or until the cookes are completely baked, golden brown on the bottom, but still pale on top. Let them cool on the pan for 5 minutes, then transfer to a rack to completely cool.

Toss the cooled cookies in the powdered sugar and serve or store with extra powdered sugar in an air-tight container. Will keep well for about 5 days. Dough can also be frozen and baked later.


0

Coquito (Puerto Rican Coconut Eggnog)

Puerto Rican Coquito
The easiest way to describe coquito [pronounced "koh-kee-toh"] to those who aren't familiar with it, is to call it a "Puerto Rican eggnog." But to be honest, I don't care for eggnog, so even just writing that makes me want to run and hug my bottle of coquito and say "There, there now. I didn't mean it. You're so much better than that."

Because it is so much better than that. If you like eggnog. If you like coconut. If you like cold, frothy drinks spiked heavy with rum, you will like this. You will really, really like this.

Growing up, my mom would always whip up a few bottles of coquito just before Christmas. My dad would usually commission a couple of them to bring into work to share with the team as a Christmas gift, but we'd keep one for sipping on throughout the holiday season.

Coquito Puerto Rico
Because of the rum, this was *mostly* off-limits for my brother and me, but every year, my parents would pour each of us a tiny half-shotglass of it to taste.

I remember being very short the first time I tried it; my memories of that moment are kind of hip-level and low to the ground. I was in the living room of our old house on Cleveland Avenue, in some kind of party dress, wearing tights that itched and shoes that pinched, but most of all I remember loving the combination of cool, creamy coconut spiced with cinnamon and vanilla.

And knowing that there was a little bit of that usually-forbidden rum in there just made it all the more enticing! It was meant to be our only sip for the night, but--like generations of kids before us--we used to make sure to grab the tiny bits leftover in the grown-up's glasses when nobody was looking. I was going to say something about it being naughty, but I don't really believe that. I hope that when I have kids, they, too, grab tiny forbidden sips when we look away.

Coquito Puerto Rico
I made a huge batch of coquito at my Puerto Rican cooking class last weekend, where we toasted and feasted, while traditional Puerto Rican Christmas songs played in the background. The coquito was such a hit, that I split the leftovers into smaller bottles and gave them to my students as a gift to enjoy later.

That evening at home, I made another two bottles of it--one to keep in the fridge, and one to share with my neighbors at our building tree-trimming party. It was the first time in four years that I was going to meet many of these people (ones who before today were just strangers on the elevator). I wondered if it was going to be awkward, but as soon as I walked into the lobby with the bottle in hand, one of the other neighbors spotted it and immediately said, "Oh, that looks like coquito!" The conversation and drinks flowed smoothly from that point on, and I'm proud to say that at the end of the night, the bottle was completely empty.

Puerto Rican Cookbooks
Like with all traditional recipes, there are seemingly as many different versions of coquito as there are Puerto Rican families. I own four different traditional Puerto Rican cookbooks, each with their own very different interpretation of this recipe.

Some recipes call for raw egg yolks to be added, while some allow for a cooking of the eggs into a kind of base custard. Some people will say that coquito with eggs actually isn't real coquito, but actually another drink called "ponche," and some people will say the exact opposite. There are people who will break down a coconut and grate it by hand the old fashioned way, patiently squeezing out the fresh coconut milk. And then there are people who will open up a few cans, whisk it all together, and call it a day.

Purists will debate long and hard and loud (especially after a few glasses) about what makes a "real" coquito, but to be honest...I confess that doesn't interest me! Everyone has their own idea about what makes the drink special, and that to me, is part of why it's so wonderful. At the end of the day, it's really hard to go wrong when coconut, sugar, and rum come together.

Puerto Rican Coquito
My personal adaptation, which I share with you below, was designed for ease.

I don't like raw eggs in my drink, and leaving them out makes this better for gift giving and making in advance, (both of which I highly recommend) so my coquito recipe is egg-less.  My recipe is also strong. As in, you can feel it down to your knees after just a sip or two. I like it that way (as do many others), but feel free to cut down on the booze, if you prefer.

This is, without a doubt, a rich, sweet, and totally decadent drink. And that is the one thing I will insist it is supposed to be. Coquito is made to be enjoyed during just a few weeks out of the year.  Enjoyed being the operative word here. A tiny bit of something truly decadent is always going to be infinitely more satisfying than a lot of something that's been lightened just to make it "healthier."

Also keep in mind that this is not a drink you pour into a pint glass--in fact, while my photos are pretty (aren't they pretty?!), I would never serve or drink that much coquito at one time without ice.

Coquito is meant to be sipped in small glasses, much the same way you would enjoy an amaretto or glass of dessert wine. If I want more, I sip it "on the rocks"--the ice cuts the strength and makes it delightfully chilly.

coquito recipe


Tip: Feel free to play around with the flavors of your coquito to personalize it! A dash of almond or anise extract would be lovely. Some orange or lime zest would be a fabulous addition. You can even add some cocoa powder or thinned chocolate ganache for a chocolate version!

Click here to try my Chocolate Coquito Recipe and my Coffee Coquito Recipe

Want more Puerto Rican Christmas recipes? Check out my eCookbook: The Puerto Rican Christmas Table with 40+ recipes and full-color photos. Click here to learn more!

Like I said, I'm not a purist. I just want you to enjoy this as much as I always have, and encourage you to create your own tradition!

****
Loved this recipe? Here are three other Latin holiday recipes you might like:


And let's connect so you can find out the next time I post! Follow me on Twitter, Instagram, or Pinterest, become a fan on Facebook, or sign up to receive my once-a-week e-mail updates.

Thanks so much for reading


Puerto Rican Coquito
Coquito (Puerto Rican Coconut Eggnog)

Recipe by Alejandra Ramos | alwaysorderdessert.com


The best and easiest Puerto Rican coquito recipe made with no eggs. A creamy coconut beverage perfect for Christmas. Includes tips for virgin and low-alcohol variations.


Prep time: 10 minutes
Total time: 10 minutes
Yield: 16-20 small servings

Ingredients
  • 1 12oz can evaporated milk
  • 1 14oz can sweetened condensed milk
  • 1 15oz can sweetened cream of coconut (such as Coco Lopez or Goya)
  • 1 14oz can coconut milk
  • 3 cups white rum (gold rum can also be substituted; see notes below for low* and no-alcohol** versions)
  • 2 teaspoons vanilla extract
  • 1 teaspoon ground cinnamon
  • 2 cinnamon sticks
  • 1 vanilla bean, split in half lengthwise
Directions
Combine evaporated milk, condensed milk, coconut cream, and coconut milk in a large blender and blend until well combined. Add the rum, vanilla, and ground cinnamon, and blend in.  (If your blender is small, do this in batches and pour into a large bowl as you go.)

Pour into a pitcher or glass bottles with sealed lids and drop in the cinnamon sticks and vanilla bean halves. Cover and chill in refrigerator for at least 2 hours or until very cold.

Serve straight in small glasses garnished or on the rocks in larger ones. Garnish with a sprinkle of cinnamon and a cinnamon stick. Leftovers will keep tightly sealed in the refrigerator for about one week (shake the jar vigorously each time before serving***).

*Want to make it a little bit less strong? To cut the rum, replace the desired amount of rum with equal parts ice cold coconut or whole milk.

**For a non-alcoholic or virgin coquito, cut out the rum, and replace it with one cup ice cold coconut or whole milk and one cup ice cold filtered water.

***Like most fats, coconut oil solidifies in the cold, sometimes making this drink very thick after a night in the fridge. Let sit out for about 15 minutes to thin it out before serving, then shake vigorously. If you're in a rush, you can also run the bottle under warm tap water for a minute or so.
0
Back to Top