Showing posts with label Smoked Spanish Paprika. Show all posts

Tortilla Española

Just as good cold as it is hot, Tortilla Española (Spanish Omelet) is pretty much the answer to all mealtime quandaries. Served piping hot from a still-sizzling skillet, it's a perfect weekend breakfast--savory, filling, and just a little bit fancy.  The potatoes are cooked right in so you don't need an additional side (though I make a personal point of never turning down a few strips of crackly, salty bacon).

For lunch the next day, or maybe even later that same afternoon, you can sandwich a cold thick slice of it between two slices of buttered, toasted bread; pure perfection whether you're pulling it out of a brown bag at the office or a picnic basket on the beach.

That same breakfast omelet is an easy dinner alongside a lemony dressed pile of salad greens and a glass of crisp white wine. When company shows up--unexpected or otherwise--slice the round into 1" cubes and poke with toothpicks for an easy and elegant hors d'oeuvre that I guarantee will be one of the first things to disappear. It also makes for a great potluck dish as it can be made in advance, travels well, doesn't need to be heated, and will appeal to meat eaters and vegetarians.

I grew up eating Tortilla Española on a fairly regular basis. My mom would always make one on the weekends, and I was young when she taught me the trick for flipping it onto the platter to cook the other side. I soon took over the weekend breakfast duties and would make the tortilla for the whole family, serving it whole alongside toasted whole wheat bread and fresh orange juice.

At first glance, the idea of making a Tortilla Española can be intimidating (flipping a half-cooked cake-size omelet?!), but I promise you it's really not that terrifying and have offered three options that you can choose from. Something you may not know about me is that I can be a total klutz; in the past month I have broken no less than 2 glasses, 1 vase, 1 ceramic breadbasket (a wedding gift!), 2 mugs, and a plate. All of this in just ONE MONTH. The first few times, Eugene came over to help clean the broken shards, but after the fourth time of hearing the tell-tale crash and my moaning "oh nooooo!" he just turned up his video game and left me to my own devices.

I tell you this to prove that if a klutz like I can flip an eggy omelet with no major disasters, you can do it too.

The "real" way to make a tortilla involves peeling and slicing the potatoes and frying them individually before making the omelet, but over the years I've found that gently boiling the sliced potatoes is a low maintenance way to achieve the same effect. No splatters to clean up and no babysitting the potatoes when you could be working on other things. (By the way, if you have leftover baked, roasted, or even fried potatoes, you can also just slice into small pieces and proceed with the recipe. It won't taste *exactly* the same, but it's a great way to use up leftovers.)


A few basic tips:

1. Use any kind of potatoes you like, but I've found that low-starch potatoes like Yukon golds work best because they don't turn into mashed potatoes during the cooking process. (Not that a mashed potato omelet is a bad thing. It sounds like a very good thing, actually, but it's not what we're going for here.)

2. Don't bother peeling the potatoes. Seriously. I never peel potatoes (or really anything) unless I really have too. The skin is loaded with nutrients, is completely edible, and doesn't affect the taste in any noticeable way. Save yourself the time and hassle and just give them a quick scrub before slicing.

3. Slice the potatoes as uniformly as possible. You want all the slices to be about the same thickness. It doesn't have to be perfect, but the more similar they are, the better. Some people like super thin slices; I usually slice them about 1/2" thick. There is no wrong way--just do what you prefer.

4. Remember that you're not looking to caramelize the onions, just soften them a bit. You want the pure, slightly spicy, flavor of the onion to come through, not the sweetness.

5. Make extra. I always use at least a full dozen eggs and a large skillet when making my tortilla, and recommend you do the same. The leftovers keep for about a week and as I described above, are great hot or cold. Grab a slice for a quick breakfast when running out the door, pack slices for lunch, or serve a piece to your kids when they get home from school. That said, if you only have a few eggs and a potato or two, you can still make a quick small one--it's a great snack or lunch when you're in a pinch.


****
New to Always Order Dessert? Consider subscribing to my RSS feed, follow me on Twitter, become a fan on Facebook, or sign up to receive my once-a-week e-mail updates by filling in your address in the box on the right. I also offer custom menu planning services and offer a variety of culinary workshops in the NYC area. Click here to find out more!

And if you ever need any entertaining or cooking advice, please don't hesitate to
e-mail me.
Thanks for reading!


Tortilla Española

Ingredients 
3 lbs potatoes, such as Yukon Gold, scrubbed and patted dry but not peeled
1 large Spanish onion or 2-3 medium yellow onions
12 large eggs
1 tablespoon smoked spanish paprika
1 teaspoon freshly ground black pepper
1 tablespoon Kosher salt

Fill a large pot with 3 quarts of cold water and season with kosher or sea salt. Slice each potato into 1/2" thick round slices and drop into pot of cold water. Once all potatoes are sliced and in water, place pot over high heat and bring to a boil until potatoes are fork tender.

While potatoes come to a boil, cut the onions in half and slice into thin half moons. Whisk the eggs in a large bowl with paprika, black pepper, and Kosher salt.

Add 2-3 tablespoons of olive oil to a 10"-12" nonstick skillet with 2" sides and heat over medium-high heat. Add the onions and saute just until translucent. Add the onions into the egg mixture. Drain the potatoes and add to the eggs.

Add a bit more oil to the pan and pour in the egg and potato mixture, distributing it evenly. Cover and let cook over medium heat for about 15 - 20 minutes or until cooked around the edges and set. Run a spatula all around the edges and jiggle the pan to make sure the omelet isn't stuck. You now have three options:

Option #1: Take a large platter and invert it over the pan, covering it completely. Place an oven mit-clad hand over the bottom of the plate and with your other hand firmly on the skillet handle, flip the omelet onto the plate. Then place the skillet back on the stove and slide the omelet back in so that the top side is now on the bottom. (This is the traditional way to do it. There is a small risk of egg and oil spillage, but it's minor and with practice won't be a problem at all.)

Option #2: Place a large platter on the counter and holding the skillet over it tilted at a 45degree angle, use a large spatula to slide the omelet onto the plate leaving the top part on top. Then invert the skillet over the omelet, place your (oven mit-clad) hand on the bottom of the plate, and flip the omelet onto the skillet. (This works best if you have a skillet with sloped sides that allow for easy sliding.)

Option #3: forget the flipping! Just turn on your broiler and slide the skillet with the omelet under the broiler for about 10 minutes to let it finish cooking. (This is both the easiest and least authentic.)

If you chose one of the flipping options, let the omelet continue to cook for another 5-10 minutes or until set. Some people like the inside of the omelet to be a little runny, but I don't so I let it cook until it's well done.

Flip onto a plate and let set for 10 minutes before serving. Can be served hot or cold. You can also adapt this recipe by adding sliced cooked chorizo, manchego cheese, spinach, kale, garlic, pimentos, or any number of additions.
0

Red Pepper, Parsley, and Walnut Spread

DSC_1139

I recently fell in love with a red pepper dip I tasted at one of my favorite Mediterranean restaurants that tasted like a cross between a traditional Muhammarah and a fresh Mexican salsa.  Honestly--it was fantastic! That place has a little shop in front when you can buy pretty much everything on their menu to take home, so before we left, I bought a small container of the dip for "research purposes."

On the menu, the dip was described as a pepper dip with walnuts and garlic. I knew there was a lot more in there, so I started tasting (aka "researching") and trying to identify all the flavors. I'm letting you know right now that this isn't it. This is a lovely dip that resulted from my various experimentations. It's not the exact one I was hoping to make, but it's so good and so versatile that I had to share it.

DSC_1147

Made with roasted red peppers, onions, walnuts, and a few other good things, this spread is wonderful on warm pita or in a sandwich in place of mayo, but it goes even further than that! You can also use it the way you would any pesto--on pasta, tossed with shrimp before grilling or sauteing, even dolloped onto tomato or lentil soup as a garnish!

The spread keeps well in the fridge for about two weeks (just give it a little whisk before using if it starts to separate), and is a quick way to pack lots of flavor into a weeknight lunch or dinner.

I'm still working on cracking the code behind that other magical dip and will be sure to share it with you as soon as I do, but until then, I'm sure you'll love this one.

DSC_1149


****
New to Always Order Dessert? Consider subscribing to my RSS feed, follow me on Twitter, become a fan on Facebook, or sign up to receive my once-a-week e-mail updates by filling in your address in the box on the right. And if you ever need any entertaining or cooking advice, please don't hesitate to e-mail me. Thanks for reading!

 
Red Pepper, Parsley, and Walnut Spread

Ingredients
3 red bell peppers, whole (see notes in recipe for substitutions)
1 cup shelled and roasted walnuts
3 cloves garlic, peeled
1 half onion, peeled
1 teaspoon Kosher salt (plus more if necessary)
1 bunch Italian flat parsley, rinsed and trimmed of the bottom 2 inches of stem
1 tablespoon smoked spanish paprika
olive oil


Directions
Roast the bell peppers by placing directly over the flame on a gas stove, turning with tongs until blackened all over. (You can also use a broiler or grill; or substitute an equivalent of store-bought roasted red peppers) Place blackened peppers in a paper bag or in a bowl covered with plastic wrap, and let steam and cool for 15 minutes.  Use your hands to peel the peppers (leaving just a bit of the charred skin), also removing the seeds and core.

In the base of a food processor or blender, combine the peeled and seeded roasted peppers, the cup of walnuts, the 3 cloves of garlic, the half onion, salt, parsley, and smoked paprika and puree until smooth. Drizzle in about 2 tablespoons of olive oil, and puree again. Taste and adjust salt as needed.

Serve immediately as a dip, use as a spread in sandwiches, toss with pasta, etc. Will keep in an air-tight container in the refrigerator for 2 weeks.
0

Crunchy Spiced Chickpeas

DSC_1293

Chickpeas have never been one of my favorites. We grew up calling them garbanzos, and eating them regularly, usually stewed in a tomato-based sauce and served along rice and some kind of meat, as is common in Puerto Rican cuisine.

We always had bags of them in the pantry, and when I was really little, my mom once sat down with me to create little chickpea dolls. If you've ever looked at a dried chickpea, you'll notice that it kind of looks like it has a little nose; we used markers to draw in the rest of the little faces, and then created a dollhouse out of a shoebox for them to live in. I was obsessed with miniatures when I was little (still am, actually. I freak out about anything tiny), so naturally this was right up my alley.

[Ed. Note: I totally Google imaged the phrase "chickpea dolls" to see if anyone else did this, but it seems that this may have been a Ramos family exclusive.]

But once I grew up and moved out, chickpeas pretty much fell out of my culinary repertoire. I preferred black beans, which I ate heavily spiced in soup form, and never felt the need to branch out. I ignored them at salad bars and on restaurant menus, and only purchased them when I wanted to make hummus or the occasional salad (like this one, which Eugene loves).

DSC_1297


This all changed a few months ago when I ordered a side of hummus with my lunch and it came topped with a handful of crisp chickpeas. They were awesome and addictive, and I found myself craving them. I still had a few cans of chickpeas in my pantry, so I pulled one out and started experimenting.

The key to crisp chickpeas is to make sure they're really dry before they go in the oven. To do this, I rinsed and drained my canned chickpeas several times, and then spread them out on a towel-lined cookie sheet. I left them on the counter for an hour to remove as much moisture as possible, then roast until crisp before tossing with olive oil and seasonings.  Dry roasting is really the trick behind super crisp chickpeas; if you season before roasting, the oil will keep them moist and protect them from the heat.

I find that these are best served hot, right out of the oven. The combination of smoked paprika, cayenne, and salt adds smoke and heat, making for a totally addictive (and high protein!) snack. They also make an awesome garnish for hummus, salads, and soup (think of them as a healthy crouton!). If you have leftovers, you can wait until they cool completely, then pop into a zipped baggie to snack on at work or while out and about.

DSC_1291

****
New to Always Order Dessert? Consider subscribing to my RSS feed, follow me on Twitter, become a fan on Facebook, or sign up to receive my once-a-week e-mail updates by filling in your address in the box on the right. 


Crunchy Spiced Chickpeas

Ingredients
2 cans chickpeas
Extra-virgin olive oil
1 tablespoon ground smoked spanish paprika (sweet or hot, if hot, reduce cayenne by 1/2)
1 teaspoon ground cayenne pepper
Kosher salt


Directions
Line a large baking sheet with parchment paper. Set aside.

Line a second baking sheet with a clean kitchen towel or several layers of paper towel. Pour both cans of chickpeas into a meshed strainer or colander and rinse well under cold running water. Let drain for 5 minutes in the strainer, then dump chickpeas onto the towel-lined baking sheet and spread out evenly. Leave to dry on the counter for one hour.

30 minutes before roasting, preheat your oven to 425 degrees.

Place the chickpeas on the parchment lined baking sheet and roast for approximately 30 to 40 minutes, shaking the pan every 10 minutes to stir them up so that they all cook evenly. When ready, they'll be crisp, golden, and have shrunken slightly.

Once crisp, remove from the oven and drizzle with olive oil (about 1 to 2 tablespoons), sprinkle on the spice and season with Kosher salt. Toss to coat evenly and serve.
0

Bagged Lunch Ideas: Egg Salad w/ Caramelized Shallots & Chives


Like a wacky sitcom neighbor who pops in unannounced, summer has been arriving in New York in tiny sporadic bursts these past few weeks. It's too soon, people cry, as they pull off the jackets and cardigans they cautiously grabbed before leaving the house that same morning. The train ride home each night is either a mass of huddled girls shivering in prematurely ambitious shorts or steaming commuters, fanning themselves with their coats bundled in a pile on their laps.

The excessively hot days--today it's already hit 90!--make me sleepy, and when I finally get in the door and drop my piles and bags and heels on the floor (yes, the floor), the last thing on my mind is standing in front of my stove for an hour. Instead, my cravings these days have turned toward the cool and salad-like. I made this herby tuna salad one day, and a similar version with showers of lemon zest another (my mercury levels are likely through the roof at this point). There were two nights of simply pan-fried chicken breasts served on a big mess of greens with this embarrassingly easy Caesar dressing.


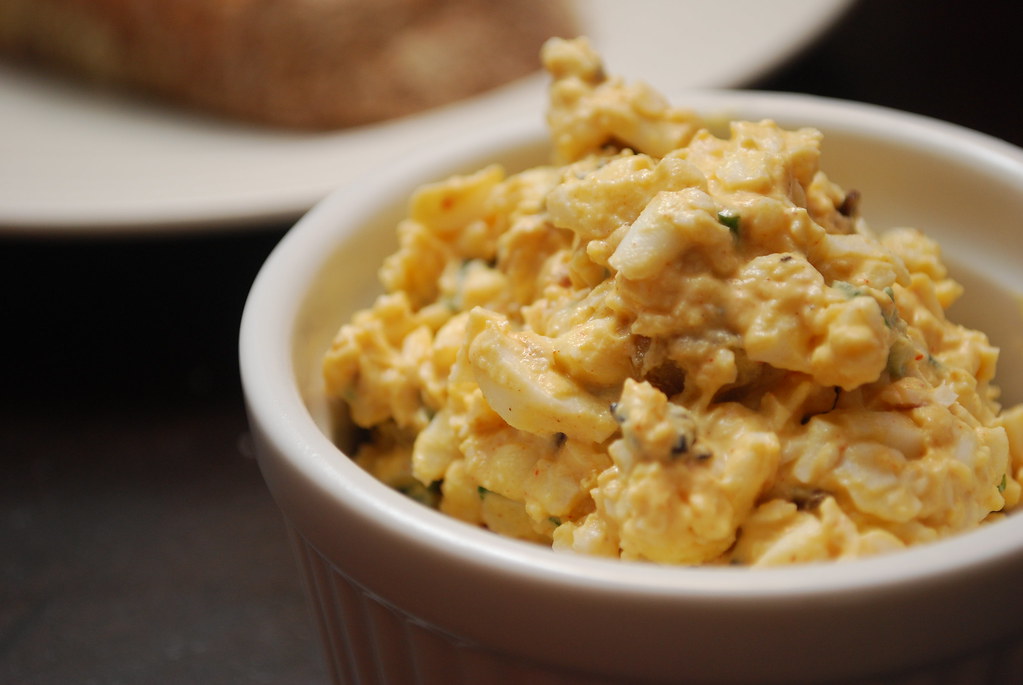
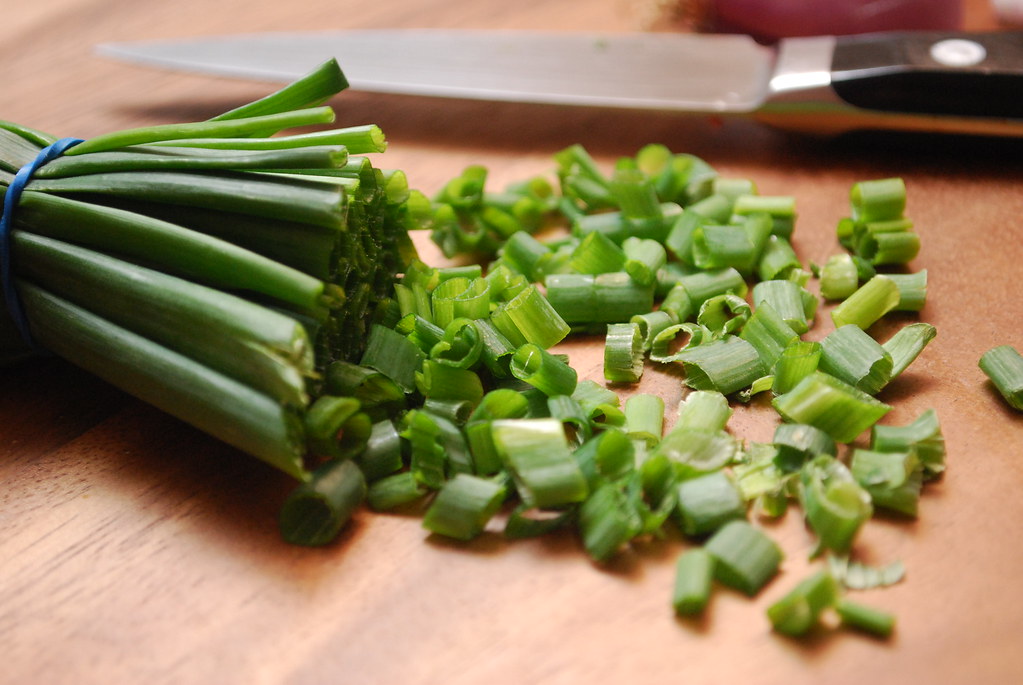
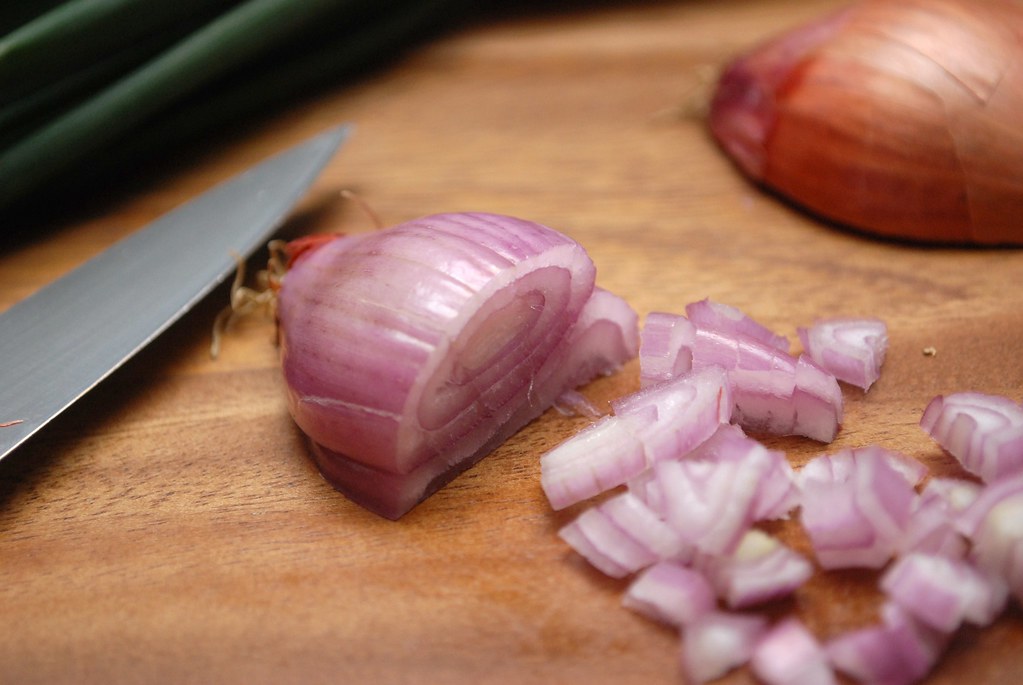
Last night, I just wanted egg salad. That's egg salad my way, with diced caramelized shallots, finely chopped onion chives, and generous dashes of both cayenne and smoked Spanish paprika. The resulting salad is simultaneously smoky, creamy, and spicy, with tiny bits of sweet. If you *really* want to make it my way, let the shallots caramelize just a bit too long until they're a little crisp. Let them hit that cusp just before burned, for a little extra smoke that I find irresistible.

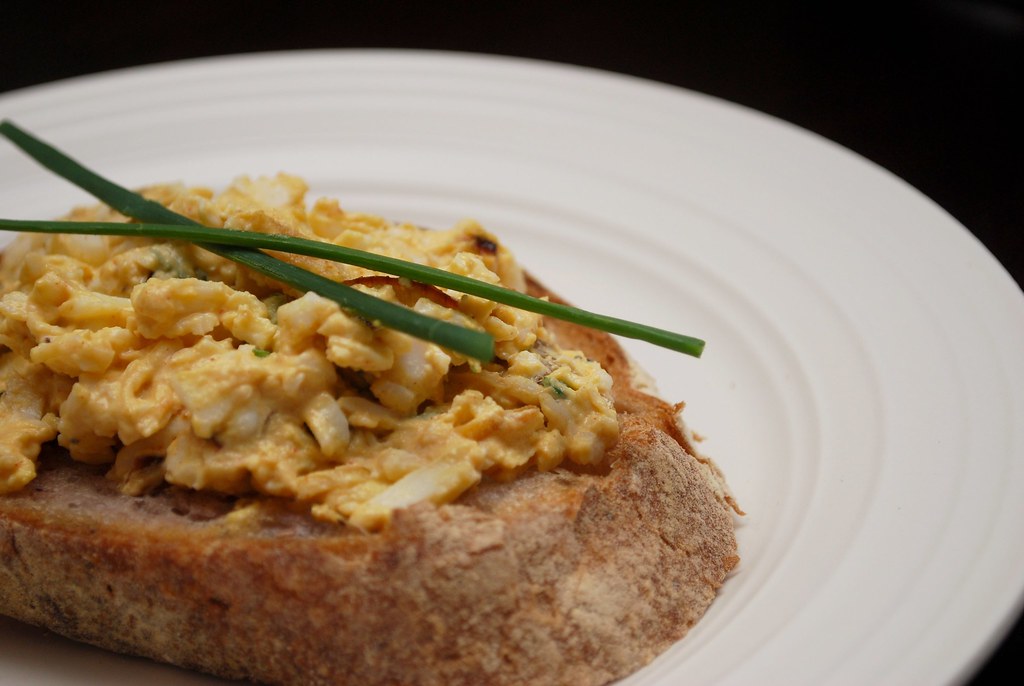
Eugene likes his egg salad on big slices of freshly baked olive bread from the farmer's market. I take it straight up, spoonful after spoonful right from the bowl I make it in. It's my favorite bagged lunch, and so I always make just enough so that I can bring a few scoops with me to work the next day. Occasionally, it's all I can do to not eat it for breakfast! ;)


Everyone has their own methods and tweaks for making an ideal egg salad, but below is my style. To get the eggs fluffy and evenly sized, I grate them on the larger side of a box grater. If I'm making a lot of egg salad (usually for a brunch party), I just toss them into my food processor with the largest grating wheel in place. As impatient as I am, I also find it's best to wait until the next day to have it. An evening in the fridge does wonders for the texture and flavors, which is why it's an ideal dish to prepare to bring to work the next day.

No matter how many eggs I start with, I always find myself wishing I'd made more. This recipe calls for 8 eggs and makes enough for dinner for two, plus one more lunch tomorrow (you guys can fight over it!). It can, of course, be easily doubled or halved.

A Tip: If you prefer it in sandwich form for lunch, just pack it in a container with the two slices of bread in a separate baggy or wrapped in paper, and assemble the sandwich at the office. This will keep the bread from getting soggy (and you can keep the bread room temperature while you refrigerate the eggs).


Now tell me, how do YOU like your egg salad?


Egg Salad with Caramelized Shallots & Chives
Makes about 3 cups.

Ingredients
8 large eggs
1 large shallot, diced
1 tablespoon butter
1/2 cup mayonnaise
1 teaspoon smoked spanish paprika
1/2 teaspoon cayenne
Kosher salt
Black Pepper
1/4 cup onion chives, chopped


Place eggs in a medium saucepan and cover with cold water. Place over high heat just until the water reaches a rapid boil. Turn off heat and let cool to room temperature (about 10 minutes). Shake pan gently to crack shells and place under cold running water for about 15 minutes (refilling with fresh cold water every so often).

While the eggs are cooking, heat a heavy-bottomed skillet over medium heat. Add the butter and the shallots and saute until caramelized (about 7-10 minutes).

When the eggs are cool, peel and grate using the large side of a box grater. Combined in a large bowl with mayonnaise, paprika, cayenne, salt, and pepper. Fold in the caramelized onions and chopped chives.

Serve immediately, or chill in the fridge. Can be made up to 24 hours in advance.
0

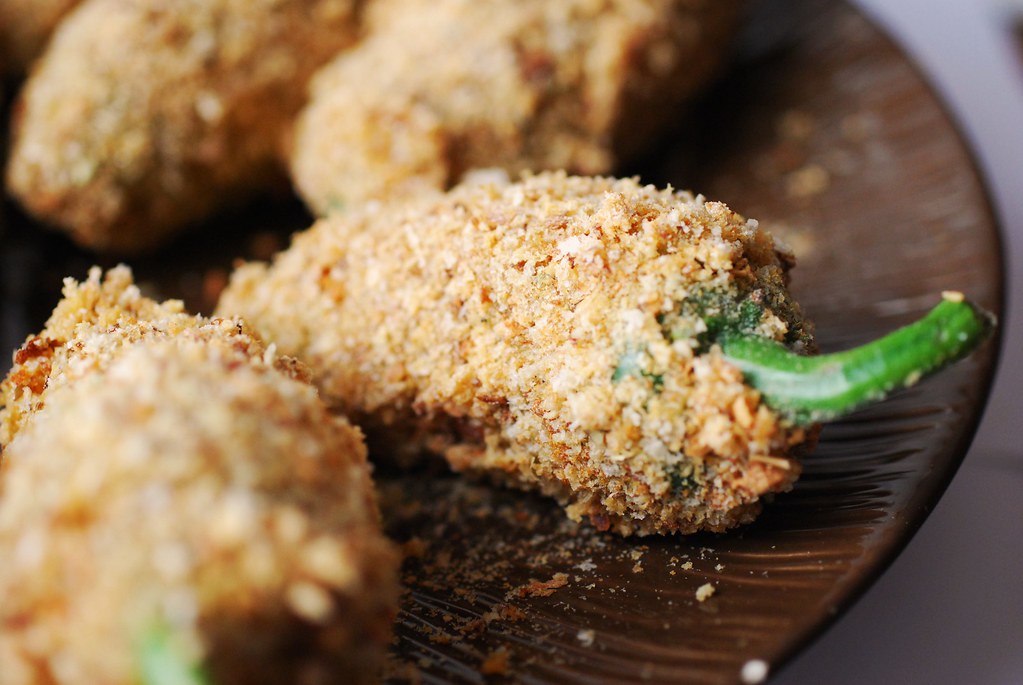
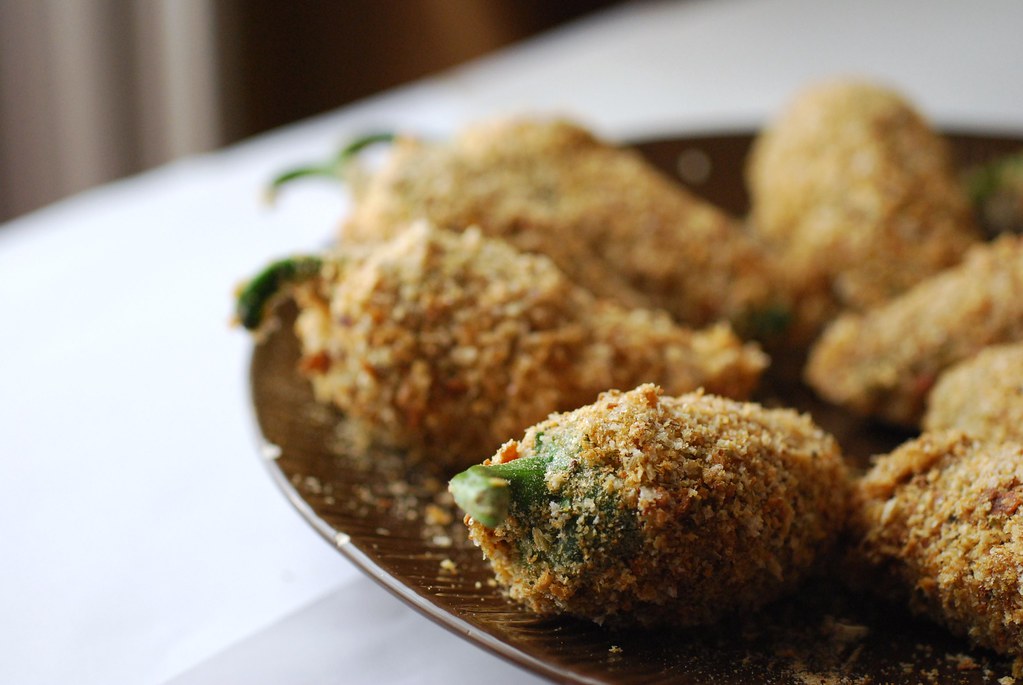
Smoky Jalapeño Poppers

Smoky Jalapeño Poppers
Until I made these Smoky Jalapeño Poppers, I'd never used more than one or two jalapeño in a recipe at a time. Oh, I'd minced one to add to my guacamole or thinly sliced a couple into my spicy artichoke dip, but I'd never had to work my way through a full bag of them. And because of this, I seriously (seriously) underestimated their heat.

To put it bluntly, these peppers burn.

I figured this out somewhere around my eighth pepper. I'd been calmly slicing into the gorgeous little green babies with my paring knife and then sliding my bare pointer finger into the small opening in order to pluck out the core of seeds. The work was tedious, but calming. At least until I noticed the weird sensation on the sides of my hands. I tried washing them, but the feeling only intensified. Soon my hands were red and hot to the touch, and no amount of scrubbing or lathering would make it stop.

I have to tell you, it's an incredibly frustrating sensation to have your hands feel as if they're on fire when they clearly are not. I kept staring at them, wondering if perhaps I was spontaneously human combusting. In a flash of inspiration, I remembered the bottle of chilled lidocaine I had sitting in the fridge since our trip to Aruba a couple months ago (where Eugene got an entirely kind of burn). I slathered a generous amount of the cool numbing cream onto my hands and reveled in the instant relief.

Despite the sacrificed skin cells, the jalapeño poppers came out fantastic: golden and crisp on the outside with a creamy and gooey (and spicy!) center. The combination of cheeses and the smoked paprika in this recipe elevated these classic bar snacks to something a little bit more elegant that the usual TGI Fridays version.

Oh and if you have leftovers, they can be frozen and then reheated in a 400 degree oven for about 5 minutes. They won't be as awesome as at first, but still pretty good.

Smoky Jalapeño Poppers


Smoky Jalapeño Poppers

12 fresh jalapeño peppers
1 cup coarsely grated Extra Sharp Cheddar
½ cup coarsely grated Asiago
½ cup cream cheese, softened
1 teaspoon chipotle flavored Tabasco (or other smoked hot sauce)
3 large eggs
1 cup plain whole wheat breadcrumbs (use the regular kind, not panko)
1 teaspoon Kosher salt
½ teaspoon ground black pepper
1 tablespoon smoked Spanish paprika

About 5 cups vegetable oil

Special equipment: latex gloves (the fitted kinds doctors use, not the bright yellow cleaning lady kind)

Use a paring knife to cut a slit in each jalapeno all the way from the stem to the tip, and then another small slit perpendicular to the first on top (it'll look like a T)

Insert your (gloved!) fingertip through the top of the opening and gently wiggle the core loose, then remove. Rinse under cold water to remove any additional seeds. Pat dry gently with a paper or clean towel, and set aside. Repeat with each pepper.

Once the peppers have been seeded, combine the cheddar, asiago, cream cheese, and tabasco until smooth and well blended.

Use a spoon to scoop gently nudge the cheese filling into the peppers. Once full, close the open pepper and squeeze gently to bring it back to its original shape. Don't worry if the pepper tears a bit, just squeeze it shut.

In a shallow bowl, combine the breadcrumbs with the salt, pepper, and smoked paprika and sift well. In a separate shallow bowl, lightly beat the three eggs.

Holding each pepper by its stem, lightly bathe it in the egg and then coat with the seasoned breadcrumb mixture. Don't worry if the breadcrumbs don't stick completely; this is only the first dunk. Do this for each pepper and then repeat one more time so that each pepper gets two coatings of eggs and breadcrumbs each. Set on a plate to dry slightly.

In the meantime, pour about 2 1/2 inches of oil (such as canola) into a heavy bottomed cast iron skillet or Dutch oven and heat to 325 degrees F. When the oil is hot, fry the peppers in batches of 3 or 4, making sure not to crowd your pan. Keep an eye on the heat of the oil and adjust as necessary so that it stays steady.

When the first batch is golden (about 5 minutes), remove to a paper towel-lined platter to drain and repeat with the remaining peppers. Toss a quick sprinkle of salt over the freshly fried peppers and serve immediately.

Any leftovers should be frozen flat and then stored in a freezer bag. Reheat in a 400 degree F oven for 5 minutes.
11

Picnic Recipes: Roasted Potato Salad w/ Red Pepper & Smoked Paprika Dressing


My mother makes delicious potato salad, but I've always had trouble eating it. As far as recipes go, it's fairly traditional: a mayo-based dressing, boiled & peeled potatoes, hard boiled eggs, herbs etc. But every time I took a bite it went something like this: chew, chew, chew, CRRRRRUNCH, UGH! spit...

That crunch, in case you're wondering, is apple. APPLE! She peels and dices it just like the potatoes so there is no way of knowing what's really lurking in there among the deliciousness. The only way to know is to take a bite, and by then it's in your mouth and it's already too late.

My dad loves the apple in the potato salad. He loves the crunch and the sweetness paired with the creaminess of the potato. Our summer barbecue guests were also fans, and so, despite our (that would be my brother's and my) years of pleading, the apples remained. The only way I could get through a serving was to carefully use my tongue to test for texture differences and then (as inconspicuously as possible) spit out the apple bits into a little pile just to the west of my plate.


Since then, I've mostly stayed away from mayo-based potato salad--I know from experience that that creaminess has a way of hiding all manner of sins--and have been drawn more to the the oil-based salads, rich as they always are with herbs and lemon. So you can imagine my surprise when one morning I found myself excitedly mixing the ingredients for this salad.

Mayonnaise is not the star of this show. Think of it more like an errand girl whose sole purpose is to run here and there and to make sure the vibrant flavors get everywhere they are supposed to be. Blended with roasted red peppers, roasted eggplant, and smoky and spice chipotle pepper, it's barely discernible. And the strong flavors all but assure that there won't be any unexpected (apple!?!) surprises.

This is a knock-out picnic dish, and one that you can easily throw together in less than an hour (plus cooling time). And if you're *really* in a hurry, pop the salad in the freezer when you're done. About 5 minutes in there and it will be cool enough to serve.


Roasted Potato Salad w/ Red Pepper & Smoked Paprika Dressing
(Heavily) adapted from a recipe by Bobby Flay

This spicy and smokey potato salad will appeal to those who like a little heat. The smoked paprika does wonderful things to the flavor, but also gives it a gorgeous, bright orange color--just perfect for a summer picnic.

Ingredients
2 pounds small red potatoes scrubbed and cut in half
1/4 cup olive oil
Kosher salt
Freshly ground black pepper
1/4 cup whole milk Greek yogurt (such as Fage)
1/2 cup mayonnaise
1 cup roasted red bell pepper slices (fresh or jarred)
1 chipotle pepper in adobo sauce, seeded
1/4 medium-sized eggplant, roasted and cooled
2 tablespoons Smoked Spanish Paprika (hot or sweet)
1/4 teaspoon hot chili oil
1/2 teaspoon crushed red pepper flakes
1/2 cup coarsely chopped parsley


Directions

Preheat your oven to 400 degrees F

Toss the cut potatoes with olive oil, kosher salt and freshly ground black pepper until well coated and seasoned. Arrange on a baking sheet, cut side down, and place in oven until crisp on cut side and fork-tender (about 20 minutes)

While the potatoes are roasting, combine the yogurt, mayonnaise, bell pepper, chipotle pepper, eggplant, paprika, chili oil, and red pepper flakes in a food processor or blender, and process until creamy and smooth. Cover and set in fridge until ready to use.

When the potatoes are ready, remove from oven and let cool for 2-3 minutes until they are cool enough to handle, but still warm.

When ready, add the potatoes to a large bowl and pour on the mayonnaise and pepper mixture and the chopped parsley. Toss well to combine evenly and taste for seasoning.

Cover with plastic wrap and place in fridge to cool completely before serving.
4

Pomegranate Braised Baby-Back Ribs


It's no secret that food writers are regularly contacted by PR reps interested in offering us free products in the hopes that we'll write about them on our blogs. While of these pitches can be pretty lame, occasionally something will come through the wire that actually sounds pretty good. I particularly like when I get offers to try out products that I can actually use in my own recipes, as was the case recently when a company offered to send me a box of POM Wonderful pomegranate juice.

In the interest of full disclosure, I should admit that I am not a juice drinker. Regardless of the reported health and antioxidant benefits of certain juices, I'd much rather chew my calories than drink them. But when the odd bottle of something ends up in my refrigerator, I'm usually quick to find savory uses for it. This is how I've learned that pure fruit juices (not "juice cocktails") make incredible braising or poaching liquids. Orange juice is perfect with poultry and seafood. Cranberry juice is brilliant on brisket. And pomegranate juice makes a to-die-for base for a slab of sticky, sweet, savory baby-back ribs. Actually, pomegranate juice is wonderful on a lot of things. I've used it to braise pork shoulder, tenderloin, and brisket. It's a great non-alcoholic way to deglaze a pan after searing a steak for a quick, tangy pan sauce. It's also lovely reduced with some honey or sugar and drizzled over various desserts. Apparently, you can also drink it.


These pomegranate-braised baby-back ribs are my favorite, though. They're easy to make since they cook in the oven for a few hours while you can be off doing other things. No need to worry about cleaning the grill or burning the glaze! They are also a great party dish since everything can be prepared a day ahead and then just reheated in the braising liquid over medium heat for about 20 minutes before serving. Or make them on Sunday afternoon to serve later on in the week. I honestly think they taste even better this way!

As a tip, I suggest doubling or tripling the dry rub recipe and keeping it in a plastic baggie or jar. It's also great on steak, shrimp, or even mixed into ground beef for burgers. The ribs cook slow and low in the oven until they're practically falling off the bone. Then the pot is brought back up on the stove and reduced until it's a nice thick glaze. If you find yourself with leftover sauce after the ribs are served, quickly steam up a batch of frozen or fresh green beans, and toss them in the warm sauce. Add a little chili oil and you've got yourself a nice sweet & spicy side dish.


Oh, and while I used the POM Wonderful juice that I was sent (the kind that comes in those adorable little round bottles), this recipe would work just as well with other tangy and strong-flavored juices such as 100% blueberry or cranberry juice. (No cocktails!)


Pomegranate Braised Baby-Back Ribs

(serves 4)

1 large slab baby-back ribs (about 10 ribs)

Ingredients for the dry rub:

1 cup dark brown sugar
3 tablespoons coarse sea or kosher salt
1 tablespoon smoked paprika (hot or sweet, depending on your taste)
2 tablespoons chili powder
1 teaspoon cayenne pepper
1 teaspoon onion powder
1 teaspoon Old Bay Seasoning
1 teaspoon dry thyme
1 teaspoon dry crushed bay leaves

Ingredients for the braising liquid:

2 cups 100% pomegranate juice (with no added sugars, such as POM Wonderful)
1/2 cup whiskey
2 tablespoons jam of a sweet, non-berry fruit (such as apricot, guava, peach)
1 teaspoon Worcestershire or steak sauce (such as A1)
1 tablespoon tomato paste
5 cloves garlic, peeled and crushed


Directions


Cut the slab of ribs in half. Combine all the dry ingredients for the rub and sift well. Rub a generous handful of the mix (you'll have quite a bit left over) onto each side of the slabs. Place the ribs in the base of a dutch oven or heavy duty baking pan, cover, and place in the fridge to marinate for at least 1/2 hour (or overnight). Note that it's OK if they overlap a little as they'll shrink down during cooking.

When you are ready to cook the ribs.

Preheat your oven to 250 degrees.

Pull the ribs out of the refrigerator and let them reach room temperature.(Do not rinse off rub.) Meanwhile, combine all the ingredients of the braising liquid in a medium saucepan over medium heat until just warm and the jam has dissolved into the liquid. Pour this over the ribs in the dutch oven, making sure to evenly distribute. Cover with the top (or foil if using a pan).

Braise in 250 degree oven for 3 hours.

Remove from the oven and place the dutch oven over medium heat on the stovetop. Without removing the ribs, heat the sauce and let it simmer until it reduces to a thick glaze (about 10 minutes).

Serve the ribs with the sauce drizzled over (about 2-3 ribs per person) and a side of wilted greens or mashed potatoes. Any leftovers can be placed back in the sauce and refrigerated, then reheated over medium heat right on the stove.
5

Vegetarian Split-Pea Soup with Smokey Garlic Yogurt


Those of you who follow my Twitter feed have probably read about the detox I've been following for the past week or so. I plan on going into a bit more detail about it in the coming week (complete with the full menu plan in case you'd like to try it out yourself), but for now I thought I'd share one of my favorite recipes from the plan: Split-Pea soup with a delicious garlic and smoked paprika yogurt dressing.

Unlike my usual bacon-infused soups, this one is made detox-friendly with vegetable broth as a base. In terms of numbers, it's much lighter than the traditional soups made with ham hocks, but that's where the differences end. The secret to this richly flavored dish is the yogurt swirl; a blend of smoked paprika, garlic, and Greek yogurt, it gives the soup the perfect amount of spice and depth. The smokiness of the paprika is reminiscent of that you'd get from bacon or a smoked ham hock, but with just a little extra spice. From a nutritional standpoint (if you're into that sort of thing) this soup is packed with protein, thiamine, folate, manganese, and a whopping 50% of your daily dietary fiber requirement. It's also a great source for those good complex carbs and carries a low glycemic load, meaning that it won't cause your body to go into post-lunch carb-crash. And given the crazy freeze that's been covering most of the US lately, I can imagine that a good soup recipe will go over well.

The yogurt dressing is also a nutrition powerhouse. The yogurt is a great source of calcium and live active cultures (the benefits of which Jamie Lee Curtis actively touts). Garlic is a powerful antioxidant that goes to work on all those free radicals, plus it's been thought to help lower cholesterol and boost the immune system against colds. Even the paprika does more than just hang out being delicious--some studies show that it can help normalize blood pressure, improve circulation, and increase the production of saliva and stomach acids to aid digestion. It's also unusually high in Vitamin C! This recipe will make a few cups of this dressing--certainly more than you'll want for the soup, but be sure to save it and experiment with it in other ways. I've found that it's great over salad, served with plain broiled salmon, or even spread on thin rye crisps. My favorite, however, is serving it alongside a big plate of oven-crisped sweet potato slices. I swear, it blows chips and dip way out of the water!


I used boxed vegetable broth for this soup and would certainly encourage you to do the same. It's a low-sodium variety that I've found both on Fresh Direct and Whole Foods. Of course, you can use your own homemade broth, or even bouillon cubes. Just make sure they're low-sodium. One of the key parts of the detox was cutting salt, and though I was reticent at first, I really didn't miss it that much once I did. The soup and dressing are rich with flavor thanks to the herbs and aromatics, and I've learned that a squeeze or two of lemon can help to "wake up" flavors in food much the same way that salt does.


Vegetarian Split-Pea Soup

Ingredients

2 tablespoons extra virgin olive oil or grapeseed oil
1 medium onion, chopped
3 garlic cloves, sliced
2 cups dried split green peas (picked over for stones and rinsed)
1 teaspoon ground coriander (you can also use crushed whole seeds)
1 teaspoon marjoram
3 sprigs of fresh thyme
1/2 teaspoon sea salt
5 cups vegetable broth


To make:

Heat the olive oil in a dutch oven over medium heat. Add the garlic and onions and cook for two minutes until soft and just slightly caramelized.

Add the peas, coriander, and marjoram, and stir to combine and coat evenly.

Add the vegetable broth, salt, and sprigs of thyme.

Bring up to a boil and then reduce the heat to medium-low, cover, and let simmer for approximately 30 minutes or until the peas are soft and fully-cooked.

Use a spoon to remove the twigs left from the thyme. Then using an immersion blender, slowly process the soup until it is completely smooth. (You can also ladle the soup in portions into a blender or food processor if you don't have an immersion blender, but be careful as the steam can push the blender cover off.)

Serve with a swirl of the Smoky Garlic Yogurt dressing (recipe below). (To obtain the swirl effect like in the photos, spoon 2-3 tablespoons of the dressing into a pastry bag or a Ziploc baggie, snip the tip, and starting from the center, swirl a design onto the soup.)


Smoky Garlic Yogurt Dressing

Ingredients:
2 cups plain strained Greek yogurt (such as Fage)
4 large garlic gloves (peeled and crushed slightly)
1 tablespoon lemon juice
1 teaspoon kosher salt
1 tablespoon smoked spanish paprika (Pimenton)

To make:

Combine all incredients in a food processor or blender and process until smooth. Can be stored in a covered container in the refrigerator for up to three days.
11

Smoky Deviled Egg Salad on Golden Rye Crisps

As much as I love to cook, there are some nights when I just don't have the energy to put much effort into it. It's on these nights that I pull out my "single girl" dinners--no, not Lean Cuisine--single girl dinners are those easy, go-to meals that you can fix in just a few minutes with minimal ingredients, but which somehow manage to satisfy each and every one of your deepest cravings. It's comfort food, tailored exactly to your very own (and often very peculiar) taste and preferences.

My single girl dinners tend to resemble an antipasti platter: hunks of cheese, roasted red peppers with bits of blackened skin still clinging, hard boiled eggs, olives, fat red grapes, and slices of salami or prosciutto eaten one-by-one, usually pulled straight from the plastic package. Basically anything tasty that I happen to find in the fridge. An ardent lover of mayonnaise, I'll often drop a dab on my little mini party platters for dipping or just licking off my fingers--something that I could never do in front of other people without fear of completely grossing them out.

I've realized that my single girl dinner habits came straight from my mom. On the nights when my dad was appearing at an event and my brother was out with friends, my mom would skip the preparation of a full meal and we'd instead sit down to a makeshift dinner of crackers, rolled up salami, hunks of cheese, and generous dollops of mayonnaise. We'd work our way through an entire package of cold cuts or crackers, making tiny sandwiches and talking about our days or anything else that was on our minds. I loved these dinners, and sometimes even preferred them to the full meals my mom made when my dad and brother were around. The men in my family have never really understood how my mother and I can be satisfied with a dinner of just a few crackers and cheese. "But that's not real food," my dad would say when he would come back to find empty salami packages and no leftovers. But to my mom and me, it's always been the most real.

While thinking up ideas for recipes to share, I keep finding myself coming back to these basic foods that I love. I'm learning that there is value in the things we eat when we're alone and perhaps in need of a bit of comfort. When cooking for yourself or for your loved ones, think back to thing things you instantly grab for when we're not trying to impress or worrying about the scale. It is from these ingredients that your most memorable meals will come.


Smoky Deviled Egg Salad on Golden Rye CrispsI love eggs and mayonnaise. If I were ever asked to pick a few desert island foods, these two would definitely be on the lists. This recipe starts out as one of the most basic of all comfort foods: the egg sandwich, and then elevates it to the next level. I’ve replaced the usual soft deli rye with a nutty Danish crisp bread to add a nice bit of crunch. I also use homemade mayonnaise (recipe at the end). The real key ingredient, however, is the smoked Spanish paprika (Pimenton de la Vera), which can usually be purchased at gourmet supermarkets or specialty stores. If you can’t find this spice near you, you can certainly replace it with the more commonly found Hungarian paprika, but note that you will lose out on the smoky heat of the Spanish version. I’ve included a link at the end for an online supplier for those of you who can’t find it elsewhere.
Ingredients3 medium eggs
2 slices of golden rye Danish crisp bread (suggested brands: Wasa, Kavli)
2 tablespoons of homemade mayonnaise (recipe below)
1 heaping teaspoon of smoked Spanish paprika (also known as Pimenton de la Vera)
Fresh cracked pepper
Course sea salt
1 teaspoon freshly chopped dill


1. Place the eggs in a saucepan filled with water and bring to a boil. Boil for 7 to 8 minutes then remove from heat. Peel the eggs under cold running water to keep your fingers from burning and then coarsely chop and place in a bowl.

2. Add the mayonnaise and paprika to the chopped eggs and mix well. The paprika should turn the mix a lovely orange color. Season to taste with course sea salt and fresh cracked pepper.

3. Arrange two slices of crispbread on a plate with nutty side up. Top each one with half of the egg salad mixture. Garnish with a sprinkle of dill before serving.


Homemade MayonnaiseThis recipe might read a bit complicated, but it’s really just about patience. An electric mixer or food processor makes it a snap!! Once you get the hang of it, you can experiment with the use of different oils or the addition of herbs and spices—I’ve included a couple variations at the end. Perfect in the Smoky Deviled Egg Salad or as a dipping sauce for French Fries.

Ingredients2 large egg yolks
1 teaspoon salt
½ teaspoon powdered mustard seed
Pinch of sugar
4 to 5 teaspoons of lemon juice (or white vinegar)
1 ½ cups olive, soy, or canola oil

1. Combine the egg yolks, mustard powder, sugar, and 1 teaspoon of vinegar/lemon juice in the base of an electric mixer and beat until the yolks double into a creamy, pale yellow.

2. Lower the mixer to medium speed and slowly drizzle in the first ¼ cup of oil.

3. Add 1 teaspoon of lemon juice

4. Drizzle in another ¼ of olive oil, a few drops at a time, making sure that it is all combined before adding the next drops.

5. Follow with another teaspoon of lemon juice.

6. Add ½ cup of oil in a steady stream and then the remaining lemon juice.

7. Drizzle in the remaining oil. If it’s too thick for your taste, finish by thinning out with a tablespoon or two of hot water.

Cover and refrigerate. Will keep in an air-tight container for up to 5 days.

Variations:
Aioli:
For every ½ cup of prepared mayonnaise, whisk in: 1 teaspoon finely chopped garlic, 1 tablespoon lemon juice, 2 tablespoons of fresh chopped coriander and salt and pepper to taste.

Meyer Lemon Mayo: Use juice from fragrant Meyer lemons in original recipe. Finish with a teaspoon of Meyer lemon zest, and some fresh cracked pepper.

Chipotle Mayo: Prepare mayonnaise then blend in a processor with 2 chipotle chilies in adobo sauce, 1 clove garlic, 1 tablespoon smoked Spanish paprika, and a squeeze of fresh lime.

Remoulade: Blend 1 cup prepared mayo with 1 tablespoon each of: minced cornichons, capers, garlic clove, chopped parsley, chopped tarragon, and spicy Dijon mustard. Finish with a few drops of red pepper sauce.


Where to Buy
The Spice House, based out of Chicago, offers all kinds of hard-to-find herbs, spices, and spice mixtures. Click here for Smoked Spanish Paprika.
3
Back to Top