Showing posts with label homemade. Show all posts

How to Make Stovetop Mac & Cheese

When it comes to comfort food, Mac & Cheese is my ultimate.

It's my lazy day food. It's my sad day food. It's my "damn it! nothing is going right today-food." It's what I want more than anything else on the days I'm feeling a bit low or exhausted, and it's usually the most reliable way to know that I'm coming down with something.

Forget the sniffles; it's the mac & cheese cravings that give it away!

Growing up, I was always a fan of the Velveeta kind. I was probably about 8 or so when I started making it myself, and can remember standing just barely over the stove, pouring in the box of shells, letting them clatter loudly into the pot of boiling water.  The sauce came in a foil packet, and would have to be squeezed out like toothpaste, falling over the pile of drained pasta in a thick, cheesy coil that would melt into a salty, creamy sauce when stirred.


When I was about 14 or 15, my friend and I were occasionally asked to babysit our pastor's younger sons, Nicky and Joseph, along with a few other kids from the church. Their mom left us boxes of Kraft Easy Mac to make them, my first experience with the "blue box."

I'd let the boys help stirring in the butter and milk and neon orange cheese powder. I didn't like the bland, chemical-y way that kind tasted, but they gobbled it up, along with the Tollhouse chocolate chip cookies we baked for dessert.

Those boys grew up to become international super stars, so now I can add "cooking mac & cheese for the Jonas Brothers" to my resume.  (I've bathed and dressed them, too, but that's a totally different story.)

These days, I much prefer the homemade kind of mac & cheese--still creamy and pretty much just as quick, but oh. so. much. better.

A few days ago, a friend and I entered into a bit of a wager...and I lost. As his prize, he requested a recipe for "really good homemade mac & cheese." He also confessed that his microwave is his "#1 cooking implement" and that he's scared of the stove. A challenge if I've ever heard one!

Homemade mac & cheese basically consists of four elements:

Pasta + Seasonings + Cheese + White Sauce = Mac & Cheese!

Let's break it down.

Step 1. Pasta!
The pasta part is super easy. You can use any kind of boxed pasta that you like, from dried shells or elbow to large penne. My favorite is gemelli--little twisty pasta that just feels really fun to eat, and is what you see pictured here. But really, it's up to you.

Pick your favorite, cook the entire 16oz box according to the directions on the box in lots of salted water (typically about 8 minutes), drain it (don't rinse it!), and set it aside while you make the sauce.


Want a cool tip? People never really know how much to salt their pasta water, and usually don't add enough. The best way to remember is that pasta water should be salty like the ocean. Remember the last time you went to the beach and got hit in the face with a mouthful of saltwater? That's what you want in order to get the best tasting pasta (same goes for boiling potatoes, vegetables, etc.)

Step 2. Cheese!
The cheese is also super easy. You can really pick any kind you'd like or even mix a few kinds. My go-to is using half a pound of extra sharp yellow cheddar cheese and half a pound of a slightly milder white cheddar. I then stir in a cup of grated Parmesan for a tangy kick. You can do all cheddar or even something like Gruyere or fontina, for a stinkier more "adult" version.

One thing I do recommend is buying the kind of cheese that comes in a block and grating it yourself; it'll melt better and give you a creamier sauce. The cheese that comes pre-grated has fillers added to it to keep it from melting in the bag so it won't melt as smoothly and you'll get a grittier texture.

(If it's all you can find, though, go ahead and use it. It'll still be delicious!)

Step 3. Seasonings
Seasonings for mac & cheese are very personal and completely customizable based on what you have and what your personal tastes are. I like to use the combo of seasonings above: dry mustard, paprika, black pepper, salt, and a bit of cayenne for spice.

You can use all of these or just some.
  • Salt and pepper are definitely necessary. Do NOT skip these.
  • I like the tang that the dry mustard powder adds (I use Colman's), but you could also replace it with regular (wet) yellow mustard or just skip it completely
  • Paprika is pretty much just there for color, although sometimes I use smoked paprika for a smokey final dish. 
  • You can use cayenne or replace it with Tabasco. If you prefer milder foods, just skip it. (I, personally, like the bit of heat it adds)
Just make sure to have everything measured out and ready to go before you start your white sauce!

Step 4. White Sauce
I think this is part that freaks most people out about homemade mac & cheese, but I assure you it's simple. And once you learn how to make it, you'll be able to make SO MANY AWESOME DISHES. White sauce is another name for "bechamel," which sounds terribly fancy and complicated, but is really just milk thickened with flour and butter.

You start off by melting half a stick of butter (4 tablespoons) into a pot set over medium-high heat, letting it melt completely and get foamy.

Then you dump in 1/3 cup of all purpose flour (you can also use whole wheat flour for a "healthier" version, but let's not kid anybody here).

Immediately stir that flour into the butter and let it cook for about a minute, stirring the entire time. It'll start to smell a little bit nutty and get just the tiniest bit golden.

You then pour in four cups of milk and stir into the flour mixture quickly. I like to switch to a whisk here for a smoother sauce, but don't worry if you don't have one. Just use what you have. I once made this using a pancake spatula because my friend didn't have anything else.

Don't stop stirring it! This part will take about 3 or 4 minutes, and you have to keep stirring it pretty much the entire time until it thickens. (You can take a few breaks, but don't walk away.) It's a good arm workout!

You're looking for the sauce to get thick and start to coat the sides of the pot and the back of the spoon.

When the sauce is coating the spoon, you can pass your finger through the back of it and see if it makes a line (like the photo). If it does, you can stop. It's perfect! Next, lower the heat to the lowest setting, leaving the pot there.

Tip: Did it get too thick, too quickly? No worries! Just add another 1/2 cup of milk and stir it in until it's perfect. 

Now it's fun time!
Add your spices, and stir them in until completely incorporated.

Add all your cheeses! Stir those in really well, too. You want them to melt completely into the sauce (about 30 seconds to 1 minute).

Now add that cooked pasta you already made and stir it into the cheese sauce until it's all coated.

Taste it! Is it good? Does it need more salt? Maybe more pepper? Maybe a little bit more spiciness? Go ahead and add it.

Now serve yourself a big bowl, and enjoy!

By the way...this recipe makes a lot because this keeps and reheats really well. I like to divide it into containers and put some in the fridge and some in the freezer for future mac & cheese eating. To reheat, just put it in a pot with about a 1/4 cup or so of milk and stir it for a minute or so until it's heated through and creamy again.

(And yeah, you can use the microwave if you prefer, too.)

****
Like this recipe? Share the photo and link with a friend on Facebook or Pinterest so that more folks can enjoy it! I'd also love if you'd consider subscribing to my newsletter, follow me on Twitter, become a fan on Facebook, or sign up to receive my once-a-week e-mail updates by filling in your address in the box on the right.

Thanks for reading & sharing!    


Easy Homemade Stovetop Mac & Cheese Recipe
This comes together really quickly, so make sure you have all your ingredients measured out and ready to go when you start making the sauce. You'll have homemade mac & cheese in less than 30 minutes!

Ingredients
1 pound (16oz) box of small dry pasta (such as elbow macaroni, penne, gemelli, or shells)
4 tablespoons (1/2 stick) unsalted butter
1/3 cup all purpose flour
4 cups whole milk
2 teaspoons kosher salt
1/2 teaspoon ground black pepper
1/4 teaspoon cayenne pepper or Tabasco sauce (optional)
1 teaspoon paprika (optional, used smoked paprika for a smokey taste)
1 teaspoon dry mustard powder or wet yellow mustard (optional)
1 pound (16oz) extra sharp cheddar cheese, grated (or use an equivalent mix of cheeses)
1 cup grated Parmesan cheese (the fresh kind, not the dry powdery stuff!)

Directions
Bring a large pot of water to boil, salt generously, and cook pasta according to box directions until "al dente." Drain pasta and set aside.

Make the white sauce. Before starting, make sure you have measured out and prepared all your spices, the flour, the milk, and the cheese you will be using in the sauce.

Place a large pot over medium-high heat and melt the butter until foamy. Add the flour and stir in for one minute until fully incorporated with the butter. Slowly pour in the four cups of milk and stir continuously until the sauce thickens and coats the back of the spoon.

Add the spices, and stir in. Add the cheeses and stir in until completely melted and incorporated. If the sauce seems a bit thick, add in a 1/2 cup or so of milk and stir in completely to thin. Add the cooked pasta and stir in until completely coated.

Serve immediately. Leftovers can be refrigerated for up to one week or frozen for up to six months. Reheat on the stove with additional milk to thin the sauce, or in the microwave.


0

From Scratch Rum Cake Recipe (Homemade Tortuga Rum Cake Copycat)

From Scratch Rum Cake
My recipe for Homemade Rum Cake started with a shopping spree at TJ Maxx. See...sometime back in November I made the mistake of buying a tiny box of Tortuga rum cake that I saw on sale at our nearby store. It looked tempting, so I brought it home and opened the box for a small taste of cake before dinner.

And it was incredible!

Eugene witnessed my minor freak-out as I raved over the moist, golden rum cake studded with a tiny sprinkle of crushed walnuts. Before I knew it, I had eaten the entire cake and was walking around the room with a happy buzz.

Homemade Scratch Rum Cake Recipe
The next day after work, I returned to TJ Maxx and bought two more rum cakes--full-size this time. I proceeded to spend the next few weeks eating rum cake every night, returning to TJ Maxx regularly to replenish my supply. On one visit I finally realized that it would make more sense to just buy every cake they had left in stock (yes, this "made sense" to me)...so I did. I was so excited about the prospect of bringing home all these cakes that it didn't even occur to me to be embarrassed as I walked to the register with a tower of 8 rum cakes balanced in my arms.

"These are really, really good," I told the bemused cashier.

That was at the height of my wedding planning, and I credit a steady diet of nightly rum cake with helping me keep my sanity. (Miraculously, I still managed to lose quite a bit of weight pre-wedding; this may have to do with the fact that I was essentially replacing dinner with cake.)

Moist and golden homemade rum cake
When I got back in January, the first thing on my agenda was recreating this cake at home. I searched the Internet for recipes, but all the ones I found relied on a combination of boxed cake and pudding mixes.  I wanted to make rum cake from scratch, without bags of powdery substances. I finally found one recipe that was all from scratch except for the pudding mix (this, I’m sure you’ve guessed, is what led me to my recipe for homemade vanilla pudding mix). Not perfect, but definitely a start!

After a few trials and errors, I figured it out; I adjusted the original homemade rum cake recipe slightly, and then replaced the packaged pudding mix called for in the recipe with a cup of my own homemade pudding mix (essentially a combination of powdered milk and cornstarch). I pulled it from the oven, poured on the syrup, and waited anxiously until morning to see if it worked.

From Scratch Rum Cake Recipe
The results were brilliant!

The buttery rum syrup soaks evenly throughout the cake and leaves you with a moist, soft, golden cake speckled with flecks of vanilla bean. The texture of the cake is absolutely perfect—soft and springy without being spongy. Since the ingredients are all whole and from scratch, it lacks the artificial flavor undertones of the "semi-homemade" version.

The batter comes together easily, with not that much more effort than a cake mix, but the results are infinitely better.

The rum both in the cake and the syrup can be adjusted according to your tastes. If you’re trying to recreate the Tortuga cake (the one in those hexagonal yellow boxes found in the airports all along the Caribbean—and TJ Maxx), I recommend getting a bottle of Tortuga rum, which can be found in various places online.

You can also use infused or spiced rums such as Bacardi Coco or Captain Morgan’s, but I honestly prefer the simplicity and rich flavor of a good dark aged bottle (like Bacardi Anejo).
From Scratch Rum Cake Recipe

Want more Puerto Rican holiday recipes? Check out my eCookbook: The Puerto Rican Christmas Table with 40+ recipes and full-color photos. Click here to learn more!

****
New to Always Order Dessert? Consider subscribing to my RSS feed, follow me on Twitter, become a fan on Facebook, or sign up to receive my once-a-week e-mail updates by filling in your address in the box on the right. And if you ever need any entertaining or cooking advice, please don't hesitate to e-mail me. Thanks for reading!


From Scratch Rum Cake Recipe (Tortuga Rum Cake Copycat)

Recipe by Alejandra Ramos | AlwaysOrderDessert.com
A recipe for homemade from-scratch rum cake made with no boxed mixes. Similar to Tortuga Rum Cake. The best from-scratch rum cake recipe!

5 stars
Prep time: 10 minutes
Cook time: 55 minutes
Total time: 1 hour 5 minutes
Yield: 10 Servings
Ingredients
  • 1/2 cup crushed walnuts
  • 1 1/2 cups granulated white sugar
  • 1/2 cup unsalted butter
  • 3 tablespoons + 1/2 cup vegetable oil
  • 1 3/4 cups all-purpose flour
  • 1/4 cup cornstarch
  • 4 teaspoons baking powder
  • 1 teaspoon kosher salt
  • 1 cup DIY Vanilla Pudding Mix (Click here for my easy pudding mix recipe or substitute one 3.4oz box of store bought pudding mix)
  • 3/4 cup whole milk
  • 4 large eggs
  • 3/4 cup dark rum
  • 1 tablespoon pure vanilla extract
For the Rum Syrup:
  • 1/2 cup unsalted butter
  • 1/2 cup water
  • 3/4 cup granulated white sugar
  • 1 teaspoon kosher salt
  • 1/2 cup dark rum 
Directions 
1. Preheat oven to 325 degrees. Grease and flour a bundt pan, and drop crushed walnuts into the bottom of the pan. Set aside.

2. In the base of a mixer, cream the 1 1/2 cups granulated sugar and the 1/2 cup butter. Add the 3 tablespoons oil, flour, cornstarch, baking powder, and kosher salt combining until evenly distributed. (Mixture will look like fine crumbs.) Mix in the pudding mix.

3. In a separate bowl, whisk together the eggs, milk, rum, vanilla extract, and remaining vegetable oil. Add to the dry mixture and mix well until combined. The batter will be smooth, thin, and pour easily.

4. Pour into the prepared bundt pan and bake for 50 to 60 minutes, or until a tester inserted in the cake comes up clean.

5. Let cool in pan for 10 minutes, then invert onto a rack. Let cool for 20 to 30 minutes.

6. While the cake cools, prepare the rum syrup: In a large saucepan with high sides, combine the butter, water, granulated sugar, and salt. Cook over medium heat until the butter completely melts and the sugar dissolves. Let reduce slightly, keeping an eye on it so it doesn’t boil over. Remove from the heat and stir in the rum (it will bubble).

7. Wash and dry the bundt pan, then place over the cool cake and invert the cake back into the pan. Pour the hot rum syrup all over the cake and let soak for 8 hours (overnight). In morning, invert the cake back onto a serving platter.

Keeps covered for 1 week at room temperature.
0

Beet Goat Cheese Gnocchi in Rosemary & Sage Butter Sauce


This is the other recipe I made at my cooking demo last Saturday, and I figured it’s time that I share it with you guys, too!

Pureed roasted beets and creamy tangy goat cheese come together for one of the easiest homemade pasta dishes you’ll ever tackle (promise!).

Start with pureed roasted beets (make them yourself, buy them pre-roasted and peeled in those lovely little vacuum packs, or go ahead and use canned, if you’d like) and whisk in the cheese, an egg and some flour to bind it all together.

You only need about a half cup of the puree for a batch of pasta big enough to serve four. These freeze well, too, so even if it’s just you, I recommend making the whole thing and freezing the rest for easy meals the rest of the week.


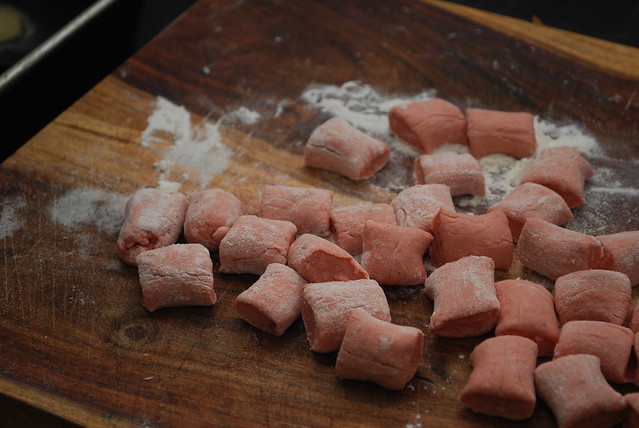
The little dumplings are soft and cook up quickly once they’re done.

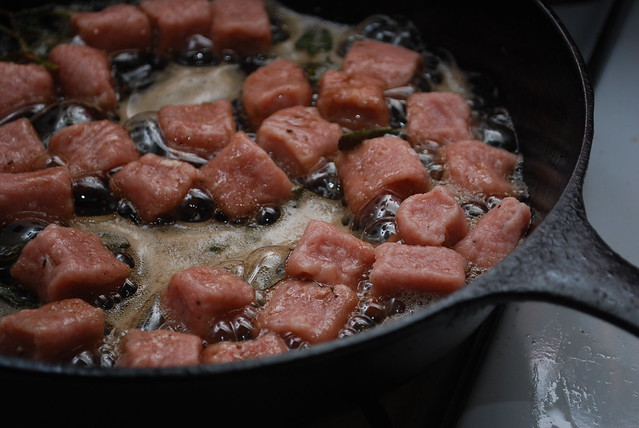
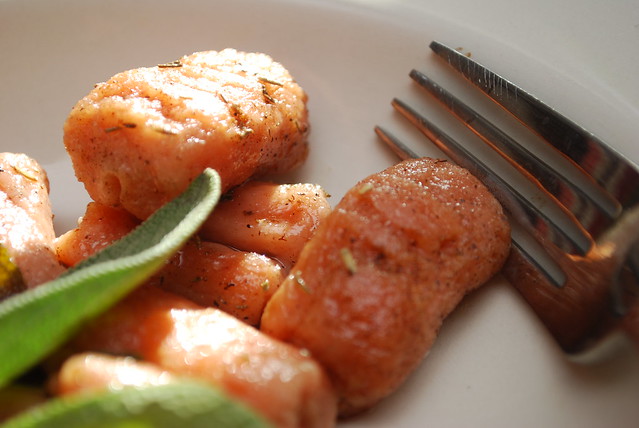
I boil them and then crisp them just a bit in a skillet of hot browned butter gently scented with fresh herbs (sage and rosemary in this case, but go ahead and use what you have and what you like) and a little dash of nutmeg.

Or you can skip the butter (though I never would) and just serve them with your favorite sauce...something creamy and cheesy perhaps, or savory and red and right out of a jar.


I first made these a while ago, back when Eugene and I started dating, but I’ve tweaked the recipe since and this is how I like it best.

The beauty of it all is that you can play around with it until you find the way that YOU like it best. So use cream cheese instead of goat or ricotta if you prefer. If you don’t have (or don’t like) beets, try the same recipe with pumpkin, butternut squash, or sweet potatoes.

Make it in advance and freeze it until you’re ready to cook (a great trick for dinner parties and busy weeknight dinners), and then when you sit down with your glass of wine and everyone is about to dive in just casually let it drop that you made these.

From scratch.


****
New to Always Order Dessert? Consider subscribing to my RSS feed, follow me on Twitter, become a fan on Facebook, or sign up to receive my once-a-week e-mail updates by filling in your address in the box on the right.

And if you ever need any entertaining or cooking advice, please don't hesitate to
e-mail me.
Thanks for reading!

Beet Goat Cheese Gnocchi in Rosemary & Sage Butter Sauce
Serves: 4

Ingredients

 
For the gnocchi:
1/2 cup goat cheese (chevre)
1/2 + 2 tablespoons cup roasted beat puree (approximately 1-2
large beets, roasted, peeled, and pureed in food processor or blender)
1.5 cups all purpose flour (plus more for flouring boards)
1 whole egg, slightly beaten
1 tablespoon kosher salt
1 teaspoon freshly ground black pepper
1 teaspoon nutmeg

For the sauce:
1 stick unsalted butter
1 bunch fresh sage
1 sprig fresh rosemary
salt & pepper


Steps:
1. In a large bowl, whisk the goat cheese until smooth. Add the beet puree and mix until evenly combined.
2. Whisk in the egg, followed by the salt, pepper, and nutmeg.
3. Slowly add the flour into the beet mixture, 1/4 cup at a time until it is all incorporated into the dough. If your dough seems a bit too wet, feel free to add an extra 1/4 – 1/2 cup of all-purpose flour.
4. Turn the dough out onto a heavily floured work surface and knead for a few minutes. The dough will still be fairly wet, but you should be able to handle it by keeping your hands and the surface floured.
5. Working with about a handful of dough at a time, roll out a long snake about an inch thick. Use a floured knife to cut out the gnocchi every 1 inch. Roll each gnocchi along the tines of a fork (or simply indent by gently pressing the back of the fork into the side of each nugget).
6. Place the formed gnocchi on a floured baking sheet. These can be frozen for later use or cooked right away.
7. When ready to cook, bring a large pot of salted water to a rolling boil and add the gnocchi in batches. Let cook until they bob to the surface and then cook for an additional 2 minutes. Use a slotted spoon to pull out of the pot and set aside.
8. While the gnocchi are boiling, heat a heavy skillet (cast iron is ideal) over medium heat and melt the 1/2 stick of butter. Tear 5-6 fresh sage leaves in thirds and drop into the hot butter along with a tablespoon of fresh rosemary. Saute the herbs in the hot butter, letting the sage leaves crisp slightly. When the gnocchi are finished boiling, add them in batches to the hot butter and toast on each side for about a minute each. Repeat with each batch, adding more butter and herbs as necessary.

Season with salt and pepper to taste, and serve immediately with a drizzle of the butter sauce and a few of the crisped sage leaves scattered on top.

Cook's Note: These same gnocchi can also be served with other kinds of
pasta sauce such as marinara.
0

Kitchen Tip: Homemade Almond Paste

A few readers have e-mailed to say that they can't find almond paste where they live and have asked for alternatives. I'm going to share a really simple recipe showing you how to make homemade almond paste. The ingredients are almonds, sugar, egg whites, and vanilla, so you should all be able to make this easily at home.

This homemade almond paste can be used in my recipe for Italian Rainbow Cookie Cake, as a filling for danish or cakes, or for any other recipe that calls for almond paste. (Note that this is different than marzipan.)


****
New to Always Order Dessert? Consider subscribing to my RSS feed, follow me on Twitter, or sign up to receive my once-a-week e-mail updates by filling in your address in the box on the right. And if you ever need any entertaining or cooking advice, please don't hesitate to e-mail me.


Homemade Almond Paste


Ingredients
3 cups blanched almonds
3 cups confectioners (powdered) sugar
2 large egg whites, room temperature
1/2 teaspoon vanilla extract
1 tablespoon pure almond extract
1/2 teaspoon kosher salt

To Make:

Pour almonds into the food processor and process until finely ground.

Add the confectioner's sugar, egg whites, vanilla extract, almond extract, and salt and continue to blend until smooth and well combined. Use paste immediately, or place in a an air-tight container and store in the refrigerator for up to 2 weeks.
1

Homemade Pecan Milk


I am so impatient. Really. I have the hardest time making things that actually require me to start the day ahead. Mostly because I only realize this right at that moment when I'm going to start my baking (it's usually baking) and read that the first step requires something to sit or soak or proof or whatever overnight.

Overnight?! No way! Because when I bake it's because I want cake or bread now, or at least 2 or 3 hours from now, but definitely not tomorrow.

This is why I never make sourdough, and why I shamelessly dropped out of the Bread Baker's Apprentice challenge before the first week even finished. Forget proofing, I'm more than happy with challah, which everybody knows is Jewish for "The World's Most Perfect and Delicious Bread," and which I (and you too!) can make, start-to-finish, in less time than it takes me to watch Forrest Gump for the 87th time on AMC.

And yet, despite all these truths, I'm about to share with you a recipe that you won't be able to taste until tomorrow. Or at least until very, very late tonight. I know. I'm awful, but read on...


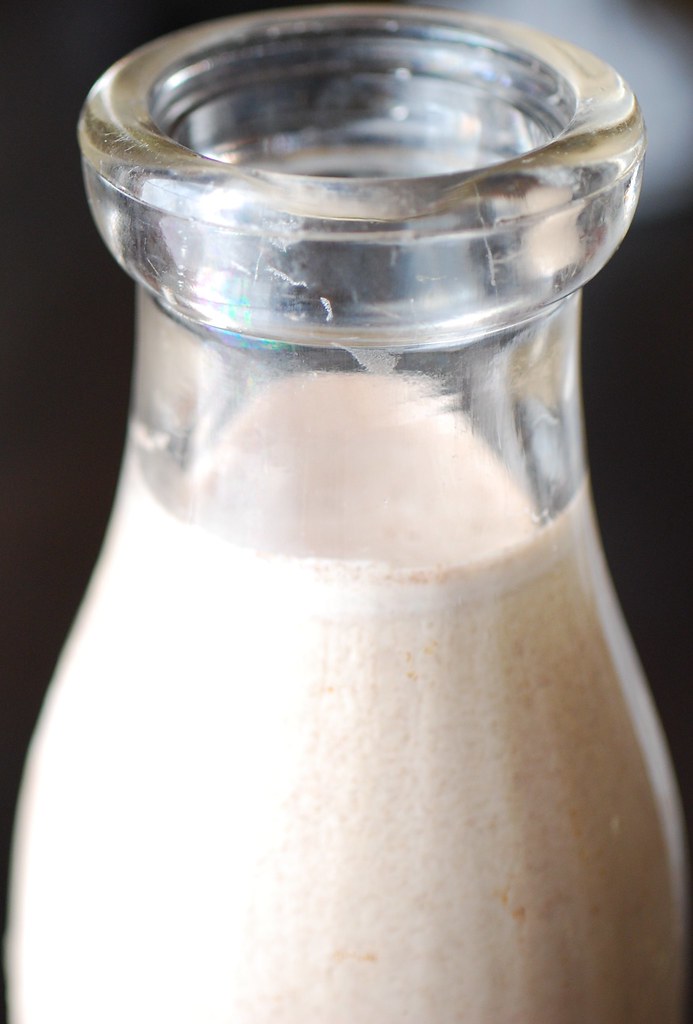
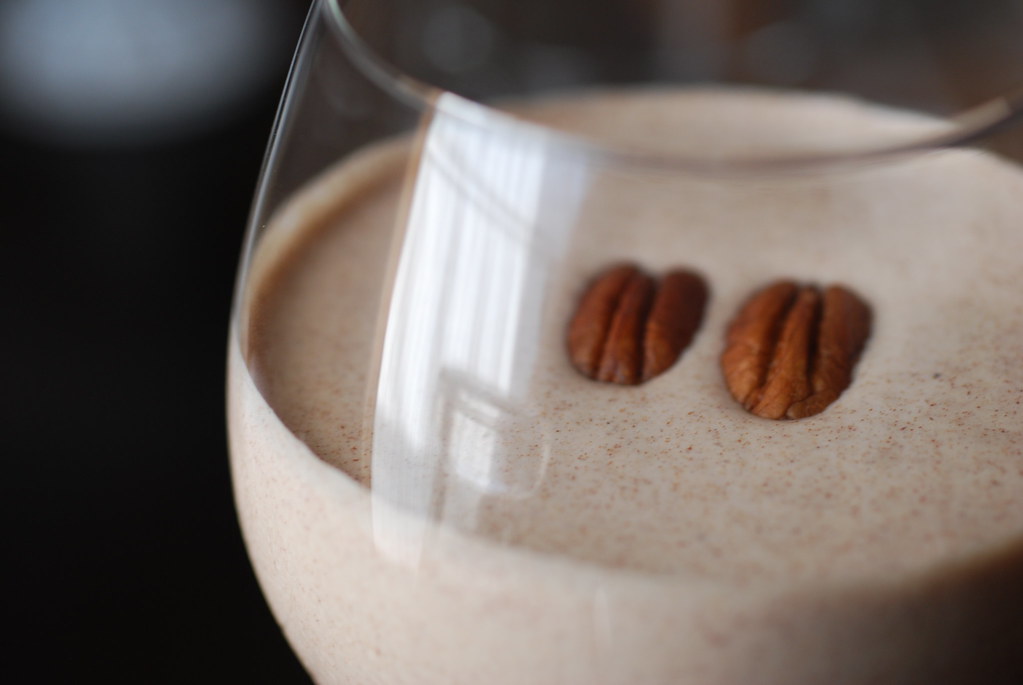
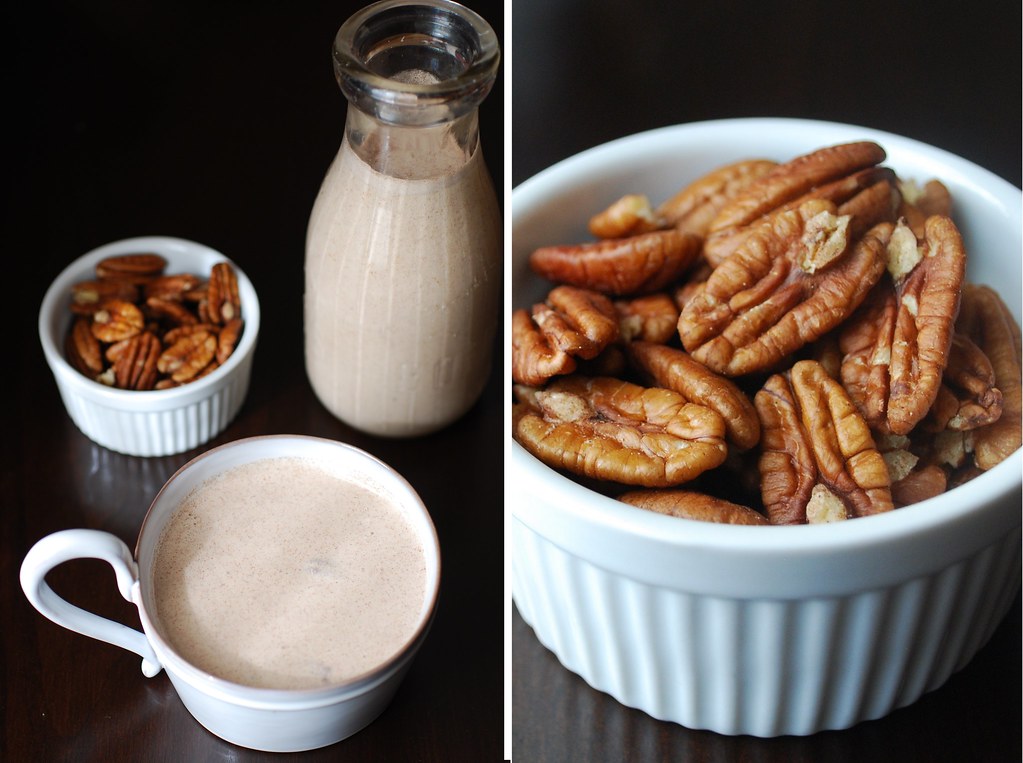
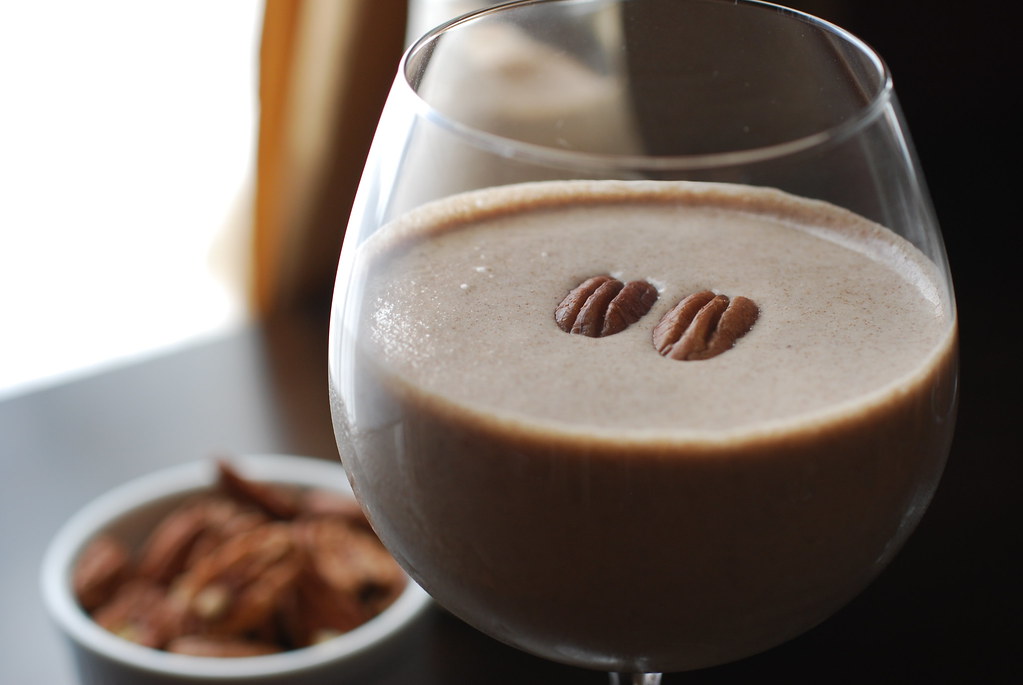
So the recipe is for homemade Pecan Milk, which is a dairy-free "milk" similar to almond or rice milk, but better. Better because it's lusciously creamy and tastes kind of like an amazing nutty milkshake, except that it's actually healthy. According to ILovePecans.org (that's an actual website although I suspect it *might* be a little biased), pecans contain more than 19 vitamins and minerals -- including vitamin A, vitamin E, folic acid, calcium, magnesium, phosphorus, potassium, several B vitamins and zinc. They're also a great source of fiber, and have been shown to control weight and possibly even prevent heart attacks.

So basically here I'm giving you a recipe for life-granting elixir. A life-granting elixir that tastes like a milkshake. Aren't I awesome?

You can drink pecan milk (aka life-granting elixir) straight, over ice, or even in your coffee in place of regular milk or soy milk. Pour it over your cereal. Warm it up and drink a big mug of it while sitting on your bed wearing pajamas and listening to your Kindle read you a bed-time story in her sexy robotic Kindle voice. It's the future, kids. And in the future we have talking paper and milk made out of nuts. And pajamas. It's like the Jetsons.


So the only problem that I see is trying to figure out what to do with the eight hours you have to let the nuts soak. You probably already have plenty of things to do, but if no, here are a few suggestions:

First, you should make this perfect for Fall Pumpkin Spice Challah.

That only took three hours, so now you should make this Vanilla Bean Challah so that you don't have to share the pumpkin one.

It's now been six hours and you're probably craving a little protein, so why not make yourself a bowl of this Pumpkin Chili.

And now it's time for the milkshake.

Oh and by the way, this recipe also works fantastically with cashews or, if you love luxury and want to lavishly celebrate the end of the recession, macadamia nuts. (Gasp!)

It's the future, kids. Enjoy it.


Pecan Milk


1 1/4 cups raw or roasted pecans (unsalted)
4 cups filtered or spring water
1/4 cup raw honey (can substitute maple syrup)
1/3 cup coconut milk
1 teaspoon ground cinnamon
1/4 teaspoon freshly grated nutmeg
1/2 teaspoon celtic sea salt (or Kosher salt)
Additional honey or sugar for sweetening.

1.)Combine the pecans, salt, and water in an air-tight container. Seal and leave to soak in the refrigerator for at least 8 hours or overnight.

2.) Pour the soaked pecans and the water mixture into a blender (note that the water will have turned slightly golden from the nuts). Add the honey, coconut milk, cinnamon, and nutmeg. Process on high for two minutes or until the mixture is well combined and smooth. Sweeten to taste and store in the refrigerator. This will last one week refrigerated in an air-tight container.

Note: If you'd like a smoother beverage, pour the pecan milk through a sieve lined with cheesecloth.


19

Fresh Basil Pesto Agnolotti (Ravioli)


A few months ago, I read a wonderful book called The Lost Ravioli Recipes of Hoboken. It's the story of a woman--a historian--who sets about tracking down the long-lost ravioli recipes her relatives once made in Italy. The story weaves food history with memoir and recipes as she bounces back and forth between Italy and New Jersey, past and present.

What stayed with me most is a wonderful scene where the author spends a long day pouring through ancient cookbooks in the library stacks. She's desperately trying to figure out why it is that the women in her family always stuffed the ravioli with raw meat instead of cooked, the way it is traditionally done in Italian homes. She searches and searches for a reason and in doing so realizes that every culture and tradition has its own version of ravioli and that each kind fed off of each other.

She learns, for example, that the varenyky and pelmeni of Eastern Europe originated in China and were brought West by the Mongols into Siberia from which they gradually spread throughout Russia and Eastern Europe. The kreplach served in Jewish homes during the High Holidays is said to have originated in the ravioli introduced to Germany by Ashkenazi Jews who arrived there after having been expelled from Venice in the 14th century. She realized the similarities between her traditional family dish and the manti that is popular in Turkey, the shishbarak eaten in Lebanon, empanadas in Latin America, and even (unexpectedly) sandwiches (meat and/or cheese layered within slices of dough!).


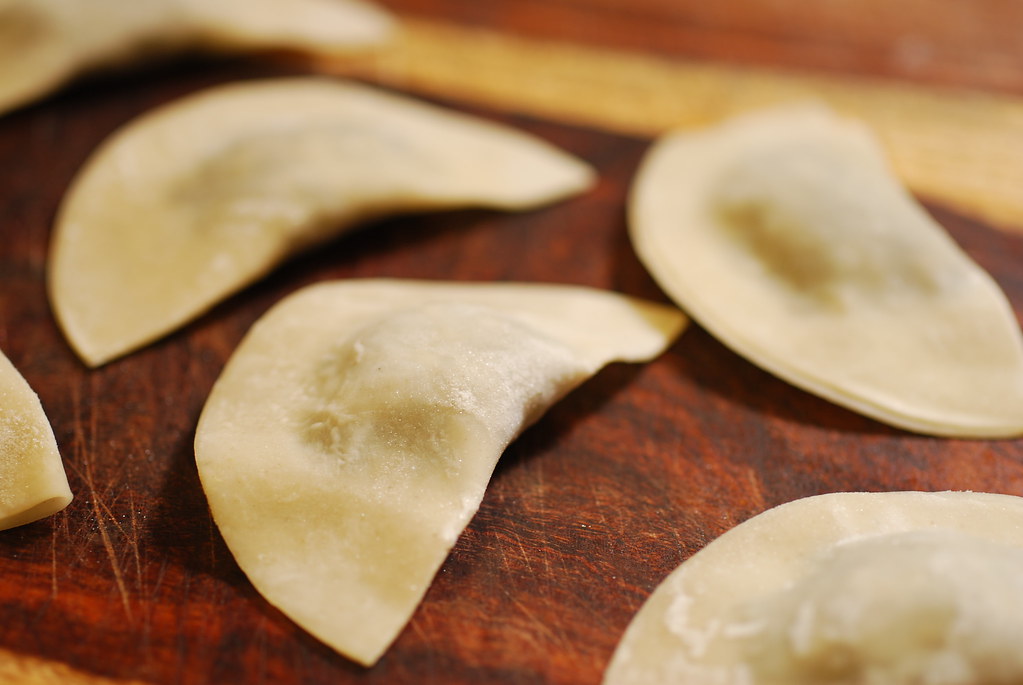
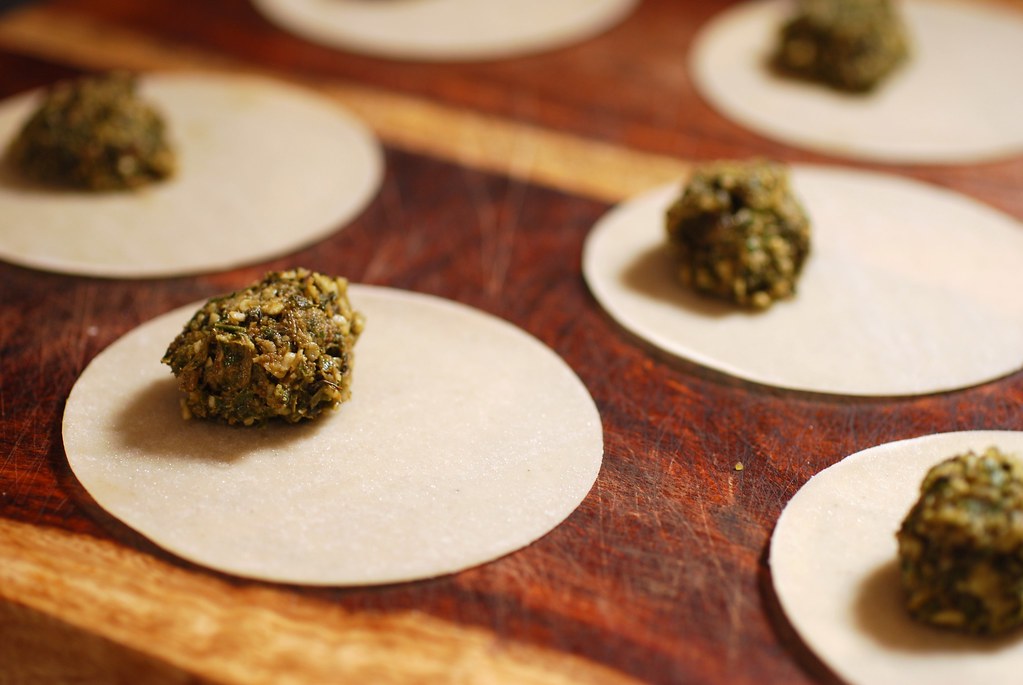
I thought about those connections again recently when I stood in my kitchen rolling little balls of chilled pesto genovese and tucking them into premade Gyoza wrappers. This method is an easy and increasingly popular way to make homemade ravioli without the laborious (albeit incredibly satisfying) work of rolling out pasta dough from scratch. It is also a pretty tangible example of the way that cultures meld seamlessly in the kitchen (sealed with a wet fingertip dipped in starch).

The recipe itself is a simple one that belies the history-laden centuries that precede it. Simply a basic pesto of basil crushed with olive oil, garlic, hard cheese, salt, and almonds (I was out of pine nuts) tossed into the food processor or blender or (as I suggested to an incredulous coworker this afternoon) even roughly chopped by hand with the rapid rock of a mezzaluna. Rolled into little balls in the palm of my hand and then placed carefully on one half of the packaged rounds (or squares; won ton wrappers work too). A little finger bowl of water is all the glue necessary to bind the halves together forming neat half-moon shapes.


I should note that this technique actually produces a pasta shape called Agnolotti, which means "priest caps" because of the way the folded over half-moon shape mirrors the little curved hats priests once wore. It's now come to refer to any kind of stuffed pasta that is folded over from one piece of pasta, instead of two pieces layered on top of each other.

After a quick boil in salted water, the Agnolotti come out whispery light and translucent. A drizzle of olive oil or a quick shave of Pecorino and the dish is complete (the sauce, after all, is inside).


This pesto recipe can be easily modified and multiplied as necessary. Try adding roasted red peppers or anchovies. Swap in any variety of nut. And don't even feel restrained by the basil. I'm actually toying with a version made with a Thai-style version made with cilantro, ginger, and peanuts. But that will have to wait for another afternoon.


Fresh Basil Pesto Agnolotti (Ravioli)

For the Pesto:

1 large bunch of basil leaves, washed and patted dry with a towel
3-4 cloves of garlic
1/2 cup raw pine nuts (or almonds, walnuts, etc.)
3/4 hard cheese such as Parmigiano-Reggiano or Pecorino Roman, coursely grated
1/4 cup extra-virgin olive oil (plus more if necessary)
1 teaspoon of lemon juice (optional)

Combine all the ingredients except for the olive oil in your food processor with the chopping blade attached. Pulse while gently drizzling in the olive oil. You want to finely chop all the ingredients without pureeing them. Once it is ready, taste and add salt if necessary. Pour into an air-tight jar or container and store in the refrigerator or freezer.

Note: The lemon juice is optional, but it will help keep the pesto green if it is not all going to be used immediately.

For the agnolotti:

1 package (about 50) Gyoza wrappers
1 cup warm water


To make:

Spread the Gyoza wrappers on a dry and flat surface (make sure it is dry as any moisture will combine with the starch on the wrappers causing them to stick).

Use a teaspoon to measure out a generous rounded portion of pesto into your hand. Roll gently into a ball and place on one half of the wrapper. Work in batches and fill 5 at a time, then use your fingertip dipped in the warm water to brush the outside of each wrapper. Bring the empty side over the filling and pinch shut, making sure to push out from the filling towards the edge in order to remove all the air. This will keep the dumplings shut while boiling. Repeat with remaining wrappers and pesto.

To cook, bring a large pot of salted water to a rapid boil. Add the agnolotti in batches (cook no more than 15 at a time or they'll stick to each other) and let cook for 4-6 minutes or until they rise to the top and look translucent. Remove with a slotted spoon and serve immediately topped with olive oil and grated cheese.

Cook's Note: the agnolotti can be prepared and sealed then frozen to be cooked at a later date. No need to thaw before cooking, just leave them in a minute or two longer.


8
Back to Top