Tuna, Parsley & Radish Salad


Sometimes I think I'm at my most creative the week before vacation. It's one of the few times when I diligently take stock of everything that I have in the refrigerator and pantry, and think of ways to use it all before we leave. The rush is not to use the things before they wilt and die, but rather to use everything period. I like to leave the fridge nearly clear so that there is no risk of anything going to waste in our absence, and so that we can start fresh upon our return.

A few days ago, I was thumbing through the March issue of Real Simple magazine on the train home from work when I came across a nice looking tuna salad billed as the "brown-bag lunch of the month." The ingredients called for radishes, celery, parsley, and some seasonings; all ingredients which are usually rolling around my fridge begging to be used. I made a mental note to remember the combination of ingredients.

This morning on Day 6 of our thwarted vacation (we were supposed to have left for Puerto Rico last Wednesday but the snow had other plans), I woke up hungry. We are finally (God-willing) getting on the plane tonight, so the fridge is really down to the bare bones

"I'm going to make some food now," I said to Eugene as I rolled out of bed. Pulling out a few cans of tuna, a handful of radishes, and one huge bunch of parsley, I got to work. Though the original recipe only called for 1/4 cup of parsley, I, inspired by the wonderfully fresh and nutty tabbouleh salad we had at Ilili the other day, decided to finely mince the entire bunch and use it all (stems too!). I think parsley is all-too-often relegated to the role of garnish when it really is wonderful enough to stand alone. (Anyone who loves chimichurri as much as I do will likely agree!)


I chopped the radish into little matchsticks and diced a whole red onion. I used four 5oz cans of tuna that I rinsed with fresh water first (if you don't like the "fishy" smell of canned tuna, that's a great way to eliminate it before using in a recipe. I zested and juiced an entire lemon, drizzled in some olive oil, and topped it all off with a shower of freshly cracked black pepper and sea salt. I skipped celery because I didn't have any, but I did add a heaping teaspoon of dried oregano.

The finished salad is beautiful, with lots of green and gorgeous hints of red from the radish. I served it with toasted slices of whole wheat and pumpernickel bread and a little ramekin of mayonnaise on the side for spreading on the bread. I love the flavor of mayonnaise with my tuna, but I didn't want one of those heavy tuna salads we're all so accustomed to eating.

This salad keeps well overnight, so--just like Real Simple suggested--it's a great one to try if you're looking for a healthy lunch option the next day. My recipe below makes about two to four servings, depending on how much you usually eat. Eugene, left to his own devices, would probably eat the entire bowl himself. And then ask for more.


Speaking of lunch, I've recently become quite smitten with Elizabeth Bard's new book, Lunch in Paris (a love story! with recipes!). I devoured the book in two days and have been recommending it to everyone. I absolutely loved her writing and was actually sad when it ended. Those of you who loved Molly's A Homemade Life or Kim Sunee's Trail of Crumbs (another favorite!) should absolutely look out for it next time you're at the bookstore.

****
New to Always Order Dessert? Consider subscribing to my RSS feed, follow me on Twitter, or sign up to receive my once-a-week e-mail updates by filling in your address in the box on the right. And if you ever need any entertaining or cooking advice, please don't hesitate to e-mail me.

Tuna, Parsley, and Radish Salad
Serves 2-4 (inspired by a recipe in Real Simple, March 2010)

Four 5-ounce cans of tuna, drained and rinsed
12 small radishes, julienned (about 1 cup)
1 small red onion, diced (about a 1/2 cup)
1 bunch of parsley, minced entirely (including stems)
1 teaspoon dried oregano
zest and juice of 1 whole lemon
1/4 cup extra virgin olive oil
Sea Salt
Freshly Ground Black Pepper

1/4 cup mayonnaise, Toasted whole wheat or pumpernickel bread, for serving

In a large bowl, combine the drained tuna, julienned radishes, diced red onion, minced parsley, oregano, lemon zest, lemon juice, and olive oil.

Toss to combine. Season with sea salt and freshly cracked black pepper to taste.

Serve with toasted bread and mayonnaise on the side (mayonnaise can be spread on the bread or mixed into the salad by each individual if desired).

Can be refrigerated in an air-tight container for up to 24 hours.
12

On new dishes, spicy tea, and lazy cake


I'm a little bit in love with my new dishes. Whirly white and purposely unglazed on the outside, they're a dream to hold. I found the first plate on the clearance rack at Bed, Bath & Beyond for 3 dollars, and brought it home to use as a photo prop. For weeks I kept this one plate stacked on top of all my others, instinctively pulling it out whenever I was serving myself. The stacks and stacks of hand-painted brown plates I'd owned for ages went (mostly) undisturbed while I washed and rewashed my favorite plate.

And then on my birthday, I realized what I had to do. I turned my cherished plate over and I looked up the pattern (Mikasa "Swirl White"). The results popped up quickly and I was a little bit horrified to find that it was a much pricier set than I'd expected. After a few days of searching for the best deal, I fell upon a delicious sale that would cut the price of the plates down to about half. Still spendy, but I pounced and ordered myself a service for eight.


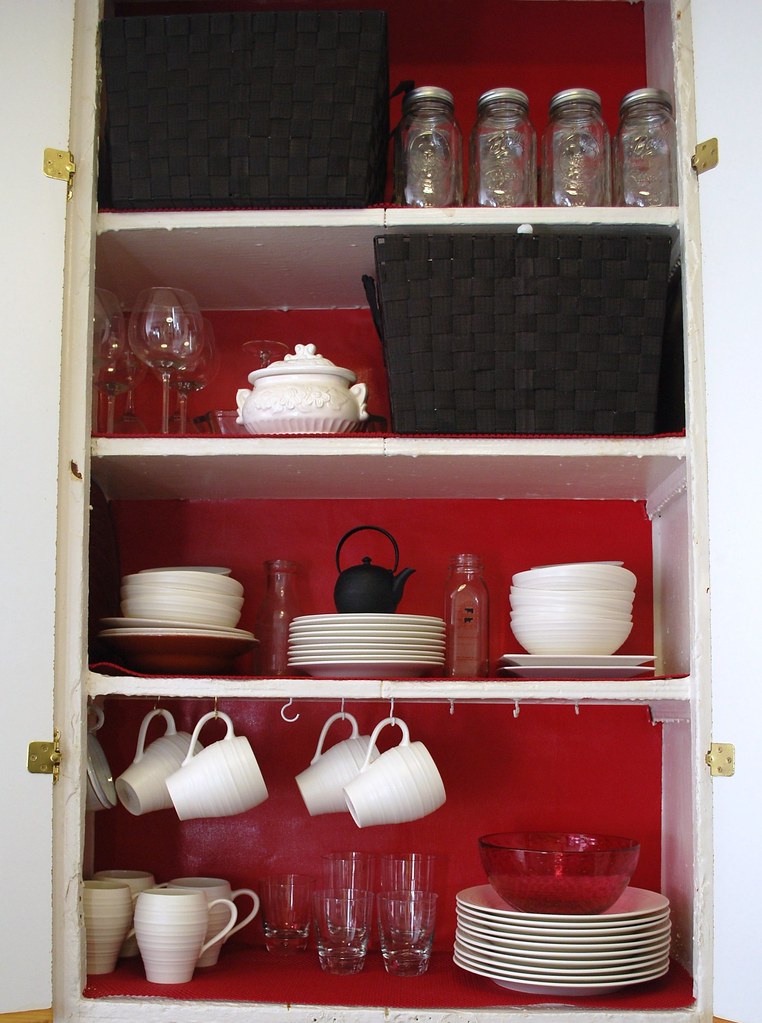
They arrived at my office a few days ago in eight matching navy blue boxes that Eugene helped me carry home Saturday morning. The afternoon was spent arranging the new plates and mugs and sweet little whirly bowls in my newly-lined red cabinets.

Because, why can't kitchen cabinets be pretty?

For years I was bored with the old bumpy white cabinets that had been painted and repainted in a dingy shade of blah. So I hunted around, and found some gorgeous faux-lizard skin paper in a brilliant glossy shade of red at only 5 dollars a sheet. I brought this home and cut it down to size, then affixed it to the backs of the cabinets using Elmer's spray adhesive and a credit card. Back at Bed Bath, I found a matching red grip liner paper to cover the bottoms of the cabinets and provide a protective soft cushion for my plates and glasses. A few more snips with my scissor and the cabinet was suddenly pretty as a schoolgirl in a frilly red dress.


My ultimate plan is to remove the cabinet doors so that the pretty red is permanently on display. Of course, open kitchen cabinets call for a bit of editing so I pulled out all my old dishes and mugs (I'm planning to either sell or donate to Housing Works), along with a few random plates and cups that I no longer want.

I bought two large woven totes in a lovely shade of espresso, and filled them with all the ramekins, jars, mini casserole dishes and small appliances that were cluttering up the cabinets. I placed one of these on each of the top two shelves, and then rearranged the remaining glasses and dishes from top to bottom in order of use (with the most-used plates and mugs at eye level, and the less used wine glasses, soup tureens, and canning jars up at step-stool height).


I recently had a bunch of prints made from some of my favorite food photographs (available for sale here, if you'd like to buy your own!) and decided to tuck a few of these in the cabinet behind the plates. I'd never thought to hang pictures inside my cabinets before, but once I did it, I was absolutely smitten and ran around the apartment trying to see where else I could hang a couple pictures.

(Eugene is going to be mightily surprised the next time he goes to grab a pair of a boxers...)


The final result is so pretty that Eugene keeps walking in on me leaning against the kitchen sink just staring up at the cabinet admiringly. When we get back from vacation next week, I'll pull out the drill and take the cabinet doors off, fill and sand the screw holes with wood filler, and paint over the whole thing. I also bought new floor tiles (black and white checked, of course) and our Super has agreed to lay them down for a very reasonable price. I can't wait for the finished results! (And don't worry because I will be sure to share!)

My love affair with these new mugs has left me looking for excuses to use them, and so I thought I'd share my new favorite excuse with you: a hot vanilla ginger infusion.


To make it, simply simmer about two inches of sliced fresh ginger, a half vanilla bean, and a few cardamom pods in 3 cups of water for a half hour. (You can add cinnamon sticks or orange peel or star anise to the ginger, if you prefer.) I then turn off the heat and let it cool to room temperature for about 15 minutes (you can let it go longer too; that's just the minimum so I can get a nice steep going). When I am ready to drink, I heat it up to a boil again quickly before straining and pouring into a mug. I sweeten it with a bit of sugar or honey or--if I'm feeling virtuous--Splenda, and then I add a splash of cream.

The end result is spicy and soothing; perfect if you have a cold (or are simply trying to warm up during one of these frigid afternoons.) I tend to stay away from caffeinated tea, but if you're a fan, I bet this would also be a lovely with a bag of English Breakfast added to the cup.


One tiny warning: this tea absolutely SCREAMS for a piece of cake.

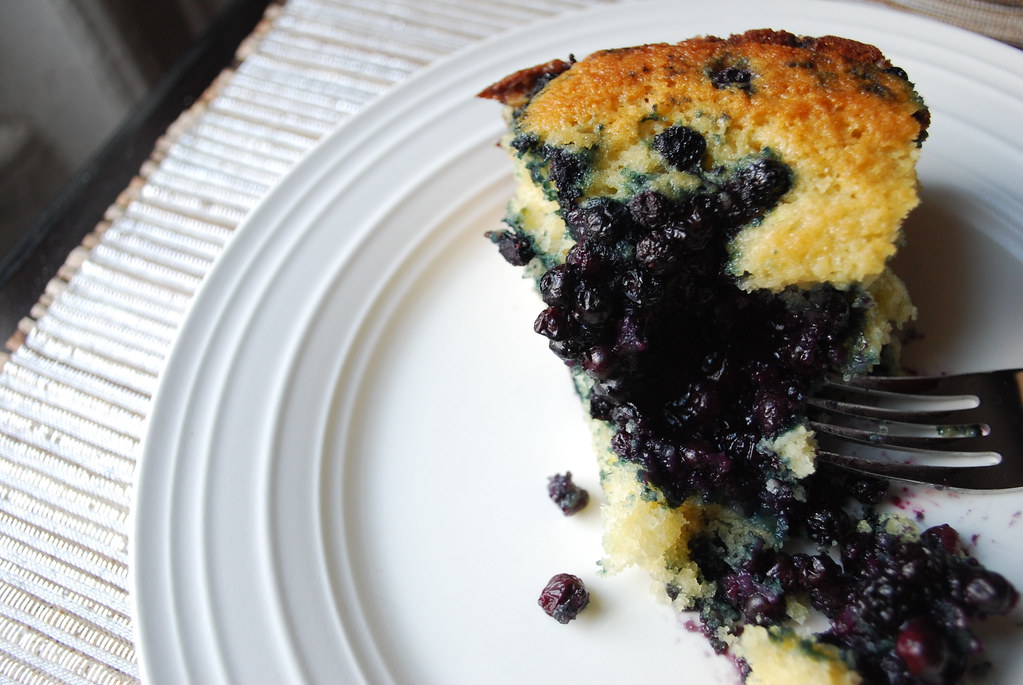
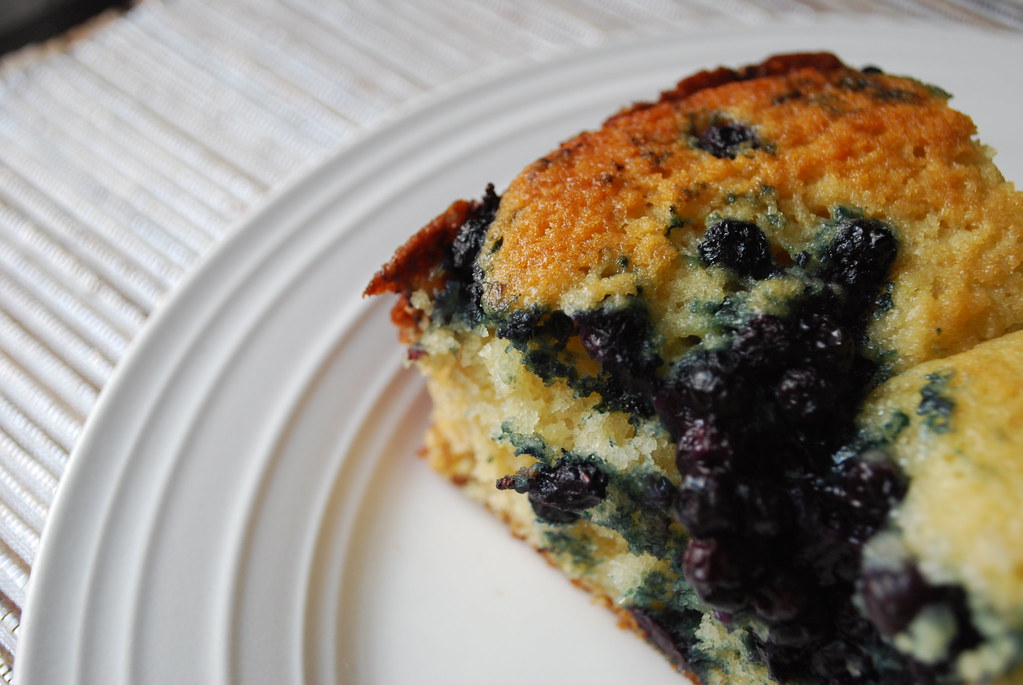
I didn't have any on hand yesterday, and so despite the fact that we were heading out for Valentine's Day dinner in just two hours, I soon found myself whipping up a lazy-easy blueberry buttermilk cake (using one bowl, one measuring cup, and more handfuls than called for of winter-friendly frozen wild blueberries). I pulled the cake out of the oven and was finishing my last bite of my first piece (I didn't even let it cool before cutting it!), before I realized this was the official first cake to be served on the new plate.

Quite a nice start, I'd say.


****
New to Always Order Dessert? Consider subscribing to my RSS feed, follow me on Twitter, or sign up to receive my once-a-week e-mail updates by filling in your address in the box on the right. And if you ever need any entertaining or cooking advice, please don't hesitate to e-mail me.
12

5 Quick & Easy Valentine's Day Desserts


Up until Tuesday night, I thought I was going to be spending this Valentine's Day reading trashy novels and sipping fruity cocktails by the luxurious pool at the Intercontinental Hotel in San Juan, Puerto Rico. And then it started to snow. And it snowed and snowed, and then...our flight was canceled. After a few days of trying to reschedule flights, it became glaringly apparent that we would be spending this week here in New York. Temporarily ignoring the half-packed suitcases crowding our living room floor, Eugene and I instead scrambled to make last-minute Valentine's Day dinner reservations. I love to be in the kitchen, but I'm sure you'll understand that after having spent the past six months looking forward to a week of having other people pamper and wait on me, I sure as HECK wasn't about to make dinner.

The best places that I would have loved to celebrate in were all booked, naturally, and while we considered taking a chance on a few places I'd never heard of, I finally told Eugene that I'd had my fill of disappointment this week and really didn't want to chance it. So we went for the sure thing: we made reservations at Ilili where I celebrated my birthday just a couple weeks ago. That meal was spectacular and so we decided to trust them with our Valentine's Day (and with my tender and seriously bruised expectations).

If, like me, your plans fell through this year. Or if you've simply been too busy to give it much thought. Here are five great ideas for luscious desserts that are absolutely perfect for sharing (and which all come together rather quickly and unfussy-ly).

And if it's just going to be you on Sunday night, I can wholeheartedly assure you that these desserts are also perfect for not sharing. (Trust me; before Eugene came around, it was just me and #3 for many many years.)

Have a sweet one!


1. Coconut Flour Brownies
Coconut flour replaces the traditional kind in this recipe for a moist and cake-like brownie. The hints of coconut are present in every bite, and are a perfect complement to the rich dark cocoa. Serve these a little warm, and paired with a generous scoop of ice cream for a perfect sweet ending (or beginning!).


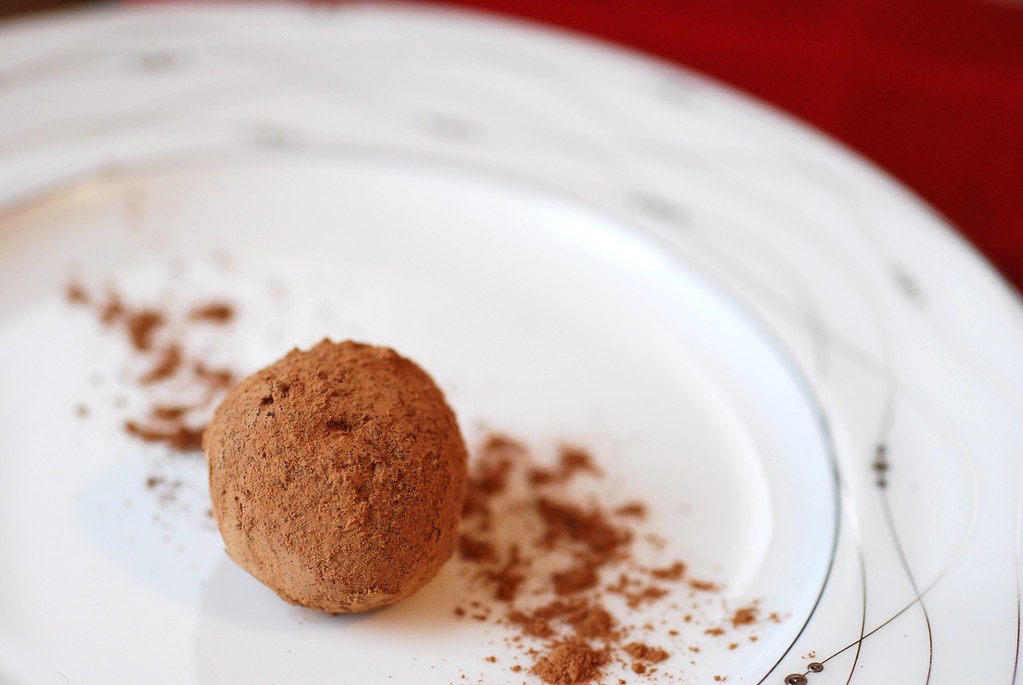
2. Cocoa Espresso Truffles
These luxe and creamy truffles are a cinch to make and can be prepared well in advance. Pile a few of them into a pretty bowl and curl up on the couch to share them after dinner, or bring the bowl to bed with you. These bite-sized treats are spike with just a hint of espresso so their is no chance of anyone drifting off to sleep too soon. Get the recipe.


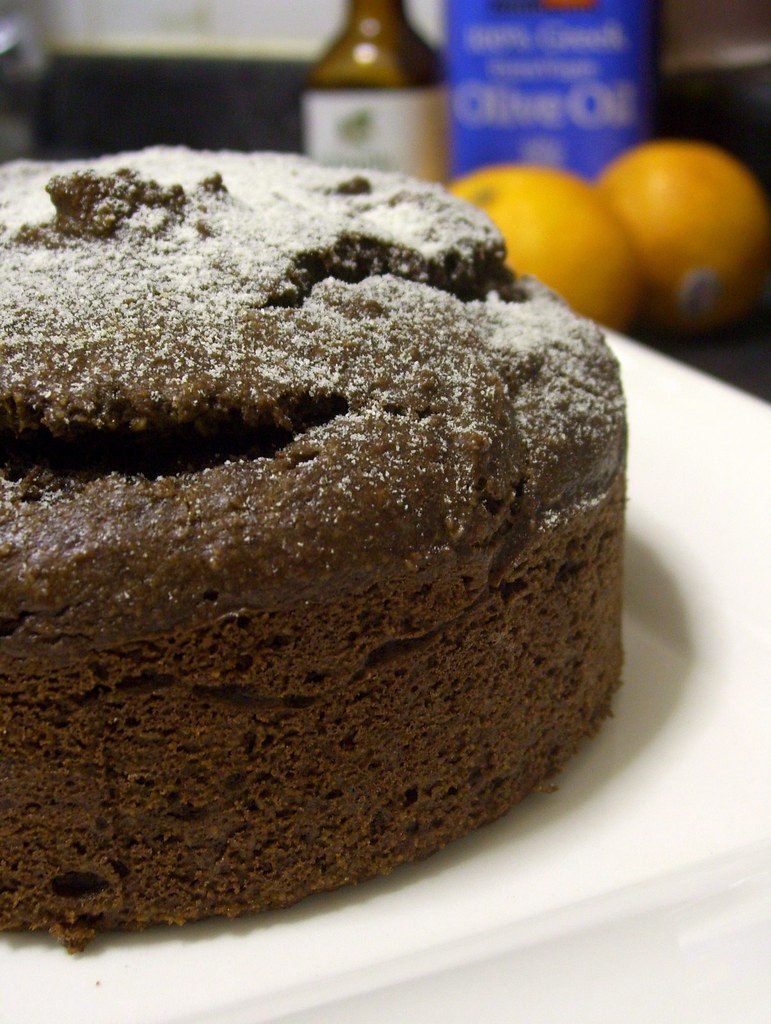
3. Flourless Chocolate Orange Almond Torte

This little cake is perfectly sized for sharing with that special someone. Scented with lusty hints of almond, olive oil, and fresh winter citrus, it's not your average flourless chocolate cake. And the bonus? If you're really in a hurry, you can combine all the ingredients and "bake" it in the microwave for a decadent dessert in just 5 minutes. You know, should you find yourself distracted with other things while getting the meal ready. Get the recipe.

4. Cherry Almond Frozen Yogurt
While this one does take a little bit more advance planning than the others (it needs time to freeze, after all), this cherry almond frozen yogurt can be made a few days in advance and scooped out whenever you're ready to serve. People tend to gravitate towards hot desserts during Valentine's, but sometimes I think it's nice to have a little something ready to cool things off. During the summer, I make this frozen yogurt with fresh sour cherries, but in the winter, frozen or jarred sour cherries will work just as nicely. Get the recipe.

5. Star Anise & Vanilla Bean Poached Pears
These plump little pears are absolutely gorgeous. Poached in a sultry combination of white wine, anise, and vanilla beans, they settle onto the plate in a soft and quivering little pool of flavor. I like to serve them with a bowl of dark chocolate ganache to drizzle with abandon. One pear is enough to share, or be greedy and demand your own. And make sure to bring an extra spoon for the chocolate. That in itself can be quite the adventure. Get the recipe.

6

Lebanese Milk Ice Cream (rosewater and orange blossom ice cream)


My birthday this year fell on a Thursday, which gave me the perfect excuse to arrange for bookend celebrations the weekend before and after. Last Sunday, wrapped in my vintage mink collar, I joined my parents and Eugene's for an early birthday dinner at Ilili, an opulent Lebanese restaurant in Murray Hill recommended to me by the fabulous Erika of The Pastry Chef at Home. Due to an Eastern European superstition observed strictly by Eugene's mother, we were careful to avoid any mention of the phrase "Happy Birthday," and instead focused on the parade of impeccable dishes that appeared on our table in a seemingly unending succession.

Since there were six of us, we each chose two mezze to share, plus an extra order of my personal favorite: fried kibbeh, those crisp little footballs of bulghur and seasoned lamb that I've craved like clockwork every few months since they were first introduced to me by an otherwise unmemorable date some six or seven years ago.

We passed the many dishes around the large round table with abandon, helping ourselves and then reaching out again for second and third bites between satisfied moans. The kibbeh were perfect, of course, but I also loved the spicy braised sausage, the crisp sheets of pastry topped with ground lamb and what I suspect were hints of cinnamon and allspice, and the fresh tabbouleh salad that I unashamedly helped myself to from Eugene's father's plate. There were marrow bones, too, and crisp nuggets of liver, but I couldn't really eat more than a tiny bite of each. Say what you will, but I freely admit that I don't have much of a tolerance for offal. My father is like me on this, but the rest of the party enjoyed them, while I happily focused on dipping freshly baked puffs of pita into a broth-rich bowl of Araq-steamed clams.

My main was a lamb burger so flavorful it nearly knocked my previous favorite burger--the pair of explosive pork and beef sliders at Fatty Crab--from its long-cemented top spot. Instead of wine, we ordered from the inventive cocktail menu. I fell in love with a sparkling passion fruit and cilantro-mint vodka concoction; Eugene stuck with St. Germaine, gin, and muddled-basil. The passion fruit cocktail, by the way, smelled just as good as it tasted. So good that I actually spent the first three minutes just sniffing it.


Dessert, which unbeknown to you has actually been my point all along (but really, isn't it usually?), was a bit of a complicated affair. See, the thing is that I arrived at the restaurant with a plan. I'd spent quite a bit of time researching the menu and had discovered that in the dessert section, they offered either a trio of sorbets or a trio of ice creams. The problem was that I wanted a combination of sorbet AND ice cream. Specifically, I wanted to try the much-lauded "milk" ice cream, a fragrant combination of rose water and orange blossom; the apricot ice cream, and the passion fruit sorbet (of course). I'd been planning to use my birthday as leverage to have the waiter agree to combining the two for me.

The only problem was that I forgot that it was Restaurant Week! And during Restaurant Week, they require that either everyone or no one order from the special menu. Personally, I hate Restaurant Week menus. I find them limiting and annoying, and I'd much rather spend a little more to get what I actually want than sticking to a reduced-price menu with restricted offerings. Ilili, to its credit, had a rather expansive Restaurant Week selection on offer (take note, OTHER places), but I still had to go off-menu to order the Kibbeh, and the dessert option unfortunately limited us to just ONE flavor of ice cream with no (gasp!) passion fruit sorbet option.

Fortunately, I worked it out. I explained to the waiter exactly what it was that I wanted--even revealing to him my aforementioned plan and the fact that it was my birthday, and he worked with me. He told me to order a regular dessert from the Restaurant Week menu, and told me that he would try to get the manager to buy me the special ice cream-sorbet concoction I wanted. In the end, it worked out even better than I imagined since I ended up with not just one dessert, but four. I got the "candy bar," a clever little brownie-caramel-cookie bar, my Lebanese apricot and milk ice creams, a bowl of fragrant honey-drenched dumplings, and my coveted passion fruit sorbet with a candle on top.

Now that, dear readers, is how we do birthdays here at Always Order Dessert.


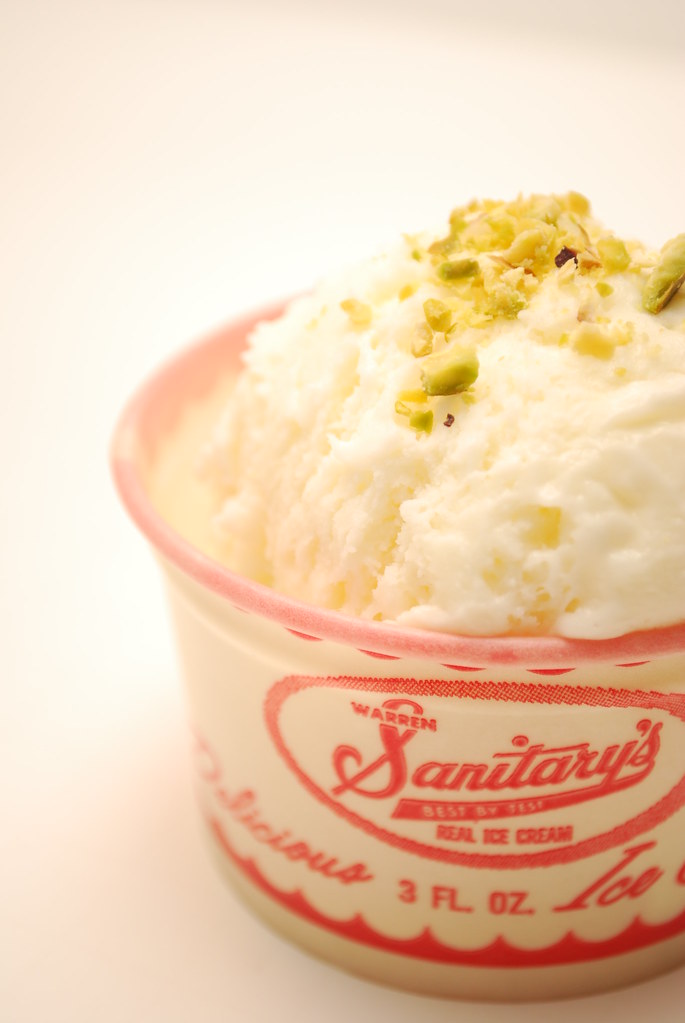
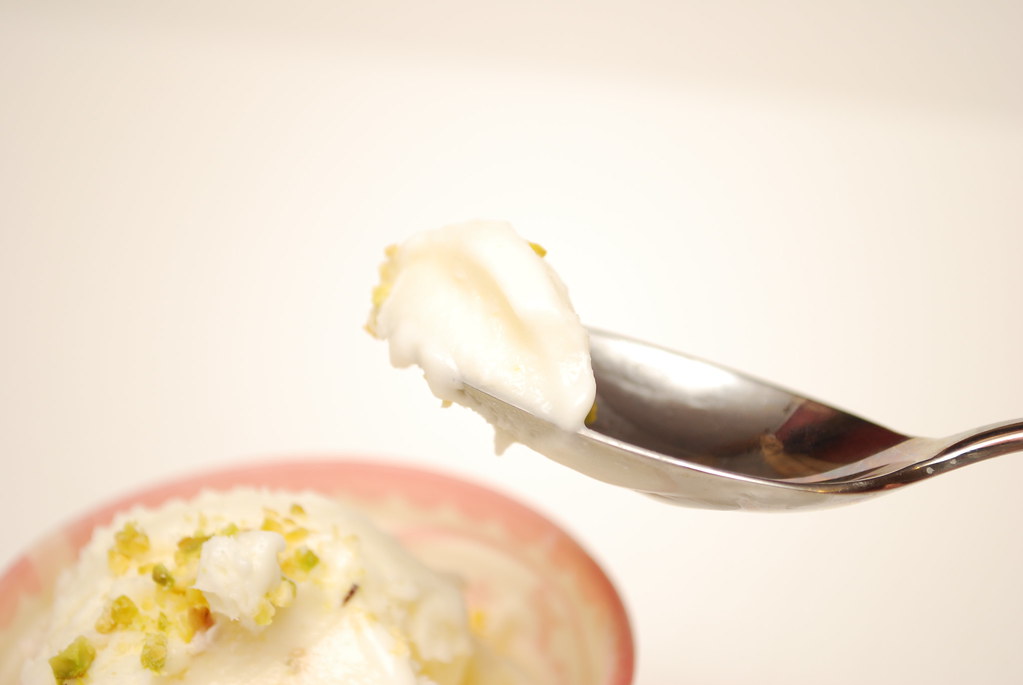
Everything was incredible, but what captured my imagination most was the fragrant milk ice cream. Arabic ice cream (or bouzat haleeb) is a much different affair than the rich custardy treats popular here in the US. Simultaneously light and creamy, the ice cream has a bit of an elastic quality because it's thickened with sahlab, an orchid tuber extract typical throughout the Middle East. Flavored with rose and orange blossom, the ice cream is floral without tasting soapy, and after that tiny scoop on Sunday night, I was determined to recreate the experience at home.

True sahleb is nearly impossible to find in the US. It only seems available in a sugary powdered drink form, and I read somewhere that it's actually illegal to export from Lebanon. Fortunately, readily available cornstarch is a decent substitute and though you won't get quite the same elastic quality, the rich mouth-feel will be very close. Mastic is much easier to fine (online, at least) but it's an optional ingredient. What you do need is a bottle each of rose water and orange blossom (or orange flower) water.

These are easily obtained in the Middle Eastern/Asian aisles of most well-stocked supermarkets or from Middle Eastern specialty grocers. Latin grocers should also carry them since Latin grandmothers tend to love to splash that water around babies and doorways to ward off evil spirits and such (ask for "Agua de Azahar" for orange blossom and "Agua de Rosa" for rose water). The bottles are rarely more than 1-3 dollars each and they last a long time since you never want to use more than a couple tablespoons in a recipe unless you're hoping to end up with a bowl full of cologne.

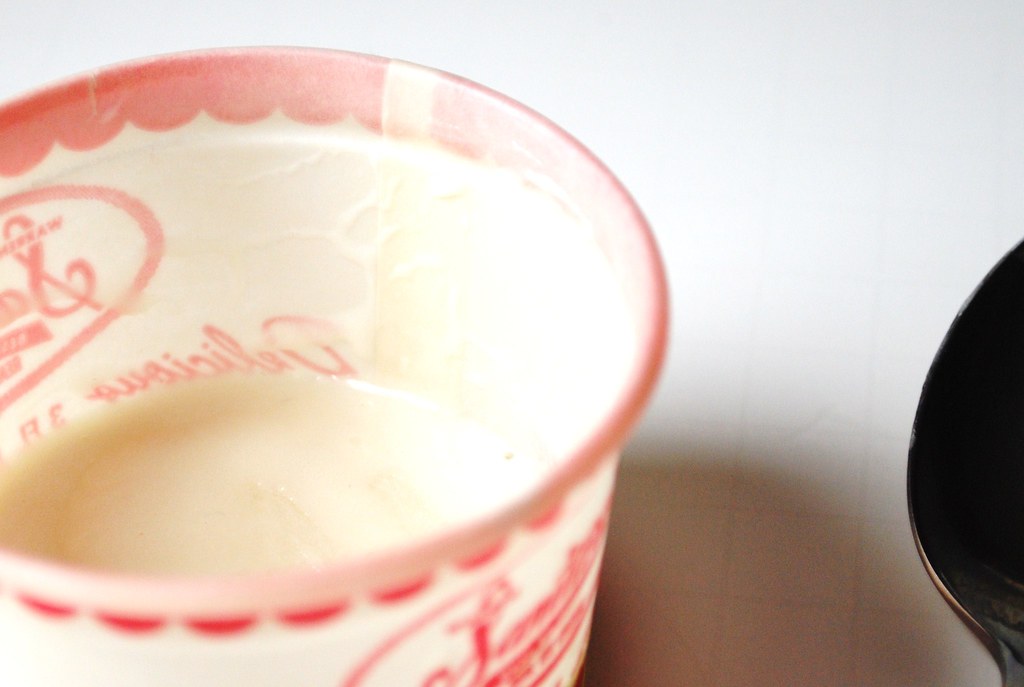
We ate at the restaurant on Sunday. I made this ice cream on Monday. And, I confess, I've been eating a scoop of it every single night since. The ice cream freezes beautifully and scoops easily. While you're shopping for ingredients, grab a bag of pistachios too. A few crushed and sprinkled on top will complete the dish. Serve it alone or with chocolate cake or as the dessert course in a middle eastern themed dinner party.

Any and every way, it's a showstopper.

Ilili
www.ililinyc.com
236 Fifth Avenue
New York, NY 10001
P: 212-683-2929


****
New to Always Order Dessert? Consider subscribing to my RSS feed, follow me on Twitter, or sign up to receive my once-a-week e-mail updates by filling in your address in the box on the right. And if you ever need any entertaining or cooking advice, please don't hesitate to e-mail me.


Lebanese Milk Ice Cream
This floral ice cream is flavored with rose and orange blossom waters, and has a creamy mouth feel unlike anything I've ever tasted. Thickened with cornstarch instead of eggs, it's a practically "foolproof" ice cream that freezes and serves beautifully.
Makes about 1.5 pints.

Ingredients
1 1/2 cups heavy cream
3 tablespoons cornstarch
1 1/2 cups whole milk
3/4 cup sugar
1.5 tablespoons orange blossom water
1.5 tablespoons rose water

Pistachios for garnish (optional)

1. Whisk together the cornstarch and cold heavy cream in a bowl until it's smooth and well-combined with no lumps. Set aside.

2. Combined the milk and sugar in a saucepan over medium heat, stirring occasionally until the sugar is full dissolved (about 2 minutes). Remove from the heat and gently pour in the heavy cream and cornstarch mixture, stirring to combine. Return the pan to the stove over medium heat and let cook, stirring constantly in one direction until the mixture thickens. Continue to let cook for an additional few minutes, tasting it occasionally until you can no longer detect the taste of cornstarch. Once the cornstarch is completely cooked and the mixture is thick enough to coat the back of a spoon, turn off the heat.

3. Add the tablespoon and a half of rose water and the tablespoon and a half of orange blossom water and stir in until well combined. Pour the mixture into a large bowl and press a piece of plastic wrap against the surface (this will help prevent a skin from forming on it while it cools). Chill in your refrigerator for 3-4 hours until completely cool (you can make this up to 24 hours in advance).

4. When ready to freeze, pour the mixture into your ice cream maker and process according to manufacturer's instructions. Once the ice cream has frozen to the consistency of soft-serve, pour into an air-tight and freezer proof container and freeze for at least 4 hours (again, overnight is also OK) before serving.

If desired, serve topped with a sprinkle of crushed pistachio. The ice cream will keep in a sealed container in your freezer for up to 2 weeks.
9

Chipotle Challah


I've made no secret of my love for challah bread. I first declared it passionately two Thanksgivings ago with my Pumpkin Spice Challah recipe, and then followed it up a few weeks later with an elegant Vanilla Bean & Honey twist on the original. Then last year I went on an international quest to bring you Bamboo Charcoal Challah.

Today, I've got another fun version: Chipotle Challah!

Unlike traditional challah, which tends to be quite sweet, this bread has a third less sugar so that the focus is really on the smoky and spicy flavors of the chipotle and smoked paprika. I wanted to make sure that heat really came through without being overwhelming so that it can be paired with various meats and cheeses as a sandwich. I think you'll be surprised by how much flavor is in its soft and buttery crumb.

I enjoyed it alone spread with a generous bit of good salted butter, but I'm already looking forward to a spicy grilled cheese sandwich filled with melted cheddar, tomato, and maybe even a crumble or two of crisped bacon. Yum! This would also be a perfect base for a savory French toast or to serve with a bowl of hearty chili.

The recipe for this challah comes together easily just like the traditional kind, with only the slight addition of pureed chipotles in adobo sauce and a bit of smoked paprika. Once baked, the bread comes out of the oven with a golden terracotta hue and the tiniest flecks of chiles scattered throughout. It's a beautiful bread, and one that will definitely be a favorite for those of you appreciate a little heat in your dishes.

Chipotle Challah Bread
Ingredients
7g active dry yeast (1 envelope)
4-5 cups white bread flour
1/4 cup white granulated sugar
2/3 cup warm water
¼ cup olive oil
2 large eggs beaten + 1 egg yolk for egg wash
1/3 cup chipotles in adobo sauce, pureed (about half a traditional sized can)
1 tablespoon smoked spanish paprika
1 teaspoon salt


Directions
Mix the yeast with 2/3 cup of the flour, the sugar, and the warm water. Whisk gently until well combined and leave in a warm (but not hot) spot to proof. In about 10-15 minutes, the mixture will look foamy and somewhat alive.

Pour this into the bowl of your electric mixer with the dough hook in place. Add the olive oil and eggs, and beat until well incorporated (about 1 minute). Add the chipotle/adobo puree and the smoked paprika, mix until combined. Add the salt and the remaining flour, 1 cup at a time until the dough starts to pull away from the sides of the bowl. Depending on a variety of factors, your dough might require a bit more flour than listed above. Add this ¼ cup at a time until the dough is springy, but not sticky. Knead with the hook (or remove to a floured surface and knead by hand) for about 5-10 minutes.

Roll the flour into a ball and place in a greased bowl. Turn the dough once to grease the top then cover with plastic wrap or a clean towel and leave in a warm spot to rise. I like to place it inside my (turned off) oven. (The heat from the pilot is just perfect to keep it going.) Let rise until doubled in bulk (about 1 hour to 1 hour and a half).

Poke the dough down (no need to actually “punch” it) and reshaped into a ball. Grease the bowl once again, turn, cover and repeat the rising process for about another hour.

Turn the dough out onto a lightly floured surface. Cut the dough in half. This will make two nicely sized loaves. Set one half aside and place the other half in front of you. Use a pastry cutter to split into six evenly sized pieces. Roll each of these pieces into a rope-like shape, making sure to taper the ends. Should be about 8-12 inches long.

Line the six ropes vertically in front of you and pinch all the ends together so you have what looks like a sea creature with six tentacles. Starting with the piece all the way to the right, pull it over the next two pieces, then under the third, and over the last two. Repeat this with each piece at the right until you can no longer continue braiding. It helps to chant to yourself “Over two, under one , over two.”

Pinch the ends and tuck under. Repeat with the second half of dough.

Prepare a large baking sheet (or two smaller ones) by lining with a sheet of parchment paper. Place the two loaves on the sheet allowing enough room on each side for them to rise. If necessary, use two baking sheets.

Beat one egg yolk with a tablespoon of olive oil and use a pastry brush to gently (gently!) brush over the braid. This will give it that lovely shine once baked. Top loosely with oiled or sprayed plastic wrap and let proof (rise) again for about 40 minutes or until doubled. About half-way through this rise, you might want to start preheating your oven to 350 degrees (but be sure to remove the braids first if you’re letting them rise in there!!)

Once risen, brush with another coat of egg wash. (Be sure to be even more gentle now as the braids are very delicate right now.) Bake in the 350 degree oven for about 40-45 minutes or until golden on top. To test for doneness, turn one of the loaves over and tap the bottom; if it sounds hollow, it's ready!

Let cool on wire racks before serving.
9
Back to Top