Winter Wheatberry Salad

I tried wheat berries for the first time back in February at my friend Bethany's bridal shower. There was a selection of different salads and sandwiches for the girls to choose from and intrigued by the nutty looking dish, I served myself a tiny scoop to taste.

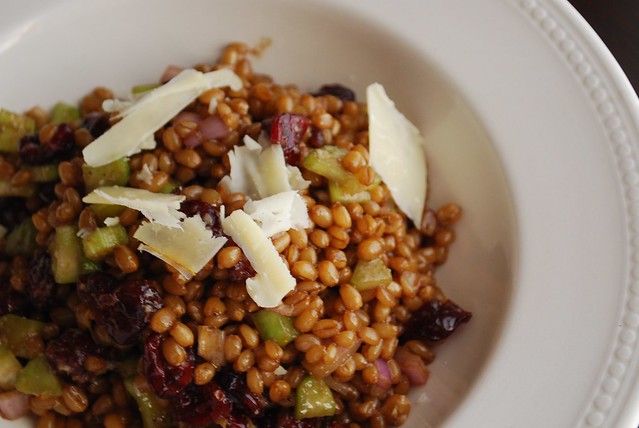
A few minutes later I found myself exclaiming, "What is this stuff?! This is so good!" The chewy, nutty little grains were wonderful and especially perfect paired with the sweetness of the dried fruit in the salad.

The following weekend, I headed to Whole Foods in search of wheat berries. I looked all over: in the grains, the bulk aisle, the pasta aisle, even the frozen section, but they were nowhere to be found. I repeated my search in vain a few times that year, always surprised that a place like Whole Foods would carry 5 different kinds of quinoa, but not a single wheat berry. I soon forgot about them and gave up my search.

It wasn't until a couple months ago, after seeing them served in my office cafeteria, that I became determined to find them again. I went to Whole Foods and searched package by package. I found nothing labled "Wheat Berries," but I did come across a bag of "Whole Grain Wheat" that looked incredibly familiar, though the word "berry" wasn't mentioned anywhere on the label. I turned it around and in the preparation instructions found that the grains were called "berries." "Aha!" I thought as I dropped the bag into my basket.

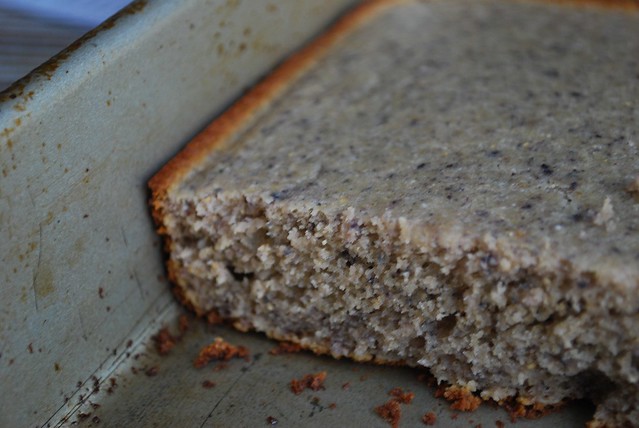
Wheat berries require a tiny bit of preparation before you can use them. The berries, which are essentially intact grain of wheat (the stuff you grind to make flour), are an incredible source of whole grain. They do, however, need to be cooked first. You can do this one of two ways: Either rinse and then combine with 3 cups of water for every cup of berries and let soak overnight or for at least 8 hours. Then drain, add a fresh 3 cups of water per cup of berries, and let simmer on low until most of the water is absorbed (about 20-30 minutes) OR you can just rinse and combine with 3 cups of salted water for every cup of berries and simmer for about an hour. It really depends on how much time you have.

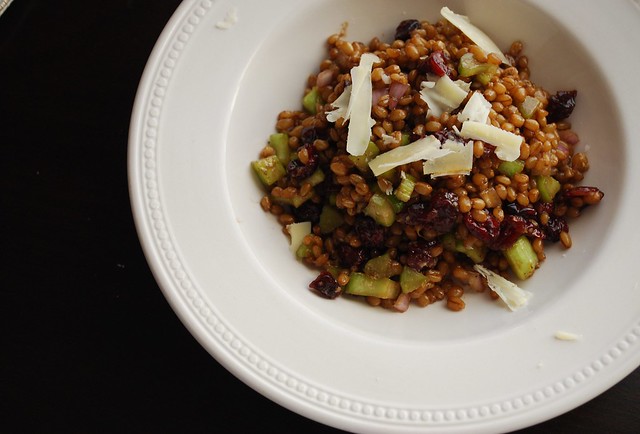
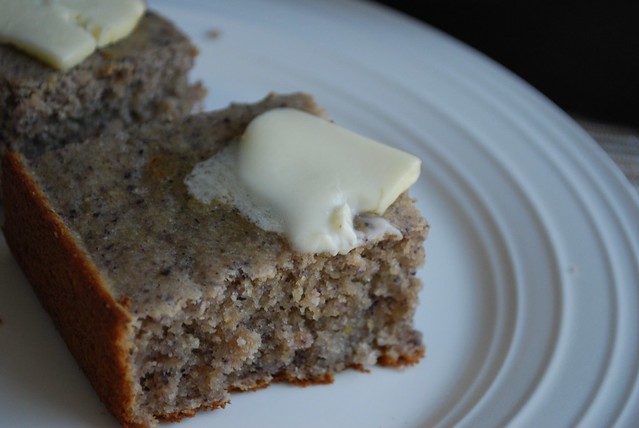
You can eat wheat berries hot or cold; I prefer them cold in salads, but they can also be used with creamy sauces for a “risotto” type dish. You can also add to soups. This salad, made with a sweet and sour dressing and a combination of crunchy vegetables, is one of my favorites. The cheese on top at the end is what makes it so be generous!


****
Love Always Order Dessert? Let's connect! Follow me on Twitter or Pinterest, become a fan on Facebook, or sign up to receive my once-a-week e-mail updates. And if you ever need any entertaining or cooking advice, please don't hesitate to e-mail me. Thanks for reading!   
 

Winter Wheat Berry Salad
About 8 servings
Ingredients
6 cups water
salt (I prefer Kosher, but whatever you have on hand is fine!)
2 cups winter wheat berries (also sold as "Whole Grain Wheat")
1/2 cup extra virgin olive oil
3 tablespoons good sweet balsamic vinegar (I love using berry flavored balsamic for this)
Grated zest and juice of 1 whole large lemon
2 stalks of celery, finely diced
3 large shallots, finely diced
1 cup dried cranberries (can also use dried cherries or diced dried apricots)
Kosher salt
Freshly ground black pepper
1/4 cup shaved hard sharp cheese, such as Robusto, aged Gouda, Pecorino, Asiago, or Parmegiano-Reggiano

To prepare:
Heat the 6 cups of water over high heat until boiling. Generously salt the water (like you would for making pasta) and add the wheat berries. Stir until they’re completely submerged and then lower the heat to medium low. Cook uncovered for about 45 minutes, or until the wheat berries are soft and have the texture of cooked brown rice or farro. Drain off any remaining water (much will be absorbed) and spread the wheat berries out on a large baking sheet to cool. Set aside.

In a large bowl, combine the olive oil, vinegar, lemon juice and zest. Whisk well. Add the cooled wheat berries on top and toss to coat completely. Stir in the diced celery, diced shallots, and cranberries. Season with salt and pepper to taste. Top with shaved cheese (or serve in individual bowls and garnish with cheese).

This keeps in an air-tight container in the refrigerator for about 1 week. (Best if you save the cheese until just before serving.)
0

Hello there!

It's been making me a bit sad how quiet it's been around here. My brain has officially been taken over by the wedding. I tried to resist and insist that I could soldier on as normal with my full-time job and planning the wedding and posting delicious recipes and posts and ideas right up until the big day, but that does not seem possible anymore. I even admit that I haven't been doing much creating in the kitchen lately.

I have been cooking, but it's mostly simple things. Things that don't need recipes or that just seem to fall together in the pan while my brain heads off elsewhere counting tables, chairs, guests, stamps, minutes, dollars. This wedding, I've learned, is what grade school math was preparing me for. It wasn't for college or for my job or for the grocery store checkout line. Nope, it was so that one day I could stand in the middle of the ribbon department at Kate's Paperie and accurately calculate how many yards of red satin ribbon I would need to create belly bands that wrap one and a quarter times around 87 four and a quarter inch wedding invitations...without a calculator. (Just under 26, if you're wondering.)

So I found out that I'm a math genius, but dinner has consequently become secondary: whole wheat spaghetti tossed with pesto leftover from a summer bounty of fresh basil, roasted sweet potatoes served with Greek yogurt, giant bowls of peppery arugula dressed in lemon juice topped with sardines straight from the can, Honeycrisp apples and peanut butter, loaves of Balthazar bread served along hunks of Truffle Tremor and salami. Oh and one glorious night when I arrived home late and totally exhausted to find that Eugene had stopped at Di Paolo's and bought me a perfectly round ball of burrata, lush and plump with cream and stracciatella. I sat right on the couch and ate it all; a perfect dinner.

Fortunately for you (and this blog), I do have new recipes. Recipes that I created a while ago, but never quite got around to posting. Recipes that were apparently waiting for this moment. Stay tuned; I won't leave you hungry for too long...

xoxo

Alejandra
0

Peanut Butter Coconut Truffles


The other afternoon, Eugene came home from work to find me measuring things into a bowl. "Oh good," he said as he stopped to give me a kiss. "I'm just so hungry." Then, upon taking a closer look at the contents of my bowl, he stopped.

"Chocolate?! This isn't dinner food!"

"No," I admitted. "This is dessert, but there's a meatloaf in the oven."

There were no complaints later when, after the meatloaf, Eugene helped himself to several spoonfuls of the truffle ganache as I molded the rest into little treats. I tucked the results into an air-tight container and popped them in the fridge for future snacking.

Made with creamy peanut butter and good bittersweet chocolate, these taste a bit like grown-up Reese's Peanut Butter Cups. I added a bit of coconut oil and rolled them around in (unsweetened) desiccated coconut to add another interesting layer of flavor, though you could certainly use regular butter and roll them around in chopped salted peanuts instead, or in confectioner’s sugar or cocoa (or a mix of all of these!)

If you're looking for an interesting hostess or Christmas gift, consider pairing these with my espresso cocoa truffles and presenting in a pretty gift box or cellophane bag tied with ribbon.


****
Loved this recipe? Here are three other homemade truffle recipes you might like:
 

And let's connect so you can find out the next time I post! Follow me on Twitter, Instagram, or Pinterest, become a fan on Facebook, or sign up to receive my once-a-week e-mail updates.

Thanks so much for reading!


Peanut Butter Coconut Truffles
Yields 2 dozen truffles

Ingredients
12oz bittersweet chocolate chips
1/2 cup creamy peanut butter
2 tablespoons coconut oil
1 cup heavy cream
1/2 teaspoon kosher salt
1 teaspoon vanilla extract
1 cup shredded coconut

Directions
Combine chocolate chips, peanut butter, and coconut oil in a large bowl and mix well. (It will be lumpy.) Set aside.

In a small saucepan, combine heavy cream and salt. Set over low heat and bring just to a boil. Immediately remove from heat, stir in vanilla, and pour over the chocolate and peanut butter mixture.

Use a whisk or fork to stir until the chocolate and peanut butter is melted into a smooth thick ganache (chocolate sauce). Let the ganache cool in the bowl on a counter overnight or for 3-5 hours--this will depend on the weather. (Do not refrigerate--letting it cool slowly is important.)

Once it's firm to the touch, use a cookie scoop or tablespoon to scoop out balls of the ganache. Roll in your hand then drop into the shredded coconut and roll to coat. Place on a parchment lined tray or plate and repeat with rest. Chill one hour before serving. Store in the refrigerator or an air-tight container for up to 2 weeks. Can also be frozen.

0

Kitchen Tip: 5 Ways to Keep Your Cakes from Sinking

I occasionally get emails from readers asking me why their cake sank in the middle when baking. They always say something along the lines of: "I followed the recipe perfectly, but it still sank. What did I do?!"

While it's impossible for me to know exactly what happened in any specific occasion without my actually being there (Not even I'm not THAT awesome ;), these are the top 5 things you should look out for to keep your cake from sinking the next time you bake:

1. Old Baking Powder -- Baking powder may only account for a tiny percentage of your entire cake ingredients, but it can ruin the whole thing if you're not careful! Remember that baking powder only stays fresh for about 6 months to a year, so date them when you buy them, and toss and replace any containers that have been hanging around too long.

Not sure if yours is still good? Take 5 seconds to test it before you start baking by placing a teaspoon of baking powder in about a 1/2 cup of hot water. If still good, it should start to bubble rapidly. If nothing (or barely nothing) happens, it's time to head to the store.

2. Too Much Leavening
-- As counter-intuitive as it might sound, adding too much baking powder, baking soda, or yeast to a cake will cause it to sink as the amount of air that is created within the cake will be more than the structure can support and the whole thing will come crashing down.

Never add additional baking powder or other leaveners to self-raising flour or cake mixes (they already have it mixed in), and always be sure to read a recipe clearly and measure carefully.

When in doubt, remember that the average ratio for baking powder to flour is 1 to 1.5 teaspoons per cup of AP flour; so if you read a recipe that calls for something way above that, it's probably an error.

0

Sweet Blue Cornbread

I realize I'll probably be offending some people by posting this, but here goes anyway:

I like my cornbread sweet.

And I don't just mean "hint of sweet,"; I mean full-on cake sweet kind of sweet. Preferably served warm for breakfast, with a generous slice of cold salty sweet cream butter set right on top. What can I say? I grew up in New Jersey!

And I really do blame Jersey for my sweet Northern cornbread love. There is a little restaurant that my family and I always used to go to after church on Sundays. It's a tiny place with a big menu featuring big dishes.

Literally. I'm talking six-egg omelettes and bigger-than-the-plate-sized pancakes and about a quart of hash browns per person. Totally ridiculous portion sizes that invariably came home with us in a doggie bag to be snacked on for what felt like weeks, but the most memorable thing...my most favorite thing about this place was the equally generous basket of warm cornbread they'd serve as soon as you sat down.

Piping hot golden squares of cornbread in both plain and chocolate chip, so cakey-soft and so cakey-sweet and so cakey-perfect after having woken up late and skipped breakfast and sat through service with a rumbly tummy. I'd tear my way through that entire basket before even thinking about glancing at my menu--much to the chagrin of my father who then kept having to ask the waitress for "one more minute" before we could finally order.

It's been a few years since we've been back to that place (though I should probably get my dad to take us there one of these days as Eugene is quite the pancake fan and now I'm not going to be able to think about anything else), but every now and then I find myself craving some of that soft, sweet cornbread. Soon after first tasting it there, I started experimenting at home, making batch after batch of cornbread until I got it right.

The other night, while making a pot of chili and wondering what to serve along with it, I decided to give it a shot. I broke out my old high school recipe and dug through the pantry only to find a bag of blue cornmeal instead of the yellow. "This'll work!" I thought, and got to mixing.

The results were lovely! Soft, moist, and sweet, with just a hint of crust along the edges. The blue cornmeal added a lovely texture and beautiful color (just look at the specs of blue!). Plus, there is just something about blue cornmeal that makes it seem healthier. (Even when slathered in butter and sugar!) I served it hot along with the chili that night, and then heated the leftovers in the oven the next morning for breakfast. There was a square or two left on the third day and those came to work with me to enjoy with my morning tea, surprisingly still lovely and moist.

In addition to the blue cornmeal, I used whole wheat pastry flour  in this recipe. It's one of my favorites, and I highly recommend it if you haven't tried it yet; you won't be able to tell the difference from the all-purpose flour, but it's still a bit healthier. That said, you can definitely just use regular all-purpose!

I also used turbinado sugar, with its natural honey-like undertones for a bit of richer sweetness, plus an additional teaspoon of honey. You can also just sub regular white sugar, if you prefer.

I hope you enjoy, and for those of you who just can't wrap your heads around the idea of sweet cornbread, I suggest you just scratch off the "bread" and change it to "cake" before proceeding.


****
Loved this recipe? Here are three other cookie recipes you might like:
 
And let's connect so you can find out the next time I post! Follow me on Twitter, Instagram, or Pinterest, become a fan on Facebook, or sign up to receive my once-a-week e-mail updates.

Thanks so much for reading!


Sweet Blue Cornbread
Makes about 9 servings

Ingredients
1 cup finely ground blue cornmeal 
1 cup whole wheat pastry flour (you can sub all-purpose flour; do NOT use regular whole wheat)
3/4 cup turbinado sugar
2 teaspoons baking powder
1 teaspoon baking soda
1 teaspoon Kosher salt
1 egg, slightly beaten
1 teaspoon honey
1 cup full-fat Greek yogurt or buttermilk
1 teaspoon vanilla extract
1/3 cup vegetable oil


Preheat your oven to 400 degrees and position the rack right in the center. Butter and flour an 8" x 2" square baking pan and set aside.

In a large bowl, sift together the blue cornmeal, flour, sugar, baking powder, baking soda, and salt.

In a second large bowl, whisk together the egg, honey, yogurt, vanilla, and oil. Pour the flour mixture into the wet ingredients and gently mix until all completely combined. Pour the batter into the prepared pan and bake for approximately 20 to 25 minutes, or until a tester inserted into the center comes out clean.

Let cool for about 10 minutes before serving (but make sure it's still warm!). You can serve it and then store the leftovers right in the baking pan (just cover with plastic wrap & store in the fridge); any leftovers can be reheated in a 400 degree oven for about 5 minutes.
0

Hostess Cheat Sheet: Cheese Knife 101

While rifling through one of my kitchen drawers the other day, I realized that I own way too many decorative cheese knives. After digging out one that had somehow wedged itself in the back of the drawer, I decided to take them all out for an inventory of sorts. There were about 12 total, some purchased in advance of parties, others given as gifts--most rarely used.

Open up the latest (or just about any) kitchen store catalog, and you'll find an array of cheese knives for the "serious" entertainer. These little gadgets definitely do look pretty, but considering that they spend most of the year rolling around the kitchen drawer gathering dust, are they really necessary? I decided to break down my inventory and sort out which knife actually goes with which cheese...and which I can just go ahead and add to the Housing Works bin.

In case you're wondering...


Spreadable cheeses, like room temperature or baked brie, chevre, Camembert, and cheese spreads (think “Boursin”) are soft enough that they can be easily cut and spread with a regular butter knife. Decorative knives or "spreaders" [top left and all the way to the top right in the photo above] can also serve in this respect, but there really is no need to clutter your drawers with an additional knife just for this purpose when you already have a knife that will work well. (Note that in a pinch you can also serve these with a regular dessert spoon.)

Semi-firm and firm cheese, like Pecorino, Manchego, Parmigiano-Reggiano, or Asiago, require a good sharp knife to cut. Again, there is no need to buy a single-use sharp cheese knife; a good multi-use paring knife will work well for this purpose, and those are often small and attractive enough that they can be served along with your cheese plate when company is over. To serve, slice a few pieces ahead of time and then leave the paring knife close to the cheese on your cheese board so that guests can continue to cut other pieces for themselves.

Semi-soft cheeses like fontina, gouda, or a chilled brie are really the only kinds of cheese that should be cut and served with a proper cheese knife. You’ll easily recognize the one for the job as that knife with a sharp edge and those weird open holes along the blade. The tip will often be shaped a bit like a fork, which can be helpful for lifting the slices that you cut. The holes in the blade are there to keep the soft cheese from sticking to the knife or breaking as you slice.

Still wondering how to get those really thin shaved pieces of pecorino or parmigiano-reggiano that usually top salads in a restaurant? You don't need a special knife (often called "a cheese plane") for this either! Simply run a clean vegetable peeler run along the surface of the cheese and let the thin slices fall over your dish. (Note: this also works with a bar of chocolate to decorate a dessert!)
0
Back to Top