Above All, Have a Good Time

Hello, dear readers! I'm back, and I've missed you (and this blog) so much.

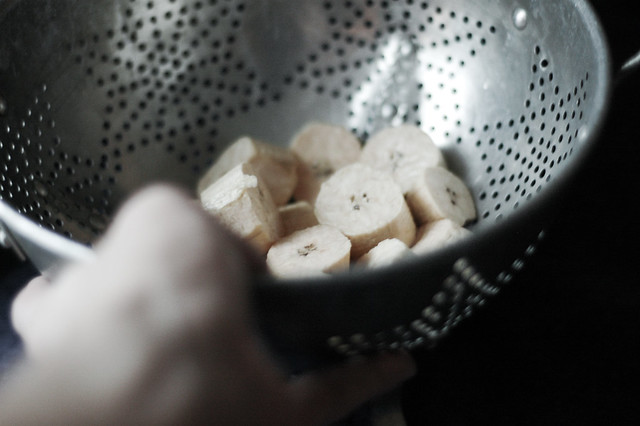
Our wedding was everything I wanted it to be,  the honeymoon an absolute dream, and I can't wait to tell you all about it. I'll have plenty of pictures (yes, that's one of them above!), recaps, some fun DIY tutorials, and of course, delicious new recipes coming up in the coming weeks, but for now, I thought I'd share with you the passage that I chose for the back of our wedding programs.

When picking the readings for our ceremony, I knew I wanted to include something food-related somewhere in the mix. I spent a while going through cookbooks and memoirs looking for just the right thing. I'd thought at first that MFK Fisher would end up providing me with the perfect words, but ultimately my choice came from the lady herself, Julia Child.

I came across the following passage, taken from the introduction to Mastering the Art of French Cooking, and fell instantly in love. It wasn't quite right for the readings, but I decided to put it on the back of the wedding programs for people to read while waiting for things to get started.

It's not a traditional wedding reading; it's not really supposed to be about marriage at all, but I think you'll understand why I thought it was perfect.

Enjoy, and I'll be back very soon with lots and lots more!

xoxo

Alejandra


from Mastering the Art of French Cooking by Julia Child
Pay close attention to what you are doing while you work, for precision in small details can make the difference between passable cooking and fine food. If a recipe says, "cover casserole and regulate heat so liquid simmers very slowly," "heat the butter until its foam begins to subside," or "beat the hot sauce into the egg yolks by driblets," follow it. You may be slow and clumsy at first, but with practice you will pick up speed and style.

Allow yourself plenty of time. Most dishes can be assembled, or started, or partially cooked in advance. If you are not an old campaigner, do not plan more than one long or complicated recipe for a meal or you will wear yourself out and derive no pleasure from your efforts.

If food is to be baked or broiled, be sure your oven is hot before the dish goes in. Otherwise soufflés will not rise, pie crusts will collapse, and gratinéed dishes will overcook before they brown.

A pot saver is a self-hampering cook. Use all the pans, bowls, and equipment you need, but soak them in water as soon as you are through with them. Clean up after yourself frequently to avoid confusion.

Train yourself to use your hands and fingers; they are wonderful instruments. Train yourself to handle hot foods; this will save time. Keep your knives sharp.

Above all, have a good time.

****
New to Always Order Dessert? Consider subscribing to my RSS feed, follow me on Twitter, become a fan on Facebook, or sign up to receive my once-a-week e-mail updates by filling in your address in the box on the right. And if you ever need any entertaining or cooking advice, please don't hesitate to e-mail me. Thanks for reading!

Photo by Samantha Nichols and Adam Ciccarino, CMOStr photography.
0

Guest Post: Bacon Cheddar Muffins by La Kocinera

**This fab guest post is from one of my favorite bloggers, Koci of La Kocinera. Thanks, Koci!**

First of all, I want to take this opportunity to excitedly gush my congratulations to Alejandra and Eugene. You kids are the coolest and I’ve loved getting to read all about your adventures here at Always Order Dessert. I wish you both lots of love and all the happiness in the world!

Now, for those of us who aren’t off honeymooning, vacationing, resting, relaxing, and all that jazz—we’ve got cooking to do. Thankfully, it’s easy cooking. Really easy cooking. This is the best kind of cooking in my book, especially when it comes to breakfast dishes.

As much as I’d love to have a personal chef who’d wake up at the crack of dawn to serve me fresh brioche and cappuccino in bed, I also have to pay for college. Of course I could make my own fluffy pastries at sunrise, but that’s no fun. Sleeping in, now that’s fun! If you feel the same way, then I think you’ll really like these Bacon Cheddar Breakfast Muffins.

If you’re a morning person, you’ll like them as well. Unless you love baking bread really early in the morning for impoverished college students, in which case you should send me an e-mail immediately.

Regardless of whether you’re a morning person or not, these muffins make for a delicious breakfast. Rather than roll out of bed and sweat your way around the kitchen—browning sausage, flipping pancakes, and the like—why not just take a bunch of breakfast-y goodies and toss ‘em in some muffins?

The formula is simple: crisp, smoked bacon plus shredded sharp cheddar, baked in a fluffy cornmeal muffin, then brushed with a heavenly blend of butter and savory spices. There’s no specific order for adding each carefully prepared ingredient that will be the deciding factor between delectable, muffin licious success and bland, hockey puck failure—it’s just a matter of mixing together some dry ingredients, adding some wet ingredients, and tossing in a few flavorful accents for good measure. Bake it all up, brush with some melted butter, and pour the coffee. Say good morning to a plate of warm, cheesy perfection.

****
New to Always Order Dessert? Consider subscribing to my RSS feed, follow me on Twitter, become a fan on Facebook, or sign up to receive my once-a-week e-mail updates by filling in your address in the box on the right. And if you ever need any entertaining or cooking advice, please don't hesitate to e-mail me. Thanks for reading!


Bacon Cheddar Breakfast Muffins 
A La Kocinera Original Recipe/Makes 12 muffins


For the muffins:
1 ¼ cup flour
¾ cup cornmeal
½ teaspoon salt
½ teaspoon baking powder
½ teaspoon baking soda

6 tablespoons butter, melted and slightly cooled
1 cup buttermilk
1 egg
1 ½ cups sharp cheddar cheese, shredded
6 to 8 strips of cooked bacon
¼ onion


For the butter topping:
3 tablespoons unsalted butter, melted
½ teaspoon garlic powder
½ teaspoon onion powder
¼ teaspoon salt
Pinch of cayenne pepper

Preheat the oven to 425 degrees. Brush a muffin tin with melted butter.

In a large bowl, whisk together the flour, cornmeal, salt, baking powder, and baking soda until well combined. In a smaller bowl, mix the buttermilk, egg, and cooled, melted butter. Add the wet ingredients to the dry ingredients and stir to combine.

Note: If the butter isn’t slightly cooled, it will curdle when it hits the cold egg and buttermilk. If this happens, just swirl it in a blender and you’re good to go. No harm done.

Using a food processor or blender, chop up the onion and bacon until it resembles a finely crushed paste. Alternatively, just finely chop the two if you don’t want to dirty up an appliance. In fact, you could go so far as to replace regular bacon with the salad topping stuff. It’ll still taste delicious and I’ll never find out.

Add the bacon and onion mixture to the batter as well as the sharp cheddar cheese, giving it a good stir so everything is evenly incorporated. Using an ice cream scoop, plop the batter into your prepared muffin tin(s) and bake for about 15 minutes, until the tops are just turning golden brown.

Once the muffins are out of the oven, melt the butter in a microwave-safe bowl and stir in the spices. Generously brush each muffin with the butter mixture and serve warm.
0

Guest Post: Korean Soft Tacos by Ambitious Deliciousness

It’s Esther from Ambitious Deliciousness and I’m super excited to share a recipe with you all!

[Sidenote: Congratulations to Alejandra and her husband on her recent nuptials! :)]

So, have you heard of Korean tacos? A Korean taco is a taco made with Korean marinated meat topped with various toppings, including salsa or kimchi in a corn tortilla or wrap. It all began with KogiTruck in California, moved its way to the east coast, and now people can’t get enough!

Just to be clear – this is my own interpretation of what a Korean taco is, and there are endless possibilities! So try different flavor combinations and see which one is your favorite!

Want to know the secret to making good bulgogi? I’ll tell you. First, be sure to purchase the beef from a Korean grocery store, as you’ll need paper thin slices of tenderloin. Why is this important? The thin slices absorb the flavors well, leaving you with lots of flavor in each bite. Secondly, use sugar as a tenderizer, and let it sit for a little bit. This simple act will help break down the tough parts of the meat before you cook it.


Korean Bulgogi Soft Tacos
Makes 5-6 soft tacos

Ingredients:

For bulgogi:

2.5 tablespoons of sugar
1/2 cup of sake or rice wine
1 pound of thinly sliced beef (tenderloin)
1/2 cup of soy sauce
2 teaspoons of sesame oil
5 cloves of garlic, minced
1 large onion, cut into ½” strips
2 stalks of scallion, cut into 1” strips

For Bokchoy & Napa salad

4 cups of chopped napa cabbage
5-6 pieces of whole bokchoy
1/4 cup of vinegar


For Gochujang sauce:

2 tablespoons of rice wine
3 teaspoons of gochujang (red pepper paste)
1 teaspoon of sesame oil

Other ingredients:

6 soft taco shells or tortillas
1 cup of finely chopped kimchi


First prepare the beef:
Remove beef from package. Separate slices and place into a large bowl. (I used a plastic bowl with a lid so I don’t have to use two bowls and put this one in the fridge when I’m done marinating.)

Add sugar to the beef and mix together. Set aside. After 10 minutes, add soy sauce and minced garlic to the beef and mix well. Add sesame oil. Add onions and scallion.

Refrigerate overnight, if possible. If not, then at least for 3 hours.

At this point, prepare the sauce and the salad:

Prepare the salad:
Mix ingredients together in a bowl. Let it sit in the fridge for at least 30 minutes.


Prepare the sauce:
Mix the sauce ingredients together. Transfer contents to a squeeze bottle, if possible. Drizzle over meat.

When the beef has marinated, grill the beef slices over a cast iron skillet (or a grill) until cooked through, about 4-5 minutes on each side, until the beef has shrunk and there are no more juices in the pan.


Assemble the taco:

On a soft taco shell add about 5-6 pieces of beef on each taco, followed by a hint of gochujang sauce, then salad, and kimchi on top.
0

Guest Post: Tostones by The Sophisticated Gourmet

tostones preparation

Hi Always Order Dessert readers! My name is Kamran Siddiqi. Some of you may know me as the teen food blogger at The Sophisticated Gourmet food blog. Or you may know me from Twitter (@ksiddiqi92). If we don’t know each other- Nice to meet you!

Alejandra asked if I could share a recipe with you while she takes a little break to enjoy her wedding and honeymoon. So today, dear Always Order Dessert Readers, I’ll be sharing a recipe for Tostones (Fried Green Plantains). Sure, these babies may seem as simple as making potato chips, but dear friends, they pack much more flavor and taste much better than potato chips.
---

When I was six-years-old, my mom, sister, and I took a month-long trip to The Dominican Republic to visit my grandparents. The morning of the trip was hectic; Dad had work, Mom was still packing our suitcases, and me and my sister were chasing each other with rollerblades in our apartment at 2:30 in the morning. The neighbors downstairs hated us for that.

At the last minute, my sister and I decided that we would pack art supplies to bring to the Dominican Republic. “Mommy, we need these crans and mahkers. And Sabrina needs all of her dollies.” Mom thought that the idea of bringing our crayons, markers, and my sister’s dolls would be a good idea. It was.

tostones preparation


The plane made a stop in Puerto Rico, then The Dominican Republic. Once we arrived in DR, my grandparents greeted us with hugs and smiles. Grandma and Grandpa snuck me and Sabrina a few pieces of chocolate when Mom wasn’t looking. We hadn’t eaten since earlier that day and it was probably the only thing that everyone in the car thought.

Instead of going straight to our grandparent’s condo, we went to Tia Kika’s house- my grandpa’s younger sister- and an amazing cook. She, my grandma, my mom, several other great-aunts, and Tia Kika’s maids prepared a feast for us. The women in our family are known to cook for huge crowds, and that night, thirty people ate.

While all of the women cooked, the men played dominoes under the cashew tree, Sabrina and I ran into the kitchen asking to help. Tia Kika asked if I was willing to help her make the Tostones (twice fried green plantains). My job was to smash the tostones with the tostonera with my “big muscles” (I aspired to be Superman).

After the tostones were fried up, I was hooked. I demanded that my mom make them when we got back home. And so she did. We had tostones with our meals almost three times a week. Now that I am eighteen, we no longer have tostones regularly, but when we have them- they are always a hit.

Today, Always Order Dessert readers, I share a recipe from my childhood with you. Enjoy!


Tostones (Fried Green Plantains)
by Kamran Siddiqi, The Sophisticated Gourmet

Ingredients:
2 Green Plantains (NOT bananas)
1 tablespoon fine grain sea salt
3 cups water
About 1 cup oil, for frying

Salt for sprinkling

Preparation:

Slice the ends off of both plantains. Make three vertical cuts along each plantain, only making sure that you are cutting into the skin. Under cold running water, using your fingers or a butter knife to remove the skins. Slice each plantain into ¾-inch to 1-inch slices. Set aside.

Mix the 3 cups of water and salt together (just until the salt is dissolved). Place the plantain slices in the salt water for ½ hour or no less than 10 minutes. Remove the plantain slices from the water and dry them well.

Heat the oil on medium heat (Oil should be around 325ºF). In batches, place the plantains in the hot oil and cook for about 4 minutes on each side until golden brown. Repeat with all the plantains, then remove from the oil and drain.

Place one of the fried plantains between two pieces of parchment paper. Using a heavy sauce pan or cast-iron skillet, smash the plantain down until it is very thin. Repeat with the rest of the fried plantains.

While smashing all of the plantains, crank the heat to high (the oil should register 350ºF to 360ºF). After all of the plantains have been smashed, fry them once again until golden brown and crispy. Immediately salt them as they come out of the oil. Enjoy.
0
Back to Top