DIY Vanilla Instant Pudding Mix

It's no secret that I'm a from-scratch kind of girl, but there are certainly times when I can appreciate the convenience of a pre-made mix! The problem is that boxed dessert mixes have tons of sugar and additives, which are definitely not good for your body.

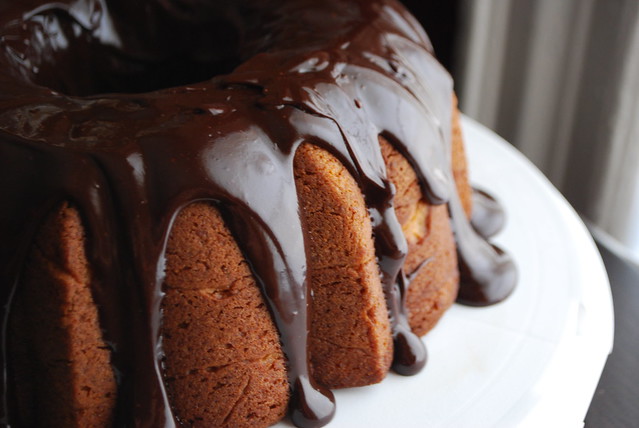
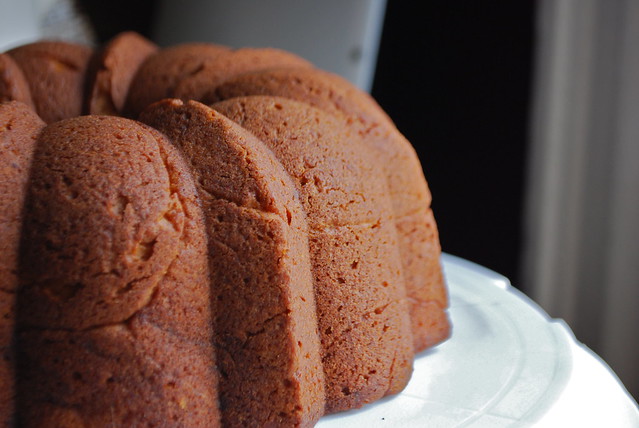
I started thinking about this problem recently while reworking an old cake recipe (coming soon!) that originally called for a package of vanilla pudding mix to be added to the batter. I didn’t want to do this, but skipping it created a notable difference in the texture of the cake. I wondered if the problem could be remedied by creating my own homemade pudding mix as a substitute.

I found a few recipes online, but the flavors were off. Most of them used nutmeg in the mix and then called for the addition of vanilla extract during the cooking. I wanted a pudding mix that, just like the boxed kind, had vanilla already in it. I realized the best way to do this would be to use whole vanilla beans. I scraped the seeds into the mix, and then cut the pods in half and  dropped them in with the powder to infuse it further with pure vanilla flavor. (This is my favorite and really inexpensive source for fresh whole vanilla beans. I buy them in huge batches and store in the freezer or use to make my own extract--can't be beat!)

The results were amazing! And the best part is that it's a quick and easy recipe that you can make in large batches and store indefinitely for instant pudding satisfaction whenever the craving hits. To actually make the final pudding, you simply measure out a small portion of the mix and combine with milk on a stove-top for about 3-5 minutes. Let it cool and voila! Instant (and totally homemade!!) pudding.

I can’t wait for you to try this as I know you'll love it as much as I did. Once you get the basic recipe down, you can experiment with flavors and spices and really make it your family’s own.

An added bonus? You can make dozens of servings at a mere fraction of the cost of those tiny grocery store boxes!

****
New to Always Order Dessert? Consider subscribing to my RSS feed, follow me on Twitter, become a fan on Facebook, or sign up to receive my once-a-week e-mail updates by filling in your address in the box on the right. And if you ever need any entertaining or cooking advice, please don't hesitate to e-mail me. Thanks for reading! 


DIY Vanilla Instant Pudding Mix
Makes about 5 batches of pudding; 4-5 servings per batch

Ingredients
3/4 cup nonfat dry milk powder
3/4 cup cornstarch
1 cup granulated white sugar
2 whole vanilla beans (I always buy them from this site.)
1 teaspoon Kosher salt

In a large mixing bowl, combine the dry milk, cornstarch, white sugar, and salt. Use a knife to slice down the center of the vanilla beans lengthwise and scrape out the seeds. Add the seeds to the dry ingredients and whisk well until evenly distributed (you may need to use the back of a spoon or spatula to break up the little clumps of seeds). Cut the scraped-out vanilla beans in 2-3 pieces each, and drop into an air-tight jar or container (such as a mason jar). Pour the mixture in, seal, and shake a couple times to distribute the vanilla bean pieces. Store in a cool dry place.

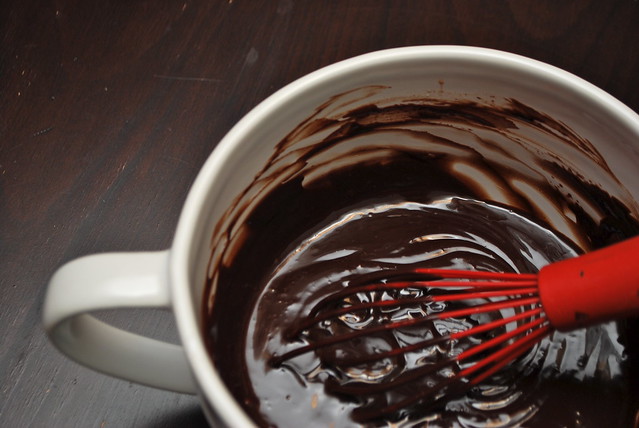
To make the pudding, combine 1/2 cup of the mix with 2 cups of milk in a medium saucepan over high heat, whisking constantly. Bring to a boil (keep an eye on it because this happens quickly!), then reduce heat to a simmer and continue whisking until the mixture thickens and coats the whisk or spoon. (About 3-5 minutes).  Pour in a container and let set for at least 5 minutes before serving. Can be served warm or cold.
(heavily adapted from a recipe found on Creative Homemaking.)
0

Inspired Entertaining: S'Mores Pop Favors

photo by Monica Navarro

I recently made these cute and inexpensive engagement party favors and thought I'd share them with you.

Last week, my friends Monica and Chris hosted a party to celebrate their new house and recent engagement. The evening was going to be a casual one with a potluck dinner and lots of dancing in the as-yet unfurnished living room, but we still wanted the guests to leave with a little something special to mark the occasion. With a chilly night theme of "Baby, It's Cold Outside," I decided to make personalized s'mores pops for the guests to enjoy either right on the stick or nuked for a few seconds to make them oooey and gooey.

0

Kitchen Tip: Cook with Vermouth

Vermouth has become my new favorite kitchen staple. It's a perfect substitution in recipes that call for white wine, but since the bottle doesn't have to be used up completely once opened, I can keep it in my pantry for months without having to worry about using up the whole bottle (or opening a brand new one just for a dish).

At around $10 a bottle it's inexpensive and adds a lovely depth of flavor to dishes. As it's a bit stronger than regular white wine, it can stand up to the heat of cooking, and--I've found--can often make for a better final dish.

If you've got a bottle already (most of us have one hanging around the back of the liquor cabinet), pull it out and give it a try the next time you saute chicken tenders or mushrooms. It's excellent with shellfish--especially clams, mussels, and shrimp--and makes an easy appetizer when simmered with sliced, pan-fried chorizo. I also find that it adds a sophisticated layer of flavor to bisques and other cream soups.

When choosing a vermouth as a substitution for white wine, make sure to stick with extra dry or white (bianco), though the sweet red (rosso) variety makes a great substitution for recipes that call for sweeter wines and liquors like Marsala, Port, or Cognac. Measurements are equivalent 1 to 1 (e.g. sub 1/2 cup of wine with 1/2 cup of vermouth).

As far as brands, there is no need to hunt around for something fancy; I've been using a $10 bottle of that ubiquitous Martini (the green bottle in the pic above) with great success.

The only warning? Don't forget to restock the liquor cabinet before your next party as those hardcore martini drinkers may not be as impressed with your kitchen thriftiness. ;)


****
New to Always Order Dessert? Consider subscribing to my RSS feed, follow me on Twitter, become a fan on Facebook, or sign up to receive my once-a-week e-mail updates by filling in your address in the box on the right. And if you ever need any entertaining or cooking advice, please don't hesitate to e-mail me. Thanks for reading! 
0

Bagged Lunch Ideas: Pesto Bean Salad with Cranberries


This easy salad has become one of my favorite bagged lunch recipes. Tossed together quickly from just a few ingredients, this salad keeps well and can be made in advance to last you through the week. Packed with protein and other good-for-you things, it makes a great option for those of you looking for an easy, healthy meal.

The pesto for this dish can be made fresh if basil is in season where you live (I include a recipe below), but a prepared pesto is just as good--especially during the winter when fresh basil isn't as plentiful. (I used some that I'd made last summer and kept frozen in individual portions in my freezer; the kind you can find at the supermarket or gourmet store will work just as well.)

The unexpected addition here is the dried cranberries; they add a lovely touch of sweetness that really makes the dish so don't skip them. If you don't have cranberries, dried cherries, currants, or raisins will also work.

I like to serve this on a bed of arugula with a few extra shavings of cheese on top; that's optional of course, but I like the freshness it adds to the dish. Enjoy!

****
New to Always Order Dessert? Consider subscribing to my RSS feed, follow me on Twitter, become a fan on Facebook, or sign up to receive my once-a-week e-mail updates by filling in your address in the box on the right. And if you ever need any entertaining or cooking advice, please don't hesitate to e-mail me. Thanks for reading! 


Pesto Bean Salad with Cranberries

Ingredients
1 can low-sodium white beans (such as great northern or cannellini)
2 cans low-sodium black beans
3/4 cup basil pesto (prepared or homemade; see below for homemade recipe)
Zest and juice of one medium lemon (About 1 tablespoon zest, 2 tablespoons lemon juice)
2 tablespoons extra virgin olive oil
3/4 cup dried cranberries
kosher salt and black pepper for seasoning


To prepare:

Drain and rinse the white beans and black beans and add to a large bowl. Add the pesto, lemon zest, lemon juice, and olive oil and stir until completely combined and evenly distributed. Add the cranberries and mix in well until evenly distributed. Taste and season with salt and pepper if needed. Best served room temperature, but can also be served chilled.

Will keep about 1 week in an air-tight container in the fridge.


Basic Homemade Pesto Recipe

Ingredients
1 bunch fresh basil (about 2-3 cups without stems), rinsed and patted dry
2 tablespoons pine nuts (you can also use almonds)
2 medium garlic cloves
1 teaspoon kosher salt
1/2 cup freshly grated parmigiano reggiano (you can substitute pecorino or other hard, sharp cheese)
2/3 cup extra virgin olive oil


In a food processor or blender, combine the fresh basil, pine nuts, garlic, salt, cheese, and olive oil and process until smooth. Use in a recipe or top with additional olive oil and store in an air-tight container in the fridge for up to 2 weeks.


0

Whole Orange Bundt Cake with Chocolate Ganache Glaze


Well, I've done it.  I've gone and fallen in love with a new cake.  The object of my confection is a moist, buttery, orange bundt cake draped with semisweet chocolate ganache that has taken permanent residence in my cake keeper, beckoning everyone who walks by to take just one tiny slice.

Not-too-sweet, and with a hint of bitterness (think marmalade in cake form), the cake pairs beautifully with the thick, rich chocolate coating. Orange and chocolate are perfection together and this cake brings together the best of both worlds.


Beyond the flavor, there is a certain novelty to this cake. With two whole oranges added to the batter (yes, peel, pith, and all), there is that special element of "oh wow...this worked!" It's an old trick, and one that I've wanted to try for a while, but which I never quite had the chance to before.

To make, two whole oranges are quartered and then tossed into the food processor to pulverize into a fairly smooth puree (no worries if there are a few tiny bits of peel left). You should use navel oranges, which don't have seeds, or you can use another kind and simply remove the seeds first. This is added to creamed butter and sugar, eggs, vanilla. The flour is folded in until just combined and the whole thing is baked in a well-oiled bundt. An hour later it comes out of the oven, golden and tender, perfuming the entire house as it cools.


Fruit in my home is a constant point of contention between the two of us. For Eugene, fruit is something in itself: tart, refreshing, sweet. He can eat a grapefruit, for example, and call it dessert. He lusts after the contents of the fruit bowl the way most people lust after chocolate. Were someone able to identify and bottle the gene in him that makes him turn down a piece of cake in favor of a pear, it could be sold as the greatest diet pill ever.

I, on the other hand, think of fruit as an ingredient. Orange for marmalade. Apples for pie. Strawberries for ice cream.  Fruit to me is a snack, not a dessert.  I remember one evening a few years ago, when Eugene brought me to his parents home for dinner. After the meal was served, his grandfather brought out a half of a watermelon and a knife, cutting it into perfect triangles. Everyone but me reached over and grabbed one. They ate, and I sat waiting, thinking how cool it was that they were serving a palate cleanser before dessert. I waited and waited, and then Eugene said "OK, we should be heading out now." The plates were being cleared, people were putting on their coats. I finally realized there would be no cake.


But in my home and in my kitchen, there is always cake. So when Eugene came home a few days ago with a large bag of plump, lush winter oranges, I knew it was time. He was bummed that I took two of *his* oranges to make this cake. (Four, actually, since I had to test the recipe again.) But he forgave me when the results came out of the oven. Fragrant, sweet, heavenly cake. The perfect winter dessert.

****
New to Always Order Dessert? Consider subscribing to my RSS feed, follow me on Twitter, become a fan on Facebook, or sign up to receive my once-a-week e-mail updates by filling in your address in the box on the right. And if you ever need any entertaining or cooking advice, please don't hesitate to e-mail me. Thanks for reading!


Whole Orange Bundt Cake with Chocolate Ganache Glaze

Ingredients
2 whole oranges (preferably seedless navel), scrubbed and washed well
3 sticks of butter (3/4 pound), softened
2 cups granulated white sugar
3 large eggs, room temperature
1 tablespoon pure vanilla extract
3 cups all purpose flour
3 teaspoons baking powder
1 teaspoon Kosher salt


Method
Preheat oven to 350 degrees. Generously grease and flour a Bundt pan and set aside.

Quarter the oranges, remove any seeds if not using navel, and put in food processor to puree. Set aside.

While the oranges are pureeing, cream the butter and sugar together in the base of an electric mixer for 5 minutes until light and fluffy. Add the eggs, one at a time, waiting until each is fully combined.  Add the orange puree and vanilla extract and mix until combined.

In a separate bowl, whisk together the flour, baking powder, and salt. Mix into the wet ingredients gently, just until fully combined.

Pour the cake batter into the prepared Bundt pan, spreading so that it is evenly distributed. Bake at 350 for about 60 minutes or until a tester inserted in the cake comes out clean.

Let cool in the pan for 15 minutes before inverting onto a wire rack to cool. When completely cool, pour on the chocolate ganache glaze (below) and let set for at least 1 hour before serving. Will keep for 3-5 days under a cake dome or plastic wrap

Chocolate Ganache Glaze

Ingredients
1 cup heavy cream
2 cups semisweet chocolate chips (such as nestle)

Heat the heavy cream over medium heat just until small bubbles begin to form. Pour the hot cream over the chocolate chips and whisk gently until fully melted and combined. Let cool for 10 minutes before glazing cake. May be prepared in advance and gently reheated in a moderate microwave.
0

Love!

As part of our wedding decor, I collected piles of vintage family photographs that I then framed and displayed all around the room. I wanted to create the feeling of being in a family home (something which our venue, The Metropolitan Building, lent itself very well to). These pictures included wedding photos, of course, but my favorites were actually snapshots like this one above, of my paternal grandmother in Puerto Rico in the 1940s. She was a newlywed bride (my grandfather is behind the camera) and clearly, very much in love.

Here's another shot of the two of them together; I can't express to you just how much I love every single detail of this photo. Have a beautiful day today, I'll be back tomorrow with more sweetness (this of the edible kind). Happy Valentine's Day!!!

0

You're the Jeffrey to my Ina

I think the relationship between Ina Garten and her husband Jeffrey is absolutely one of the sweetest love stories on television. (Liz Lemon certainly agrees!) My favorite Barefoot Contessa episodes are the ones featuring Jeffrey, because I love seeing that way that Ina lights up when he's there (like the recent "Barefoot in London"). The two of them are adorable with each other--he always seems so happy and proud to try the treats she makes him, and she's always so excited to make him his favorite dishes. It's not cheesy or fake--it's just the pure pleasure of watching two people who genuinely love and enjoy each other's company.

0

Inspired Living: Toss 5 Things

Ever since getting back from the honeymoon, I've been feeling a bit suffocated in our apartment. Between the boxes of wedding presents, the as-yet unpacked suitcases filled with summer clothes, the Christmas tree which (sigh...) is still up, and the boxes of craft supplies and decorations left over from my wedding planning, there just really isn't much room to breathe.

I love our apartment. It's a quirky pre-war with loads of charm, and by Manhattan standards, it's actually quite large (especially, thankfully, the kitchen). But the storage space is nonexistent, so as hard as I try, I never have anywhere to put things. I love books and so there are stacks of books in every room--including the kitchen and bath. I love vintage hats, so there is a wall full of hats. I love to cook and so my pantry and cabinets are overflowing with ingredients and pots and gadgets. Things that in most houses would be tossed because they never get used, but which in this home can't be since I really do actually use them all the time.

But something has to give. It's going to be some time until we can afford to buy a house (that is, unless my inevitable rise to food superstardom comes sooner than I've planned), so I need to learn to work where I am with what I have.

And that means I need to edit.

Yup...this is pretty much exactly what I look like while I clean. And that's Eugene with his car back there.

Inspired by one of my favorite bloggers who recently resolved to throw out 50 things from her apartment, I decided to create my own challenge. With my ADHD, I knew I needed something more focused to keep me on track. Something small where I could instantly see a result. So I decided that I would start by tossing at least 5 things from every drawer in my bedroom dresser.

I started with my bras, underwear, socks. Then moved on to jeans, pajamas, and tops. When I was through, I was left with a fairly sizable pile of clothing to either toss or donate, and my drawers became more useful to me since I could actually open and close them without a fight (amazing!). Thrilled, I moved on to my office bookshelves and continued the job, removing at least 5 books from each shelf. By the end of that I had a pile of about 40 books that I will now either sell back to Amazon or donate to charity.

And like this I've continued, picking a drawer, a box, a cabinet, a purse--any kind of surface or container with stuff in it, and finding 5 things that can go. No matter how small the surface, I've found that each time, I've always found 5 things I don't need, and more often than not, I've gone above and beyond that goal. My kitchen is next, and it's the one I'm simultaneously most excited and worried about; it certainly is the room that needs this the most.

It's a small step--just 5 things, but I can honestly say that I'm starting to feel better. I can breathe easier. I can think clearer. Slowly I'm reclaiming my home (and my head) from all the stuff.

So I'm sharing my challenge and inviting you to take part. Pick a drawer. Toss 5 things. Then leave a comment here so that I can cheer you on.

xoxo

Alejandra

0

Cream Cheese Pancake Balls (Aebleskiver)


At my bridal shower back in November, I received a gift that I'd been wanting for a long time--an aebleskiver pan!

Aebleskiver are a Danish treat very similar in texture to an American pancake, but spherical in shape. They're basically little pancake balls, with a light and fluffy texture, traditionally filled with a piece of apple (hence the "aeble"), though more often served with jam and other types of fruit.

In Denmark they're popular during Christmas time, when they are served as a dessert or snack, but here in the US, they're growing in popularity as a fun breakfast or brunch dish.


The pan itself is made of cast iron with seven round wells on the surface. To make, a pancake-like batter is poured into the oiled well, and allowed to cook for a few minutes before a small amount of filling is added. A tool such as a chopstick, fork, or these fancy "turning tools" (which from looking at that picture I'm just now realizing I've been using upside down!) are used to delicately push and flip the pancake ball over within the well so that the bottom can cook.

The result is a small little ball--about 2" in diameter--with a golden crust, light texture, and warm, gooey filling. These can be served with syrup or jam (lingonberry is popular), or simply dusted with a light shower of confectioner's sugar.

Based on this description (stuffed pancake balls!?!) you can imagine how excited I was to try out my new pan, but the craziness of wedding planning took over and my pan was sadly relegated to the top of the pile of wedding presents in my living room corner.


It wasn't until this past Sunday, when Eugene asked me if I could please make him those pancake balls I told him about.

I decided to make cream cheese filled ones, because I've always loved the combination of warm, salty cream cheese melting inside a pancake topped with syrup. Growing up, my mom used to make us regular flat pancakes dotted with cream cheese and they were delicious, though messy to cook.

I used a basic batter recipe, which I modified from the back of the box the pan came in. I was surprised and excited to find that they were really easy to get the hang of. In no time at all, I'd made about 40 of them and Eugene and I sat down to enjoy. The leftovers (and there were several since I made 40) were zipped into a plastic baggy and we've been enjoying them as a snack the past couple days. I was delighted to find that they taste good cold too (though they can also be reheated).


My plan now is to try savory variations, which I think would make a great appetizer for a party--perhaps with bits of pulled, braised meat, or sun-dried tomato pesto and cheese or maybe even sauteed cabbage and vegetables (like a variation on an egg roll). I also have a churro version in mind--conceived while passing a vendor on the subway platform this afternoon--with a dab of dulce de leche in the center and then dusted with a sugar and cinnamon blend. Pure awesomeness!

Have you ever tried or made any interesting aebleskiver variations?


UPDATE: My friend Kristine, who is a food writer in Denmark, pointed out that in Danish, "Aebleskiver" means "apple slices." Which I just think is fabulous because how amazing is it to be able to say "Oh, I just had some apple slices for breakfast" and to have that *actually* mean delicious buttery pancake balls filled with jam and cheese? Very awesome, that's how.


Basic Aebleskiver Recipe
Yields about 40 small filled pancakes

4 eggs, separated
4 tablespoons melted butter
1 tablespoon white granulated sugar
2 cups buttermilk
2 cups all-purpose flour
1 teaspoon baking powder
1/2 teaspoon baking soda
1 teaspoon allspice
2 teaspoon cinnamon
1 teaspoon Kosher salt
filling, if using.
Grapeseed or canola oil for cooking

Method
Whisk the egg yolks, melted butter, and sugar until well combined. Stir in the buttermilk, and set aside.

In a separate bowl, sift together the flour, baking powder, baking soda, salt, allspice, and cinnamon.

In a clean bowl (or mixer) beat the egg whites until stiff peaks form.

Add the dry ingredients to the buttermilk mixture until well combined. Use a rubber spatula to gently fold in the egg whites.

Heat the aebleskiver pan over medium high heat and add a 1/2 teaspoon of grapeseed or canola oil into each well. Once hot, pour in the batter until each well is 3/4 of the way full. If using a filling, add about a teaspoon to the very center and press in slightly. Let cook for about 1-2 to minutes until bubbles form on top and the edges look dry. Use a skewer, chopstick, or fork to push the cooked edge of the pancake to the center, gently nudging it along until it flips. If it's ready to turn, it will do so easily; if you have trouble, let it cook another 30 seconds or so and try again. You can use a second skewer to help it turn round. Let it cook for another 2 minutes until the bottom side is golden brown. Use a spoon or tongs to remove and set aside on a serving dish. Repeat with the rest of the batter.

Cream Cheese Variation: Cut one block of cream cheese into 3/4 inch cubes and set aside. Pour the aebleskiver batter into the wells about 3/4 of the way full, then drop one cream cheese cube in the center of each pancake. Let cook for about 1-2 to minutes until bubbles form on top and the edges look dry. Use a skewer, chopstick, or fork to push the cooked edge of the pancake to the center, gently nudging it along until it flips. If it's ready to turn, it will do so easily; if you have trouble, let it cook another 30 seconds or so and try again. You can use a second skewer to help it turn round. Let it cook for another 2 minutes until the bottom side is golden brown. Use a spoon or tongs to remove and set aside on a serving dish. Repeat with the rest of the batter.

Serve right away; leftovers can be reheated the next day in a hot oven.
0

Inspired Entertaining: Homemade Flavored Sugar Cubes

While working on another project this weekend,  I noticed that one of my tubes of colored sugar had not been closed properly the last time it was used, and so the sugar had clumped a bit creating sparkly green lumps. That immediately got me thinking--how fun would it be to make my own colored sugar cubes?!

I immediately pulled out a bowl and started mixing sugar with food coloring and small amounts of water, then packing and cutting them into squares with a long knife. After 20 minutes or so of drying, I was left with gorgeous little sugar cubes in an irresistible shade of pink.

I then went one step further, replacing part of the tap water I'd used with rosewater, and repeating the rest of the process to create rose-scented sugar cubes. I brewed a cup of tea and dropped in a cube to test it--it melted gently just like a store-bought sugar cube and added a subtle rose flavor to the tea. I was hooked!


I made batch after batch, using orange blossom water, and then Meyer lemon juice (with yellow extract). Each time, the results were delicate little sugar cubes in pretty pastel colors with just a subtle hint of flavor. I was so excited that I could hardly wait to share them with you!

These would be absolutely gorgeous served in the sugar bowl at a ladies luncheon or bridal shower. And I bet that they would be a hit at a young girl's princess or tea party. The colors can be changed to match your color theme (great for a wedding or baby shower), and the flavor can also be adjusted. Try adding a drop of vanilla or anise extract, or scraping in the seeds from a vanilla bean.

Another bonus? These aren't just for girly tea parties--drop one or two flavored sugar cubes into a glass and top off with champagne or white wine for an instant aperitif!


You can also use small cookie cutters to create pretty molded sugar cubes. Simply pack the wet sugar tightly into the cookie cutter of your choice and lift the mold up gently. Let dry for 30 minutes before moving onto a drying rack and letting it dry completely (about another hour).

Serve alongside tea or coffee, or place on a small plate in the center of your table so guests can help themselves. Depending on how small your cookie cutters are, guests can break off small pieces to stir into their drink or just use the whole thing. (These would also make fun decorations for a cake!)


I made rose hearts for Valentine's Day, but I'm going shopping for more small cutters to make different shapes. I bet lemon daisies would be absolutely adorable!

Definitely give it a shot and tell me what you come up with. Just a warning--if you get as into it as I do, you may end up with pastel fingertips and a sugar-dusted kitchen. (Though I think it's definitely worth it.)


****
New to Always Order Dessert? Consider subscribing to my RSS feed, follow me on Twitter, become a fan on Facebook, or sign up to receive my once-a-week e-mail updates by filling in your address in the box on the right. And if you ever need any entertaining or cooking advice, please don't hesitate to e-mail me. Thanks for reading!


Homemade Flavored Sugar Cubes
Makes about 30 1/2" cubes or 12-15 1" hearts

Ingredients

1.5 cups granulated white sugar
2 teaspoons flavoring such as rosewater, orange blossom water, or fresh lemon juice
2 teaspoons plain water
1-2 drops food coloring of your choice (I used 3 drops red to get this bright pink color, 2 drops yellow for the yellow, and 2-3 drops each red and blue for the purple)


Method
Pour the sugar into a large bowl. In a separate small cup, combine the rosewater, water, and food coloring. Pour the rosewater mixture into the sugar and mix thoroughly until evenly combined. The texture should feel and look like wet sand with a bit of fluff to it. If the mixture is too wet, add granulated sugar by the tablespoon until the texture is right (this might be the case if you live in a very humid climate). If it's too dry, add a bit more water.

Pour the sugar onto a parchment-lined baking sheet and use your hands to pack into a flat, compact rectangle. Use a bench scraper or knife to cut the block across in rows and then again in perpendicular rows, creating approximately 1/2 inch cubes. Leave the cubes to dry for about 30 minutes, before separating gently and letting dry an additional 20 minutes.

To make molded cubes: pack the wet sugar mixture tightly into a small (about 1" to 1.5") cookie cutter on a piece of parchment paper. Gently lift the cutter off and let the sugar dry for 30 minutes before moving onto a drying rack and letting dry on the reverse side. Repeat for each cube until completely dry (about an hour).

When completely dry (you should be able to squeeze a cube gently without it breaking apart, you can serve in a regular sugar bowl, or store in an air-tight container.

Notes: Try out different flavorings or maybe even alcohols for the liquids, but avoid very sugary or syrupy liqueurs (I wouldn't use amaretto, for example, though almond extract mixed with regular water will work well).  Orange blossom water works really well in the same dimensions. If you want to use an extract, only use 1 teaspoon and make the rest plain water. I noticed that the lemon juice cubes take several hours longer to dry completely and need to be turned.
0

Classic Banana Bread

Last week I realized that I'd never before made a basic banana bread. I would often start with a basic recipe, and then go to town on it, adding oats, nuts, shredded coconut, different flours, chocolate, etc. They were all delicious, and never once have I been disappointed (banana bread, I've discovered, is pretty hard to mess up).

Perhaps it's a result of the weeks of craziness that we just came through, but this time, all I was craving was something simple. I wanted a classic banana bread without a lot of fuss.

That just-perfectly-sweet kind that's perfect for breakfast or an afternoon snack, or maybe even as a substitute for dinner on a lazy weekend evening. I wanted something a little dense, with a lot of bananas in the batter, and just a hint of spice.

And while I admit that it took all my will power to back away from the chocolate chips and keep the recipe as simple as possible, in the end I was more than pleased with the results.


This recipe uses up nearly an entire bunch of bananas, and makes enough for two standard size loaves. I actually made mine in one large and two mini pans so that I could freeze the mini loaves to enjoy later.  It come out of the oven golden brown with just a tiny, crackly lump at the top (I had to resist from just pulling it off!). The inside is dark and marbled with the natural fibers and textures of the banana. Mashing the bananas coarsely assures that you'll get little pockets of creamy fruit with every bite.

It goes without saying that if you really want to play around with it, this is definitely a perfect classic banana bread recipe to riff on, but I urge you to just try it this way...at least once. When you're working with something as delicious as a banana, there really is something to be said for expressing just a little bit of restraint and letting the banana be the star.

And if you really want to add something, just wait until it's done and then pour a little chocolate ganache on it before serving. Not that I'm saying that's what I did. Nope, I'm not saying that at all...


****
New to Always Order Dessert? Consider subscribing to my RSS feed, follow me on Twitter, become a fan on Facebook, or sign up to receive my once-a-week e-mail updates by filling in your address in the box on the right. And if you ever need any entertaining or cooking advice, please don't hesitate to e-mail me. Thanks for reading!


Classic Banana Bread
Makes 2 full-size loaves

Ingredients
8 ripe medium-sized bananas, mashed roughly with a fork so that a few chunks remain
1 cup melted unsalted butter
1 cup dark brown sugar
1/2 cup granulated white sugar (reduce if your bananas are very overripe)
2 large eggs, whisked
1 tablespoon pure vanilla extract
3 cups all-purpose flour
1 rounded teaspoon Kosher salt
1 teaspoon allspice
1 teaspoon cinnamon (I used Saigon cinnamon)
2 teaspoons baking soda


Directions:

Preheat your oven to 350 degrees. Grease and flour two 4x8" loaf pans, set aside.

In a large bowl, whisk together the bananas, melted butter, white and brown sugar, eggs, and vanilla extract until fully combined.

In a separate bowl, whisk together the flour, salt, allspice, cinnamon, and baking soda.

Add the dry ingredients into the banana mixture and mix in gently until thoroughly combined. Pour into prepared loaf pans and bake for approximately 50 minutes to an hour, or until the top is golden and a toothpick inserted in the center comes out clean.

Remove from baking pan and let cool completely on a rack. Serve immediately or store for up to one week in an air-tight container.
0

Party Inspiration: Pink Chocolate Birthday

Today is my 28th birthday, and while usually I would throw a big bash to celebrate, our wedding less than one month ago has left us a bit partied out.

So, instead I decided to create an inspiration board for the kind of party I would have liked to have hosted (and the one which I surely will sometime in the future for another occasion).

Pink, chocolate, and sweet retro elements were my inspiration--I hope they'll also be yours!

From Left to right, top to bottom: 1. Bubbling pink champagne (from Redbook 12/10), 2. Pecan Pie Truffes from Oprah.com, 3. Elizabeth Taylor (via Confessions of a Perfume Nerd), 4. Pink living room by Steven Gambrell, 5. Retro Palmolive ad, 6. pink lollipop, 7. Retro styled soaps by 3 Soaps via Country Living, 8. Radish & Chive tea sandwiches from Bon Appetit, 9. Pink and gold tea cups by Yedi Housewares, 10. Flowers on side table from Good Housekeeping 7/09, 11. Polka dots from Martha Stewart, 12. Pink flowered cake from Oprah.com

****
New to Always Order Dessert? Consider subscribing to my RSS feed, follow me on Twitter, become a fan on Facebook, or sign up to receive my once-a-week e-mail updates by filling in your address in the box on the right. And if you ever need any entertaining or cooking advice, please don't hesitate to e-mail me. Thanks for reading!
0

Our Honeymoon in Vieques


I've been wanting to share some of the pictures from our honeymoon with you, but there was so much to tell that I didn't know where to begin! I decided to split it up into a few posts. First, a recap (and a few photos!) of our stay.

Eugene and I spent our honeymoon in Vieques, the small island 8 miles off the East coast of Puerto Rico. To get there we flew four hours from New York to San Juan, then took a cab ride from the airport to Fajardo, a coastal town on the Eastern tip of the main island. In Fajardo we paid $2 each to board a ferry that would take us the hour-long trip over the choppy sea to Vieques.

The boat was freezing and Eugene and I spent the trip huddled under my airplane blanket, eagerly anticipating our arrival. [You can also travel directly from San Juan to Vieques by puddle jumper, but I had a hysterical panic attack the last time we traveled on one of those little planes (I blame one-too-many childhood viewings of "La Bamba" and "Sweet Dreams") so Eugene promised me we'll never have to do that again.]

The boat docked at the main dock, and we excitedly rolled our overstuffed suitcases down the metal gangplank. From there we had to flag down a ride to our hotel. Since Vieques is such a small island, with a limited number of vehicles, those residents and visitors who don’t have personal cars, ride around in shared passenger vans called "publicos." We found one quickly, and were soon on our way to Hacienda Tamarindo, the gorgeous bed and breakfast that would be our home for our two-week stay.

This was our second time in Vieques and at Hacienda Tamarindo. Some of you might remember that we spent few days there last February and that it's the very spot where Eugene proposed to me. When picking the place to spend our honeymoon we tossed around multiple locations around the world, until we finally realized that we just wanted to go back to Vieques.

Our room was gorgeous! It was a large corner room with a small balcony overlooking the freshwater pool and a gorgeous palm tree-lined field where wild horses grazed and galloped all day and night. The sea lay just beyond, and from our room we could hear the crashing of the waves against the coast.

The hotel's resident (adorable!!!) sheepdog Zach, who played a prominent role in our engagement last year, was still there and I made a point of spending as much time with him as possible.

I felt we needed some pictures of the two of us so I pulled out my remote and set up a photo shoot.

0

Inspired Entertaining: DIY Mercury Glass Votives

A few months into my wedding planning process, I fell in love with mercury glass. Also known as silvered glass, mercury glass is a type of decorative glass that's been blown with a double wall, and then filled with a silvering solution and sealed, creating the effect of a layer of reflective silver trapped within the walls of the glass. As the pieces age, the silver within breaks up in bits creating a kind of marbled effect that, with the addition of candlelight, is absolutely dreamy and perfect for entertaining.

True mercury glass pieces are expensive, but faux versions are just as beautiful and widely available. I quickly grew obsessed with the idea of having a couple hundred mercury glass votives sparkling around the room and on the dinner tables at our reception. Unfortunately, I found that at 2 to 5 dollars a piece, even the faux versions were out of my decorating budget.

So I decided to make my own!

I scoured websites looking for tutorials on how to make my own mercury glass, but I was mostly disappointed with the results. The most popular method around the web is one from Martha Stewart, but all the posts I read about it reported less than stellar results. Her method, which calls for spritzing glass pieces with water before spraying with silver mirror paint, results in a streaky mess. Finally, I just devised my own method.

Once you get the hang of it, the process is simple and goes by quickly--necessary when you're making these in bulk. I was able to complete approximately 200 DIY mercury glass votives in just a few afternoons. My total cost for the project? About $125. Here's what I did:


Materials
1. Krylon Looking Glass mirror-like spray paint (I found this at Lee's Art Shop in NYC, stores like Pearl and some hardware shops will usually carry it. It's also available online. I used 3 cans for my 200 votives.)

2. Acrylic craft paint in shades of glossy black and metallic brown. You can use any brands, but I specifically used Apple Barrel Gloss Acrylic paint in Black and DecoArt Dazzling Metallics Elegant Finish paint in Rich Espresso. One small tube of each is fine and will go a long way. (I bought these at Michael's for less than 2 dollars each. They're also available online.)

3. Sea sponges. I bought two of these. Available at craft stores and in the bath section of drug and beauty supply stores. In a pinch, you can use a small piece of loofah. Don't use a regular kitchen sponge; you want the irregular natural pattern.

4. Clear glass votives, hurricanes, clean jam jars, or other objects of any size or shape. I used about 140 plain clear glass votives, and another 60 decorative ones with ridges. Both work equally well. (I got mine at Michael's, but also check online shops for bulk discounts if you're buying a lot.)

You'll also need:
a dropcloth (I cut a trash bag open), a small dish of water, and a well-ventilated area. (I live in an apartment and it was the middle of winter so I just opened the windows wide, turned on a fan, and took copious breaks. Not recommended unless you want a fierce headache.)

Method
Step 1. Prepare your materials: Use scissors to cut a small piece of the sea sponge. Make sure that it is small enough to hold in your fingers and dab inside the votive. Squeeze about a tablespoon each of the black and brown paints onto a plastic plate. This will be your palate.

Step 2. Dab the sponge lightly into the black and brown paint, and then blot gently inside and around the votive. Use a light hand, and only make a few spots in each. You don't want to coat the votive with paint, you just want to make a few smudges on the inside. Repeat with each of the votives and let dry for about 15 minutes.

Step 3. Shake the Looking Glass paint well and then, holding one of the votives in one hand, spray quickly and lightly INSIDE the votive. You will be doing a second coat so don't worry if it looks thin. Set the votive aside right side up (the same way you would place it on a table if you were using it), and let it dry. Some paint will pool on the inside bottom, but that's OK. Don't move it around too much to avoid streaks. Repeat with the rest of the votives, then let them all dry about 15 minutes. Repeat with a second coat of paint, then let them all dry overnight.

Step 4. If you'd like, you can add a 3rd coat of paint for a more silvered look.

Once the votives are completely dry, they're ready to use! I used these with real candles at my wedding, scattered along the dinner tables and on many other surfaces around the room. When the candle is lit, the flame gives the glass a warm antique glow. The same antiqued mercury glass effect for a mere fraction of the price!

NOTE: This technique also works well on clear glass vases to make gorgeous and inexpensive wedding centerpieces, but if you plan to fill with water, use another vessel or liner on the inside to hold the water as the paint is not waterproof. Note that this is also not food-safe, so you'll also need a liner if you want to use for a fruit bowl or other similar purpose. Once completely dry, it IS safe to use with real candles.

****
New to Always Order Dessert? Consider subscribing to my RSS feed, follow me on Twitter, become a fan on Facebook, or sign up to receive my once-a-week e-mail updates by filling in your address in the box on the right. And if you ever need any entertaining or cooking advice, please don't hesitate to e-mail me. Thanks for reading!
0
Back to Top