Fiery Sriracha Chicken Cutlets

Fiery Sriracha Chicken Cutlets


I'm just going to let you know in advance that this recipe is leading up to something.

Yes, these spicy (and easy! So easy!) chicken cutlets are fantastic on their own with rice or on top of a big green salad, but the real reason I made them is to use in a sandwich.

A delicious, ridiculous, banh mi-esque kind of a sandwich.

I was initially going to put everything together into one big huge long post full of various pickles and chicken and sauce and sandwich assembly, but then I realized that would be too much. And the thing is that these are so good that they're actually pretty fabulous on their own and would be great for a weeknight meal (they're also good cold for lunch the next day--just saying!).

So here they are--you can go ahead and make them now or wait. Totally up to you!

Fiery Sriracha Chicken Cutlets
By the way--I broil these because I live inside of an apartment without outdoor access and that's the closest I can get to a live flame, but if you have a grill then please go outside and cook these on the grill. And fix yourself a cocktail because spice and booze go well together.


****
New to Always Order Dessert? Consider subscribing to my RSS feed, follow me on Twitter, become a fan on Facebook, or sign up to receive my once-a-week e-mail updates by filling in your address in the box on the right. And if you ever need any entertaining or cooking advice, please don't hesitate to e-mail me. Thanks for reading!


Fiery Sriracha Chicken Cutlets
These spicy chicken cutlets can be served with rice or salad, sliced into pasta salads, and they make terrific sandwiches on crusty bread with a bit of mayo. They can be marinated in advance and cook in less than 10 minutes under the broiler. They can also be grilled or pan-fried on a skillet.

Ingredients

1/4 cup fish sauce (you can also substitute a teaspoon of anchovy paste stirred into another 1/4 cup of soy sauce)
1/4 cup rice wine vinegar (you can also use red wine vinegar)
1/4 cup low sodium soy sauce
1/4 cup sriracha sauce
1/4 cup olive oil
1 lime
1/2 teaspoon ground cayenne
4 garlic cloves, peeled and smashed
1- 1 1/2 pounds boneless, skinless chicken cutlets (about 4 to 6 pieces), rinsed then patted dry with paper towel and cut lengthwise in half
Kosher salt
Black pepper

Directions
Whisk together the first five ingredients in a medium-sized storage container with a lid (such as Tupperware). Cut the lime in half and squeeze in the juice, then drop in the squeezed lime halves. Stir in the ground cayenne, smashed garlic, and kosher salt. Add the chicken cutlets turning each until full coated. Cover the storage container and let marinate in the refrigerator at least 1 hour (or overnight).

When ready to cook:

Preheat your broiler and place broiler rack about 4 inches from the flame source. Prepare a shallow baking sheet or baking pan by lining with parchment paper. Be sure that the pan has at least 1" sides to catch any juices during cooking.  Use tongs to evenly place marinated chicken cutlets on pan. Sprinkle cutlets with Kosher salt and ground black pepper. Broil for 3-4 minutes on one side, then use tongs to flip and broil for 3-4 minutes on other side until cutlets are cooked fully through, with a bit of char developed on each side. Remove from the broiler and let stand for 5 minutes before serving.
0

Inspired Entertaining: Personalized Wrapped Sugar Cubes

personalized wrapped sugar cubes

A few year ago, I was sitting on the train leafing through an issue of the Australian food magazine Donna Hay, when I came across an article about her (Donna's) collection of vintage wrapped sugar cubes. It caught my eye for a number of reasons--my never ending fascination with all things old and vintage, of course--but also because of the sheer delicate beauty of each little package.

They looked like tiny presents, wrapped delicately in logoed papers, a bevy of colors, patterns, and vintage fonts. Some were decorated with florid line illustrations; others boasted the name of the cafe, hotel, or even train line. These were served in cafe and restaurants for many years, particularly in Europe, but were slowly replaced once companies figured out a way to package granulated sugar. They're still used in some cafes in France and other parts of Europe, but they are becoming more and more rare as time goes on.  New versions can also be purchased online--mostly for the purpose of use with absinthe.

personalized wrapped sugar cubes

The whole idea captured me and I remember racing home that day to check ebay for some of my own. I stopped myself, though. Life in New York City is already an endless battle against tiny pests; no need to encourage them with a collection of ancient sugar (regardless of how pretty).

So I pulled myself away and went on with things, but the idea popped back up again earlier this year when I was playing around with homemade sugar cubes. I suddenly realized that I could easily make my own wrapped sugar cubes--an unexpected and elegant touch to a tea party or bridal shower. I also like the idea of just making up a bunch to keep in your regular sugar bowl--the "house sugar," so to speak. I remember reading in Jonathan Adler's book that he and his partner keep personalized matchbooks and cocktail napkins on hand as a novelty item for guests--and idea that I've always kind of loved.

personalized wrapped sugar cubes

So I made up a batch of Alejandra+Eugene sugar, inspired by the design of the Tate+Lyle packets I saw online. To make them, I just created a  design on Illustrator and printed it out on thin paper (use the thinnest paper you can find--it'll be easier to wrap).

Is this a super fussy project? Totally. But it's not hard and the results are kind of adorable and really do open it up to lots of variations. Some other suggestions? Use patterned or colored wrapping paper or tissue paper, use parchment paper and twist the sugar into it in a candy wrapper style, or use a stamp to hand stamp paper with a date or name or design and then cut and wrap.

Check out this amazing Flickr album which features photos of vintage wrapped sugar cubes. I also loved this photo that features a whole collection of them.

personalized wrapped sugar cubes

To make your own:

If you'd like to recreate this project yourself, I suggest you start by creating a canvas on Illustrator that's 2 1/2" high by 2" wide (each sugar cube is 1/2" and I allotted two sugar cubes per package). The main logo should be 1" by 1/2" and should be placed 1/2" from the bottom with 1/2" on each side and 1 1/2" on top. Or you can do a print or design that repeats over the entire canvas. I then saved it as a pdf and printed it out scaled at 100%, 9 to a page.
I wrapped lined the sugar cubes up and wrapped each pair like a tiny present, securing the edges with tiny bits of clear tape. These will keep forever so you can make them in advance.  (The wrappers can also be reused.)


****
New to Always Order Dessert? Consider subscribing to my RSS feed, follow me on Twitter, become a fan on Facebook, or sign up to receive my once-a-week e-mail updates by filling in your address in the box on the right. And if you ever need any entertaining or cooking advice, please don't hesitate to e-mail me. Thanks for reading!
0

Easy Homemade Corn Tortilla Chips

homemade tortilla chips
I've been daydreaming about summer a lot lately. I'm picturing lazy weekend afternoons spent sitting in the hot sun with a glass of something icy-cold and a bowl of something salty-crisp. I've been especially craving tortilla chips--salty, still-hot from the fryer, served by the basket with a variety of fresh salsas and creamy guacamole for dipping.

Doesn't that just sound perfect?

Last weekend, the craving kind of got to me and, remembering the large package of corn tortillas sitting in our fridge, I decided to do something about it.

homemade tortilla chips


"Want homemade tortilla chips?" I asked Eugene, who was wandering around the apartment after having advised that he was feeling a bit peckish (totally my word--he doesn't say things like "peckish"). "That sounds like a lot of work," he replied.

"It's really not."

And with that, I headed to kitchen and started heating oil in my old cast iron skillet. The prep work for homemade tortillas in ridiculously minimal: just heat the oil and quarter the tortillas. A quick pass of the knife through the entire stack of 10 tortillas yielded 40 chips--perfect for the two of us.

homemade tortilla chips


Once the oil was shivery and hot, I dropped in the tortilla triangles a few at a time, letting them fry about 1-2 minutes on each side before flipping for another minute. I used a heavy slotted metal spoon to scoop them out and drain on a large cookie sheet lined with paper towel.

I salted them liberally with freshly cracked sea salt, and served the chips with some fresh salsa verde that I got from Gabriela at the food swap last week.

homemade tortilla chips


 These taste just like the chips they serve at good Mexican restaurants--crisp, light, and fresh. These aren't the same heavy chips you can buy by the bagful--no these taste like pure luxury. And if you're anything like me, the simple fact of having made them yourself will only add to the pleasure.

Another awesome thing? The tortilla chips keep really well--seal any leftovers in a big zipped baggie (or make extra on purpose) and you'll have snacks for the next couple nights.


Homemade Corn Tortilla Chips
This is more of a method than a recipe, and can be doubled or tripled as necessary. You can also get creative with the seasonings--add pepper, cayenne, chili powder, cumin, or anything you'd like to really spice things up.

Ingredients
round corn tortillas (yellow or white corn will both work)
canola or vegetable oi
Sea salt


Directions
Pour canola or vegetable oil into a heavy bottomed skillet or pot until it is about 1" deep. Heat over medium high heat until it reaches 350 degrees.

While the oil heats, use a knife to quarter the tortilas (for smaller chips, cut the tortilla into sixths).  Once the oil is hot, drop the tortilla quarters into the hot oil in batches, being sure not to crowd the pan. Let the chips fry for 1-2 minutes or until golden brown on the bottom; flip for another 30 seconds. Use a slotted metal spoon to remove from the pan and place on a paper towel-lined baking sheet to drain. Salt immediately to taste. Serve hot or let cool and store in zipped plastic bags for up to 5 days.
0

Happy Easter!

Blue Easter Eggs
0

Chewy Almond Farmer Cookies

Almond Farmer Cookies


I don't remember exactly how or when it started, but Eugene and I somehow got into the habit of bringing each other little treats for no particular reason. His gifts are usually sweet and edible--like a handful of salted caramels or a little box of fancy chocolates; mine are usually a little more weird and useless--like a 99-cent wind-up baby chicken toy or a thimble-sized "I Love NY" mug.

[Reading that last sentence over again I realized that it sounds like his gifts are better than mine, but I should note that those fancy chocolates tasted bad (he agreed), and that the wind-up baby chicken has provided us with endless seconds of amusement, so we've basically come out even.]

In keeping with this tradition, Eugene came home recently with a little crumpled white bag and handed it to me. "This is for you," he said excitedly.

I pulled out a thick, round shortbread cookie, and after inspecting it a bit, took a bite. It was awesome! Simply-flavored, with a slight chew in the center, and a subtle almond and anise flavor.

Almond Farmer Cookies


"It's called a farmer cookie," he told me.  He'd bought it at a Swedish bakery located near his office, where he and his friends occasionally have lunch.

I immediately started researching Swedish farmer cookies, and found a few recipes. Called Bondkakor, these cookies are a Scandinavian treat usually served around Christmas time, but delicious year-round. The bakery Eugene went to, Fika, has these on their permanent menu and charges a whopping TWO DOLLARS per cookie. (Incidentally, THIS.)

Personally, I'm of the opinion that normal-sized cookies should never be sold individually. Three is the minimum cookie serving size. Three is better for sharing, too. (As in, "one for you, TWO for me!")

I baked my first batch of these a few weeks ago, but Eugene didn't like them. Not even when I gave them to him for free. "They're not good. They don't taste right."

I blame the butter, which wasn't all that new and smelled kind of fridge-y. Also, I used walnuts instead of almonds, and added orange zest and cinnamon. I actually don't think they were bad (except for the fridge-y butter part); they were just a totally different cookie. It's like taking a sip of Dr. Pepper when you ordered a Coke.

Almond Farmer Cookies


So I tabled that recipe (trust me; it will be back), and went back to the original, using almonds for almonds, and keeping my hands away from the microplane.

And this time, Eugene liked them. "What did you do differently to make them good?" he asked midway through his third cookie.

"I didn't add weird stuff," I replied.

The awesome thing about these cookies is that they have all the buttery richness of shortbread, but with a slight chewy part in the center. It's not ooey-gooey chewy, more of a soft little give. This comes from the addition of molasses or golden syrup (molasses, which lives in brown sugar, is also what gives chocolate chip cookies their chew). I tell you this so that you don't go skipping it.

Also, don't add weird stuff.

Almond Farmer Cookies


****
New to Always Order Dessert? Consider subscribing to my RSS feed, follow me on Twitter, become a fan on Facebook, or sign up to receive my once-a-week e-mail updates by filling in your address in the box on the right. And if you ever need any entertaining or cooking advice, please don't hesitate to e-mail me. Thanks for reading!


Almond Farmer Cookies (bondkakor)
makes 2 dozen cookies

Ingredients
3/4 cup unsalted butter (1 1/2 sticks), room temperature
1 cup granulated white sugar
2 tablespoons Golden Syrup or Molasses
2 teaspoons almond extract
1 teaspoon fennel seeds, crushed (optional but adds a lovely licorice undertone to the cookie, can also sub anise seeds)
2 1/4 cups all purpose flour
3/4 cup slivered almonds, roughly chopped
1 1/2 teaspoons baking soda


Directions

Cream the butter, sugar, and golden syrup or molasses in the base of an electric mixer for 5 minutes until light, fluffy, and doubled in volume. Mix in the almond extract.

Sift together the fennel seeds if using, flour, chopped almonds, and baking soda.

Add flour mixture to the butter mixture and mix only until fully and evenly combined. Turn dough out into a floured surface and divide in half, shaping each half into a log, 1 1/2 to 2 inches in diameter. Wrap tightly in plastic wrap and chill for at least three hours (up to 3 days).

When ready to bake, preheat oven to 350 degrees and line cookie sheets with parchment paper. Slice rolls into 1/2 inch slices and bake in batches on lined cookie sheets, keeping each cookie about 1 1/2 inches apart. Bake for 12 minutes, until the cookies puff up and start to get a bit of color around the edges. Remove from the oven and let cool on baking sheets for 10 minutes before transferring to wire racks. Eat immediately or store in an air-tight container for up to 5 days. (Taste best when fresh.)

This batch makes about two dozen cookies, depending how thick you cut them.
0

Asparagus and Goat Cheese Quinoa Patties with Smoked Salmon and Lemon Yogurt Sauce

goat cheese, asparagus, and quinoa patties with lemon yogurt and smoked salmon

I recently received a review copy of Heidi Swanson's gorgeous new cookbook, Super Natural Every Day, and was excited to try out some of the recipes. The book itself is seriously beautiful--dreamy photographs, heavy matte paper, and lots of simple, inspiring ingredients.  It's vegetarian, which I admit something that I usually shy away from in terms of cookbooks, but I really like her way of presenting ideas and techniques that I can then incorporate into my own cooking.

My plan initially was to actually follow some of the recipes to the letter (itself an exercise in restraint since I usually suck at reigning in my improvisational tendencies--can any of you relate to that?), but that idea quickly went out the window. You see, while leafing through the book, I came across her recipe for "Little Quinoa Patties," with goat cheese, garlic, and herbs, which totally caught my eye. I go wild for all kinds of savory patties, cakes, and fritters, and just so happened to have a log of goat cheese in the fridge and some quinoa in the pantry. Perfect!

goat cheese, asparagus, and quinoa patties with lemon yogurt and smoked salmon


Only problem? The recipe didn't seem to actually match the description! I read the entire recipe and ingredient list multiple times, but there was no goat cheese listed anywhere in the ingredient list or directions. In fact, what the recipe actually calls for is Parmesan or Gruyère; both of which are made from cow's milk. (I totally even Googled to double-check this as I wasn't positive about the gruyere, but yeah, both from cows.)

So...my guess is that the recipe originally called for goat cheese and then was altered during the editing process, or perhaps it was just a editing error? Whatever happened, I can tell you that by this point I was in love with the idea of quinoa patties made with goat cheese, and decided to forge ahead with that idea anyway, using Heidi's recipe as a guide for the proportions.

scoop of quinoa pattie mix


I first made two cups of red quinoa in low sodium chicken broth (you can use water, but I like that it infuses a little more flavor), and while still hot, I added them to a large bowl in which I'd already placed about 4 ounces of creamy goat cheese, some hot red pepper flakes, a pinch of thyme, and two finely minced garlic cloves. I stirred gently, allowing the heat from the quinoa to melt the cheese and infuse the mix with the aroma of the fresh garlic and thyme.

I remembered that I had some asparagus that needed to get used soon, so I diced it up into tiny pieces, and sauteed it quickly on a very hot pan for just a couple minutes. I tossed the asparagus with lots of freshly cracked black pepper and sea salt and stirred it into the quinoa. Just like in Heidi's recipe I added 4 beaten eggs and whole wheat breadcrumbs (well, whole wheat Panko, actually since it's what I had on hand).

DSC_0634


Instead of forming patties with the mix as indicated in the original recipe, I used an ice cream scoop to scoop out even sized amounts that I plopped right into the hot oil. I use this method for all kinds of cake frying as it's easier, quicker, and much less messy. I let each scoop cook for about a minute before squashing it down with the back of my spatula (oiled to prevent sticking), and then let them crisp up another couple minutes before flipping.

I wanted to serve these with something, so I made a simple yogurt sauce--just Greek yogurt, lemon juice, lemon zest, and sea salt--and served the cakes for dinner topped with the sauce and a thin sliver of this really, really good smoked salmon I bought last weekend.

DSC_0630


These made a fantastic dinner (I had 4 patties; Eugene had 6), with enough leftover for today's lunch. The mix keeps well in the fridge overnight so you can prepare that much in advance and then cook them just before serving. I think these would also make a wonderful appetizer for a dinner party (you could even make them into smaller, meatball-sized patties and serve them as finger food).

I'm going to try another recipe from this book later this week, but until then, I'm just happy for the inspiration it gave me to try something a little different. Because honestly, that's what I really think cookbooks are all about.

goat cheese, asparagus, and quinoa patties with lemon yogurt and smoked salmon

****
New to Always Order Dessert? Consider subscribing to my RSS feed, follow me on Twitter, become a fan on Facebook, or sign up to receive my once-a-week e-mail updates by filling in your address in the box on the right. And if you ever need any entertaining or cooking advice, please don't hesitate to e-mail me. Thanks for reading!


Asparagus and Goat Cheese Quinoa Patties 
w/ Smoked Salmon & Lemon Yogurt Sauce
Very loosely inspired by Heidi Swanson's "Little Quinoa Patties," p. 121 Super Natural Every Day. This recipe can also be made with leftover quinoa, but I recommend heating it up a bit before adding to the cheese so that everything melts easily. If you don't have (or like) quinoa, you can also make this using cooked white or brown rice, bulgar wheat, or cous cous.

Ingredients

For the patties:
4 oz goat cheese
2 garlic cloves, finely minced
1 teaspoon thyme leaves, preferably fresh
1/2 teaspoon red pepper flakes
juice and zest of 2 lemons, divided (one for the patties, one for the yogurt sauce)
2 cups hot cooked quinoa
1 pound asparagus, diced into 1/2" pieces
1 tablespoon olive oil
Kosher or sea salt
freshly ground black pepper
4 large eggs, lightly beaten
1 1/2 cups whole wheat bread crumbs (Substitute gluten-free breadcrumbs or a mix of almond and coconut flour if you can't do wheat!)

1/4 cup coconut, grapeseed, or canola oil for frying

For the yogurt sauce:
3/4 cup plain Greek-style yogurt (such as Fage)
juice and zest of 1 lemon (as noted above)
1/2 teaspoon sea salt

8 oz thinly sliced smoked salmon, cut into small pieces (about 1" by 3")

Directions:
In a large bowl, combine the goat cheese, minced garlic, thyme, red pepper, and juice and zest of 1 lemon. Add the hot, cooked quinoa on top and stir gently, letting the heat from the quinoa melt the cheese. Stir until quinoa is fully coated. Set aside.

While the quinoa cools, prepare the yogurt dressing, by whisking together the 3/4 cup of yogurt, juice and zest of the second lemon, and 1/2 teaspoon of sea salt. Whisk until loose and smooth, adding more lemon juice or salt if necessary. Set aside.

Heat 1 tablespoon of olive oil in a skillet over medium-high heat. Add the diced asparagus and saute quickly for 2 minutes. Season generously with sea salt and freshly ground black pepper, then fold into the quinoa and cheese mix.

Add the beaten eggs and the bread crumbs, and stir until thoroughly combined. Let the mixture sit for 5 minutes. Meanwhile, heat 1/4 cup of coconut, grapeseed, or canola oil in a large skillet over medium-high heat. Once the oil is hot, use an ice cream scoop or large spoon to drop even-sized scoops of the quinoa mix into the oil. Be sure to not crowd your pan leaving 1 to 2 inches between each scoop. Let cook for 1 minute, then use a spatula that has been oiled or sprayed with nonstick spray to press down on the scoop and flatten it into a pattie. Let cook for 2 to 3 minutes or until golden and crisp on bottom side, then flip and cook for an addition 2 to 3 minutes. Once crisp and golden on both sides, remove from the hot oil and place on a paper-towel lined platter to drain. Repeat with the rest of the batter.

Assemble the patties
Top each patty with a dollop of the yogurt dressing and one small piece of smoked salmon. Serve immediately.
0

Chocolate Banana Nut Smoothies

DSC_0623 I admit that when I was working in an office, I didn't always eat breakfast. As a night person who regularly waits until 10 or 11PM to get started on some projects, mornings have never been my favorite. I have no problem staying up all night if I'm feeling a burst of creative productivity, but that usually means that my mornings then become a sleepy rush of trying to get showered, dressed, packed, and out the door in time to catch the train. Breakfast rarely happened.

Now that I make my own schedule, life is a lot better. The two to three hours that I previously used to lose on waking up, getting ready, commuting, dealing with general office morning nonsense, are now pared down to the essentials. I wake up easily, excited about the day and the projects ahead.

And yet, despite the ease, I noticed that breakfast still hasn't made it into the routine. I'm almost too excited to eat in mornings--too eager to start writing, researching, planning. It's an amazing feeling knowing that I'm passionate about everything I have to do, but even so I have to force myself to slow down a bit. Last week I realized that I'd often hit 2pm without eating at all.  Awful, right? Strange to sit here reading and writing about food, when I haven't even consumed anything yet.

So I started making myself juices and smoothies--nothing too fancy, just bananas, almond milk, unsweetened peanut butter, and cocoa. A lot of cocoa. A touch of honey. The combination is thick, filling, and comforting, and it gives me the energy I need to stay focused and get through the morning.

This batch makes enough for a few mornings (or to share!).


Chocolate Banana Nut Smoothies
Serves 4

Ingredients
2 bananas, peeled (I like to peel my bananas in advance and freeze them to make a cold and frothy drink)
4 cups unsweetened almond milk (you can also use regular whole milk or rice milk)
1/3 cup natural peanut butter (unsweetened)
1/3 cup + 2 tablespoons unsweetened cocoa powder
2 tablespoons honey
1 pinch celtic sea salt (optional)

Directions
Combine all ingredients in a blender or food processor and blend until smooth. Serve immediately or store in an air-tight glass jar in the fridge for up to 5 days (you may need to whisk quickly with a fork before pouring if storing in the fridge).
0

Pizzagaina (Italian Easter Ham Pie)

Pizzagaina (aka: Italian Easter Ham Pie, Pizza Chena, Pizza Piena)

My beautiful friend Katie sent me an email a few weeks ago suggesting that I make and write a post about Pizzagaina, the Italian meat and cheese pie traditionally eaten on Easter Sunday to celebrate the resurrection of Jesus and the gift of salvation. As soon as I got her message, I agreed because Pizzagaina is an AMAZING dish that can be enjoyed by all regardless of nationality or religion (just ask my Jewish Ukrainian husband who has been eating it daily for the past week!).

Filled to the brim with a variety of meats, eggs, and cheese, it's truly a celebratory dish that stands in marked contrast to the more modest meals traditionally consumed during the previous 40 days of fasting and sacrifice (Lent).  It's definitely not an everyday dish, but rather one that is meant to be enjoyed during this joyful season, in the company of friends and family.

Slice of pizzagaina

First, a little language lesson: The name Pizzagaina (pronounced "pizza jay-nah") is actually an Italian American adaptation of the original name Pizza Chena, which in itself is Neapolitan dialect for "full pie." The pie is also known in some families as "Pizza Piena" (piena meaning "full" in standard Italian) or simply Italian Easter Ham Pie. Those of you who also speak Spanish, will recognize the similarity to the Spanish word for full, which is "llena."

Apart from the different names, there are as many variations of this dish as there are Italian families.  Some families prefer a chewy, bread-like crust, while others go with a more standard, flaky pie crust. Some people layer their meat in sliced, while others used diced cubes. The variety of meats and cheese can also vary depending on tastes and availability. The recipe that I give you here is by no means meant to be the definitive version; but it's a good basic version, which produces a stellar pie, and which will still allow you to customize it as you'd like. Below I've added my notes and recommendations on each aspect of the dish, along with suggestions for making it your own based on your budget, tastes, and what's available in your neighborhood.

pizzagaina crust

The Crust:  I recommend a standard yeasted pizza dough crust, which is easy to work with and stands up well to the heavy filling. I provide directions for making your dough from scratch, but if you prefer, you can also use premade pizza dough purchased from the freezer section of the grocery store or even bought directly from your local pizza parlor (a lot of places will sell you a couple pounds of their dough if you just ask).

If you want a flaky dough, simply use an equivalent amount of your favorite pie crust. (If you opt for the latter, you can top the pie with a  lattice crust or even add a decorative cross with extra dough on top of the top crust.)

two pounds of meat

The Meat Filling: You're going to need about 2 pounds of a variety of meats. The choice is totally up to you. I used about a 1/4 pound each of Genoa salami, pepperoni, capicolla, hot soppressata, and a 1/2 pound each of Black Forest ham and mortadella. Feel free to pick your favorites or go by what's on sale or available in your neighborhood. If you'd like, you can also use a portion of cooked hot Italian sausage (out of the casing) to make up the 2 pounds.

One thing I definitely recommend is to use a combination of both mild (like ham and mortadella) and heavily spiced (like capicolla and pepperoni) for a more interesting and balanced flavor. Traditionally, this dish is made with pork products, but I'm sure cured beef like bresaola or bastirma would also work nicely. Depending on your budget and what is available to you, you can also get creative and use things like Taylor ham (pork roll) or diced smoked sausage.

Pizzagaina

The Cheese: Traditionally, Pizzagaina is made with an Italian cheese called "basket cheese" (also "Easter Cheese"). This cheese is often sold in regular grocery stores in neighborhoods with a high Italian-American population (like where I grew up in New Jersey) and Italian specialty stores everywhere else. It is named because of the way it is made and sold, inside a little basket. The cheese itself is very mild, and used as a binder in recipes like this one. As this can be difficult to find, you can simply use ricotta (preferably fresh) as an easy substitute. Other possible options include 
farmer's cheese, mascarpone, or quark.

For the sliced cheese, I use a 1/2 pound each of mozzarella and provolone (I like the latter because it adds a little sharpness to the mix). As this is such a heavy wet dish, I recommend using either a dryer mozzarella (one that doesn't come packed in water), or fresh mozzarella that you've allowed to drain for a few minutes before slicing. Do not use mozzarella di buffala or burrata. You can also replace a portion of the sliced cheese with grated parmigiano or pecorino, and mix that into the egg filling.

pizzagaina cooling in the springform crust

Finally, the baking dish: I make my pizza in a round springform pan with high 3" sides. I like that this pan allows you to easily release it from the mold once it's cooled so that you can serve on a pretty platter. You can also bake this in a square or rectangular baking dish and simply serve it in the pan. Once again, the choice is totally up to you! 

Oh and one last thing! Once you follow this recipe, you'll see that essentially what you're making is a filled loaf of bread. A technique which can easily be adapted to other (and perhaps slightly healthier) variations. You could, for example, make a vegetarian version that replaces the meat with a variety of grilled vegetables, or stir in some savory sauces like pesto or tapenade for additional flavor. Or you can use a variety of ground meats. The possibilities are really endless; I hope that you find this recipe just as inspiring as I do!

P.S. Want to see more step-by-step photos? Visit the pizzagaina photo album I posted on the Always Order Dessert Facebook page, and feel free to leave any questions you may have about this recipe (or any other!) on the wall, and I'll get back to you right away! xo

pizzagaina for Easter


****
New to Always Order Dessert? Consider subscribing to my RSS feed, follow me on Twitter, become a fan on Facebook, or sign up to receive my once-a-week e-mail updates by filling in your address in the box on the right. And if you ever need any entertaining or cooking advice, please don't hesitate to e-mail me. Thanks for reading!

Pizzagaina (Pizza Chena, Italian Easter Pie)
Serves 12-14; If you'd prefer, you can simplify this dish even further by using pre-made pizza dough for this recipe (you'll need 2 pounds), or for a flaky crust, substitute your favorite pie crust recipe and proceed from there.

Dough
2 1/2 teaspoons active dry yeast (1 packet)
1 tablespoon granulated white sugar
2 cups warm water (about 115 degrees F)
1 tablespoon Kosher salt
6-8 cups all-purpose flour
3 tablespoons olive oil, plus more for greasing bowl

Filling
13 large eggs
2 pounds of a variety of your choice of Italian charcuterie/salumi (such as genoa salami, mortadella, capicolla, pepperoni, ham, prosciutto, soppressata, etc.)
1 teaspoon ground black pepper
1 pound fresh ricotta or Italian basket cheese
1/2 pound mozzarella cheese, thinly sliced
1/2 pound provolone cheese, thinly sliced

Equipment: One 10" by 3" round springform pan  (A 9x3" springform will also work, but you may have a little extra filling or dough leftover)

Directions

First make the dough:
In the base of a stand mixer, combine 1 package of active dry yeast with 1 tablespoon sugar and 2 cups warm water. Whisk well to dissolve and let stand 2 minutes.

Add the tablespoon of Kosher salt and 6 cups of all-purpose flour, to start. Use the dough hook on your mixer to mix together, increasing speed as the flour is incorporated and a dough starts to form. Add the olive oil, and continue to knead at high speed in the mixer, adding more flour 1/4 cup at a time until the dough is smooth, springy, and not sticky. The dough should form a kind of a tornado within the mixer as it kneads--coming away from the sides entirely, but still connected to the bottom. If it still sticks to the sides of the bowl, add more flour. If it comes off the sides and bottom completely, add an extra tablespoon or two of water. Let knead in the mixer for 5 minutes.

Prepare a large clean glass or metal bowl by drizzling olive oil in the bottom.

The dough with be smooth and able to be handled when ready. Remove the dough from the mixer and form into a smooth ball. Place into the oiled bowl, turning once so that the oil coats the top and bottom. Cover bowl loosely with plastic wrap and place in a warm, draft-free place to rise until doubled in size--about 2 hours. [Note: I always place my rising dough inside my (turned off) oven, allowing just the heat from the pilot light to keep it warm. Other good spots are inside a (turned off) microwave.]

Prepare the filling:
Make four hardboiled eggs by placing 4 uncooked eggs in a small saucepan and covering with tap water . Place over high heat and bring to a boil. Let boil for 1 minute, then turn off heat, cover pot, and let sit for 10-15 minutes. Drain out the hot water and replace with cold water, letting the eggs cool for 5 minutes. Tap the eggs against the counter and peel. Slice each egg and set aside.

Prepare the meat by stacking the various meats into small piles, and using a sharp knife to dice into 1/2-1" size pieces.  Set aside.

In a large bowl, whisk 8 large eggs well until frothy. Whisk in the black pepper and the ricotta or basket cheese until well combined. Use a wooden spoon or spatula to gently stir in all of the cut meat pieces, mixing until all are evenly distributed. Set aside.

Assemble:
Preheat your oven to 350 degrees F, and grease the inside of your springform pan with olive oil or nonstick baking spray.

Once the dough has risen, poke it down to release the air bubbles. Sprinkle some flour on a clean work space, and transfer the dough to the floured surface. Cut the dough in half, returning one half to the bowl, and focus on the other half. Shape into a ball, and then use a rolling pin to roll out the dough into a large round (about 11 or 12 inches in diameter). If the dough keeps shrinking back, let it rest for a few minutes before trying it again.

Gently fit the rolled out dough over and into the prepared springform pan, tucking it into all sides. The dough should overhang about 1 to 2 inches around the top.

Use a large spoon to pour in about 1/3 of the egg and meat filling, spreading it evenly. Top with about 1/3 of the sliced eggs and 1/3 of the sliced mozzarella and provolone cheeses. Continue in this order until all the filling, eggs, and cheese have been added (or until the filling reaches the top if you're using a smaller pan).

Grab the second half of the dough and place on the floured work surface, and roll out a second 10-12" round.  Lift this dough round over the filled pan and cover it entirely. The dough should overhang about 1" on all sides. Use a knife or kitchen shears to trim off anything longer than 1", and then pinch together the top and bottom doughs well until sealed, then roll up evenly around the pan to create a rim.

Whisk the final egg in a small bowl along with a 1/4 cup of water. Use a pastry brush to brush the egg wash over the entire pie.

Bake in your preheated 350 degree oven for 60 to 70 minutes, or until the crust is golden brown. Remove from the oven and let cool in the pan for 30 minutes before releasing the spring and removing the outside ring. Transfer to a serving plate and let cool completely. Can be enjoyed the same day, or chilled up to 2 nights in the fridge before serving cold or at room temperature.

Pizza can be stored in an air-tight container in the fridge for up to one week, or slices can be individually wrapped and frozen.
0

Spring Menu Tasting at The Peninsula NYC


This past Monday, I (along with a few other NY food bloggers) attended a lovely and intimate menu tasting at Fives restaurant located in The Peninsula Hotel.  The event was meant to give us a chance to try a few of the new spring menu items, and to meet Fives' charming new Executive Chef, Chef Anuwat Nu Morakotjantachote (Chef Nu, for short).

The meal was amazing, and I was really impressed by the quality of the dishes. The menu was very seasonally inspired--filled with gorgeous, fresh Spring vegetables and grass-fed meats (and a pretty fantastic chocolate dessert!). As good as the food was, I think I was most excited about finally seeing so many gorgeous colors on my plate again--think bright green romanesco, red baby carrots, peas, asparagus, and lots of herbs.

Chef Nu himself was absolutely wonderful--he came out and described each dish in details, patiently answering any questions we asked. And the final sweet touch? We all got these adorable cupcakes to take home as a parting gift. (I ate mine for breakfast-dessert the next day!)

I posted an album containing pictures and details about each of the amazing dishes we ate; visit the Always Order Dessert Facebook page to check them out!
0

Homemade Orange Curd

DSC_1127

I fell upon a basket of gorgeous oranges at the grocery store the other day. Bright orange skin with stems and lush green leaves still attached. I bought a few of them and arranged them on a bowl in my kitchen counter, delicately placing them so that the leaves would stay intact.

There is something just so lovely about fruit that still feels that close to the way it came into this world. I remember during our trip to California a little over a year ago, when I used to slip out back in the mornings to the garden filled with herbs, plants, and fruit-bearing trees. Or how exciting it was on our honeymoon to discover the mango and grapefruit trees growing behind our bed & breakfast.

orange with leaves


It's not as common here, but I love stumbling upon a blackberry bush in Central Park, and I'm hoping that this summer will finally be the summer that we get in the car and drive the hour or so to the nearby pick-your-own farms. I'm looking forward to baskets of peaches, berries, and plums to bake with!

Until then, I have my oranges, or rather I have orange curd which will hopefully last me a few more weeks until the farmer's market starts offering up something a little more exciting than cold-storage apples.

orange curd


****
New to Always Order Dessert? Consider subscribing to my RSS feed, follow me on Twitter, become a fan on Facebook, or sign up to receive my once-a-week e-mail updates by filling in your address in the box on the right. And if you ever need any entertaining or cooking advice, please don't hesitate to e-mail me. Thanks for reading!


Orange Curd
Like with all fruit, taste your oranges before you get started--sweeter fruit will require a little more lemon to keep the balance right. Makes about 2 cups of curd.

Ingredients
1 1/2 cups fresh orange juice (from about 4 oranges)
zest from two whole oranges
4 tablespoons lemon juice
2 large whole egg
4 large egg yolks
1/2 cup granulated white sugar
8 tablespoons unsalted butter, room temperature
pinch of Kosher salt

Directions
Pour the orange juice in a small saucepan over medium-high heat and bring to a simmer. Let reduce down to about 1/2 cup (about 5 minutes). Remove from the heat and stir in the zest and lemon juice. Let cool.

In a separate bowl, combine the whole egg, yolks, and sugar, whisking well. When the orange juice and zest mixture has cooled to room temperature, pour it into the egg mixture in a steady stream, whisking constantly.

Prepare a medium sized bowl with a fine mesh strainer over it and set aside.

Pour the egg and juice mixture back into the small saucepan and set it over medium heat, stirring constantly until the mixture has thickened and coats the back of a spoon (about 7 to 10 minutes). Once thickened, strain into the clean bowl to remove the zest. Whisk in the butter and salt while the curd is still warm. Transfer to a clean glass jar with lid or another air-tight container and let cool. Will keep refrigerated for up to 2 weeks.
0

Red Pepper, Parsley, and Walnut Spread

DSC_1139

I recently fell in love with a red pepper dip I tasted at one of my favorite Mediterranean restaurants that tasted like a cross between a traditional Muhammarah and a fresh Mexican salsa.  Honestly--it was fantastic! That place has a little shop in front when you can buy pretty much everything on their menu to take home, so before we left, I bought a small container of the dip for "research purposes."

On the menu, the dip was described as a pepper dip with walnuts and garlic. I knew there was a lot more in there, so I started tasting (aka "researching") and trying to identify all the flavors. I'm letting you know right now that this isn't it. This is a lovely dip that resulted from my various experimentations. It's not the exact one I was hoping to make, but it's so good and so versatile that I had to share it.

DSC_1147

Made with roasted red peppers, onions, walnuts, and a few other good things, this spread is wonderful on warm pita or in a sandwich in place of mayo, but it goes even further than that! You can also use it the way you would any pesto--on pasta, tossed with shrimp before grilling or sauteing, even dolloped onto tomato or lentil soup as a garnish!

The spread keeps well in the fridge for about two weeks (just give it a little whisk before using if it starts to separate), and is a quick way to pack lots of flavor into a weeknight lunch or dinner.

I'm still working on cracking the code behind that other magical dip and will be sure to share it with you as soon as I do, but until then, I'm sure you'll love this one.

DSC_1149


****
New to Always Order Dessert? Consider subscribing to my RSS feed, follow me on Twitter, become a fan on Facebook, or sign up to receive my once-a-week e-mail updates by filling in your address in the box on the right. And if you ever need any entertaining or cooking advice, please don't hesitate to e-mail me. Thanks for reading!

 
Red Pepper, Parsley, and Walnut Spread

Ingredients
3 red bell peppers, whole (see notes in recipe for substitutions)
1 cup shelled and roasted walnuts
3 cloves garlic, peeled
1 half onion, peeled
1 teaspoon Kosher salt (plus more if necessary)
1 bunch Italian flat parsley, rinsed and trimmed of the bottom 2 inches of stem
1 tablespoon smoked spanish paprika
olive oil


Directions
Roast the bell peppers by placing directly over the flame on a gas stove, turning with tongs until blackened all over. (You can also use a broiler or grill; or substitute an equivalent of store-bought roasted red peppers) Place blackened peppers in a paper bag or in a bowl covered with plastic wrap, and let steam and cool for 15 minutes.  Use your hands to peel the peppers (leaving just a bit of the charred skin), also removing the seeds and core.

In the base of a food processor or blender, combine the peeled and seeded roasted peppers, the cup of walnuts, the 3 cloves of garlic, the half onion, salt, parsley, and smoked paprika and puree until smooth. Drizzle in about 2 tablespoons of olive oil, and puree again. Taste and adjust salt as needed.

Serve immediately as a dip, use as a spread in sandwiches, toss with pasta, etc. Will keep in an air-tight container in the refrigerator for 2 weeks.
0

Food Swapping in Brooklyn

BK Swappers Food Swap
A few weeks ago, I read a really cool article in the New York Times about a food swapping event being held every so often here in New York, during which a group of canners, bakers, gardeners, food bloggers, and other talented food folks get together to exchange their homemade (or homegrown) treats, share potluck dishes, and just hang out in person for a few hours.

Awesome, right? I was instantly smitten with the idea, and signed up to attend the next event, which was held yesterday afternoon at a store/culinary studio called Brooklyn Kitchen in the Williamsburg section of Brooklyn.

DSC_0607
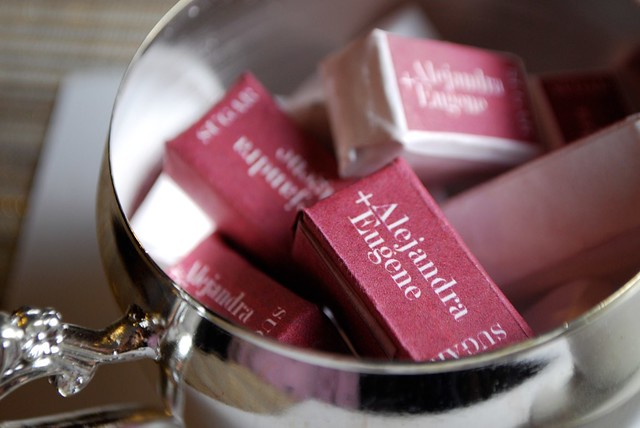
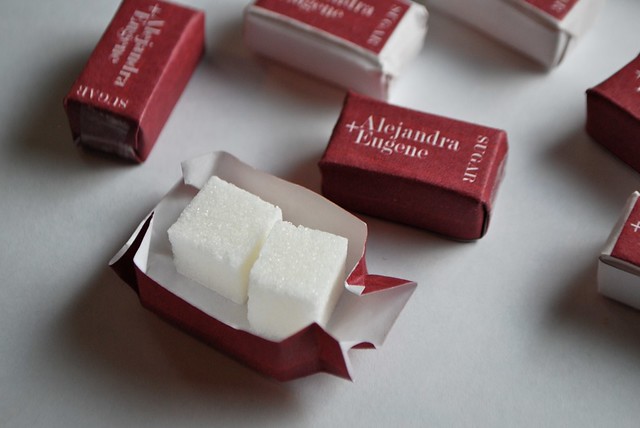
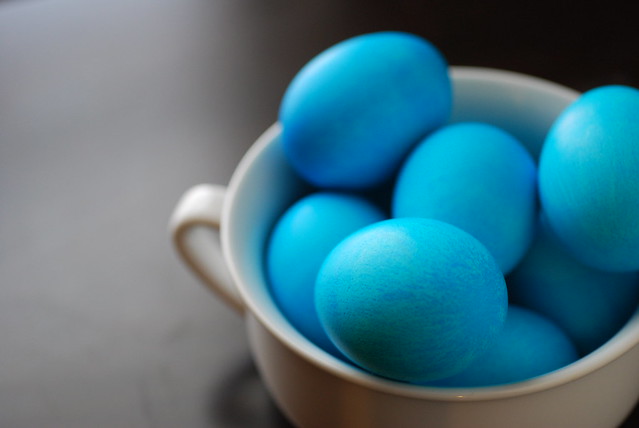
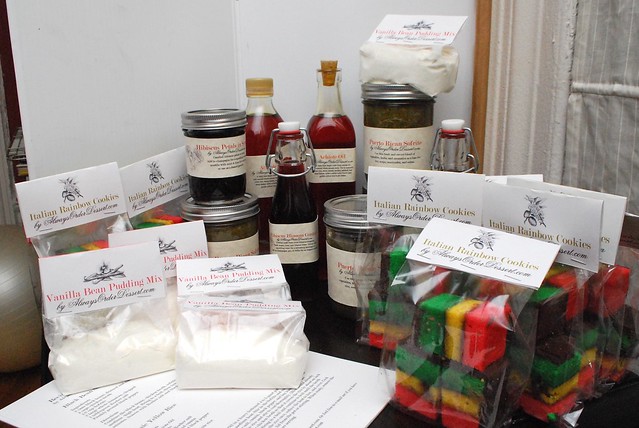
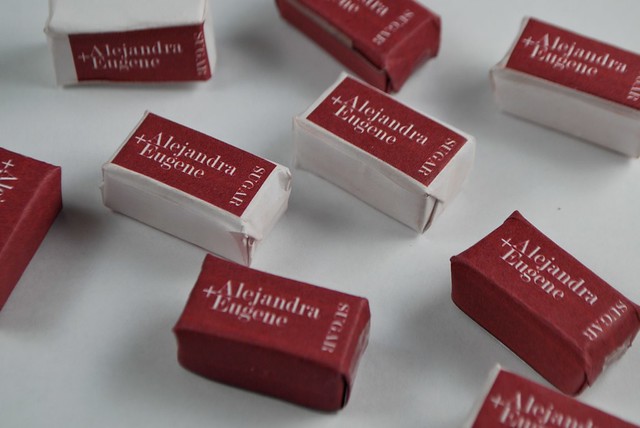
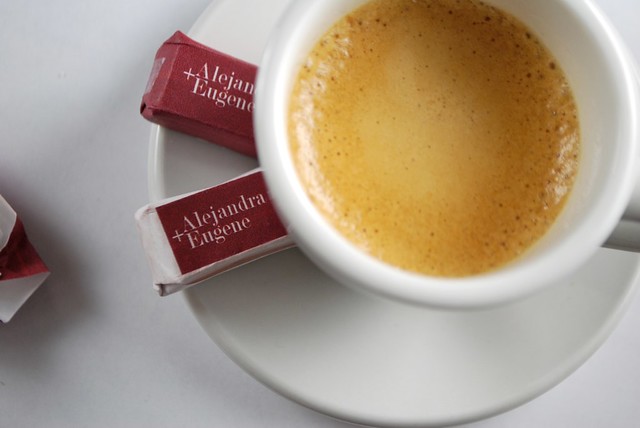
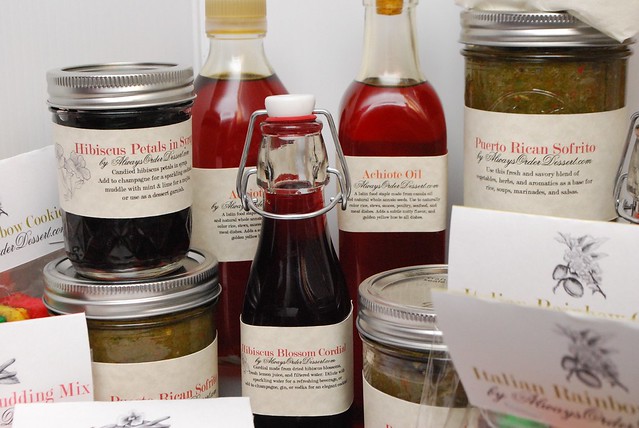
The items I made and brought to the food swap (all in my homemade packaging!)
In anticipation of the event, I spent a few days trying to figure out what to bring. I'm not really much of a canner, so I don't have stores of pickles and jams and things in my pantry, but I do love to make stuff,  so I ended up putting together a variety of sweet and savory items that I hoped would go over well with the other swappers.

I decided to go with a kind of Latin theme. I used a bag of dried hibiscus flowers (flor de jamaica) that my friend Looney brought me from Nicaragua a while ago to make hibiscus blossom cordial and candied hibiscus blossoms in syrup, both of which can be used for cocktails and sparkling non-alcoholic beverages. I also made a couple Puerto Rican pantry staples that I thought might attract attention: achiote oil, a red-hued oil made by simmering anatto seeds in canola oil that is used to naturally color Latin dishes (it's the yellow in yellow rice),  and sofrito, a fresh blend of vegetables, herbs, and aromatics that acts as the base of pretty much all Puerto Rican dishes. I printed up sheets with recipes for black bean soup and yellow rice so that people who took home the sofrito and achiote would know what to do with it.

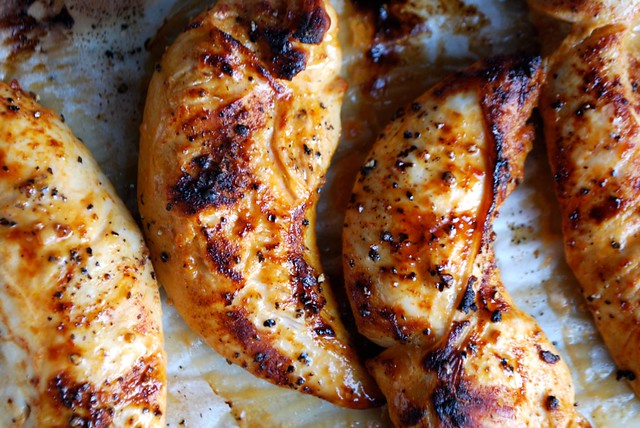
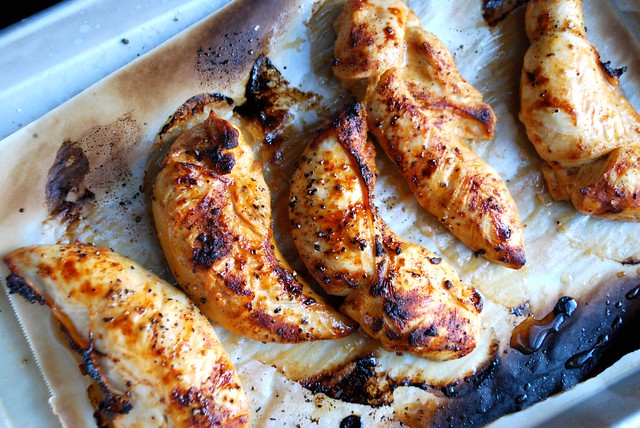
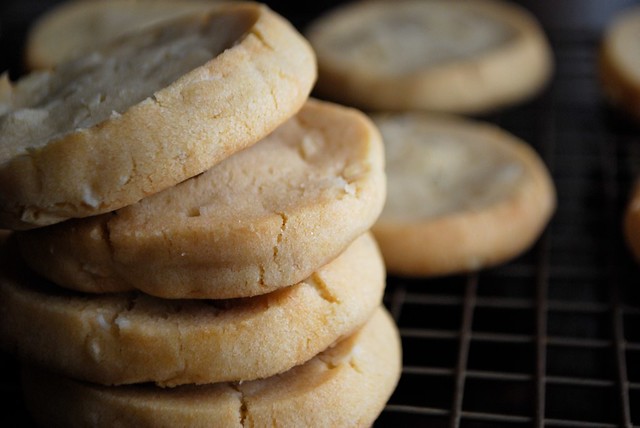
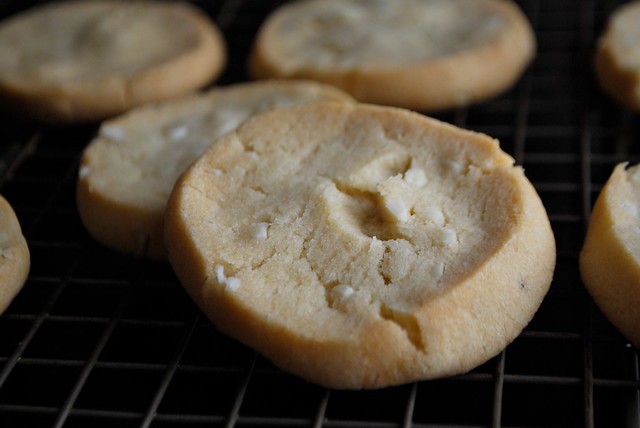
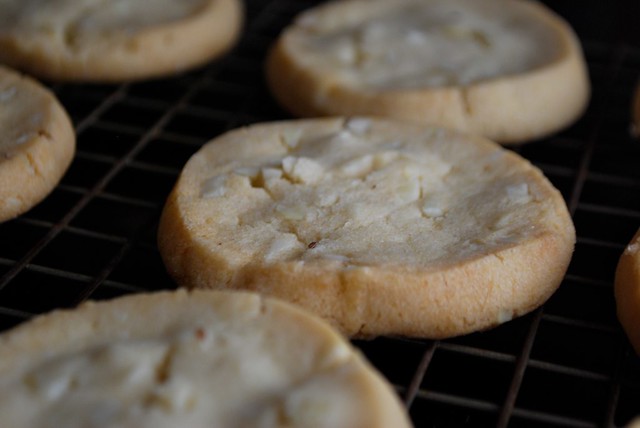
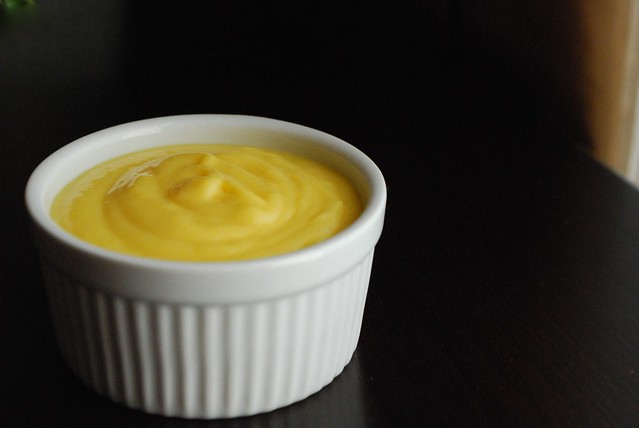
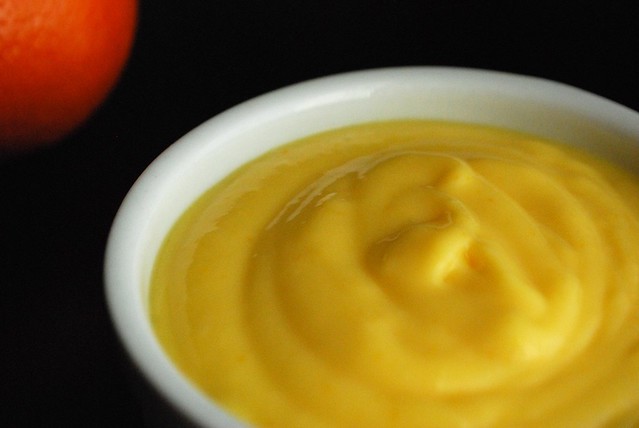
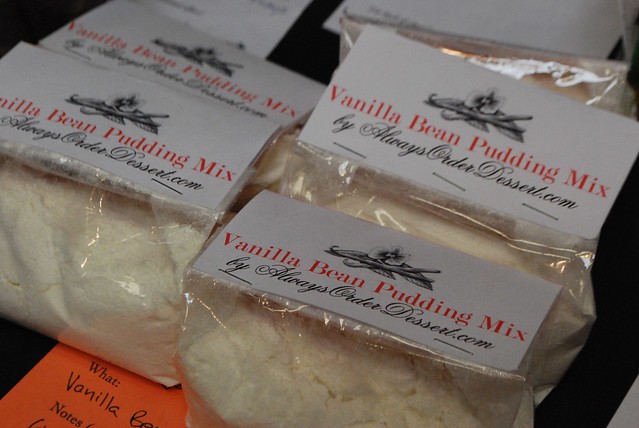
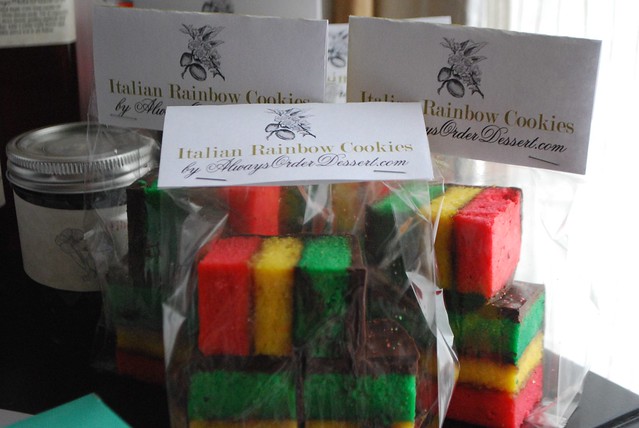
I also baked a batch of my signature Italian Rainbow Cookies, and I portioned out cute packages of my homemade vanilla bean pudding mix, each with a half of a vanilla bean tucked in. (I know you're curious so don't worry because ALL of these recipes are indeed forthcoming!) The swap was also meant to be a potluck brunch, so I brought some of my 
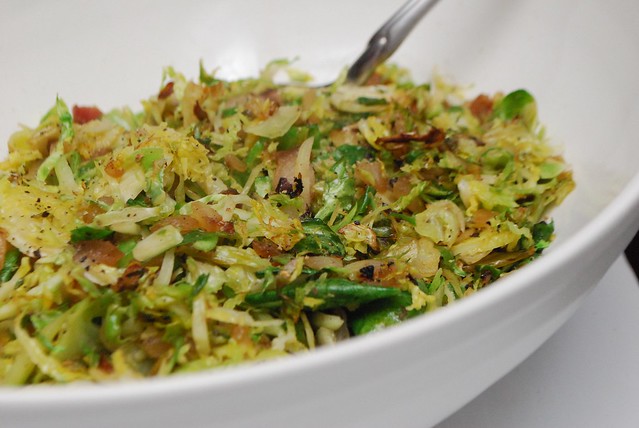
smoky deviled egg salad with caramelized shallots to share with the other swappers.

DSC_0631
DSC_0618
DSC_0626

I'm all about presentation and branding (and love any excuse for a craft project), so I created some simple, but elegant labels on Illustrator, and packaged the items in pretty bottles, jars, and clear treat bags. The results were adorable--so much so that I was worried I would have a difficult time letting go of the treats once I got to the event!

I was glad to have put in the extra effort as the people at the event all seemed to really love my packaging (some folks even asked if cater or have a store!). Even better, all of my items were well-received, although I have to note that the sofrito and the rainbow cookies were definitely the standouts from my bunch. The other items on offer were incredible--everything from hard cider and infused booze to all kinds of pickles, jams, and preserves. Savory items seemed to be more popular than the sweet ones, but I think everything got a little bit of love!

DSC_0630
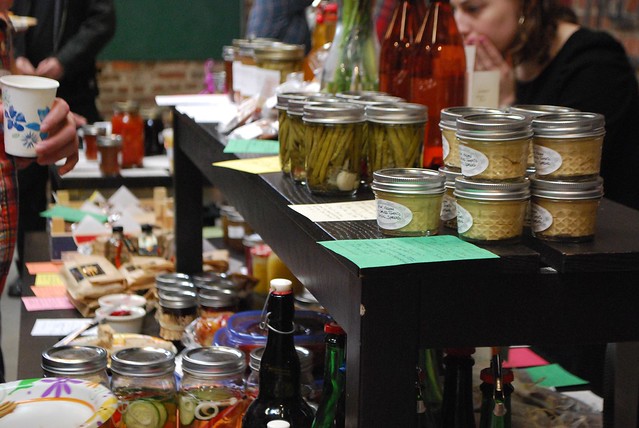
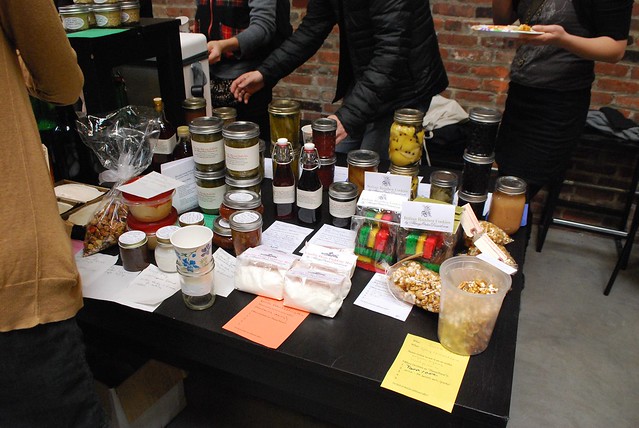
My products on display with folks swapping and snacking in the background.

DSC_0634

The swap itself was a bit of a whirlwind--almost a little overwhelming, actually. We started out Chinese auction style by writing our names on little cards placed near each item, but come swapping time, it was really more of a free-for-all; with people just walking up to the person who had the item they wanted and negotiating a trade. There were a few times when I found myself totally confused by what was going on as food kept exchanging hands, but once it settled down, I was pleased with the results. Delighted, actually!

I came home with two heavy bags FILLED with treats (Eugene lovingly drove me to the event and then picked me up, as it would have been impossible for me to carry everything on that long train ride with my back injury).  In exchange for my items I got: chipotles in adobo sauce and salsa verde (by Gabriela from Gabriela's Kitchen), hot curry cinnamon chocolate sauce, port wine chocolate sauce from Melissa of the Spatula Queen, homemade "dumpling" pork sausage seasoned with chives, glazed lemon cake, strawberry chipotle jam, homemade coconut extract by Emily of 
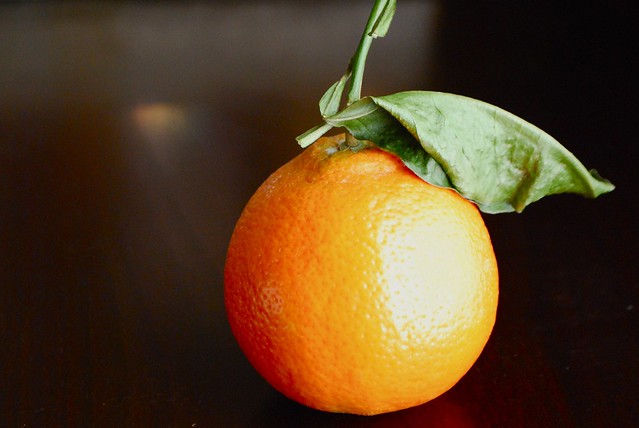
Nomnivorous, a carafe of freshly squeezed orange juice, chocolate babka by Richela, salted cinnamon caramels by 
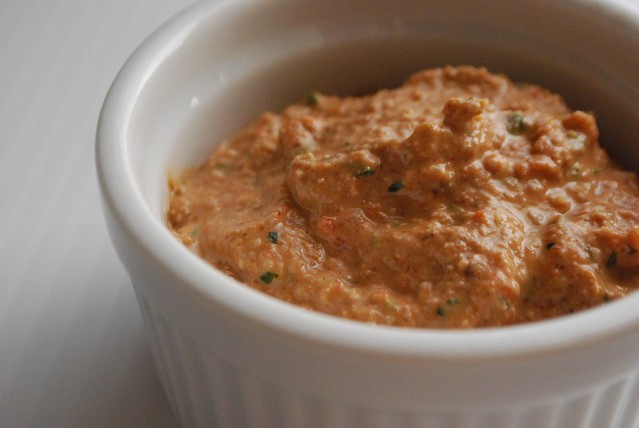
the Singing Chef, mango chutney, homemade marshmallows, raw vegan sun-dried tomato and basil spread, pickled beets from Communal Table, upside-down pineapple cake, salt and pepper cookies, honey and chili nut brittle by Raganella, and a tub of schmaltz. (The latter of which has made Eugene very pleased indeed; he keeps talking about getting some "good bread" to spread it on. Nothing like rendered chicken fat to make a Jewish man happy!)

DSC_0643
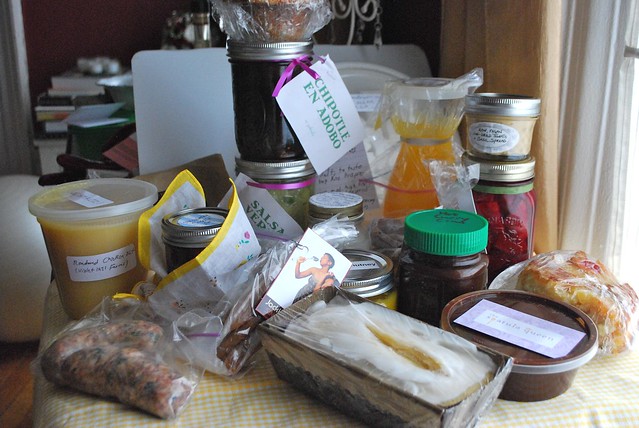
The selection of treats I brought home from the swap.

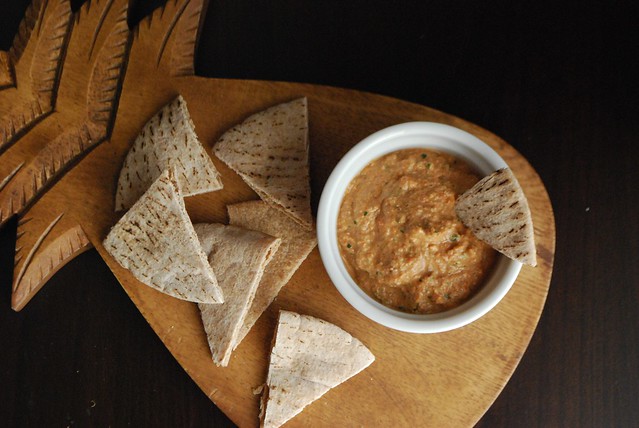
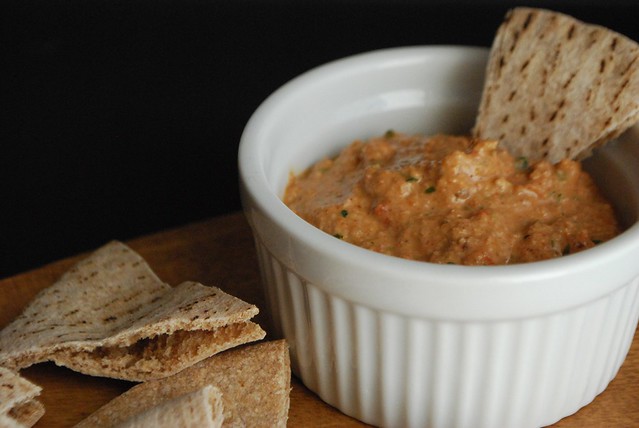
I haven't been able to try everything yet, but I was really surprised to find that the raw vegan spread is so far in the running for my favorite item. I've been spreading it on crackers and snacking on it all day, which just goes to show why events like this are a great way to not only meet and share with people, but to try new things that you otherwise wouldn't even think consider.

I had a great time at the swap, and look forward to the next event. If you live in NY and are interested in attending the next swap, sign up for the BK Swappers Facebook page to find out more details. (And I hear that there are swaps taking place all over the country, so check Facebook for local swaps in your neck of the woods!)

Visit the Always Order Dessert Facebook page to check out more of my photos from the swap!


****
New to Always Order Dessert? Consider subscribing to my RSS feed, follow me on Twitter, become a fan on Facebook, or sign up to receive my once-a-week e-mail updates by filling in your address in the box on the right. And if you ever need any entertaining or cooking advice, please don't hesitate to e-mail me. Thanks for reading!
0

Sweet and Sour Brussels Sprouts Hash

brussels sprouts hash with bacon
I love all the recipes I share with you here, but every now and then there is one that just blows the rest out of the water and gets me really excited. This quick and easy recipe for Brussels sprouts is definitely one of the latter.

The back story: A few weekends ago, Eugene and I took a long subway ride down the village in search of pie. I'd read that the editors of Martha Stewart Living had opened a weekend pop-up pie and tart shop in celebration of her latest book, and told Eugene about it. He's a huge pie fanatic so we made a plan to check it out.

I wish you could have seen how excited he was about this; the entire trip down he kept wondering out loud about how many pies he'd get, and once we got off the train he got so worked-up that he was practically tripping over himself.  Unfortunately, by the time we arrived at the shop, the pies were all sold out; they hadn't anticipated the demand and ran out of pie several hours before closing. 

We left sad, empty-handed, and hungry, and decided to soothe ourselves with brunch at a nearby French bistro. He ordered a croque monsieur and I the housemade hotdog on a pretzel bun. I also requested a side of brussels sprouts.
brussels sprouts hash with bacon

The dishes arrived, and to be honest, they weren't all that great. The flavors where amazing, but it was nearing the end of service and you could tell they weren't prepared well. My bun was hard and over toasted--like it had been left in open air for a few hours; and my hotdog--more of a spicy sausage--was overcooked and a little dry. The brussels sprouts, though, got me excited. They were too oily, but the idea--shredded and sauteed hash-style with pearl onions and lardon--was wonderful.

"I'm going to fix this," I told Eugene, as I pulled out my phone and snapped a photo for reference.

And fix it I did. I spent about two weeks playing with this recipe (we've been eating a lot of Brussels sprouts around here). I replaced lardon with thick country slab bacon that I diced into tiny cubes and sauteed until crisp. I then added a lot of finely diced onions and cooked them in the bacon fat until caramelized and just a tiny bit charred. I shredded a half pound of Brussels sprouts in my food processor and then added them into the bacon and onion mix, stirring well to coat, then sauteing until tender. Just before serving, I folded in thick, plain Greek yogurt and then drizzled with reduced aged balsamic vinegar to highlight the sweetness of the sprouts. Seasoned with sea salt and fresh-cracked black pepper, the result is incredible--sweet and sour, creamy and crisp. The bacon adds a hint of smoke, and the reduced balsamic adds another layer of earthiness.

I've been eating this straight from the skillet as a main dish, and then serving it to Eugene as a side along with some baked ham. I bet this would also be amazing with roast or grilled chicken or turkey, and would be an awesome dish to bring to a potluck.

brussels sprouts hash with bacon

****
New to Always Order Dessert? Consider subscribing to my RSS feed, follow me on Twitter, become a fan on Facebook, or sign up to receive my once-a-week e-mail updates by filling in your address in the box on the right. And if you ever need any entertaining or cooking advice, please don't hesitate to e-mail me. Thanks for reading!


Sweet and Sour Brussels Sprouts Hash 
Serves 2 as a side; can be doubled

Ingredients
2 thick slices country bacon, diced into 1/2" cubes
1 large Spanish onion, finely diced (about 1 1/4 cups)
1/2 pound Brussels sprouts, trimmed and shredded finely (I use my food processor for easy shredding; you can also just slice finely with a knife)
1/2 cup plain Greek yogurt (full fat is best)
4 tablespoons aged balsamic vinegar
sea salt and freshly ground black pepper


Directions
Add the diced bacon to a large, heavy-bottomed skillet (I use cast iron) and place over medium-high heat. Cook the diced bacon until crisp and all the fat is rendered. (If the pan is a little dry because the bacon didn't render much fat, drizzle in some olive oil.)

While the bacon cooks, pour the balsamic into a small saucepan and bring to a simmer over medium-high heat. Let reduce by about half until the the vinegar is thick. Remove from heat and set aside to let cool.

Once the bacon is ready, add the diced onions and spread evenly in the skillet. Saute until caramelized and golden brown, about 5 minutes.

Add the shredded Brussels sprouts to the pan and fold into the bacon and onion mixture until evenly distributed. Let cook for five minutes, until the sprouts are tender. Season to taste with sea salt and freshly ground black pepper.

Fold in the Greek yogurt and place on a serving dish. Drizzle the reduced balsamic over the entire dish and serve immediately. 
0

Kitchen Tip: How to Keep Bread Fresh Overnight

DSC_1345
I love freshly baked bread--whether artisan loaves from the bakery, or ones I make myself. But with just the two of us in the apartment, it's rare that we're able to finish an entire loaf of bread in just one day. It's a shame because we know that by day 2, that awesome bread will have lost a lot of its charm. I've tried multiple ways to store fresh bread--inside a paper bag, wrapped in plastic, in a cloth bag, even in a pillowcase! The results were never perfect as the cut side usually ended up hard and stale, while the crusty part ended up soft and kind of chewy.

But not too long ago I learned a pretty cool trick. To keep a crusty loaf of bread fresh overnight, store it cut-side down on a wooden cutting board. The bread's natural crust will keep the exposed bread fresh, while the cutting board will protect the side that's been cut. I've been doing this lately, and have been amazed by how well it works.

I've found that this only works really well a maximum of 2 nights, but that's usually enough for us to finish off a small loaf. Anything past that, I toast the bread and use as crostini or croutons.
0
Back to Top