Inspired Living: 10 Kitchen Lessons

Today I thought I'd share a few tips and ideas that I live by in the kitchen. I hope one or two (or all!) of these inspire you to try something new. xo
 
1. Moisturize! Whenever you get a little extra oil on your hands, whether it be olive, coconut, or anything else, don't rinse it off! Take advantage of that gorgeous liquid and rub it right into your skin. It's great for your hands, arms, legs, elbows, knees. Keeps your skin soft and is the best moisturizer. This goes for the men, too! Men never seem to moisturize enough. (Especially not mine.)

2. Always buy extra lemons. Seriously. You can never have too many lemons! Squeeze them into your morning water, your tea, your cocktails. Squeeze them over fish, over chicken, over berries, use instead of salad dressing, zest the rind into anything you can. Use them to decorate the water in a vase of flowers or just pile a bunch into a bowl for a pretty and bright centerpiece. Use them to clean your fingernails and get the garlic smell (really, it's an aroma!) out of your hands. Put a drop on your face to dry a pimple. Add a few to the laundry to brighten your whites. Mix the juice and rind with sugar and olive oil and scrub your knees and elbows and the rough parts of your feet. Squeeze some into your hair and go out in the sun like an 80s teenager. Drop one down the disposal to freshen it up. And if you still have leftovers (seriously?) make lemonade. Make a LOT of lemonade.

3. If you can't remember when you last replaced the baking powder, just throw it out and buy a new one. The $2 you spend replacing it are well worth what you save in NOT ruining a cake or batch of cookies full of expensive butter, chocolate, spices, sugar, and flour.

4.  Whenever you spot an empty ice cube tray lounging about your kitchen, fill it with water and put it in the freezer. If you use an ice cube, refill the empty spot. Even if it's 2 AM and you were just going to get a glass of water before padding back to bed. You'll be glad you did when you go to make a cocktail and find that there are plenty of icy cubes waiting to clink into your glass.

5. Don't worry too much about expiration, sell by, and "best by" dates on labels and packages. Keep in mind that those are estimated dates, which vary based on a number of different circumstances, and which are purposely skewed to favor the manufacturer, not YOU. Use your God-given senses--taste, smell, sight, touch to determine if the food is still OK. If the milk looks good, smells good, and tastes good, it doesn't matter if the carton says it "expired" yesterday. Trust yourself, not things written on boxes. In fact...

6. Trust yourself, not things written on boxes by people trying to sell you stuff. Most words on boxes don't hold a lot of meaning, or are purposely put there to make you think something is cleaner, healthier, safer, more "green," than it really is. Realize that words and phrases like "natural" and "healthy" and "good source of whole grain" and "fat-free" and even "organic," don't necessarily mean that it is good. Really read the box, look at the ingredients, look up words if you have to. If you don't know what a word means (or can't even pronounce it), wait until you can look it up and find out what it is to decide if it's something you want you or your family to eat.

7. Hide the marshmallows. Trust me on this. I have no problem with keeping a few indulgent treats around, but it's better when they're hidden away and out of sight. You'll forget about them most of the time, and then that moment will come when you really need...something...and that's when you'll remember about that jar of Nutella tucked in the back of the cabinet or the Halloween candy in the freezer. And they'll seem like a discovery, a prize. Like even more of a treat than you could have imagined and exactly what you need at that moment. Hide them now, and surprise yourself later.

8. Spice up your eggs. Scrambled eggs are a good, solid, easy meal at any time of day. But there is no reason to keep it boring! In fact, they provide a great opportunity to experiment. Take a look at your spice rack and sprinkle in a little something fun! Add some turmeric for bright color, a subtle kick of flavor, and tons of health benefits (turmeric is a fantastic anti-inflammatory!). Or add cayenne for a little heat (and to ramp up the metabolism). Add smoke with paprika or cumin or chili powder. Add freshness with thyme. Sweetness with nutmeg or cinnamon (yes, seriously. You do it with french toast, right?) Add sesame seeds or za'atar or sumac or curry. Pull out that spice that you bought to make that ONE dish 3 months ago and then never used again and add it to your eggs. They're a blank canvas. Start painting.

9. Use Unsalted Butter. Unsalted butter gives you control. It lets you decide how much and what kind of salt to sprinkle on your buttered toast or sauteed veggies or grilled corn. It lets you regulate the salt in your baking. Even better, it's much more likely to be fresh because without salt, butter spoils quicker and there is nothing to mask the rancidity. Another bonus? Since it's less popular, some stores will actually charge less for the same amount and same brand of unsalted butter than they do salted!

10. Double It. Anytime you make anything that requires a little more effort than usual, double it. If you make a lasagne, make 2. If you're making stuffed shells, double the recipe. Make a bigger pot of soup, a double-batch of tuna or egg salad or rice or mashed potatoes. You're already peeling and chopping and dirtying up the pots, so take advantage and make a little more. Half is for dinner tonight, the other half is for the freezer. Then next month or next week or later this summer, when you're too tired or sick or hot or just having too much fun to stop and cook, all you have to do is open the freezer and pick out an already home-cooked meal. Your future self will thank you!


****
New to Always Order Dessert? Consider subscribing to my RSS feed, follow me on Twitter, become a fan on Facebook, or sign up to receive my once-a-week e-mail updates by filling in your address in the box on the right. I also offer custom menu planning services and offer a variety of culinary workshops in the NYC area. Click here to find out more!

And if you ever need any entertaining or cooking advice, please don't hesitate to
e-mail me.
Thanks for reading!
0

My Spanish Tapas Cooking Class

Last Thursday I hosted the first of my summer cooking class series. It was SO MUCH FUN! The class was such a blast, with a group of 7 students including one adorable and very precocious 10-year-old.

The theme for this class was "Seasonal Spanish Tapas," and under my instruction, the students made (and ate!) a full menu of classic Spanish tapas dishes with a Summery, seasonal twist. We made grass-fed beef meatballs with a spicy herbed-tomato sauce, chorizo and red onions cooked in dry vermouth, bacon-wrapped apricots stuffed with an almond-sage stuffing, chorizo-chocolate-saffron crostini (yes, sir!), roasted plums in spiced honey with fresh ricotta, red wine cherry compote (served with salty cream cheese), grilled pan con tomate topped with fresh tomato and just a hint of sea salt, and black pepper asparagus with homemade garlic aioli (that we whipped up completely by hand!). I also made a couple of pitchers of sangria--a white sangria with fresh nectarines and guava nectar, and a red sangria with oranges, cherry bitters, and a medley of fresh berries. I also taught our youngest student how to make herself a pitcher of virgin "sangria" so she could join in on the fun!

It really was such a fun time cooking and sharing in the gorgeous professional kitchen, with everyone pitching in to put together a wonderful meal, and I was happy to learn that the students all left with full bellies and lots of new cooking techniques and recipes.

Here are a few pictures for you to check out (there are also more on my Facebook page).
The gorgeous professional kitchen in Midtown West where the classes take place.

Each student gets his/her own work station complete with a cutting board, chef's knife, apron, towel, and recipe booklet.

I assign each student a recipe to be in charge of, though we end up working on everything together.

You are never too young (or too old!) to learn how to cook!
In this class we made aioli by hand from scratch. Here, a student takes a turn with the whisk.

Teaching how to create a smooth garlic paste on the cutting board as a base for aioli and vinaigrette.
After cooking, we sit back and relax, enjoying the meal we made.


****
New to Always Order Dessert? Let's connect so you can find out the next time I post! Follow me on Twitter, Instagram, or Pinterest, become a fan on Facebook, or sign up to receive my once-a-week e-mail updates.
0

Banana Rosemary Baby Bundt Cakes w/ Brown Butter Icing

Banana Rosemary Baby Bundt Cakes w/ Rosemary Brown Butter Icing
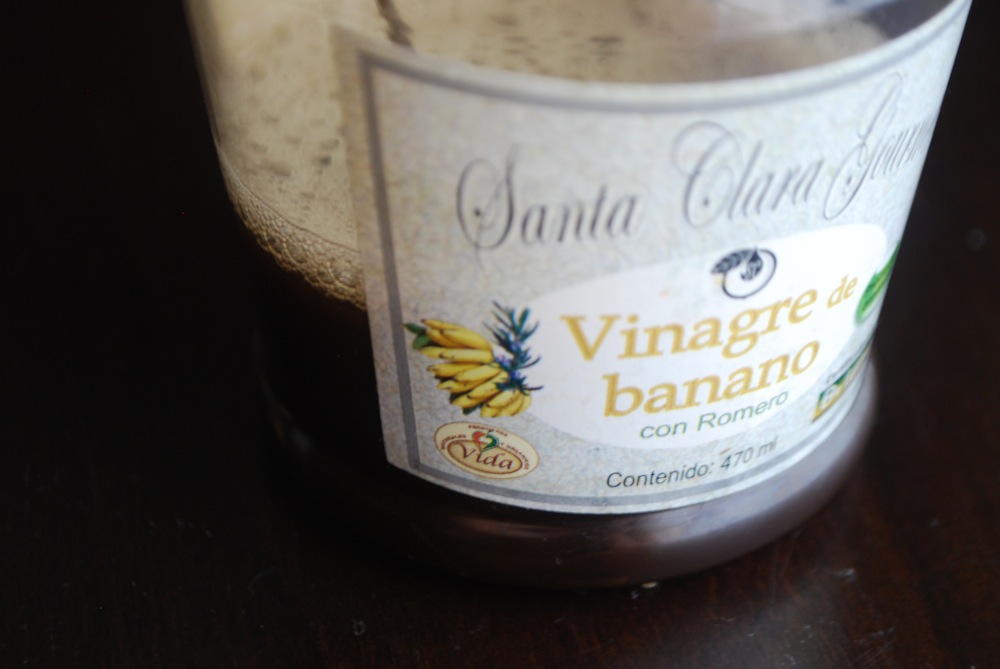
About a year and a half ago, my wonderful friend Looney brought me a whole bag full of edible goodies from a trip to Nicaragua. Among the many treats in the bag was a bottle of banana vinegar scented with rosemary. I fell in love.

The vinegar was a little bit sweet, with a strong tropical aroma of bananas all underscored by hints of woodsy, piney rosemary. I used it in salad dressing and marinades, and discovered it was the perfect vinegar for baking or for adding a little something special to jams and compotes. Amazed by its many uses, I have nursed this little bottle, prizing each drop like it's made out of gold.

banana rosemary vinegar


About a week ago, I decided to reorganize my pantry (more about that soon!) and came upon the bottle of vinegar. I opened it up just to take a quick sniff of the syrupy aroma, when an idea suddenly came to me. What if I were to combine the banana and rosemary in a cake?

It took a few days before I could get started on the idea, but I knew it would work. I started with my favorite classic banana bread recipe and lightened it up a bit for a more delicate, cake-like texture. To infuse the cake with rosemary flavor, I browned the melted butter with several sprigs of rosemary, letting them infuse the butter. For another layer of flavor, I made rosemary sugar, blitzing together granulated sugar with fresh rosemary sprigs until smooth.

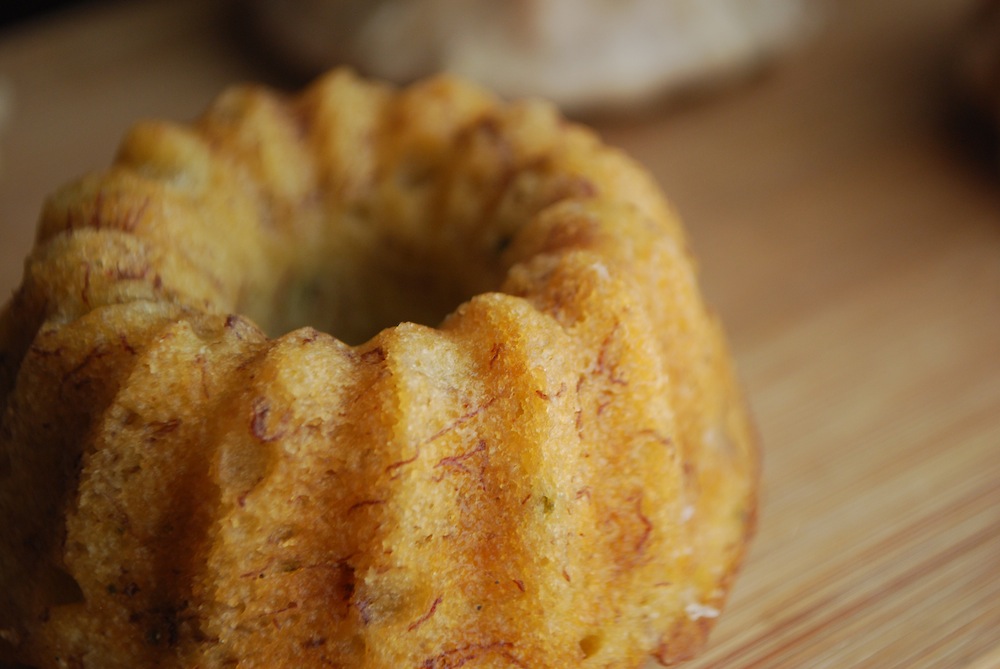
Banana Rosemary Baby Bundt Cakes w/ Rosemary Brown Butter Icing


I baked the cakes in the new mini-bundt pan I bought at the Wilton tent sale on my trip to the Wilton blogger workshop a couple weeks ago, and I was excited when they came out just as I'd imagined--soft, springy, golden, and buttery. The aroma was fragrant and positively intoxicating--sweet banana with the perfect hint of rosemary wafting all throughout our apartment.

To top off the little cakes, I made a browned butter glaze, also infused with more rosemary. Drizzled on top of each one, it was the perfect complement.

Banana Rosemary Baby Bundt Cakes w/ Rosemary Brown Butter Icing


****
New to Always Order Dessert? Consider subscribing to my RSS feed, follow me on Twitter, become a fan on Facebook, or sign up to receive my once-a-week e-mail updates by filling in your address in the box on the right.
 
Banana Rosemary Baby Bundt Cakes with Brown Butter Icing 
Print this Recipe For the Cakes
4 ripe medium-sized bananas, mashed with a fork
4 3-inch sprigs of fresh rosemary
3/4 cup butter
3/4 cup granulated white sugar
1 large egg, whisked
1 tablespoon pure vanilla extract
1 1/2 cups all purpose flour
1/2 teaspoon Kosher salt
2 teaspoons baking powder
1/4 teaspoon baking soda

For the icing:
1/2 cup butter
2 3-inch sprigs of fresh rosemary
1 cup confectioners' sugar

Directions
Preheat oven to 350 degrees. Grease a mini bundt or muffin pan and set aside.

Place the mashed bananas in the base of an electric mixer with the paddle attachment and beat for 2 minutes until smooth.

In a medium saucepan over medium heat and combine butter and 2 of the springs of rosemary (reserving the other two sprigs). Heat the butter until it melts and then let continue to cook until the butter turns golden brown and starts to smell a little bit nutty--about 5-7 minutes. Remove from the heat and let cool with the rosemary still in the butter.

While the butter cools, place the granulated sugar in a food processor or blender and add the leaves from the two remaining sprigs of rosemary. Be sure to remove the stem--only add the leaves. Pulse in the food processor or blender until smooth.

Remove the rosemary sprigs from the cooled butter and add the butter to the banana puree. Add the rosemary sugar, the egg, and the vanilla, and beat for 2 minutes until all well combined.

In a separate bowl, whisk together the flour, salt, baking powder, and baking soda. Stir into the wet ingredients with a light hand only until thoroughly combined.

Spoon the batter about 3/4 of the way in each of the prepared mini bundt molds (or muffin tins). Bake at 350 degrees for about 20 minutes, or until the cakes are golden and spring back when touched. Remove from the oven and let cool in the pan for 10 minutes before unmolding onto wire racks to let cool completely.

Make the icing:
In a medium saucepan over low heat, melt 1/2 cup of butter and 2 sprigs of rosemary for 5-7 minutes until golden brown and nutty. Pour into a medium bowl through a fine sieve to remove most of the solid bits and rosemary sprigs. Whisk in 1 cup of confectioners' sugar until smooth.

Dip each cooled cake in the icing and return to the rack to let set.
0

Crispy Pan-Fried Tilapia with Lemony Baby Arugula Salad

A few days ago, I got an email from a reader (hi, Lorianna!) asking me if I would share a few quick and easy weeknight recipes. I don't think she realized just how thoroughly I was going to reply, but I basically gave her a detailed inventory (including recipes) of the dishes I cook here at home most weeknights.

Once I finished the e-mail, I realized that 80% of the dishes in the message aren't even ones that I've featured here before! That is now going to change. Starting with this ridiculously easy fish dish that I make and eat about once a week (sometimes more!).

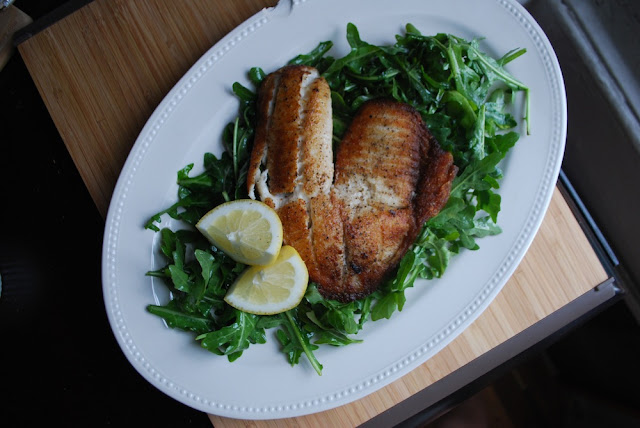
White fish fillets like snapper, tilapia, or sole are some my favorites. They're inexpensive, easy and quick to cook, has lovely subtle flavor, and (super key!) doesn't make my entire apartment smell like a seaside fish shack when I cook it.

There are a lot of things you can do with white fish, but my favorite is this simple preparation: seasoned generously with lots of good sea salt and freshly cracked pepper, then pan-fried until crisp and golden in a mix of butter and olive oil.  I lay this over a big huge pile of lemony-dressed arugula, and proceed to eat every single last little bite.

It's awesome. I promise.

P.S. It takes about 7 minutes to make. No joke.


****
New to Always Order Dessert? Consider following me on Twitter, become a fan on Facebook, or sign up to receive my once-a-week e-mail updates by filling in your address in the box on the right.
 
Pan-Fried Tilapia with Lemony Baby Arugula Salad
Serves 1. Multiply as necessary.

Print this Recipe
Ingredients
1 8-oz tilapia or other white fish fillet (like lemon sole, snapper, etc.)
1 tablespoon butter
2 tablespoon olive oil
sea-salt or kosher salt
Freshly ground black pepper
3oz baby arugula greens
1 clove garlic
Juice of 1 lemon
Extra-virgin olive oil (use something good and fruity for the best flavor)
2 lemon wedges, for garnish (optional)


Directions
Rinse the tilapia fillet and pat dry with a paper towel, removing as much moisture as possible. Add the butter and olive oil to a medium skillet and place over medium-high heat. While it heats, season the tilapia generously on both sides with the sea-salt and black pepper.

Once the oil is hot, place the tilapia in the pan and let cook for 2-3 minutes or until golden and crisp on the pan side. Make sure that it is golden and crisp before flipping; if it isn't, leave for another minute or so until it is. Flip and cook on other side for another 2-3 minutes. (Again, until it is golden and crisp. It will be fine to eat if you don't wait, but that crust is where all the flavor is. Wait for it. It's worth it!)

While the fish cooks, place the arugula greens in a large bowl. In a smaller bowl or glass, whisk together the lemon juice with the second amount of olive oil  and the crushed garlic clove. Drizzle dressing over the salad and toss well to coat (remove the garlic clove). Season with salt and pepper.

Placed the cooked tilapia on top of the salad and drizzle on the pan juices. Garnish with 2 lemon wedges and serve immediately.
0

Kale Pesto for Quick Summer Meals


There is something to be said for having a few substantial dishes at the ready on hot summer days. Especially in my apartment where, as much as I love to cook, the kitchen sometimes gets so hot that it's completely unbearable to do anything more than assemble a quick salad or grab a bottle of cold wine from the fridge.

One of my recent discoveries in the world of quick summer meals has been kale pesto. Similar in process and appearance to the more traditional kind, this version replaces basil with raw kale.  I've mentioned before that I'm always looking for ways to add a little more kale to my diet. I tuck big frilly pieces of it in sandwiches and burgers, and dehydrate them for a quick snack, but I think this latest use might just be my new favorite!

Eaten raw, kale has lovely bittersweet flavor that works beautifully in combination with the garlic, cheese, and fruity olive oil. If you're fond of bitter greens and vegetables like escarole, dandelion greens, endive, or broccoli rabe, you'll probably appreciate this.

The final pesto is gorgeous, bright emerald green with lots of powerful flavor that you can then adapt to a number of recipes. Toss with cooked pasta, use as a spread on sandwiches or burgers, dollop on top of a soup as a garnish, or whisk into a vinaigrette for a quick salad dressing. For lunch today I made a quick chickpea salad, thinning the pesto with a little vinegar and coating the chickpeas with the sauce. After an hour of chilling in the fridge, it was perfect. (I'm actually sitting here eating spoonfuls of it right from the serving bowl as I write this post.) If you're caught entertaining last-minute guests, the pesto works great as a topping for crostini or pita chips.

Traditionally, kale is made with pine nuts, but I usually add whatever nuts I happen to have on hand. The idea is to add a little bit of crunch and natural sweetness, plus some protein and healthy fats. Almonds are actually my favorite and they're the ones I recommend below (around here they're also cheaper than pine nuts, which is an added bonus). You could also substitute walnuts, pistachios, hazelnuts, or really just about any nut you like. 

The pesto becomes even easier when you plan ahead!

On Saturday I made a large batch of kale pesto and portioned it out into muffin tins that I'd swiped with a little bit of olive. I popped the muffin tray into the freezer and let it solidify for about an hour. When it was ready, I used a butter knife to loosen each little pesto "muffin" and then put them all into a large zipped freezer bag.

Now whenever I want a quick meal, all I have to do is grab one of the little pesto muffins [yeah, I'm just going to keep calling them that] and defrost it. I've found that 1 minute on the defrost setting in the microwave is all I need to get it back to room temperature. If you don't have, or prefer not to use, a microwave, you can also just leave it on the counter for 20 minutes or so. Or if you're working with a hot dish, like cooked pasta or some kind of meat, just add it right in; the heat of the food will be enough to warm it up.

The batch below made enough to fill 8 standard size muffin tins. You can, of course, adjust the recipe according to your tastes by adding more or less nuts, skipping the cheese, more kale, adding red pepper flakes, etc. There is so much that you can do!


****
New to Always Order Dessert? Consider subscribing to my RSS feed, follow me on Twitter, become a fan on Facebook, or sign up to receive my once-a-week e-mail updates by filling in your address in the box on the right. I also offer custom menu planning services and offer a variety of culinary workshops in the NYC area. Click here to find out more!

And if you ever need any entertaining or cooking advice, please don't hesitate to
e-mail me.
Thanks for reading!


Kale Pesto


Print this Recipe
Ingredients
2 teaspoons Kosher salt
1/2 cup chopped almonds (can also use pine nuts or walnuts)
3 large cloves garlic, peeled with ends trimmed off
1/4 cup Parmigiano-Reggiano
1/2 pound raw kale, stems removed, coarsely chopped
1/2 cup extra virgin olive oil
Freshly ground black pepper
1 tablespoon lemon juice

Directions
Combine the kosher salt, almonds, garlic cloves, and Parmigiano-Reggiano in the base of a food processor. Pulse repeatedly until all ingredients are coarsely chopped.

Add the kale, olive oil, and lemon juice and pulse again until it reaches a fine grind, but not quite a puree. If necessary, add a bit more olive oil to loosen it up.

Turn out into a bowl and stir a few times to loosen up. Season with freshly ground black pepper. Can be used right away or frozen.

To freeze, simply portion into 1/4 to 1/2 amounts and pack into the wells of a muffin tin (can also use an ice cube tray for smaller portions). Let freeze for one hour before removing and storing in a large freezer-safe zipped plastic bag or container. Will will keep well for at least 6 months.
0

Serve Yourself by Joe Yonan

UPDATE: This giveaway is now closed. Congratulations to Diana who was the randomly selected winner. Thank you all for entering! Stay tuned for future giveaways. 

One of the coolest speakers I had the opportunity to hear at Eat Write Retreat, the food blogger conference I attended a couple weeks ago, was Joe Yonan, the food editor of the Washington Post. He was smart, affable, laid-back, and gave great advice in his talk and one-on-one conversations. I was charmed, as were most of the other bloggers in the audience.

A few days after the trip, I opened my laptop to find an email from his book publicist, offering me the opportunity to review and giveaway a copy of his new cookbook, Serve Yourself: Nightly Adventures in Cooking for One. Having heard him mention a few of the recipes in it during the conference, I jumped on the opportunity.

The book kind of languished on my coffee table for a few days until I finally picked it up. I have to admit that I was surprised. This isn't your usual "cooking for one" type book; the majority of which, I admit, I usually find kind of depressing. This book was packed with seriously cool recipes--mini meatloaf, individual portions of mac n' cheese, homemade pizza, a whole section on tacos (complete with great instructions on how to make homemade corn tortillas). It even opens up with a selection of recipes near and dear to my heart--homemade condiments. Yes, please!

I'm not single anymore, but I was for a long time and I am acutely aware of what it's like to live alone. And even now that I'm married, my days are mostly spent alone working from home so I could definitely see myself putting together a few of these recipes for lunch or even dinner on nights when Eugene has a work event. As one who loves to entertain, I could also see multiplying some of these recipes to serve as individual portions for guests--how cute, for example, would mini meatloaves be at a dinner party?

Just like in person, Joe comes across as a really cool guy in his writing. Each chapter begins and ends with brief stories; I loved the one about how his mom sent him grocery shopping at a young age because after his parents divorced he was the only one who still had access to the heavily discounted grocery store on base. And I'm sure many of us could relate to the ups and downs of cooking for dates, which he relates with quite a bit of humor and honesty.

Though geared towards the single cook, I think there will be a little bit for everyone in here.
0

Tortilla Española

Just as good cold as it is hot, Tortilla Española (Spanish Omelet) is pretty much the answer to all mealtime quandaries. Served piping hot from a still-sizzling skillet, it's a perfect weekend breakfast--savory, filling, and just a little bit fancy.  The potatoes are cooked right in so you don't need an additional side (though I make a personal point of never turning down a few strips of crackly, salty bacon).

For lunch the next day, or maybe even later that same afternoon, you can sandwich a cold thick slice of it between two slices of buttered, toasted bread; pure perfection whether you're pulling it out of a brown bag at the office or a picnic basket on the beach.

That same breakfast omelet is an easy dinner alongside a lemony dressed pile of salad greens and a glass of crisp white wine. When company shows up--unexpected or otherwise--slice the round into 1" cubes and poke with toothpicks for an easy and elegant hors d'oeuvre that I guarantee will be one of the first things to disappear. It also makes for a great potluck dish as it can be made in advance, travels well, doesn't need to be heated, and will appeal to meat eaters and vegetarians.

I grew up eating Tortilla Española on a fairly regular basis. My mom would always make one on the weekends, and I was young when she taught me the trick for flipping it onto the platter to cook the other side. I soon took over the weekend breakfast duties and would make the tortilla for the whole family, serving it whole alongside toasted whole wheat bread and fresh orange juice.

At first glance, the idea of making a Tortilla Española can be intimidating (flipping a half-cooked cake-size omelet?!), but I promise you it's really not that terrifying and have offered three options that you can choose from. Something you may not know about me is that I can be a total klutz; in the past month I have broken no less than 2 glasses, 1 vase, 1 ceramic breadbasket (a wedding gift!), 2 mugs, and a plate. All of this in just ONE MONTH. The first few times, Eugene came over to help clean the broken shards, but after the fourth time of hearing the tell-tale crash and my moaning "oh nooooo!" he just turned up his video game and left me to my own devices.

I tell you this to prove that if a klutz like I can flip an eggy omelet with no major disasters, you can do it too.

The "real" way to make a tortilla involves peeling and slicing the potatoes and frying them individually before making the omelet, but over the years I've found that gently boiling the sliced potatoes is a low maintenance way to achieve the same effect. No splatters to clean up and no babysitting the potatoes when you could be working on other things. (By the way, if you have leftover baked, roasted, or even fried potatoes, you can also just slice into small pieces and proceed with the recipe. It won't taste *exactly* the same, but it's a great way to use up leftovers.)


A few basic tips:

1. Use any kind of potatoes you like, but I've found that low-starch potatoes like Yukon golds work best because they don't turn into mashed potatoes during the cooking process. (Not that a mashed potato omelet is a bad thing. It sounds like a very good thing, actually, but it's not what we're going for here.)

2. Don't bother peeling the potatoes. Seriously. I never peel potatoes (or really anything) unless I really have too. The skin is loaded with nutrients, is completely edible, and doesn't affect the taste in any noticeable way. Save yourself the time and hassle and just give them a quick scrub before slicing.

3. Slice the potatoes as uniformly as possible. You want all the slices to be about the same thickness. It doesn't have to be perfect, but the more similar they are, the better. Some people like super thin slices; I usually slice them about 1/2" thick. There is no wrong way--just do what you prefer.

4. Remember that you're not looking to caramelize the onions, just soften them a bit. You want the pure, slightly spicy, flavor of the onion to come through, not the sweetness.

5. Make extra. I always use at least a full dozen eggs and a large skillet when making my tortilla, and recommend you do the same. The leftovers keep for about a week and as I described above, are great hot or cold. Grab a slice for a quick breakfast when running out the door, pack slices for lunch, or serve a piece to your kids when they get home from school. That said, if you only have a few eggs and a potato or two, you can still make a quick small one--it's a great snack or lunch when you're in a pinch.


****
New to Always Order Dessert? Consider subscribing to my RSS feed, follow me on Twitter, become a fan on Facebook, or sign up to receive my once-a-week e-mail updates by filling in your address in the box on the right. I also offer custom menu planning services and offer a variety of culinary workshops in the NYC area. Click here to find out more!

And if you ever need any entertaining or cooking advice, please don't hesitate to
e-mail me.
Thanks for reading!


Tortilla Española

Ingredients 
3 lbs potatoes, such as Yukon Gold, scrubbed and patted dry but not peeled
1 large Spanish onion or 2-3 medium yellow onions
12 large eggs
1 tablespoon smoked spanish paprika
1 teaspoon freshly ground black pepper
1 tablespoon Kosher salt

Fill a large pot with 3 quarts of cold water and season with kosher or sea salt. Slice each potato into 1/2" thick round slices and drop into pot of cold water. Once all potatoes are sliced and in water, place pot over high heat and bring to a boil until potatoes are fork tender.

While potatoes come to a boil, cut the onions in half and slice into thin half moons. Whisk the eggs in a large bowl with paprika, black pepper, and Kosher salt.

Add 2-3 tablespoons of olive oil to a 10"-12" nonstick skillet with 2" sides and heat over medium-high heat. Add the onions and saute just until translucent. Add the onions into the egg mixture. Drain the potatoes and add to the eggs.

Add a bit more oil to the pan and pour in the egg and potato mixture, distributing it evenly. Cover and let cook over medium heat for about 15 - 20 minutes or until cooked around the edges and set. Run a spatula all around the edges and jiggle the pan to make sure the omelet isn't stuck. You now have three options:

Option #1: Take a large platter and invert it over the pan, covering it completely. Place an oven mit-clad hand over the bottom of the plate and with your other hand firmly on the skillet handle, flip the omelet onto the plate. Then place the skillet back on the stove and slide the omelet back in so that the top side is now on the bottom. (This is the traditional way to do it. There is a small risk of egg and oil spillage, but it's minor and with practice won't be a problem at all.)

Option #2: Place a large platter on the counter and holding the skillet over it tilted at a 45degree angle, use a large spatula to slide the omelet onto the plate leaving the top part on top. Then invert the skillet over the omelet, place your (oven mit-clad) hand on the bottom of the plate, and flip the omelet onto the skillet. (This works best if you have a skillet with sloped sides that allow for easy sliding.)

Option #3: forget the flipping! Just turn on your broiler and slide the skillet with the omelet under the broiler for about 10 minutes to let it finish cooking. (This is both the easiest and least authentic.)

If you chose one of the flipping options, let the omelet continue to cook for another 5-10 minutes or until set. Some people like the inside of the omelet to be a little runny, but I don't so I let it cook until it's well done.

Flip onto a plate and let set for 10 minutes before serving. Can be served hot or cold. You can also adapt this recipe by adding sliced cooked chorizo, manchego cheese, spinach, kale, garlic, pimentos, or any number of additions.
0

Passion Fruit Mojito with Fresh Basil

photo by Monica Navarro
When it comes to cocktails, I love them bright and sour, with notes of fresh, herbal flavors. I especially love those that feature pure passion fruit pulp--as no matter where I am, something about the flavor instantly makes me feel like I am on a vacation.

Last year, on the shoot for our engagement photos, we took a break for lunch at a Cuban restaurant in the Meatpacking district called Son Cubano. I spotted a passion fruit mojito on the menu and ordered it, quickly falling in love with the combination of fresh passion fruit and herbs. A photo of my hand holding the drink ended up becoming the "ring shot," and I went home determined to recreate the cocktail.

Having recently come into a bounty of fresh basil at the farmer's market, I decided to swap out the mint for basil to see how it would work. It was fantastic! The fresh basil worked beautifully with the passion fruit and it quickly became my favorite.

I am now going to confess to you that I actually wrote this recipe and took these photos LAST June. Unfortunately, in the midst of all the crazy wedding planning I never got the post up, and so I filed it away all fall and winter long, waiting for the Summer and basil to come back in season so that I could share it with you. It's finally starting to heat up again, and basil will be popping back up in the markets any second now so it's the perfect time to share.

I hope you enjoy!


****
New to Always Order Dessert? Consider subscribing to my RSS feed, follow me on Twitter, become a fan on Facebook, or sign up to receive my once-a-week e-mail updates by filling in your address in the box on the right. I also offer custom menu planning services and offer a variety of culinary workshops in the NYC area. Click here to find out more!

And if you ever need any entertaining or cooking advice, please don't hesitate to
e-mail me.
Thanks for reading!


Passion Fruit and Basil Mojito Cocktail
This take on a classic mojito features fresh basil and pure passion fruit pulp for a refreshing and tangy sweet and sour cocktail. Feel free to adjust the amount of sugar or limes if you prefer drinks a little sweeter or a little more sour. Makes 4 cocktails; can be doubled or halved as desired. 
Ingredients
12  basil leaves,  plus 4 more left whole for garnish
2 large limes, cut into 12 wedges, plus 1 more cut into round slices for garnish
3 tablespoons turbinado sugar (sugar in the raw; can also use regular white sugar)
1 tablespoon granulated white sugar
6 ounces white rum
4 ounces frozen pure passion fruit puree, thawed (can also use fresh puree)
Club soda

Directions
Prepare 4 high ball glasses by filling with ice. Combine 12 of the basil leaves and 12 lime wedges in a large beverage shaker.
Use a muddler, pestle, or wooden spoon to mash and muddle the limes and basil leaves together, releasing as much lime juice and oil from the basil leaves as possible. Add the ice, white rum, and passion fruit puree.
Shake well and divide into the 4 prepared high ball glasses.
If desired, add a few of the muddled limes and some of the muddled basil leaves into each glass, and top off with club soda. Garnish each glass with a slice of lime and a whole basil leaf. (You can thread the basil through the lime so that it stays on the glass.)
Tip: If you don't own a beverage shaker or want to make a larger batch at one time, use a large bowl and follow all steps, just stirring the ingredients vigorously instead of shaking. 
0
Back to Top