Showing posts with label Bagged Lunch Ideas. Show all posts

5 Great Cold Weather Lunch Salads

I love salads for lunch, but as the weather gets chillier, I find that my usual mix of greens and grilled chicken just doesn't satisfy the way it does in the summer. Here are a few of my favorite hearty salads--rich with whole grains, roasted vegetables, and warm flavors that make them perfect for Fall and Winter lunches.

1. Winter Wheatberry Salad
Hearty wheatberries tossed with a mix of fresh herbs, dried cranberries, salty cheese, and a tangy balsamic vinaigrette.

2. Deconstructed Hummus Salad
All the flavors of hummus, in salad form! Super high in protein and rich with flavor. Make this one in advance and enjoy it all week!

3. Curried Couscous with Maple Acorn Squash
Warm curry flavors are fantastic when paired with sweet maple roasted acorn squash. This one is just as good warm as it is cold.

4. Sweet Potato Farro Salad with Dried Fruit & Nuts
One of my absolute favorites. Delicately spiced farro is tossed with roasted sweet potatoes, dried fruit, and handfuls of toasted nuts and seeds.

5. Farro Beet & Citrus Salad with Goat Cheese
I love this combination of sweet and tangy flavors. Use your favorite citrus and pair with chewy whole grain farro, roasted beets, goat cheese, and a bit of arugula for added freshness. 

****
Love Always Order Dessert? Let's connect! Follow me on Twitter or Pinterest, become a fan on Facebook, or sign up to receive my once-a-week e-mail updates. And if you ever need any entertaining or cooking advice, please don't hesitate to e-mail me. Thanks for reading!  
   
0

Bagged Lunch Ideas: Deconstructed Hummus Salad

So I'm just going to straight up admit that I kind of feel like a douche for referring to a dish as being "deconstructed." It literally makes me cringe a bit. Even though all deconstructed means is that you use all the same ingredients for one dish in a kind of looser, less...er...constructed way.

But I think the term has been ruined by some of the more unpleasant contestants on shows like Top Chef and the like.

But that said, this is a VERY good salad. It's got all the flavors of hummus--the chickpeas, sesame, garlic, lemon, etc., but tastes a little bit fresher and lighter.

It makes for a great bagged lunch or even just to serve as a side with dinner. I made this as part of a Mediterranean-themed mezze spread on Mother's Day, when my mom, brother, and in-laws came over for lunch at our apartment (my dad missed out because he was in Puerto Rico visiting his mom that weekend so we don't feel sorry for him).

I prepared the entire menu in about 2 hours--not because I'm some kind of rockstar (although I most certainly am), but because the dishes were really just that simple. What I love about this type of food is that it doesn't require much fuss--you're simply celebrating the natural flavors that are already there. No need to mess with what God got right the first time.

In addition to the hummus salad (made in this manner, literally, because I just didn't want to have to wash the food processor), I also served a platter of roasted marinated eggplants, slow-roasted tomatoes, tzatziki, a big Greek cucumber salad, a version of this Mediterranean pasta salad, homemade pita chips, burrata topped with fresh basil, flaky salt, and olive oil, and a platter of savory keftedes (Greek meatballs). I'd say the meal was a success as the mom's were both happy, and even my notoriously picky brother served himself a rather generous helping of everything.

For dessert, I served my "cheater espresso pots de creme"--a super easy and oh-so-good chocolate treat that is always a hit. I actually filmed a little tutorial video for these, which you can watch HERE.

The leftovers of this salad keep really well, and actually even taste better the next day once the flavors have all had a chance to get comfy cozy together. They also last for about 10 days so make a big huge batch and enjoy delicious healthy lunches all week long!


****
New to Always Order Dessert? Consider subscribing to my newsletter, follow me on Twitter, become a fan on Facebook, or sign up to receive my once-a-week e-mail updates by filling in your address in the box on the right. If you're in the NYC area, be sure to check out my NYC dinner party style cooking classes. Thanks for reading!


Deconstructed Hummus Salad

Ingredients
Zest and juice of 1 large lemon
1 tablespoon red wine vinegar
2 large garlic cloves, minced finely
1/4 cup tahini paste
1/3 cup extra virgin olive oil
1/4 cup minced fresh parsley
2 14-oz cans chickpeas, drained and rinsed well under cold running water
Kosher salt and black pepper, to taste

Directions
In a large bowl, whisk together the lemon juice, zest, vinegar, minced garlic, tahini, and olive oil. Add the parsley and chickpeas and toss to coat. Season with kosher salt and black pepper, to taste. Let chill before serving.

0

Bagged Lunch Ideas: Curried Sweet Potato Farro Salad with Dried Fruit & Nuts

I love good, hearty grain salads year round, but especially in the colder months when a light salad of mixed greens just doesn't feel like enough. No way am I ever going to have "just a salad" when it's freezing outside.

But if "just a salad" is packed with gorgeous nutty grains, roasted sweet potatoes, dried apricots and cranberries, toasted pumpkin seeds, almonds, and lovely warm spices well then, yeah, I can totally get behind that.

Farro is one of my favorite grains--nutty and packed with fiber and protein, it's one of those grains that you can really feel good about eating. Essentially whole spelt, it feels healthy and wholesome, like it can erase whatever food sins you committed earlier in the day.

Skipped breakfast? Have a bowl of farro!

Ate chocolate chip cookies for lunch? Farro!

Went out late last night, overslept, and got into work late? Pretty sure a bowl of farro will fix that!

When I first started cooking with farro I learned that I had to soak it for a couple hours before cooking with it. Not much in terms of effort, but definitely required a bit of advance planning. But the other day I happened to glance at the directions on a new bag I had just bought and saw that it recommended simply rinsing and cooking it in boiling water or broth, much the way I would a pot of quinoa or rice.

I decided to give it a shot, rinsing it thoroughly then combining with the water and bringing it up to a boil. In about 15 or so minutes, it was done! Fluffy, with a little bit of a chewy texture.

Unlike rice, cooked farro doesn't absorb all the liquid it's cooked in, so I drained it and then rinsed in very cold water before proceeding with my recipe. (The final rinse was just to cool it down since I was making a salad; for hot dishes there is no need to rinse.)

I tossed the farro with sweet potato that I'd diced and roasted, along with some chopped dried apricots and cranberries. I made a quick dressing with balsamic vinegar (I chose a strawberry one I had in the pantry to complement the dried fruit, but any good balsamic will work) and olive oil, seasoned with lime zest, curry powder, cayenne, and a few other herbs and spices. At the end, I folded in some lightly toasted sliced almonds and pumpkin seeds, for a bit of added crunch.

The results were exactly what I'd been craving and I ate two bowls of it right on the spot (all under the pretext of "recipe testing," of course).


This is one of those dishes that is really best at room temperature, so it's perfect for bagged lunches or for entertaining a crowd. You can make the dish well in advance as it keeps for about a week (if not more).

You should also feel free to improvise, swapping out other nuts or dried fruits, using butternut squash or zucchini, or even adding in cooked shrimp or diced chicken to make it a heartier dish.  If you don't have or like farro, you can use wheat berries, couscous, quinoa, barley, or even brown rice instead (just follow prepare each of those according to their specific directions before proceeding with the recipe.) When I had some yesterday afternoon, I topped it with a dollop of Greek yogurt and found that it added a perfect bit of tang.


*****
Did you enjoy this post? Be sure to share it with your friends on Facebook and Twitter! Consider subscribing to my RSS feed, follow me on Twitter (@nandita), become a fan on Facebook, or sign up to receive my once-a-week e-mail updates by filling in your address in the box on the right. I also offer custom menu planning services, group cooking classes, and offer a variety of culinary workshops in the NYC area. Click here to find out more!

And if you ever need any entertaining or cooking advice, please don't hesitate to
e-mail me.
Thanks for reading!  


Curried Sweet Potato Farro Salad with Dried Fruit & Nuts

Print this Recipe

Ingredients
1 1/2 cup uncooked farro (whole spelt)
4 cups water
kosher salt
2 medium sized sweet potatoes, washed and diced (but not peeled)
4-5 sage leaves
Extra virgin olive oil
black pepper
1/4 cup parsley, minced
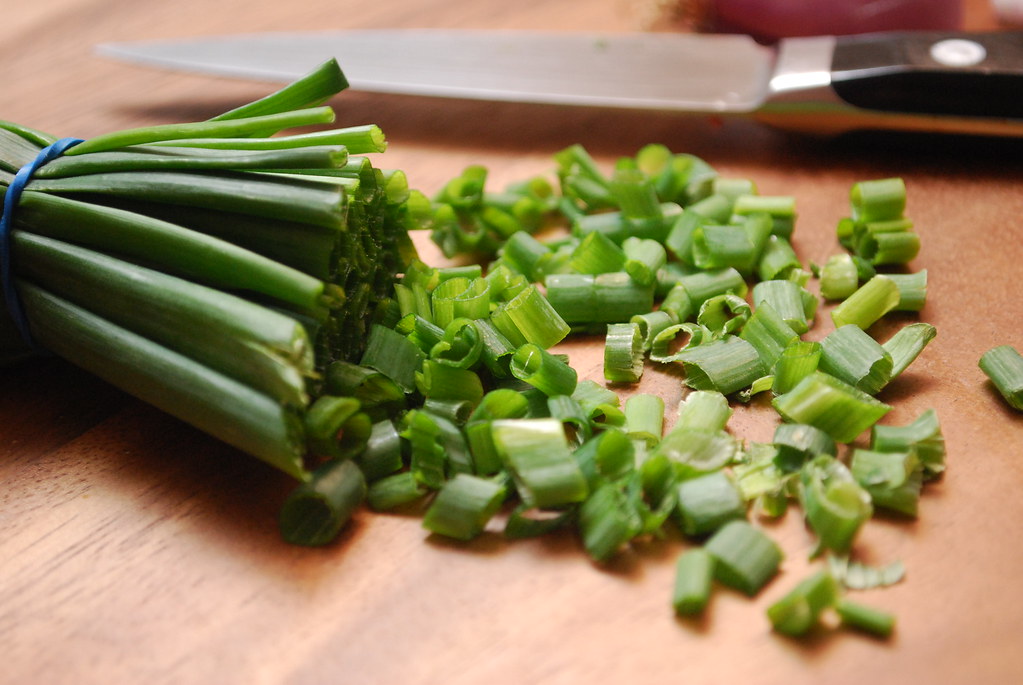
2 scallions, thinly sliced
1/3 cup dried cranberries
1/3 cup dried apricots, chopped
1/3 cup sliced almonds
1/3 cup pumpkin seeds (pepitas)
For the dressing
1/4 cup extra virgin olive oil
2 tablespoons balsamic vinegar
Zest of one lime
1 tablespoon curry powder
1 teaspoon turmeric
1 teaspoon ground cayenne


Directions
Preheat oven to 375 degrees.

Combine the farro and water in a medium pot and add about 2 teaspoons of kosher salt. Bring to a boil over high heat, then reduce heat to medium-low, cover, and simmer about 30 minutes until the farro is tender with just a bit of chew. Once ready, drain the farro well and rinse under cold water to cool. Let drain in a colander while you prepare the rest of the recipe.

While the farro cooks, toss the diced sweet potatoes and sage leaves with a few teaspoons of olive oil and season well with kosher salt and pepper. Spread out on a baking sheet and roast in the oven for about 20 minutes, or until the pieces are fork tender. Remove from the oven and let cool.

Toss the cooled farro with the cooked sweet potatoes (including the sage), parsley, scallions, cranberries, and apricots. Make sure everything is evenly distributed.

Combine the almonds and pumpkin seeds in a large skillet and toast over medium heat about 2-3 minutes, shaking the pan regularly and keeping a close eye on them so they don't burn. You just want them to warm up and smell a little bit toasted. Remove from heat and let cool.

Whisk together the ingredients for the dressing: olive oil, balsamic, lime zest, curry powder, turmeric, and cayenne. Pour dressing onto the farro mixture and toss to coat evenly. Fold in the cooled and toasted almonds and pumpkin seeds. Season with additional kosher salt and black pepper, to taste.

Serve at room temperature or chill, if desired. Will keep well in an air-tight container in the fridge for at least one week. 
0

Bagged Lunch Ideas: Golden Herbed Quinoa Salad

I've only been out of town for fewer 12 hours, and I've already learned that my husband apparently ate a bowl of garbage for dinner last night.

Literally.

Whenever I leave town I like to pull a Barefoot Contessa and leave Eugene a few delicious things that he can enjoy while I'm away. This time around I left him a casserole of ricotta and herb-stuffed shells in spicy homemade tomato sauce, a large glass jug of cucumber spa water in the fridge, a grilled skirt steak, some roasted vegetables, and a gorgeous, golden herbed quinoa salad tossed with very finely grated aged gouda. I let him know via email what I'd made and how to heat things, and then off I went on my trip (I'm in Vermont right now on a weekend culinary retreat).

During the ride up last night I sent him an email to see how dinner went and to see what he thought of the quinoa salad. He replied that it was fine, but that the bottom was "all burnt and stuck" and so he was only able to eat from the top.

"Oh no!!!!" I replied as I realized what he'd done.

See, when I was making the quinoa on Wednesday, I got caught on a conference call and forgot to turn the stove off. The bottom ended up burning and sticking to the pot (a quinoa socarrat, if you will), but the top was light and fluffy so I simply scooped all that into a large bowl and prepared my salad, leaving the stuck bits in the pot to clean later. In my rush to finish packing and make my shuttle today, I didn't have time, so I simply poured in some hot tap water and let it sit so that it would soften, making it easier for Eugene to rinse off when he got home.

Unfortunately, I neglected to tell him this key bit of information and so when he got home he assumed the stuff in the pot was his dinner.*

"I thought it was too wet," he replied, once I'd explained what happened.

So that was terrible, but I'm still very excited about the recipe I'm sharing with you today (and which Eugene will, hopefully, finally get to taste this evening.)

This is one of those great make-ahead salads that's absolutely perfect for bagged lunches (and picnics!). The golden color comes from turmeric, which lends a very subtle flavor but is really there to brighten up the dish. A simple dressing of fresh lemon juice, good olive oil, fresh chives, and finely grated garlic (a brilliant trick that helps the powerful garlic to just melt into your dish) coats the fluffy grains of quinoa. To finish it off, I sprinkle on a generous shower of good, sharp, hard cheese (aged gouda is my favorite for this, but you can use what you have) and toss to evenly distribute.

This is good hot, but I honestly think it's even better cold. With the freshness of the herbs and the great sharp flavor from the cheese you end up with a totally satisfying bowl just perfect for lunch. A complete protein in its own right, quinoa is a healthy and affordable option for meatless meals and salads. Since it can be eaten both hot or cold, it travels really well and you don't have to worry about refrigeration.

Add a sliced cucumber, a handful of nuts, and a little something sweet to end the meal (I chose blueberries and almond cookies), and you have a perfectly balanced lunch that will keep you focused without making you so sleepy that you start contemplating a nap under your desk. (Admit it. you've totally thought about it.)

Even though I now work from home, I still find that it's smart to make good balanced lunches like this for myself in advance. Otherwise, I get so wrapped up in my work that I never stop to eat. Fortunately, a large bowl of this salad takes just about 20 mostly-inactive minutes to assemble and will keep well for at least a week. It really makes preparing a healthy lunch totally effortless. (Not to mention incredibly affordable!)


*I'm actually a little bit surprised--perhaps even offended--that Eugene took a look at that gross burnt and watery pot and assumed that was what I'd left him for dinner. I mean, doesn't he know me (and my cooking!) better than that? ;)


****
New to Always Order Dessert? Consider subscribing to my RSS feed, follow me on Twitter, become a fan on Facebook, or sign up to receive my once-a-week e-mail updates by filling in your address in the box on the right. I also offer custom menu planning services and offer a variety of culinary workshops in the NYC area. Click here to find out more!

And if you ever need any entertaining or cooking advice, please don't hesitate to
e-mail me.
Thanks for reading!   


Golden Herbed Quinoa Salad


Print this Recipe
Ingredients
4 cups low-sodium chicken broth
2 cups quinoa
1/4 cup extra-virgin olive oil
Juice and zest of one lemon
1/2 cup chopped fresh chives
1 garlic clove, finely grated
1 teaspoon dried oregano
1 1/2 teaspoons ground turmeric
1/2 teaspoon cayenne pepper
1/2 cup finely grated hard sharp cheese such as Asiago, Aged Gouda, Pecorino, Parmiggiano-Reggiano, etc.
Kosher salt and freshly ground black pepper

Directions
Prepare the quinoa. In a medium saucepan, combine the chicken broth and quinoa over medium-high heat. Bring to a boil then reduce heat to a simmer. Cover the pan and cook until all liquids are absorbed, about 12-15 minutes.

While the quinoa cooks, whisk together the olive oil, lemon juice, chives, grated garlic, oregano, turmeric, and cayenne pepper. Add the dressing to the cooked quinoa and toss to coat.  Stir in grated cheese. Season with Kosher salt and pepper, to taste, and serve.

Can be served hot or cold.
0

Bagged Lunch Ideas: Mediterranean Whole Wheat Pasta Salad with Basil Vinaigrette

I served a version of this pasta salad at the very first dinner party I ever hosted. I was 16.

I don't remember the exact occasion, but I'd invited a group of my nerdy high school friends over and we feasted on a Mediterranean inspired spread of homemade roasted garlic hummus, tzatziki, balsamic chicken flat-bread pizzas, bruschetta, crudite, and this salad. For dessert I made bread pudding with butterscotch sauce (two things I'd been obsessed with at that point in my life). There may have also been some Arbor Mist served, but we'll just forget about that part.

I remember that this salad was one of my favorites of all the dishes, and that I made so much of it that my family and I ate the leftovers for the rest of the week. It's one of those incredible dishes that just seems to get better by the day, as the pasta and cheese absorb more and more of the tangy fresh basil vinaigrette.

This is a great salad for lunch; you can keep it as-is or add some grilled chicken or cooked shrimp to round it out. It's also easy to adapt depending on the season. I've made it with sun-dried tomatoes in the winter and cherry tomatoes in the summer. I've added steamed broccoli florets when I had some in the fridge. You can play around with the cheeses or use tricolor rotini to make it a little more festive.

This also make a great salad for a picnic or outdoor barbecue since it's oil-based and will keep at room temperature for several hours.


****
New to Always Order Dessert? Consider subscribing to my RSS feed, follow me on Twitter, become a fan on Facebook, or sign up to receive my once-a-week e-mail updates by filling in your address in the box on the right. And if you ever need any entertaining or cooking advice, please don't hesitate to e-mail me. Thanks for reading!


Mediterranean Whole Wheat Pasta Salad with Basil Vinaigrette


Ingredients
12 oz whole wheat rotini (or other small whole wheat pasta such as penne)
1 cup roughly chopped kalamata olives (preferably not canned)
1 red bell pepper, diced
1 cup feta cheese, diced
1 cup fresh mozzarella pearls, drained (or diced fresh mozzarella)
1 cup cherry or grape tomatoes, sliced in half
1/4 cup red wine vinegar
3/4 cup extra virgin olive oil
3 garlic cloves, peeled
zest of one whole lemon
2 cups fresh basil leaves, washed and ripped off the stems
1/2 teaspoon sugar

Kosher salt
Black pepper


Directions
Cook the pasta according to box directions until al dente. Drain and rinse with cold water until cool to the touch. Drain and place in a large bowl.

Add the olives, bell pepper, feta, mozzarella, and grape tomatoes to the pasta and mix until evenly distributed.

In a blender or food processor, combine the vinegar, olive oil, garlic cloves, lemon zest, basil, and sugar. Process until smooth and emulsified (it will look almost a little bit creamy.

Pour the dressing into the salad and toss well to coat. Season with kosher salt and black pepper to taste. Let chill for at least 3 hours before serving (can be made up to 2 days in advance; will keep well in the fridge for about a week).
0

Bagged Lunch Ideas: Cold Sesame Soba Noodle Salad

DSC_1126
On Friday night, I made a big bowl of this cold soba noodle salad. Seasoned with toasted sesame oil, ginger, garlic, and spicy sriracha, it's a quick and easy dish that can be eaten as a side or as a main course. Soba is a great healthy alternative to standard wheat spaghetti. These Japanese buckwheat noodles are loaded with protein, vitamin B1 and B2, and rutin, a bioflavanoid similar to that found in green tea and red wine--not bad for a huge bowl of pasta!

I personally think that soba tastes best cold, which is perfect because it means you can make it in advance and leave in the fridge for a quick meal whenever you need it. Eugene and I spent most of the weekend digging our fork into the bowl in the fridge, and last night I split the leftovers into two containers so that we could each eat the rest for lunch today.

DSC_1127


This is just a basic recipe for the noodles, but you should use it as a template and spice it up however you'd like. Add pieces of cold chicken or shrimp to make it a heartier entree, or toss in some crisp green beans, sliced almonds, or water chestnuts for added crunch. A shower of minced cilantro would also work nicely here. If you love spice, add a little extra sriracha to the dressing and up the kick (totally what I did!).


****
New to Always Order Dessert? Consider subscribing to my RSS feed, follow me on Twitter, become a fan on Facebook, or sign up to receive my once-a-week e-mail updates by filling in your address in the box on the right. And if you ever need any entertaining or cooking advice, please don't hesitate to e-mail me. Thanks for reading!


Cold Sesame Soba Noodle Salad
Serves 4-6 as lunch entree or side

12-13 ounces soba noodles (Japanese buckwheat noodles)
2 tablespoons sesame seeds
3 tablespoons sesame oil
1 tablespoon low sodium soy sauce
2 teaspoons sriracha or other chili paste
1 teaspoon honey
1 teaspoon fresh ground ginger
1 garlic clove, finely minced
Kosher salt
Black Pepper


Bring a pot of salted water to a boil and cook soba noodles for 5 minutes. Drain and rinse with cold water until cool. Place in a large bowl.

While the water boils, place a skillet over medium-high heat and add the sesame seeds. Toast gently over the heat, moving constantly to keep from burning. Will be golden brown and smell nutty when ready; 1-3 minutes. Remove from heat and set aside.

In a separate small bowl, wisk together the sesame oil, soy sauce, sriracha, honey, ginger, and garlic. Pour dressing over cooled soba noodles and toss to coat evenly. Sprinkle in the toasted sesame seeds, and season to taste with Kosher salt and freshly ground black pepper. Serve immediately or keep covered in the refrigerator for up to one week.


0

Bagged Lunch Ideas: Black Bean, Corn, and Red Pepper Salad Wraps

DSC_0631
At Monica's engagement party in Baltimore the other day, I fell in love with a wonderful black bean, corn, and pico de gallo dip made by Monica's cousin Danielle. This thing was so good that I seriously I parked myself near the table and spent most of the night shamelessly scooping it up with salty tortilla chips. I ate about 1/2 the bowl when I had to stop since the chips had run out.

Ever since we got back to New York, I've had the combination on my mind and knew that I wanted to recreate something similar  I could eat for lunch at my desk.  I came up with the idea of turning the dip into a wrap that can be easily constructed right at my desk.

DSC_0626
DSC_0632

As a bagged lunch, the concept is simple--first you toss together the filling--an easy bean salad that can be made in advance--and then you pack up a portion of it topped with a generous sprinkle of shredded cheese. A whole wheat tortilla or wrap is rolled up and brought along separately. Come lunch time, you simply place your container of bean salad and cheese in the microwave for 30-45 seconds--just long enough to melt the cheese--and then scoop it all into the tortilla. Roll and enjoy at your desk or wherever you normally eat lunch. Preparing it this way protects the integrity of the tortilla, keeping it so that it doesn't get soggy sitting in your lunch bag all day.

I actually also eat this for breakfast sometimes--it's a great way to get a little protein in the morning when you're sick of eggs. The salad can, of course, also be eaten on its own, or served for dinner along with accompanying garnishes.

DSC_0622

A few notes about this recipe:
  1. Since it's winter, I used frozen bagged corn that I steamed before adding to the salad. But when corn is in season in a few months, I will definitely take advantage of the amazing fresh corn available and use that. Just know that both options are OK. (I wouldn't recommend canned; canned corn always tastes metallic to me--not good ever, but especially not when it's the star player.)
  2. Be sure to rinse your canned beans well before using; it gets rid of excess sodium and that stinky sludge at the bottom of the can. I just toss mine into a mesh strainer and run under cold tap water for a minute or so until the beans are clean without any of that inky sauce left on them.
  3. The southwest influences in this recipe scream for black beans, but if you don't have any or need to use up another variety! I bet navy, pinto, or even black-eyed peas would be awesome in it! 
DSC_0630


Click for more original Bagged Lunch Ideas!

****
New to Always Order Dessert? Consider subscribing to my RSS feed, follow me on Twitter, become a fan on Facebook, or sign up to receive my once-a-week e-mail updates by filling in your address in the box on the right. And if you ever need any entertaining or cooking advice, please don't hesitate to e-mail me. Thanks for reading!


Black Bean, Corn, and Red Pepper Salad Wraps
Assembling these just before eating help the wrap from getting soggy. It's not required, but definitely recommended!

Ingredients:
2 cans low-sodium black beans, drained and rinsed well until water runs clear
2 cups cooked corn kernels (fresh or frozen is fine!)
2 small jalapeno peppers, seeded and diced
1 small yellow onion, diced
1/2 cup roasted red pepper, drained and chopped
2 cloves garlic, minced
3 tablespoons olive oil
Juice of two fresh limes (about 2 tablespoons)
1 teaspoon your favorite hot sauce (I recommend Chipotle tabasco--adds a great smokiness!)
Salt and pepper

For Serving:
flour tortillas (I like whole wheat)
shredded Cheddar or jack cheese
Fresh cilantro, washed with heavy stems removed, chopped coarsely


Directions:
In a large bowl, combine the rinsed and drained black beans, corn kernels, diced jalapeno, diced onion, and roasted red pepper. Toss to distribute evenly and set aside. In a small bowl, whisk together the minced garlic, olive oil, lime juice, and hot sauce. Pour dressing over bean mixture and toss to coat. Season with salt and black pepper. Store in an air-tight container in the fridge.

To serve, cover portion with shredded cheese and heat in microwave (or toaster oven) just until the cheese melts. Scoop into flour tortilla and top with fresh cilantro.
0

Bagged Lunch Ideas: Pesto Bean Salad with Cranberries


This easy salad has become one of my favorite bagged lunch recipes. Tossed together quickly from just a few ingredients, this salad keeps well and can be made in advance to last you through the week. Packed with protein and other good-for-you things, it makes a great option for those of you looking for an easy, healthy meal.

The pesto for this dish can be made fresh if basil is in season where you live (I include a recipe below), but a prepared pesto is just as good--especially during the winter when fresh basil isn't as plentiful. (I used some that I'd made last summer and kept frozen in individual portions in my freezer; the kind you can find at the supermarket or gourmet store will work just as well.)

The unexpected addition here is the dried cranberries; they add a lovely touch of sweetness that really makes the dish so don't skip them. If you don't have cranberries, dried cherries, currants, or raisins will also work.

I like to serve this on a bed of arugula with a few extra shavings of cheese on top; that's optional of course, but I like the freshness it adds to the dish. Enjoy!

****
New to Always Order Dessert? Consider subscribing to my RSS feed, follow me on Twitter, become a fan on Facebook, or sign up to receive my once-a-week e-mail updates by filling in your address in the box on the right. And if you ever need any entertaining or cooking advice, please don't hesitate to e-mail me. Thanks for reading! 


Pesto Bean Salad with Cranberries

Ingredients
1 can low-sodium white beans (such as great northern or cannellini)
2 cans low-sodium black beans
3/4 cup basil pesto (prepared or homemade; see below for homemade recipe)
Zest and juice of one medium lemon (About 1 tablespoon zest, 2 tablespoons lemon juice)
2 tablespoons extra virgin olive oil
3/4 cup dried cranberries
kosher salt and black pepper for seasoning


To prepare:

Drain and rinse the white beans and black beans and add to a large bowl. Add the pesto, lemon zest, lemon juice, and olive oil and stir until completely combined and evenly distributed. Add the cranberries and mix in well until evenly distributed. Taste and season with salt and pepper if needed. Best served room temperature, but can also be served chilled.

Will keep about 1 week in an air-tight container in the fridge.


Basic Homemade Pesto Recipe

Ingredients
1 bunch fresh basil (about 2-3 cups without stems), rinsed and patted dry
2 tablespoons pine nuts (you can also use almonds)
2 medium garlic cloves
1 teaspoon kosher salt
1/2 cup freshly grated parmigiano reggiano (you can substitute pecorino or other hard, sharp cheese)
2/3 cup extra virgin olive oil


In a food processor or blender, combine the fresh basil, pine nuts, garlic, salt, cheese, and olive oil and process until smooth. Use in a recipe or top with additional olive oil and store in an air-tight container in the fridge for up to 2 weeks.


0

Spicy Shrimp & Avocado Salad Sandwiches

Last week I read the book Her Fearful Symmetry by Audrey Niffenegger (she of The Time Traveler's Wife fame). I ended up not really liking the book as much as I expected. In fact, I didn't really like it at all. The story was fine initially, but I expected something spookier and felt like many parts of it were left unexplained and unexplored. Even with suspension of disbelief, much of it just really didn't make any sense. The final third of the book, in particular, was stupid, and rushed, almost as if it had been written in haste just to get it over with or like she just grew bored.

To put it frankly, it was a huge waste of time.

But all was not lost!

It's a long book and once I put it down (once I got past just how bad it was), I found myself thinking over and over again about one particular scene. Just a few lines, really, where the main characters--a pair of 20-something American twins living in London--are taken on a picnic by a male neighbor. He brings along sandwiches and when they ask what kind they are, he says

"Prawn-mayonnaise sandwiches...[In America] you would call it a shrimp-salad sandwich, though I've never understood where the salad idea comes into."

I thought that was a pretty clever observation because it's true; we do seem to call just about everything a "salad" even though most barely are (think Ambrosia salad or classic tuna or egg or elbow macaroni salad; x-flavored mayo would definitely be more appropriate). That said, the thought of a creamy shrimp salad was officially stuck in my head and it wasn't long before I made it our dinner.

I used small hand-peeled Laughing Bird white Caribbean shrimp for mine. If you haven't tried them yet, I definitely urge you to seek them out. Humanely farm-raised in filtered sea water, they are fed a completely vegetarian diet (that keeps them 100% mercury free) and are chilled immediately after being caught (never frozen) so they are always fresh and sweet. Bonus points because the farm where they are raised has been given high marks and praise by the World Wildlife Fund.

Oh and at around $10 a pound, they brought me infinitely more pleasure than that lousy book.


****
New to Always Order Dessert? Consider subscribing to my RSS feed, follow me on Twitter, become a fan on Facebook, or sign up to receive my once-a-week e-mail updates by filling in your address in the box on the right.

And if you ever need any entertaining or cooking advice, please don't hesitate to
e-mail me.
Thanks for reading!

Spicy Shrimp and Avocado Salad Sandwiches
Makes 6-8 sandwiches

Ingredients
1.5 pounds clean and peeled small shrimp (I love Laughing Bird hand-peeled shrimp, which are humanely farmed shrimp completely free of mercury, sulfates, or other nasty things.)
2 teaspoons Old Bay seasoning
1 teaspoon smoked Spanish paprika
1 tablespoon cooking or olive oil

1 red onion, finely minced
1 large Florida avocado, diced into about 3/4" cubes
1 cup minced celery (about 2 stalks)
1 bunch roughly chopped watercress (or arugula)

1/2 cup mayonnaise
1/2 cup plain Greek-style yogurt
zest and juice of 1 large lemon
1 tablespoon grainy or Dijon mustard
2 teaspoons apple cider or red wine vinegar
2 garlic cloves, minced or pressed
1 teaspoon Oregano
1 teaspoon Cayenne pepper
Kosher salt
Ground Black pepper

Kaiser or Whole Grain buns for serving


In a large bowl, toss the clean and peeled shrimp with the Old Bay and paprika.

Over medium-high flame, heat the oil in a large dutch oven or skillet and add the shrimp. saute until cooked thoroughly. Remove the shrimp from the pot and place in a large clean bowl. Reserve the liquid from the pot.

To the bowl of shrimp, add the minced red onion, diced avocado, minced celery, and watercress.

In a smaller separate bowl, whisk together the mayonnaise, yogurt, lemon zest and juice, mustard, vinegar, garlic, oregano, and cayenne. If too thick, add a tablespoon or two from the reserved cooked shrimp liquid.

Pour the dressing over the shrimp and watercress mixtures and toss to coat well. Season with Kosher salt and freshly ground black pepper as desired.

Serve the salad piled into Kaiser or Whole Grain buns for serving as a sandwich or serve in small bowls as a salad.
0

Bagged Lunch Ideas: Cucumber Chickpea Salad


This is a simple salad for lazy days. Just chickpeas, diced cucumbers (lots of them), and big bright showers of cilantro and lemon zest. (OK...a little bit of diced onion too.) The dressing is just a bit of oil whisked with a bit of lemon juice and a splash of vinegar.

Make a big bowl because it develops the longer it sits and will taste better tomorrow than it does today. Left to soak in a bit, the cucumbers take on a slight pickled tasted and the chickpeas absorb mouthfuls of flavor until you find yourself sneaking forkfuls right out of the fridge.

I used canned chickpeas for these, but I made sure to give them a good rinse with fresh cold water first. It's not required, but it's something I always like to do to whisk away that slightly sludgy liquid and musty smell all canned beans seem to have. (This trick, by the way, also works wonders to get rid of the extra fishy smell of water-packed tuna.) Some brands package their beans with a bit of extra sugar or salt in the liquid so a quick rinse helps get rid of that and gives you more control over the flavor of your dish (and your nutritional intake).

(And you can, of course, soak and boil your own dried beans.)


****
New to Always Order Dessert? Consider subscribing to my RSS feed, follow me on Twitter, become a fan on Facebook, or sign up to receive my once-a-week e-mail updates by filling in your address in the box on the right.

And if you ever need any entertaining or cooking advice, please don't hesitate to
e-mail me.
Thanks for reading!

Cucumber Chickpea Salad


2 cans chickpeas, rinsed
2 large cucumbers, diced into 1/2" cubes
1 bunch cilantro, stems removed, leaves chopped finely
1/2 small red onion, diced
3 tablespoons Extra Virgin Olive Oil
Zest and juice of 1 large lemon
1 teaspoon Apple Cider or Red Wine Vinegar
1 teaspoon Kosher salt (more to taste)
1 teaspoon freshly ground black pepper

In a large bowl, combine the rinsed chickpeas, diced cucumber, cilantro, and red onion. In a separate bowl, whisk together the olive oil, lemon zest and juice, vinegar, salt, and pepper. Add the dressing to the chickpea mixture and toss to coat. Taste and adjust seasoning if necessary (depending on how much juice your lemon had, you may need a bit more vinegar or oil. This can be eaten right away or made up to 24 hours in advance.
0

Bagged Lunch Ideas: Lemon Chicken Salad Sandwiches


My cravings for cool salads continue as the temperatures hold steady at "decidedly hot." This chicken salad is a favorite of mine that I've been making since I was in college. I got the idea from the lunch place I used to frequent during my first internship. A tart and creamy salad with sliced nuts, dried fruit, and fresh diced apples, it was delicious on the buttery croissants they used to serve it on.

As much as I love croissants, I've since replaced them with a slightly heartier cranberry walnut bread, which stands up better to the creamy salad and makes it perfect for a bagged lunch or picnic. The combination of sweet and tart is what makes this one work, so don't shy away from the addition of apples and lemon; I promise it works! The Greek yogurt in the dressing also lightens it up a bit, but if you prefer, you can use sour cream or a bit of buttermilk instead.

I love this with a generous handful of watercress tucked in (or my favorite Upland Cress!), but of course it's optional. If you prefer, you can also eat this as an entree over a bed of greens (I served it this way at one of my recent brunch parties and it was a hit).


Lemon Chicken Salad Sandwiches

Makes 6 large sandwiches (salad can also be served as an entree over greens)

Ingredients
1.5 lbs boneless skinless chicken breasts (you can also substitute cooked roast chicken or turkey)
Ground black pepper
Sea Salt

2 tablespoons olive oil
2 cups chicken broth.
2 cloves garlic, smashed

1/2 cup mayonnaise
1/2 cup plain Greek-style yogurt (such as Oikos or Fage)
2 tablespoons fresh lemon juice
Zest of 1 whole lemon
1 teaspoon oregano
2 Granny Smith apples, cored but not peeled, diced into 1/4" cubes
1 shallot, minced
1/4 cup sliced almonds
1/2 cup cranberries (optional)

To serve: watercress, sliced cranberry walnut bread

1. Season the chicken breasts on both sides with ground black pepper and sea salt. Heat the oil in a medium skillet over medium-high heat. Add the chicken breasts and sear on both sides (2 minutes each). Pour in the chicken broth and garlic cloves, and bring to a simmer. Let the chicken simmer until it is cooked through (about 10 minutes). Remove the chicken from the heat and let cool on a plate.

2. In a large bowl, combine the mayonnaise, yogurt, lemon juice, lemon zest, oregano, plus a 1/2 teaspoon each of sea salt and black pepper. Whisk well and fold in the diced apples, minced shallots, sliced almonds, and cranberries (if using).

3. Cut the cooled chicken into cubes (or use a fork to shred, if you prefer), and add to the dressing. Toss well and taste for seasoning. Cover and chill in the refrigerator for at least one hour (up to 24).

4. To serve, make sandwiches using sliced cranberry walnut (or other desired) bread. Top each with a small handful of watercress. Serve immediately or wrap in parchment paper and serve for lunch.

0

Bagged Lunch Ideas: Egg Salad w/ Caramelized Shallots & Chives


Like a wacky sitcom neighbor who pops in unannounced, summer has been arriving in New York in tiny sporadic bursts these past few weeks. It's too soon, people cry, as they pull off the jackets and cardigans they cautiously grabbed before leaving the house that same morning. The train ride home each night is either a mass of huddled girls shivering in prematurely ambitious shorts or steaming commuters, fanning themselves with their coats bundled in a pile on their laps.

The excessively hot days--today it's already hit 90!--make me sleepy, and when I finally get in the door and drop my piles and bags and heels on the floor (yes, the floor), the last thing on my mind is standing in front of my stove for an hour. Instead, my cravings these days have turned toward the cool and salad-like. I made this herby tuna salad one day, and a similar version with showers of lemon zest another (my mercury levels are likely through the roof at this point). There were two nights of simply pan-fried chicken breasts served on a big mess of greens with this embarrassingly easy Caesar dressing.


Last night, I just wanted egg salad. That's egg salad my way, with diced caramelized shallots, finely chopped onion chives, and generous dashes of both cayenne and smoked Spanish paprika. The resulting salad is simultaneously smoky, creamy, and spicy, with tiny bits of sweet. If you *really* want to make it my way, let the shallots caramelize just a bit too long until they're a little crisp. Let them hit that cusp just before burned, for a little extra smoke that I find irresistible.

Eugene likes his egg salad on big slices of freshly baked olive bread from the farmer's market. I take it straight up, spoonful after spoonful right from the bowl I make it in. It's my favorite bagged lunch, and so I always make just enough so that I can bring a few scoops with me to work the next day. Occasionally, it's all I can do to not eat it for breakfast! ;)


Everyone has their own methods and tweaks for making an ideal egg salad, but below is my style. To get the eggs fluffy and evenly sized, I grate them on the larger side of a box grater. If I'm making a lot of egg salad (usually for a brunch party), I just toss them into my food processor with the largest grating wheel in place. As impatient as I am, I also find it's best to wait until the next day to have it. An evening in the fridge does wonders for the texture and flavors, which is why it's an ideal dish to prepare to bring to work the next day.

No matter how many eggs I start with, I always find myself wishing I'd made more. This recipe calls for 8 eggs and makes enough for dinner for two, plus one more lunch tomorrow (you guys can fight over it!). It can, of course, be easily doubled or halved.

A Tip: If you prefer it in sandwich form for lunch, just pack it in a container with the two slices of bread in a separate baggy or wrapped in paper, and assemble the sandwich at the office. This will keep the bread from getting soggy (and you can keep the bread room temperature while you refrigerate the eggs).


Now tell me, how do YOU like your egg salad?


Egg Salad with Caramelized Shallots & Chives
Makes about 3 cups.

Ingredients
8 large eggs
1 large shallot, diced
1 tablespoon butter
1/2 cup mayonnaise
1 teaspoon smoked spanish paprika
1/2 teaspoon cayenne
Kosher salt
Black Pepper
1/4 cup onion chives, chopped


Place eggs in a medium saucepan and cover with cold water. Place over high heat just until the water reaches a rapid boil. Turn off heat and let cool to room temperature (about 10 minutes). Shake pan gently to crack shells and place under cold running water for about 15 minutes (refilling with fresh cold water every so often).

While the eggs are cooking, heat a heavy-bottomed skillet over medium heat. Add the butter and the shallots and saute until caramelized (about 7-10 minutes).

When the eggs are cool, peel and grate using the large side of a box grater. Combined in a large bowl with mayonnaise, paprika, cayenne, salt, and pepper. Fold in the caramelized onions and chopped chives.

Serve immediately, or chill in the fridge. Can be made up to 24 hours in advance.
0
Back to Top