Showing posts with label how to. Show all posts

Kitchen Tip: How to Cut Fennel


Step 1. Rinse the fennel under cold water and pat dry. Lay the fennel flat on the cutting board, and use a large chef knife to cut off the "fingers." (Really, they're called fronds, but...come on.

They're obviously fingers.) Set those aside for later.


Step 2. Cut the bulb in half lengthwise, then in half again to make quarters.

Step 3. Tilt each quarter on its side and cut into the fennel on an angle to remove the core.

If you'd like to leave the fennel in wedges (best when serving as part of a roasted vegetable platter), leave a bit of the core to hold the leaves together.

If you'd like to separate it (best when adding to pastas, salads, etc.), remove the entire core.

Repeat with the other 3 quarters.


Step 4. Separate the leaves.

To roast, I spread the leaves out on a baking sheet and drizzle with oil. You can also grill or saute them. They're also lovely served raw with a dip on a crudite platter.

What to Do with Fennel Fronds
Never throw out fennel fronds! They're edible and can be used in several ways.

Pluck some of the green leaves and mince finely to sprinkle over the final dish as a garnish. These are also wonderful pureed into salad dressing or soups.

You can also use the fronds and leaves to make homemade fennel tea, which is excellent for digestion (especially when bloated or consuming a lot of spicy food or legumes).

To make fennel tea: Simply place them in a large pot and cover with cold water. Bring to a simmer for 5 minutes, and then turn off heat and let steep, covered, for at least an hour. Drain and you have fresh fennel tea, which is lovely hot or can be chilled and stored in the refrigerator for up to a week.

(You can also add fresh mint leaves for a lovely mint-fennel tea!)

****
Love Always Order Dessert? Let's connect! Follow me on Twitter or Pinterest, become a fan on Facebook, or sign up to receive my once-a-week e-mail updates. And if you ever need any entertaining or cooking advice, please don't hesitate to e-mail me. Thanks for reading!  
0

Guest Post: How to Mix a Perfect Cocktail at Home

I recently signed up for a series of mixology workshops at the Astor Center here in New York. I unfortunately got sick and was unable to make the first class, so I sent my husband, Eugene, in my place. 

Here is his post about the experience, complete with tips on how to mix up the perfect cocktail at home:
 
I think most men fancy themselves competent, at the very least, in the task of making a cocktail. Using a jigger, or knowing the difference between a Hawthorne and julep strainer are not considered required knowledge. 

Finding myself squarely in this camp of know-nothing-know-it-alls, I set off for the Astor Center--taking the place of an ailing Alejandra--to take a hands-on cocktail basics workshop, led by the highly knowledgeable and very experienced April Wachtel inside the incredible Astor Center space: 2-level stadium seating, super comfy leather chairs, and immaculate individual workstations where we found our bar tools, cocktail recipes, and an Old Fashioned.

After a brief stroll through the history of cocktail making, April introduced us to the tools of the trade. Here is a list of the most basic tools that every bar should be stocked with:

  • Boston shaker (can be metal-on-metal or glass-on-metal)
  • strainer (Hawthorne for shaken and julep for stirred)
  • jigger
  • bar spoon
  • muddler
 
Once we went over the tools, it was time to put them to good use: making dranksWe started with cocktails that fill the dreams of 007s past and future: shaken cocktails. 

This meant a how-to session on the Boston shaker. I won’t go into the actual technique of using the shaker as I’m sure you can find a ton of YouTube videos on the topic, but I’ll just highlight some of the pointers that April went over:

  • Always assemble your cocktail in the larger of the two vessels.
  • Add the ice last and make sure you fill the assembly vessel all the way to the top with it.
  • If you have smaller hands or you don’t have a lot of arm strength, a smaller metal-on-metal shaker would feel more comfortable.
  • When the metal vessel begins to frost on the outside, you know the cocktail is at the right temperature.
  • Practice shaking with just ice and water so you don’t waste any of the good stuff if you mess up.


At this point you may be asking yourself: “but how do I know if a cocktail should be shaken or stirred?” 

I always thought--as I’m sure lots of people have--that the choice was pure preference, and although I’m sure there are plenty of recipes that break the mold, there’s a simple rule that you can follow if you’re just not sure or don’t have the recipe in front of you:
If a cocktail has juice or egg in it, it should be shaken. If a cocktail is just booze and mixers, it should be stirred.
Once we were done practicing shaking water and ice cubes, April tasked half the class with making a Sidecar, and the other half made its bastard child: the Margarita

We were asked to pour some of our drink into one of the provided small cups to exchange with another person that made the other of the two cocktails. This helped inject a jovial, social spirit into the workshop (the cocktails also helped on that front).

April taught us that the sidecar and Margarita belong to a class of cocktails known as “sours.” These are made up of a base spirit (booze), lemon or lime juice, and a sweetener (some also include an egg white). These cocktails are very flexible, and by simply changing the proportions of the three main ingredients, you can really tailor it to your taste. April gave us the following handy guide to experiment with:
(booze / citrus/ sweetener)

dry and boozy - 2 oz / 0.5 oz / 0.5 oz

juicy and balanced - 1.5 oz / 0.75 oz / 0.75 oz

sweet and not boozy - 1 oz / 1 oz / 1 oz
Now that we had mastered the shaker, we moved on to the bar spoon--stirred cocktails.

The key points are:


  • Keep your forearm stiff and just stir using finger motion.
  • The back of the spoon should always be touching the inside of the glass.
  • Only fill the glass with ice just above the drink line.

Two stirred classics that we made were the Negroni (I either messed this one up by using too much Campari or I just don’t like Negronis), and the Manhattan.


For the final cocktail, the the entire class made the classic daiquiri, but half used a different proportion of rum to lime juice to simple syrup in order to highlight how by just adjusting the amounts, the cocktail can be made to taste significantly different.


In the end, this workshop really highlighted how embarrassingly little I actually knew about making a proper cocktail. It also showed that just by making a small investment in some simple tools, and learning a few basic techniques, your cocktail game will be improved tremendously.


Happy mixing!


****
Love Always Order Dessert? Let's connect! Follow me on Twitter or Pinterest, become a fan on Facebook, or sign up to receive my once-a-week e-mail updates. And if you ever need any entertaining or cooking advice, please don't hesitate to e-mail me. Thanks for reading!   


0

How To Make Homemade Coconut Milk (from a fresh coconut!)

Coconut milk is one of my favorite ingredients. I usually buy it in bulk and use it in everything from smoothies and desserts to savory recipes like curry or light broths. Even though I use it, I admit that I'm not really a fan of the funky additives you can find in store-bought coconut milks. I bought an extra coconut the other day to use in a photo shoot, and while wondering what to do with it, I remembered my mom telling me stories about how my grandmother used to make coconut milk from scratch to use in her Puerto Rican dessert recipes.

It's a really easy process and takes mere minutes--especially now that we have access to the beautiful modern convenience that is the food processor. The results are especially lovely, with a strong and natural coconut flavor and aroma that is much different from the canned version.

NOTE: In this post I'll show you how to make the milk starting with a whole coconut, but you can also skip ahead and use a bag of unsweetened dried coconut, then begin from the food processor step!

Here's how you do it:

Start off with a fresh coconut. You want to use the brown "mature" coconuts, not the "young Thai" version. Choose a coconut that feels heavy for its size. You should also be able to hear the liquid sloshing around inside when you shake it. Also be sure to test the "eyes" by pressing on them; they should be hard without any give.

Once home, use a nail or screw to break through the eyes and drain out all the water inside--reserve this as you'll be using it in the recipe. You can then break the coconut open and remove the hard hairy brown outer shell. (Here is a great tutorial on how to open a coconut.)

The meat on the inside should be white with no yellow or moldy spots. Use a vegetable peeler to remove and discard the thin brown skin and cut the peeled meat into small chunks.

Combine the chunks of coconut in a food processor with the reserved coconut water plus two cups of boiling filtered water. (You can also use a strong blender or Vitamix for this step. No "Magic Bullets," please!) It's important that the water be very hot as that will help extract as much fat as possible from the coconut meat.

Puree the coconut and water for about 5 minutes. The coconut meat should be finely ground and frothy once ready.

Pour this into a fine sieve or a colander lined with a cheesecloth set over a large bowl.

Press down hard with a spatula or the back of a spoon to squeeze out all the liquid (I also just use my hands).

Once you have removed all the liquid, set the sieve with the shredded coconut aside (you can use this as-is in baking recipes or dry it to make homemade coconut flour).

The leftover liquid is your homemade coconut milk! You should have about 2 1/2 cups or so, depending on how moist your coconut was.

Use it right away, if desired, or transfer to a jar and store in the refrigerator for up to 3 days. Note that the lack of additives or emulsifiers will also mean that the coconut milk will separate in the fridge with the fat solidifying on top--this is a good thing! It's natural! You can heat it up slightly and stir it back together to use or just pop in a blender to emulsify into a creamy milk again.

And remember: Don't have a fresh coconut? You can also make coconut milk using frozen coconut or shredded dried coconut (the unsweetened kind) and follow the process from the food processor step.

****
New to Always Order Dessert? Consider subscribing to my newsletter, follow me on Twitter, become a fan on Facebook, or sign up to receive my once-a-week e-mail updates by filling in your address in the box on the right. If you're in the NYC area, be sure to check out my NYC dinner party style cooking classes. Thanks for reading!


0

Kitchen Tip: How to Get Rid of Fruit Flies

"Time flies like an arrow. Fruit flies like a banana." - Groucho Marx

Fruit flies thrive in the summer when the heat causes fruit and vegetables to ripen and spoil quickly on the counter. Below are some of the best ways to quickly get rid of fruit flies.

1. Store onions and shallots in the refrigerator. The natural sugars and powerful scent of the onion is like a sweet siren song for fruit flies. Potatoes and onions can also be problematic; pop those in the fridge, too.

2. Once a week, empty out your fruit/vegetable baskets, and rinse and wipe them down with warm water and a little dish soap before filling them up again.

3. Check your fruit daily, and put any very-ripe fruits of fruits with gashes or soft bruises in the fridge. 

4. Make a homemade fruit fly trap by leaving a cup or wine glass filled with about 2 inches of red or white wine in it near the fruit basket. The flies will be drawn to the sweet smell, fly or crawl in, drown, and die a boozy death. You can also use vinegar with a slice of ripe/rotting banana or peach in it, but I honestly find that wine works best.

5. Keep a small fan in the kitchen (I have one on top of my fridge). If the flies start buzzing around (fruit flies or really any kind of winged flying creature), turn it on. Flies are very weak, and even the slightest breeze from a fan can knock them off course and send them away. This is also a great tip if you're trying to keep the larger flies from bothering you outdoors. Plug in a few fans and it'll keep the bugs away better than any citronella candle ever could. 

Bonus Tip: Remember that garbage cans, wet sponges, and damp mops can also be breeding grounds for fruit flies. Take out the trash regularly, spraying and wiping the can down about once a week. Swap out sponges regularly (or keep them clean and dry by washing them in the dishwasher along with your dishes and letting dry in the sung). Wring mops out well and let dry in the sun before storing. 

This has nothing to do with fruit flies. I just like it.
0

How to Arrange a Buffet Table (Retro Video)

I came across is fun how-to video from the 1940s on how to set up a buffet table and just had to share it. Even better? The tips stand the test of time!

0

Inspired Entertaining: DIY Chalkboard Wine Glasses

Last month I got an email from one of those "deal of the day" websites featuring a very cute set of wine glasses with chalkboard stems from a company called Chalkboard China.

I've seen chalkboard glasses before, and always thought them to be a fun and chic way for guests to keep track of their glass throughout the night so you don't end up with mixed-up glasses or dozens of half-full glasses left around the house.  But all the ones I've seen in stores feature a strip of chalkboard paint across the bowl of the glass, which I've always felt looks awkward and takes away from the beauty of the wine or beverage in the glass. What I like about this version is that the writing part is at the bottom on the stem and foot of the glass, so it doesn't compete with the beverage.  I also like that the simple black foot on the glass is in itself an elegant design element, and would work just as well with no writing on it.

What I did NOT like about the glasses, was the price. $19.95 per glass is absurd and totally unnecessary.  Especially when you want to be able to entertain a large group of people, or simply not worry about breaking glasses.

So I figured, "I can totally make that myself!" I had a can of chalkboard spray paint in my cabinet left over from when I created a small chalkboard wall in my kitchen (you can see a bit of that wall here) and I have plenty of inexpensive wine glasses left over from my bridal shower (they were used for the favors), so I go to work.

Here's how you can make your own set of inexpensive chalkboard wine glasses:


Materials
1. Krylon Chalkboard Aerosol Spray Paint. I bought this at Lee's Art Shop in NYC, but it's also available at stores like Michael's, Pearl, and other craft shops. You can also buy it online. I prefer the standard version in black, but chalkboard paint does also come in other colors (red, hunter green, etc.) so choose what works with your decor.

2. Clear wine glasses. I used a couple inexpensive wine glasses I already had in my cabinet. They were leftovers from bridal shower favors and I believe my bridesmaids purchased them at IKEA. Feel free to use glasses you already own, or pick up cheap ones at a thrift store or restaurant supply shop.

3. Painter's Tape. You'll use this to block off the rest of the stem. Be sure to get masking or painter's tape, as other kinds of tape may leave sticky residue on the stem of your glass.

You'll also need:
A small waterproof dropcloth to protect your floor or work surface--I just used a few old Target grocery bags that I spread out on the floor. You'll also need a well ventilated area. I sat on the floor in front of an open window and turned on a fan for good measure; if you have outdoor space you can work in, that's even better as the spray paint fumes are pretty strong.

Method
Step 1. Wash and dry your glasses thoroughly. If there is any oil or residue on the glasses, use rubbing alcohol to wipe it off. Decide where you want the chalkboard part to end on the glass and tape the rest of the stem that won't be painted. (For example: I wanted it to go up about an inch above the foot of the glass so I taped off the rest of the stem.) If you use more than one strip of tape, be sure to overlap them slightly so you don't end up with any paint between the tape strips. Tape off all your glasses at once before you start painting.

Step 2. Spread your dropcloth over the area you'll be working on. Shake the paint well and, holding the nozzle about 2 inches away from the glass foot, spray the paint lightly until it coats the entire surface. Set down and repeat with all the other glasses. Let dry for about 20 minutes before repeating with a second coat on each glass. Let dry for 2 hours.

Step 3. After about 2-3 hours, gently remove the painter's tape, then turn the glasses upside down so the stems are up. Let dry overnight this way until the paint fully dries.

Once the glasses are completely dry (about 24 hours) they're ready to use! When entertaining, leave a small container of white or colored chalk so guests can write their names (or whatever they want) on their glasses and keep track of them throughout the night.

These would also make a great (and inexpensive!) DIY holiday or hostess gift idea! I recommend that you pair a set of the glasses with a favorite bottle of wine and a small package of chalk. Note that the chalkboard paint is NOT dishwasher safe, but the finished glasses can be washed by hand in the sink with warm water and dried with a dishcloth (or left in the rack to air dry).

*****
Did you enjoy this post? Be sure to share it with your friends on Facebook and Twitter! Consider subscribing to my RSS feed, follow me on Twitter (@nandita), become a fan on Facebook, or sign up to receive my once-a-week e-mail updates by filling in your address in the box on the right.
Thanks for reading!  
0

DIY Vanilla Instant Pudding Mix

It's no secret that I'm a from-scratch kind of girl, but there are certainly times when I can appreciate the convenience of a pre-made mix! The problem is that boxed dessert mixes have tons of sugar and additives, which are definitely not good for your body.

I started thinking about this problem recently while reworking an old cake recipe (coming soon!) that originally called for a package of vanilla pudding mix to be added to the batter. I didn’t want to do this, but skipping it created a notable difference in the texture of the cake. I wondered if the problem could be remedied by creating my own homemade pudding mix as a substitute.

I found a few recipes online, but the flavors were off. Most of them used nutmeg in the mix and then called for the addition of vanilla extract during the cooking. I wanted a pudding mix that, just like the boxed kind, had vanilla already in it. I realized the best way to do this would be to use whole vanilla beans. I scraped the seeds into the mix, and then cut the pods in half and  dropped them in with the powder to infuse it further with pure vanilla flavor. (This is my favorite and really inexpensive source for fresh whole vanilla beans. I buy them in huge batches and store in the freezer or use to make my own extract--can't be beat!)

The results were amazing! And the best part is that it's a quick and easy recipe that you can make in large batches and store indefinitely for instant pudding satisfaction whenever the craving hits. To actually make the final pudding, you simply measure out a small portion of the mix and combine with milk on a stove-top for about 3-5 minutes. Let it cool and voila! Instant (and totally homemade!!) pudding.

I can’t wait for you to try this as I know you'll love it as much as I did. Once you get the basic recipe down, you can experiment with flavors and spices and really make it your family’s own.

An added bonus? You can make dozens of servings at a mere fraction of the cost of those tiny grocery store boxes!

****
New to Always Order Dessert? Consider subscribing to my RSS feed, follow me on Twitter, become a fan on Facebook, or sign up to receive my once-a-week e-mail updates by filling in your address in the box on the right. And if you ever need any entertaining or cooking advice, please don't hesitate to e-mail me. Thanks for reading! 


DIY Vanilla Instant Pudding Mix
Makes about 5 batches of pudding; 4-5 servings per batch

Ingredients
3/4 cup nonfat dry milk powder
3/4 cup cornstarch
1 cup granulated white sugar
2 whole vanilla beans (I always buy them from this site.)
1 teaspoon Kosher salt

In a large mixing bowl, combine the dry milk, cornstarch, white sugar, and salt. Use a knife to slice down the center of the vanilla beans lengthwise and scrape out the seeds. Add the seeds to the dry ingredients and whisk well until evenly distributed (you may need to use the back of a spoon or spatula to break up the little clumps of seeds). Cut the scraped-out vanilla beans in 2-3 pieces each, and drop into an air-tight jar or container (such as a mason jar). Pour the mixture in, seal, and shake a couple times to distribute the vanilla bean pieces. Store in a cool dry place.

To make the pudding, combine 1/2 cup of the mix with 2 cups of milk in a medium saucepan over high heat, whisking constantly. Bring to a boil (keep an eye on it because this happens quickly!), then reduce heat to a simmer and continue whisking until the mixture thickens and coats the whisk or spoon. (About 3-5 minutes).  Pour in a container and let set for at least 5 minutes before serving. Can be served warm or cold.
(heavily adapted from a recipe found on Creative Homemaking.)
0

Kitchen Tip: How to Cook Corn on the Stove

It's the height of corn season, and Eugene and I have been eating ears of sweet, local bi-color corn pretty several times a week. Earlier this summer, when the first lovely ears started showing up at market tables, Eugene brought a few home from the farmstand near his office and asked me to make them for him. I shucked the corn and dropped them into a pot with just an inch or so of water, covered it, and raised the flame to high. About 7 minutes later, I brought Eugene a plate with two ears rolling on top of it from side to side. "Do you want butter?" I asked.

He stared up at me in amazement. "It's already ready?!"

Turns out that when he was growing up, Eugene's mom used to prepare the corn by boiling it in a large pot filled with water. Waiting for that much water to boil was quite the process and so, like Eugene explained, it always took "forever" from the moment he asked until the cooked corn finally arrived on his plate.

0

Kitchen Tip: How to Roast Beets

It's prime beet season and the earthy (and incredibly affordable!) jewels are everywhere. While beets can be prepared in any manner of ways, my absolute favorite way is to roast them. Unlike boiling, which tends to wash them out, roasting preserves the gorgeous natural colors, keeps the tenderness intact, and deepens and enhances it's characteristic earthy sweetness.

The bonus is that roasted beets can be prepared in a large batch all at once, then stored in the fridge for a bevy of uses over the coming week. Think sliced into salads, paired with tangy goat cheese as an appetizer, sauteed in hot herbed butter, mashed into ravioli filling, or (my favorite) pureed and baked into chocolate cake. Roasted beets are in fact so versatile that they're actually sold that way at the grocery store, but there is no need to spend extra bucks to have someone do the work. With just a few quick steps, you can learn to roast a perfect beet every single time.


0

The Healthy Way to Deep Fry


I know some people shy away from frying food, but the truth is that when done correctly, frying is actually not as unhealthy a cooking method as you might think!

Back when I was in high school, my friends and I took a public speaking class where we each had to give presentations. I (big surprise) did a cooking demo, and showed the class how to make a homemade egg cream. My friend Nick, who at the time was working part-time in the kitchen of a pizza parlor, gave a demo about the "healthy" way to deep-fry that was probably one of the most useful things I ever learned in high school.

First, you should understand what actually happens when you drop a piece of food into the hot oil. All food, as you know, contains water. So whether it's a chicken wing, a shrimp, or a piece of broccoli, there is naturally occurring water inside of it. As soon as you drop it into the hot oil, that water is converted into steam (from the heat). As you know, oil and water don't mix, so this steam comes out of the food and forms a kind of barrier that prevents the oil from penetrating it.

In those seconds when that steam is surrounding the food and keeping the oil out, the food is quickly browning and creating that crisp delicious exterior that we love about fried food. This crust then takes over protection duties, and keeps the oil out while the rest of the food continues to cook on the inside due to the high heat. (Think of it like a mini oven inside the crisp exterior.)


The magic ingredient to make this all run smoothly? Temperature. Specifically, a temperature between 350 and 375 degrees F. (about 177-190 Celcius).

That's why whenever you read a recipe for a fried dish it's going to tell you to fry it at this temperature; because this is the perfect temperature in which this process can take place. Any hotter than 375, and the steam will evaporate quickly, the exterior will crisp and brown too fast, and the food on the inside won't cook completely. Any lower than 350, and exterior of the food won't be able to develop in time to protect the inside before the steam evaporates, so you'll end up absorbing way more oil (and calories) than you would have if it were cooked properly.

Makes sense, right?

I remember being totally fascinated by this explanation when I was 17, and 10 years later, I still think about it every single time that I fry. (Actually, I should probably send Nick this link as soon as I post it. I wonder if he even remembers this!) And in case you're skeptical of something I learned from another 17-year-old, I'll note that this same lesson was essentially repeated by my chef instructor when I went to culinary school a few years later.

So that said, there are some other things to keep in mind when frying. Here are my tips (please feel free to add your own in the comments):


1. Use a heavy-bottomed pot that will help retain the heat from the burners and conduct it evenly. If the pot is too thin, the oil will heat up too fast and the food will burn. I usually use my dutch oven or my cast iron skillet. If I'm only frying a couple things, I'll use a smaller saucepan (seen above). If all my wedding registry dreams come true, I'll soon have some even better pots that I can use.

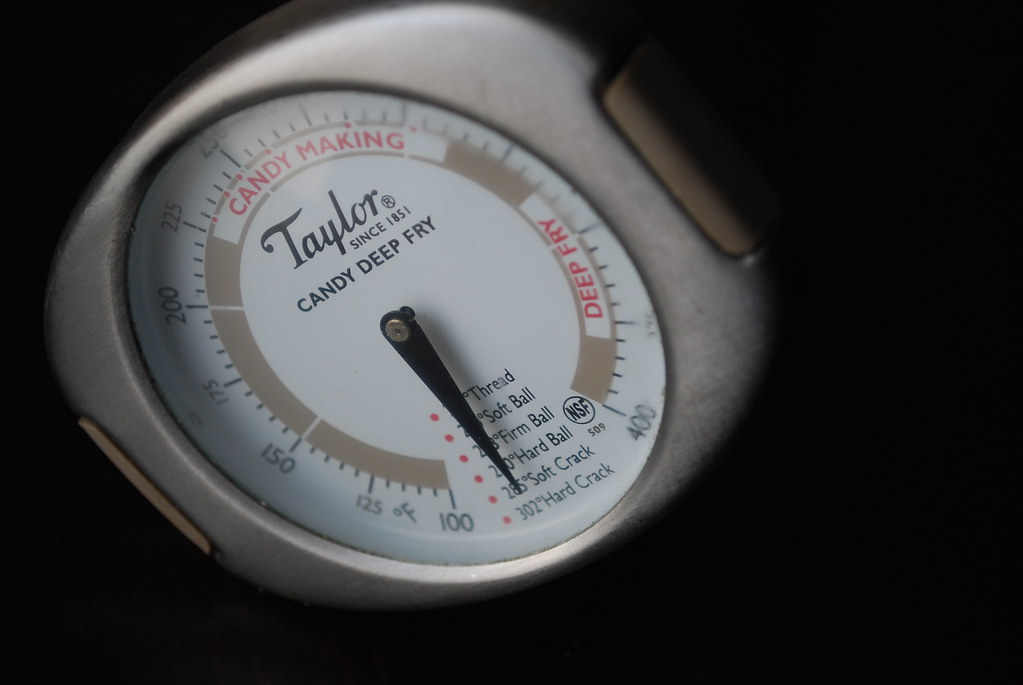
2. Get a thermometer. Seriously, you have to do it. They're 10-20 dollars and will give you that much more confidence when dealing with the oil. You can also use them for candy or jam making if you're so inclined.

3. Use clean oil to fry. I know some people like to strain their oil and reuse, but I'm not really a fan of that because the properties of the oil break down a bit each time you use it. Reused oil is more likely to smoke and burn your food. It can also absorb flavors that will ruin the taste of your food. (If you feel bad throwing it out after one use, you can look for centers that recycle used cooking oil.)

4. Man the controls. Sometimes I feel like I'm flying a plane when I fry. The reason? You need to use the burners to regulate the temperature of the oil. When you add food to the pot, the heat will drop quickly, so raise the flame to get it back where you want it. If it gets too hot, lower it. (If you own a deep fryer, this is moot, but I know most of you don't.)
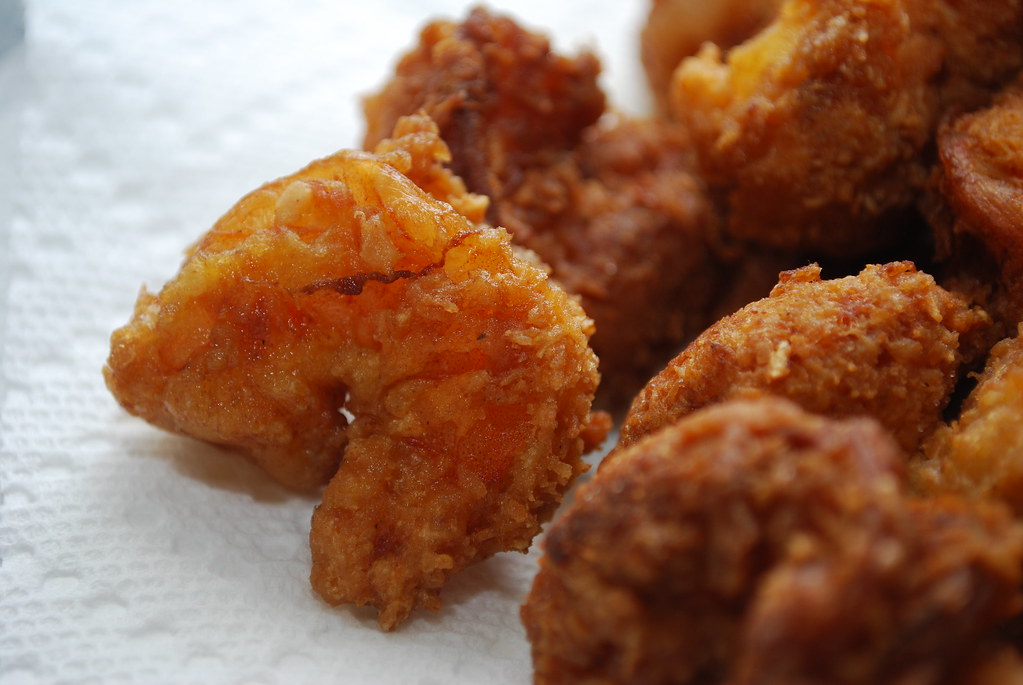


5. Don't add everything to the pot at once or the temperature will drop. This isn't like boiling. You can only fry a few things at a time; how many determines on the size of what you're cooking and how big your pot is. Fry them in batches; it'll still go quickly.

6. Fried leftovers don't reheat well, but if you must, I suggest you freeze them and then reheat in a 400 degree oven for about 5 minutes. Don't even think about microwaving them.

7. Salt *after* you fry. Salt will pull moisture to the food's surface and make it splatter when you add it to the oil. It will also lower the smoking point of the oil. Adding it to the food after it's fried will prevent this.

8. Use a good metal or heat-resistant silicon slotted spoon to take things out of the oil, and sift out any bits of breading or food after each batch. Never use wooden utensils; they tend to retain moisture which will make your oil splatter and spit. Plastic will melt.

Finally, what kind of oil you cook with is up to you. Personally, I only ever use virgin coconut oil (which I buy in bulk from this store) or grapeseed oil, both for health and taste reasons. Coconut oil is one of my absolute favorite things to cook with, and I may delve into why in a future post.
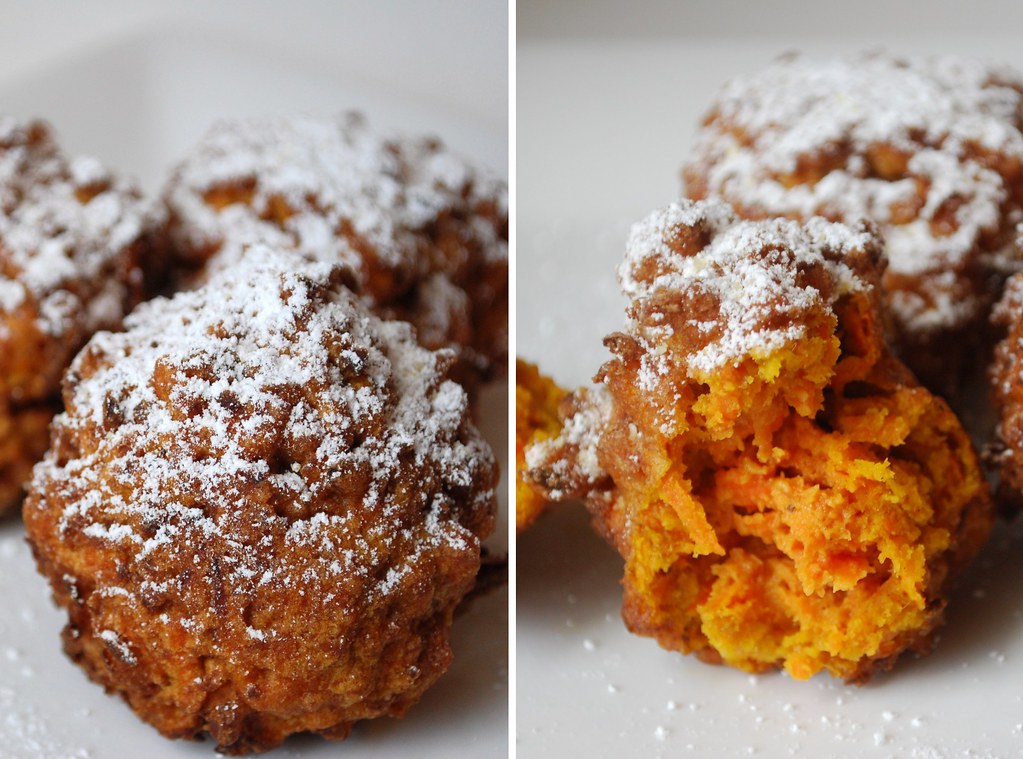


But for now, you're ready to fry! Here are some recipes you can now guilt-lessly (well, almost!) try:

Fried Macaroni & Cheese

Sweet Carrot Zeppole

Smokey Jalapeno Poppers

Arancini di Riso
0

How to Braid a Six-Strand Challah (A Video Tutorial)

In this second installment of AlwaysOrderDessert How To,* I show you my favorite technique for braiding a six-strand loaf of challah bread using a batch of my new favorite Chipotle Challah dough (see recipes details below).

The braiding technique might seem a bit daunting at first, but it really is pretty straightforward. It should only take you once or twice to get the hang of it, and pretty soon I promise you'll be whipping up gorgeous challah braids that will rival those in even the best bakeries!

[Just a warning that I was in a bit of a silly mood when I made this video and kept bursting out into laughter during a few key moments (you'll see which ones!). I was going to edit them out, but then I changed my mind. After all, those of you who know me in real life, know that I really do tend to burst out laughing at the drop of a dime. This way you get to know the real me! ;) Plus editing it would have just been a pain... lol!]

I hope you guys enjoy the video! I posted a couple of my challah recipes below, which you can use to experiment. And if you have any questions, leave them in the comments and I'll get back to you right away!

xoxo

Alejandra


Practice your challah braiding technique with one of these great challah recipes:


Chipotle Challah - A spicy challah with chipotle puree baked right into the dough

Vanilla Bean Challah
- A more traditional challah recipe, with just a touch of fragrant vanilla bean flecks

Pumpkin Spice Challah - Pull out that can of pumpkin puree from the pantry and use it to make this sweet and spicy pumpkin bread.


* I have got to come up with a more clever name for these video tutorials. Any ideas?

****
New to Always Order Dessert? Consider subscribing to my RSS feed, follow me on Twitter, become a fan on Facebook, or sign up to receive my once-a-week e-mail updates by filling in your address in the box on the right. And if you ever need any entertaining or cooking advice, please don't hesitate to e-mail me. Thanks for reading!
7

Kitchen Tip: Homemade Almond Paste

A few readers have e-mailed to say that they can't find almond paste where they live and have asked for alternatives. I'm going to share a really simple recipe showing you how to make homemade almond paste. The ingredients are almonds, sugar, egg whites, and vanilla, so you should all be able to make this easily at home.

This homemade almond paste can be used in my recipe for Italian Rainbow Cookie Cake, as a filling for danish or cakes, or for any other recipe that calls for almond paste. (Note that this is different than marzipan.)


****
New to Always Order Dessert? Consider subscribing to my RSS feed, follow me on Twitter, or sign up to receive my once-a-week e-mail updates by filling in your address in the box on the right. And if you ever need any entertaining or cooking advice, please don't hesitate to e-mail me.


Homemade Almond Paste


Ingredients
3 cups blanched almonds
3 cups confectioners (powdered) sugar
2 large egg whites, room temperature
1/2 teaspoon vanilla extract
1 tablespoon pure almond extract
1/2 teaspoon kosher salt

To Make:

Pour almonds into the food processor and process until finely ground.

Add the confectioner's sugar, egg whites, vanilla extract, almond extract, and salt and continue to blend until smooth and well combined. Use paste immediately, or place in a an air-tight container and store in the refrigerator for up to 2 weeks.
1

How to Peel a Kiwi (A Video Tutorial)

One of my many plans for the upcoming year, is to incorporate video tutorials and podcasts here on the blog. I'm starting this today with my very first video tutorial.

It's a quick, two-minute video where I show you my favorite technique for peeling a kiwi fruit. You don't need any special equipment and it's a great way to perfectly peel a whole bowl of kiwis for use in a salad, a fruit plate, or in a recipe like my Kiwi Sorbet.

I hope you enjoy my first video, and please let me know what you think! Also, if you have any special requests for similar tutorials, please let me know in the comments.

4
Back to Top