Showing posts with label NaBloPoMo. Show all posts

Success!


Eugene came home this afternoon with a dozen roses for me. "Is this for our month-aversary?" I asked.

"No," he replied. "It's to celebrate your successful completion of NaBloPoMo."

"Ooooh!" I squealed. "That's even better!" At which point he frowned slightly, but I think he knew what I meant.

The point is that with this post I've officially completed my 30 days of NaBloPoMo! I'm beyond giddy with excited and--I'm just going to say it--pretty darn proud of myself for getting through it despite all the other stuff I took on this month (Book Proposal writing class, Fake Thanksgiving shopping and planning and cooking, Real Thanksgiving shopping and baking).

Loosening the restrictions and allowing myself to just write without any rules unleashed my creativity and is absolutely what made this all possible. And even despite that, I just counted and realized that I posted 25 new original recipes on the site this month. I guess like most things, the good comes along when you stop trying so hard and just let it happen.

I hope to keep up the momentum (though perhaps not *quite* as copiously). Especially now that Christmas is coming since that means a whole bunch of party and holiday recipes (many with a retro twist). I hope you'll stick around!
5

Retro Cocktail Party Planning Continues


Today, Eugene and I got ourselves out of bed at a reasonable hour and headed off to the Housing Works Thrift store on the Upper West Side. It was a two-fold plan. First, I wanted to drop off a couple bags of clothing and a box of books that I've been meaning to donate for a while. It was actually really easy. I just walked the stuff to the back of the store (well, Eugene carried the box of books) and dropped it off. I filled out a quick form for my tax receipt and then I was free to proceed with the second part of my plan: shopping!

I have a very particular list of things that I want to get for the party. I'm all set on glasses (thanks to my own collection plus a little help from the Crate & Barrel Outlet store) and serving trays (from eBay, Sur La Table, Crate & Barrel). I ordered a few old fashioned molds from Sur La Table for my gelatin and fish mousse creations; I admit I was only going to buy one, but somehow I ended up with one of each kind in my shopping cart. Whoops! I justified it by convincing myself that they serve two purposes: practical and decorative. I plan to hang them on the wall above my stove a la Goldie Hawn in Cactus Flower (more about that later...).

Today I was able to find one of the other key pieces: a punch bowl! It's glass with a grape-pattern decoration along the sides. I love it because it has a nice full belly with a slightly narrower rim, which will help avoid spills. I can't wait to fill it up with something boozy and (probably) pink. I also found a set of very quirky coasters with mod Asian ladies on them for just two dollars. They're like little works of art and will look perfect underneath all those martinis and whiskey sours I plan on serving.


I'm still on the hunt for a nice big ice bucket (something shiny and chrome), a big cocktail shaker so that Matt Looney (my appointed bartender) can pour them out a few at a time, and MOST importantly: my fabulous dress. If you have any great recommendations for vintage stores in NYC that carry a nice and moderately priced 60s cocktail and evening gown selection, please send them my way!

In the meantime, I'm keeping busy with those vintage cookbooks I already told you about, and doing a little bit of film research courtesy of the Netflix "Instant Play" options. Recent 60s movie picks have included Cactus Flour (starring Walter Matthau, Ingrid Bergman, and introducing the gorgeous Goldie Hawn who won an Oscar for her role as a 20-something free spirit), The Courtship of Eddie's Father (Glenn Ford and a tiny Ron Howard!), and How To Steal a Million (with the lovely Audrey Hepburn). They're fabulous for great 60s style and decorating inspiration.

5

A Tiny Request


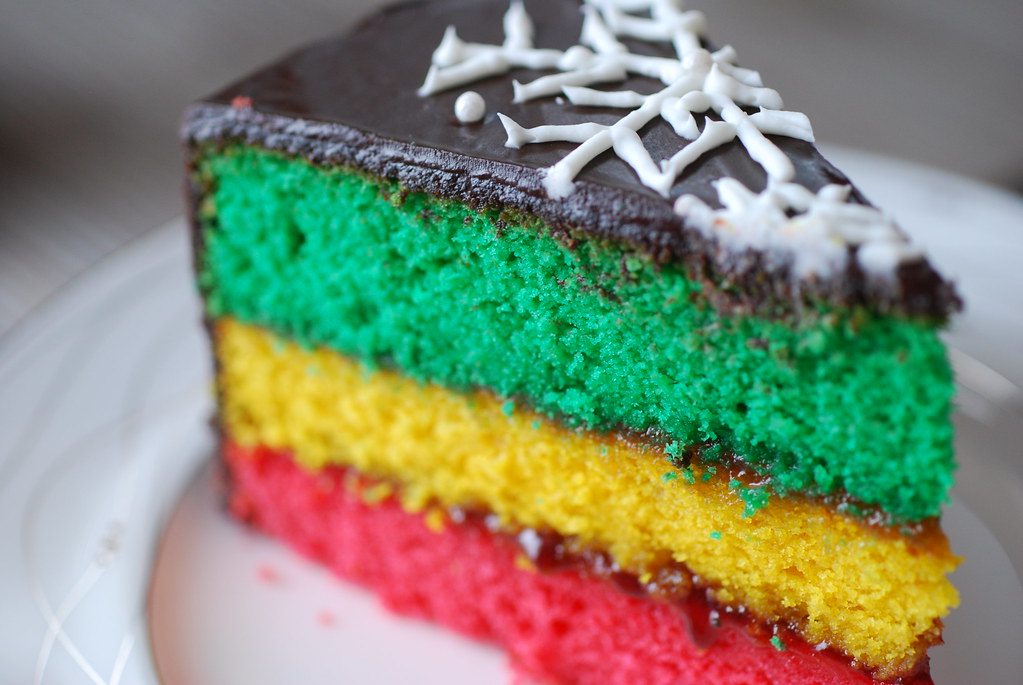
I'm absolutely lazy about posting today, but I promise I'll be back tomorrow with more. In the meantime, can I shamelessly ask you for your vote for the Bon Appetit Bake-Off? I made the Italian Rainbow Cookie Cake you see in this photo. You can get the recipe and read all about it here, or simply vote for me here in the "cakes" category.

Thank you!
3

5 Last-Minute Thanksgiving Recipe Ideas

Are you still looking for last-minute Thanksgiving recipe ideas? Seriously!? Well, it's OK. I'm not going to judge. Lord knows I am a fan of last-minute everything...

And I have a few ideas that you might like...
0

Star Anise & Vanilla Bean Poached Pears


One night about 4 or 5 years ago, my friend Matt and I went to see a movie at the wonderful little independent movie theater in Dupont Circle just a few blocks from my then-apartment. I think the movie was Capote.

After the movie, we wandered out onto the sidewalk and spent a few minutes trying to figure out where to go to dinner, when, just over Matthew's shoulder, I spotted one of my journalism professors, a cranky veteran reporter with a slightly jaundiced pallor, standing intimately close to a much younger girl with long thick hair and Asian features.

This thrilled me the way that catching a professor living a real life outside of the classroom can thrill any student, and so we took off giggling and hiding and conjecturing having stumbled upon an illicit affair on that weekday evening. We passed the entrance to an Italian tratoria on Jefferson Place (a nobby little street I've always loved) that I'd been long-obsessed with because it was underground and had stone steps and a charmingly cliche Chianti bottle hanging above the doorway. And because Matt was usually game for a nice dinner on an average evening, we went in and were seated right away under a brick wall covered in photos of Giovanni, the owner, with random celebrities. (Of course, this was DC, so the celebrities were people like Sam Donaldson and the Ambassador of Kuwait and the ever-rapacious Helen Thomas.)


The dinner was good; I ordered costolleta alla milanese, which was the most expensive entree on the menu, and Matt some kind of pasta, which I recall him describing in a very Matt-like way as being "great but not memorable." But really, it was the dessert that somehow buried itself into my brain as one of the most perfect things I've ever tasted: a white wine poached pear served with vanilla ice cream and an ethereal coat of caramel sugar. I spent the next 15 or so minutes in absolute rapture as I ate and exclaimed and forced spoonfuls of my dessert at Matt who was (I'm absolutely sure) nursing some kind of coffee beverage.

The funny thing that I'm realizing as I write this, is the way that magnificent pear seems to have frozen all the details of that night in my brain. It was the first poached pear I'd ever eaten, which I suppose explains some of the fascination, but to be honest there was something magical in the blend of flavors that really captured my imagination, and which (I suspect) I've been trying to recreate with every single vanilla bean I've split and scraped ever since.


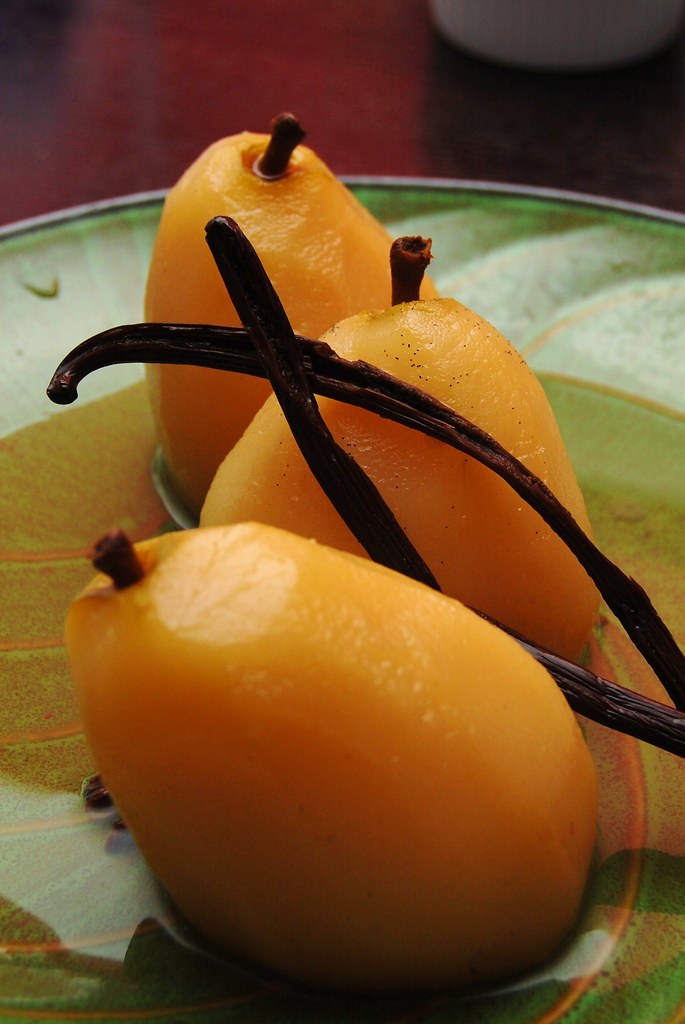
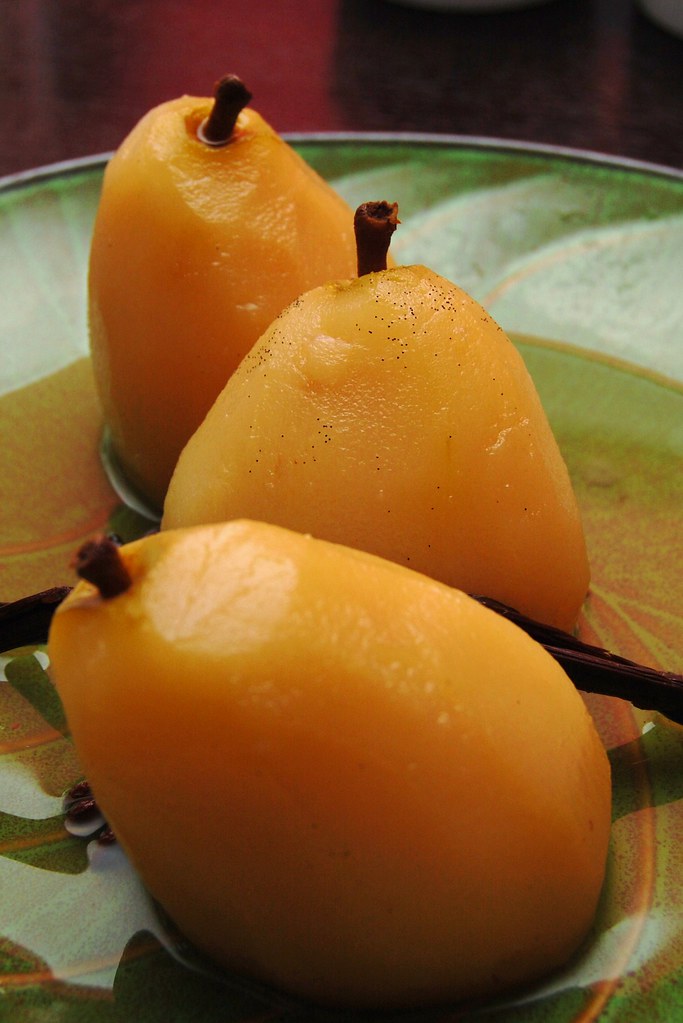
These pears...the ones I'm offering you today, I'm sorry to say, are not as perfect as the one I had that night. But they are wonderful and taste the way I suppose the word "gold" would taste if you were to lick it one quiet afternoon. It's the anise and the vanilla, which infuse the syrup, and (of course) the fat little pears which sit solidly on the plate, swollen and brimming with vanilla speckled nectar. And because when things are good I just like to keep on pushing, I served these with warm chocolate ganache and a spoon for drizzling.

Serve these on Thanksgiving as your dessert, along with kiwi sorbet and some kind of boozy cake. They're actually perfect for a crowd since they can be made ahead and can be served cold or at room temperature or even hot, if you prefer. And the leftovers can be sliced and heaped over a pile of pancakes or baked into a clafouti then served to the family member who still happen to be hanging around the morning after.


****
New to Always Order Dessert? Consider subscribing to my RSS feed, follow me on Twitter, or sign up to receive my once-a-week e-mail updates by filling in your address in the box on the right. And if you ever need any entertaining or cooking advice, please don't hesitate to e-mail me.


Star Anise & Vanilla Bean Poached Pears


1 bottle white wine (I used a buttery Chardonnay)
1 cup apple cider or water
3/4 cup white granulated sugar
3 tablespoons honey
1 whole vanilla bean, split
6 star anise pods
2 cloves
6 firm pears (such as Bartlett or Bosc)

1. Peel the pears, leaving the stems in place. Core from the bottom. Use a paring knife to slice off a tiny bit of the bottom in order to create a flat base.

2. In a 4 or 5 quart saucepan or dutch oven, combine the wine, water, sugar, honey, vanilla, anise, and cloves. Set over medium-high heat and bring to a boil, stirring occasionally to make sure all the sugar and honey is dissolved.

3. Lower the heat to a gentle simmer, and place the pears in the liquid. If the liquid doesn't rise high enough to cover them while upright, place on their sides, but rotate every 10 minutes so that they are poached evenly on all sides. Continue to cook for 25-30 minutes until the pears are tender but not mushy (use a thin knife gently inserted in the side of the smallest pear to test).

4. Remove the pairs to a large air-tight container and cover with the liquid. Let cool to room temperature, then cover and place in the refrigerator to chill (up to 24 hours).

5. The day you are ready to serve, remove the pears to a serving dish and pour the liquid back in a saucepan. Reduce the syrup over medium-high heat for 15-20 minutes until slightly thick. Let cool to room temperature before pouring over the pears. Serve alone, with whipped cream, or with a drizzle of chocolate ganache.
6

Kiwi Sorbet


The desserts on my fake-Thanksgiving table were a bit more colorful than the usual shades of orange and um...pecan that usually fill the holiday table. But as someone who has little interest in pumpkin pie or corn syrup pie (which, let's face it, is actually what pecan pie is), I decided to try a few new things for my menu.

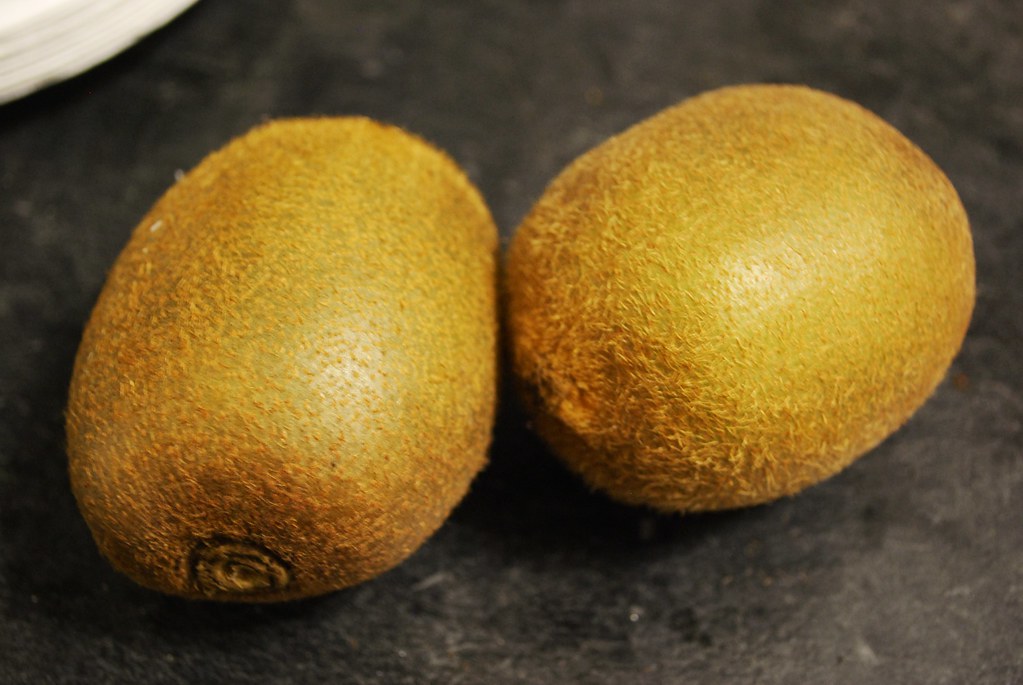
I went to the market with vague ideas and a desire to let the seasonal produce inspire me. It was a the towering display of plump, in-season kiwis that first got me excited.

I grabbed a handful and held them up to Eugene. "Did you know that it's kiwi season now? I'm going to make kiwi sorbet for the party."


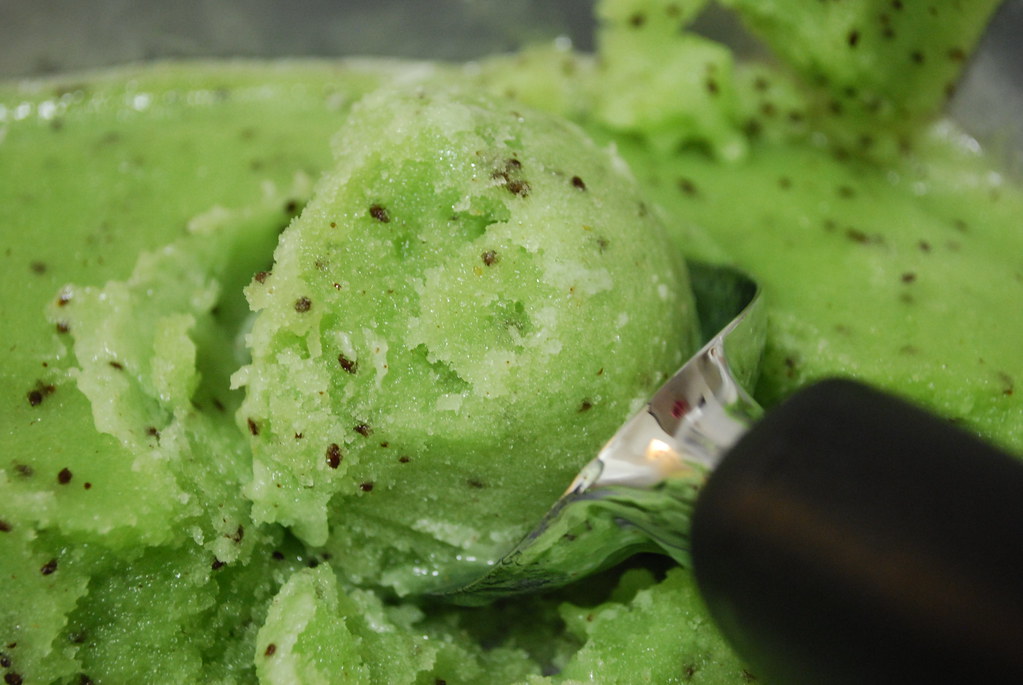
Kiwi, like citrus, is a winter fruit that's often mistakenly appropriated for summer. But mid-to-late November is really when the gorgeous green fruits start to come into their own. Usually eaten raw, a sorbet is a simple way to highlight the natural flavor of the in-season fruit while still making it exciting enough to serve at the end of a festive meal. When I was making this, I casually tossed a whole vanilla bean and a few star anise pods into the simple syrup as it cooled. It infused the syrup with just a hint of flavor that really played quite nicely with the natural honey-like flavor of the kiwi fruit.

Sorbet is a simple frozen treat to make. Though I recommend using an ice cream maker for sorbet, there are ways of doing it without one and I recommend Anna's tutorial for advice. At home, I use a small ice cream maker that my brother gave me for Christmas a few years ago, and which can easily be purchased online very inexpensively (I've seen it for less than 30 dollars at times) or possibly even on Craigslist. These machines are wonderfully versatile and don't take up that much space (even in my tiny kitchen) so if you're interested, keep an eye out for a good deal.


I served this sorbet along with white wine and anise poached pears, a rich chocolate ganache sauce, and my Italian Rainbow Cookie Cake. The sorbet is particularly lovely when drizzled with the chocolate sauce. Kiwi, I've discovered, is wonderful when paired with bittersweet chocolate.

At my party, a few of the guests noted that I must have gone to a lot of trouble to prepare the sorbet since I had to peel all those kiwis. I told them about the great "spoon trick" I use to peel the kiwi, which cuts the time down to a few seconds per fruit. I decided to film a quick video to show you all how simple it really is. If you plan to make this recipe, I definitely suggest checking it out first as it will save a lot of time.

A few notes to keep in mind when making sorbet:

1. Sugar and alcohol are what keep the sorbet soft and scoop-able. You can skip the alcohol in this recipe, but note that the sorbet will probably freeze a bit harder so you'll have to remove it from the freezer 10 minutes or so before serving.

2. The sweetness of the sorbet mix will be much weaker once you freeze it. It's good to keep this in mind when testing the recipe. You want it to be a little sweeter than your final product so don't be too scared about adding sugar. Of course, do keep the natural sweetness of the fruit in mind when preparing the recipe. You can also add a hint of honey, or more lemon juice to balance the flavor.

Kiwi Sorbet
Hints of vanilla, rum, and star anise help to highlight the wonderful natural flavor of the kiwi.

Ingredients
10 kiwi fruits
1 cup water
3/4 cup sugar
1 vanilla bean (optional)
3 star anise pods (optional)
2 tablespoons rum (I used a coconut flavored rum, you can also substitute vodka)
1 teaspoon fresh lemon juice

To make:
In a medium size saucepan, combine the water and sugar, and bring to a boil until all the sugar is dissolved. Lower the heat and let simmer for 2-4 minutes or until the water reduces slightly. Turn off the heat and add the anise pods and vanilla bean, cover and let cool to room temperature. Once cool, remove the anise pods and vanilla bean and reserve the syrup.

Peel the kiwis and cut each one in half. (Check out my tutorial on How to Peel a Kiwi for a great trick to do this quickly.) Use a blender or food processor to puree the fruit until smooth.

Combine the kiwi puree with the cooled syrup, rum, and lemon juice. Pour into your ice cream maker and freeze according to the manufacturer's instructions. Pour the frozen sorbet into an air-tight container and store in the freezer for up to 2 weeks.
2

How to Peel a Kiwi (A Video Tutorial)

One of my many plans for the upcoming year, is to incorporate video tutorials and podcasts here on the blog. I'm starting this today with my very first video tutorial.

It's a quick, two-minute video where I show you my favorite technique for peeling a kiwi fruit. You don't need any special equipment and it's a great way to perfectly peel a whole bowl of kiwis for use in a salad, a fruit plate, or in a recipe like my Kiwi Sorbet.

I hope you enjoy my first video, and please let me know what you think! Also, if you have any special requests for similar tutorials, please let me know in the comments.

4

Black Pepper & Parmesan Puff Pastry Cheese Straws


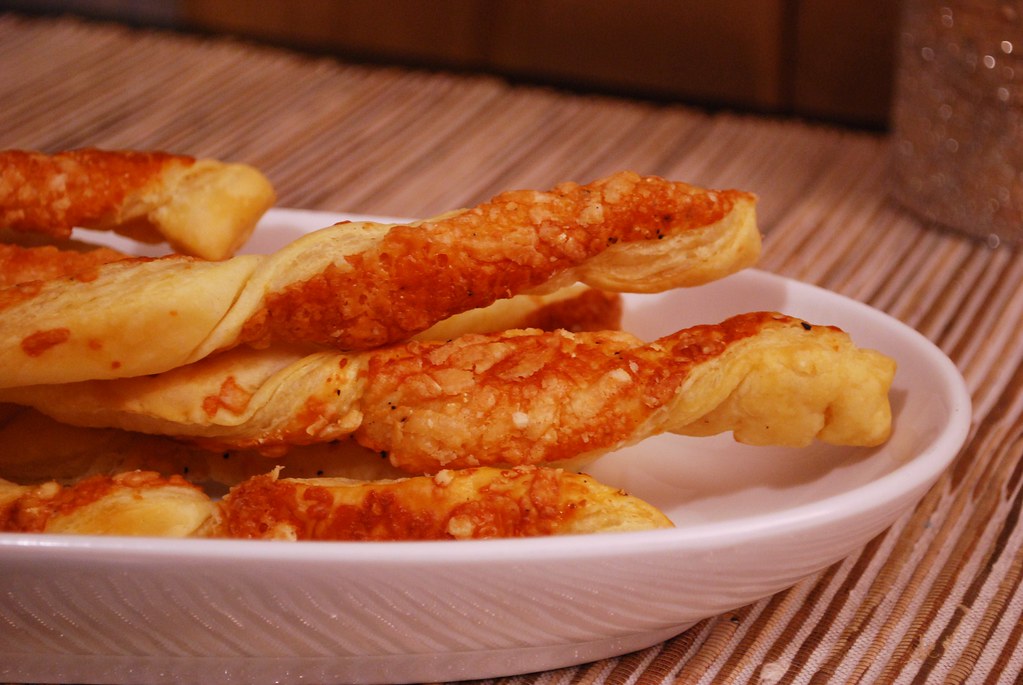
These cheese straws smelled so good when they came out of the oven that I had a hard time controlling myself long enough to take a photo. Once I got a decent enough shot, Eugene and I dove right in and devoured them alongside a bowl of egg salad. An odd meal, but also oddly perfect.

The straws are a great mix salty, chewy, and crisp with just a hint of heat from the cracked black pepper. When Eugene took his first bite, he turned to me and said, "These are so good they make me angry! I'm mad that I had to wait 26 years to taste this!" Needless to say, we didn't have any leftovers.

Normal people (i.e. not us) might prefer to serve these when company comes over. They go quickly though, so I would highly,
highly recommend doubling the recipe. This way you won't get stuck wishing you'd made more.

These cheese straws also lend themselves well to adaptation. Experiment using a blend of cheeses and added spices. Think Asiago or cheddar, or perhaps a dash of cayenne or rosemary. You can also cut the puff pastry into 1" pieces for a fun and "pop-able" snack.


Black Pepper & Parmesan Puff Pastry Cheese Straws

2 sheets frozen puff pastry, defrosted
All purpose flour for dusting
1 large egg, lightly beaten
1.5 cups finely grated Parmeggiano Reggiano
Freshly Grated Black Pepper
Kosher salt

Preheat the oven to 350 degrees

Lightly flour you work surface then roll out both sheets of puff pastry. Go over them both with a rolling pin just to smooth them out slightly.

Brush the surface of both sheets lightly with the beaten egg. Sprinkle both sheets liberally and evenly with the grated cheese and then generously sprinkle with freshly cracked black pepper. Run over the sheets with your rolling pin to press the seasonings and cheese into the pastry. Sprinkle lightly with Kosher salt.

Used a pizza cutter or sharp knife to cut each sheet legnthwise into 10-12 strips each. Twist the strips and arrange on baking sheets lined with parchment paper, about 1" apart.

Bake for 10-12 minutes until they begin to turn golden and puff slightly. Turn each twist over and let bake for an additional 3-5 minutes or until golden and puffed. Be sure to keep an eye on them at the end since the cheese can easily burn.

Let cool and serve at room temperature.
1

More Thanksgiving Recipe Ideas

I noticed that a lot of readers are coming here for Thanksgiving recipe ideas, so I've decided to collect and highlight a few recipes from the archives that can really work well for your dinner this year. I've noted on each entry if it's something that can be made ahead or if it can be served at room temperature or cold. Also check out the Recipe Index for more ideas or my suggestions for Quick & Easy Thanksgiving Sides that can be prepared in 15 minutes or less of active time.

If you have any specific questions or need help with any recipe (even if it's not one of mine!) send me an email and I'll be happy to help. Think of me as your Thanksgiving cooking hotline! ;)


Breads
Pumpkin Spice Challah--This sweet pumpkin challah with hints of cinnamon and nutmeg would be incredible on your Thanksgiving table. It can be made the day before and the leftover are lovely toasted with butter or made into French toast. You can also make them into small rolls by reducing the cooking time to about 20-25 minutes.

Rosemary & Garlic Focaccia Rolls--The dough for these rolls can be made 24 hours in advance and then simply prepared and baked the day of. The rosemary and garlic would pair well with the warm autumn flavors on your table.


Appetizers

Savory Rosemary & Chevre Mini Muffins--These savory muffins can be made up to 8 hours in advance and can be served warm or room temperature. They can be an easy appetizer along with your cheese plate, or can be served along with the meal as a bread.

Homemade Membrillo
--This is my tutorial on making membrillo, a sweet quince paste that is often served along with cheese as an appetizer or during a cheese course. This recipe can be made several weeks in advance and can be served cold or room temperature. (Oh and because I hate peeling, I show you how to do it without having to peel the quince!)

Mini Crabcakes with Cilantro & Lime Aioli--These are a perfect appetizer because they can be prepared and assembled well in advance and are baked, not fried (!!). The aioli can be made from scratch, or by simply adding the herbs and spices to prepared mayonnaise. Easy!

Roasted Pumpkin Seeds--This is a great little snack to keep in bowls on the coffee table for guests to snack on while enjoying their cocktails. This can be made in advance and should be served at room temperature.


Soups

Chestnut, Bacon, and Green Apple Soup--if you'd like to start your meal off with a soup course, this is definitely the way to go. This soup can be prepared in about 30 minutes total, and can be prepared in advance then quickly reheated just before serving.

Potage Parmentier (Potato Leek Soup)--This is an easy classic that can also be prepared in advance and can actually be served either hot or cold.


Salads
Roasted Potato Salad w/ Red Pepper & Smoked Paprika Dressing--The smoky dressing on this salad makes it perfect for Fall. It can be prepared ahead of time and served cold.

Mixed Green Salad with Ginger Vinaigrette --This is great homemade dressing that you can blitz up 24-hours in advance and serve with any packaged or freshly cut salad greens.


Desserts

Classic Vanilla Bean Panna Cotta--This creamy and cool dessert can be made up to 2 days in advance.

Vanilla Bean & Anise Poached Quince
--This easy preparation for quince, which are in season right now, can be served with ice cream or over a basic pound cake.

Carrot Cake with Maple Orange Cream Cheese
--This is my favorite carrot cake recipe and it can be made with shredded fresh carrots or leftover pulp from a juicer.

Flourless Chocolate Hazelnut Torte--A completely flourless chocolate cake made with ground hazelnut meal (you can also substitute ground almond meal or ground macadamia nuts). This is one of the easiest cakes ever. Simply dump all the ingredients in a bowl, mix, and bake. It's always a favorite with chocolate fans.

Apple Cake--Another easy cake that highlights the flavors of the season. Use a mix of your favorite apples and serve with freshly whipped cream.
0

5 Quick & Easy Thanksgiving Side Dishes

Anyone who has ever prepared Thanksgiving dinner for a crowd will understand what I mean when I say that time has a way of disappearing that day. One minute you are popping out of bed with a list of things to do, and then next you're rushing to get dressed while the first guests are already ringing the doorbell.

That’s why I’ve come up with five incredible Thanksgiving side dishes that each take only 15 minutes or less of active time to prepare. Whether you're looking for something traditional or craving a dish that's a little spicy and exciting, I'm sure you'll find something in this list that you like. Just a few quick minutes in the kitchen and you can let the oven or stove take over while you go and try to find those last two missing napkin rings.


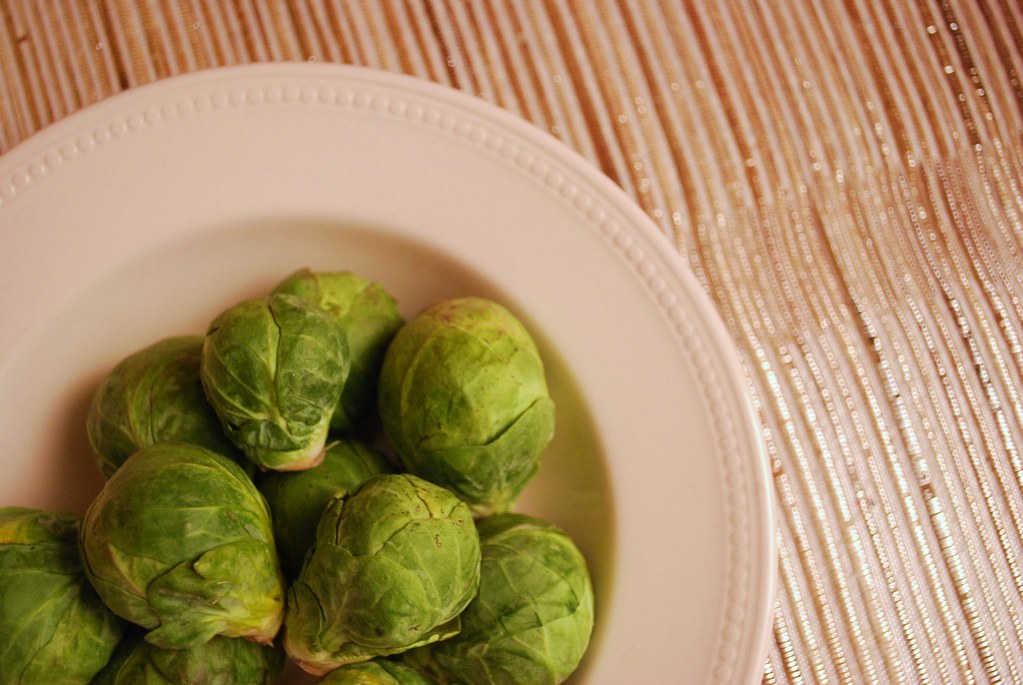
1. Roasted Brussels Sprouts with Bacon & Walnuts


Eugene and I are a little bit obsessed with this dish and it’s a regular on our weekday dinner menu. Sometimes, we don’t even put it on a plate; we just plop the baking sheet right on the coffee table and go to town with our forks while watching The Office.

It’s also one of my favorite side dishes to serve when I have company over. The sprouts crisp up on the outside while staying nice and tender inside. Add the salty/smoky bacon and a few handfuls of toasted walnuts and you are golden! It’s easy and an almost guaranteed crowd pleaser. It’s totally one of those dishes that people who claim to hate Brussels sprouts eat and then say “wow! These are good!”

You can prep these ahead of time on Thanksgiving. Simply trim and quarter the sprouts, toss with some olive oil, walnuts, and diced bacon then spread out on a big baking sheet. When the turkey comes out of the oven, crank up the heat to 400, then pop these in while the turkey rests. Both will be ready to serve at the same time.


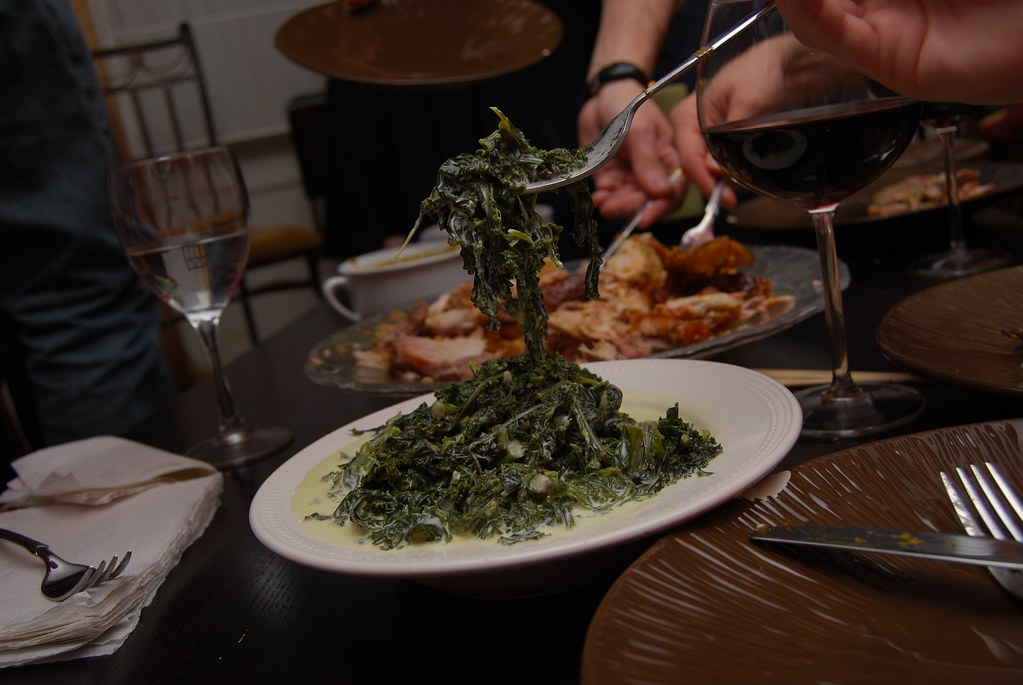
2. Creamed Kale


This is a wonderful and unexpected twist on the usual creamed spinach. Unlike the latter, which can sometimes be mushy or soggy, Creamed Kale offers a bit more bite and substance for a lush side dish that will stand up quite nicely to any kind of turkey. A rich cream sauce of butter, cream, and just a hint of nutmeg play wonderfully against the natural nutty taste of the kale. (And yes, you MUST use the nutmeg. It makes the dish.)

You can use any kind of kale, but for a quick shortcut, grab a package of (fresh! NOT frozen) pre-washed and pre-cut kale. I've seen these at Trader Joe's, Whole Foods, BJs, and pretty much every major supermarket (look for it near the "salad in a bag"). If you can’t find it, you can use whole kale, but you’ll have to tack on an extra 3 minutes to your prep time while you quickly rinse and shred the leafy green. (scroll down for the complete recipe)


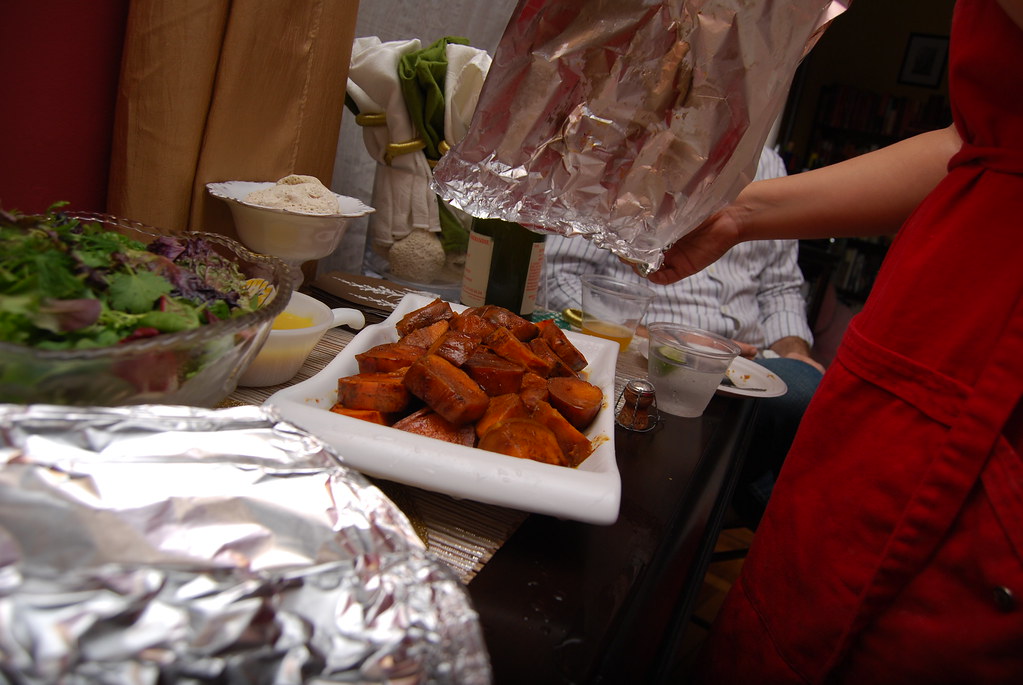
3. Chipotle & Cola Braised Sweet Potatoes

Anyone who loves Southwestern flavors or a little spice will fall madly for these sweet and spicy sweet potatoes. I save time by skipping the peeling. The peel on the sweet potato is completely edible and actually packs a great nutrient punch.

To prepare, just scrub them well and slice into thick one-inch rounds. Layer these into a baking dish then drizzle with olive oil and pour in the braising liquid: a blend of cola (Coke, Pepsi, or Malta), chipotle peppers in adobo sauce, plus a few pats of butter. Cover tightly with foil then pop in the oven alongside your turkey for 35 minutes.

The potatoes will come out of the oven tender and flavorful. (Scroll down for the complete recipe.)


4. Roasted Plum Tomatoes with Garlic & Shallots

It's very late in the season, but in most places you can still find some lovely plum tomatoes. Drizzled with olive oil, crushed coriander, garlic, and whole shallots, and roasted in the oven for an hour, the tomatoes come out sweet and dripping with rich and flavorful juices.

Serve the roasted tomatoes at room temperature along with your dinner, or use them to top slices of toasted baguette that have been spread with cream cheese or chevre for a easy appetizer your guests can enjoy along with their first glass of champagne. (Scroll down for the recipe)


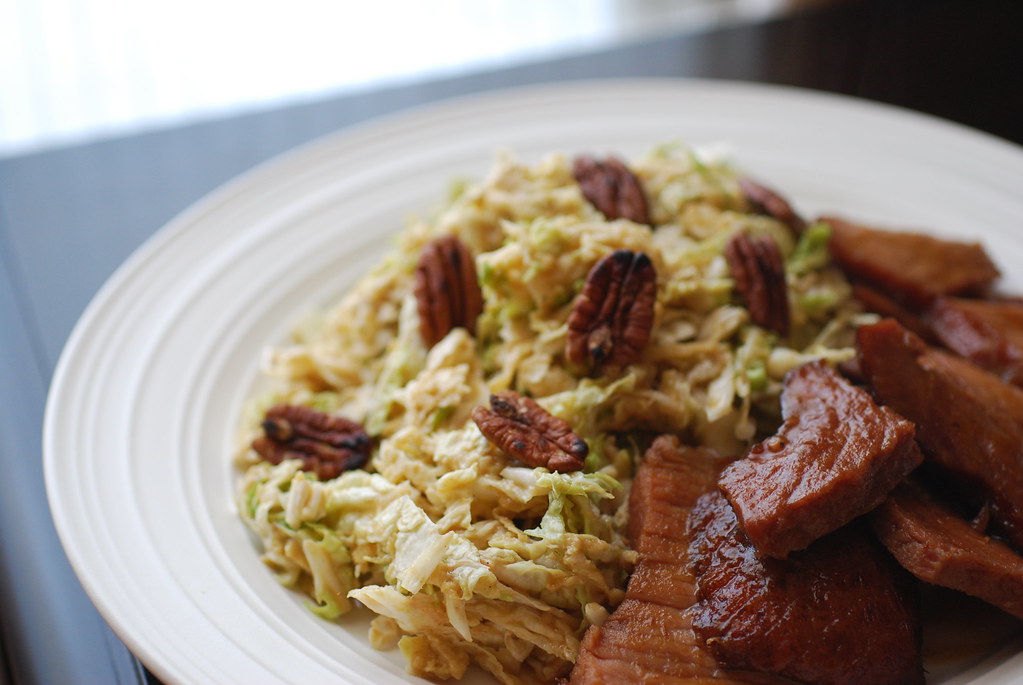
5. Napa Cabbage Slaw with Mustard & Apple Butter Vinaigrette


This autumnal take on the classic coleslaw would be a perfect addition to your Thanksgiving table. Unlike the summery version that's heavy with mayonnaise and...well...basically it's just mayonnaise, this one gets its creaminess from a warm and tangy dressing redolent with the flavors of mustard and and apple butter. Toasted pecans add a lovely crunch and like all the best Thanksgiving sides, it can be prepared well ahead of time. Get the recipe here.


Still need a great cranberry sauce recipe? Try my Spiced Cranberry Orange Sauce.

Still trying to decide the best way to cook your turkey? Try my Perfect Thanksgiving Turkey for the juiciest turkey breast you've ever tasted.

Looking for Thanksgiving dessert ideas? Come back tomorrow because that's next on the agenda!

Roasted Brussels Sprouts with Bacon and Walnuts

Ingredients
2 pounds Brussels sprouts
3/4 cup walnuts halves
Extra virgin olive oil
3 strips bacon, cut into 1/2 inch pieces
kosher salt
black pepper

To make:

Preheat your oven to 400 degrees

First prepare the Brussels sprouts: trim off the stems and then quarter. Combine the Brussels sprouts in a large bowl with the walnuts and drizzle liberally with olive oil. Use your hands to mix and maker sure they are all coated well.

Spread the Brussels sprouts and walnuts in a single layer on a large baking sheet. Scatter the bacon pieces evenly throughout the pan, then season with kosher salt and black pepper.

Roast in the oven for 20-25 minutes or until the sprouts and bacon are crisp.

Creamed Kale


Ingredients
2 pounds kale, washed and sliced
4 tablespoons unsalted butter
1 cup heavy cream
1/4 teaspoon ground nutmeg


To make:
Blanch the kale in salted boiling water for 2 minutes. Drain, then return to a medium size pot or saute pan. Add the butter, cream, and nutmeg and cook over medium heat for approximately 5 minutes or until has reduced and thickened slightly. Season to taste and serve.

Chipotle & Cola Braised Sweet Potatoes

Ingredients
6 large sweet potatoes
12 oz Malta (can be purchased in the Latin aisle in most major grocery stores). Use cola or cream soda as a substitute. Look for brands made with real sugar as they cook down better).
1 cup chicken or vegetable broth
2 chipotle peppers in adobo sauce, chopped coursely
3 tablespoons adobo sauce (from chipotles)
4 tablespoons butter
kosher salt
black pepper

To make:
Preheat the oven to 350 degrees

1. Scrub the sweet potatoes well, then dry and slice into thick 1" rounds. Layer into a baking dish.

2. In a large bowl, whisk together the soda, broth, chipotle peppers, and adobo sauce. Pour over the sweet potatoes in the baking dish. Dot with pats of butter then sprinkle with salt and pepper.

3. Wrap the baking dish tightly with foil and bake for 20 minutes, remove from the oven and flip the sweet potatoes then return to the oven to bake for another 15 minutes. Check for seasoning and serve.


Roasted Plum Tomatoes with Garlic & Shallots

Ingredients
10 Whole Plum Tomatoes (fresh)
2 Whole Shallots
5 garlic cloves, peeled and crushed
Extra Virgin Olive Oil
1 teaspoon whole coriander seeds, crushed roughly
1 teaspoon fresh thyme
Kosher salt
Black pepper

To prepare:

Preheat your oven to 350 degrees
1. Cut each tomato in half and spread in a single layer in a baking dish. Slice the shallots in half (leave peeled) and scatter into the dish along with the crushed garlic cloves.
2. Drizzle generously with olive oil. Sprinkle with crushed coriander, thyme, Kosher salt, and black pepper.
3. Roast in oven for 1 hour. Can be served hot, at room temperature, or cold.
3

Perfect Thanksgiving Turkey


On Saturday, I had dinner with my boyfriend's family for his mother's birthday. It was the day before my own party for fake-thanksgiving, and I was discussing a few of the menu points with his brother.

"I've never had a good turkey," he summarily declared. "Turkey is an inherently dry bird so it's impossible to make it tender."

At this, I laughed. "That is just plain not true!" I exclaimed.

I went on to explain the most common problem with turkey, which is that most people just don't know how to cook it properly. They're so concerned with it looking golden and perfect, that they ignore some of the basic aspects of turkey. That, of course, being that turkey breast cooks in about half the time of the rest of the bird so by the time the whole thing comes out of the oven, the breast is overcooked and dry. It's why people who in regular life have little interest in dark meat, tend to prefer it in the Thanksgiving turkey.

The best way to avoid this, I continued, is to cook the bird upside down. My secret is to go even further and half-braise/half-roast the turkey by filling the basin of the roasting pan with a delicious braising liquid. I lay the bird right into the pan without a rack so the breast cooks slowly in the rich liquid, while the rest of the bird roasts and crisps.

Ilya was skeptical, but upon tasting my turkey the next day, he conceded. "You were right," he said as he reached in for another helping.


I hope to convince you to try it this way, too. And so here is Alejandra's ...er...MY recipe for a perfect Thanksgiving Turkey. Note that you'll have to let go of your preconceived notions of what a turkey should look like, but once you try it, I suspect you'll be pretty pleased! (Oh and I should also note that all the amazing photographs in this post were taken by my friend and incredible photographer Monica Navarro. She also does weddings, portraits, and cute baby photos. You can check out more of her work here.)

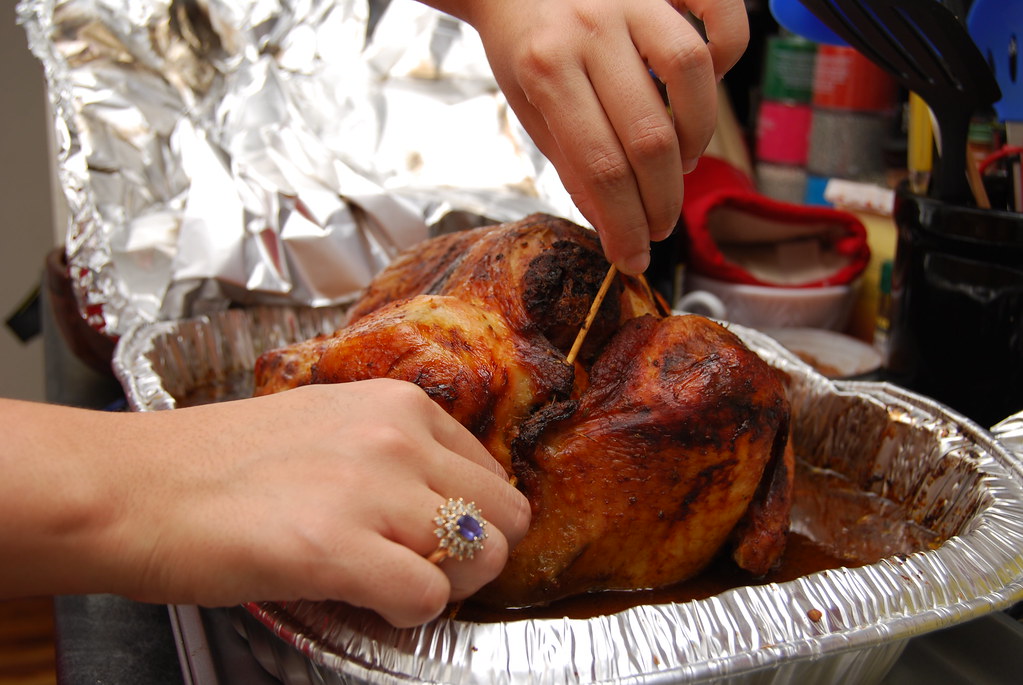
Since I know many of you are worried about not having a picture-perfect bird. Let's just get that out of the way first!

Come time to serve the bird, I have two suggestions:

1. Set it on the platter and bring it to the table upside-down! It will still look absolutely gorgeous--crispy skin and all. And I guarantee you that 75 percent of your guests (unless you come from an unusually foodie clan) won't even know that it's upside down. You will get your ooohs and aaahs and can leave it there while saying grace or making toasts. Explain that it's upside down because it cooks better that way and, when they challenge you, say "oh just you wait, annoying Uncle Steve!" Then, come time to carve it, simply pull it away and say, "we're going to carve it in the kitchen and bring it back." Uncle Steve will be begging you for more!

2. Carve the bird in the kitchen and layer the slices elegantly on a pattern adorned with roast vegetables and sprigs of herbs. Then bring it out to the table where, I assure you, you will STILL get lots of oooohs and aaahs. Maybe even more now that your family will know they can just dig in without having to wait while you carve it.


If you're concerned about the crispy skin, simply remember that the WHOLE bird is covered in skin. Even if you cook it upside down, you still get a whole half-a-turkey full of crispy skin on the bottom part. Just pull it off before you flip the bird, then proceed as usual. The tender and juicy breast will hush any doubts the more skeptical members of your family may have.

This is my recipe for a perfect Thanksgiving Turkey. The marinade is a rich sauce made out of onions, garlic, fresh herbs, and spices. It has a it of a Latin kick to it with fresh cilantro, sour orange juice, and warm and smokey Spanish paprika. You can, of course, adjust the marinade to your tastes so just think of it as a guideline. This turkey is wonderful paired with all the traditional Thanksgiving accompaniments, a few of which I'll be posting over the next few days.

Another tip: on a smaller scale (think half), this recipe and method is also absolutely brilliant for your average roast chicken. One thing to remember is that you need to think ahead.

This turkey is best when it is marinated for at least 24 hours in advance. My mom likes to marinate it a full 48 hours in advance and it comes out even better. The recipe itself is actually pretty quick and easy because it there is no dicing or chopping involved. Also no messy brines to contend with. It will work for turkeys of any size, simply adjust the cooking time based on the size of your bird.


Alejandra’s Perfect Thanksgiving Turkey
This recipe is for a turkey that cooks upside down with the breast in a braising liquid. There are a lot of ingredients, but don’t let that scare you; the actual hands-on time is minimal.

Ingredients

For the marinade:
1 whole Spanish onion (Spanish onions are typically spicier and larger than regular yellow onions; if you can’t find any, substitute two whole yellow onions)
1 whole red bell pepper
1 whole head of garlic, each clove peeled
1 bunch of cilantro
1/2 bunch parsley
3 tablespoons Smoked Spanish Paprika
Juice of two seville oranges (sour oranges often available in Latin grocers, or substitute a mixture of 1 whole regular orange and 1 whole lemon or the juice of 3 Meyer lemons)
1 cup extra virgin olive oil
1 teaspoon ground black pepper
1/4 cup Kosher salt, plus more if necessary (as outlined in the instructions)

For the herb butter:
1 stick of salted butter, softened at room temperature
1 tablespoon fresh thyme
1 tablespoon fresh oregano
1 tablespoon paprika

For the turkey cavity:
1 Spanish onion, quartered
1 lemon, halved
1 head of garlic, whole but with top sliced off


1 fresh Turkey (any size)

For the braising liquid:
1 bottle of Malta (a latin malt soda) or 1 can of Coca Cola
2-3 cups low-sodium chicken broth (homemade or boxed)
1/2 cup orange juice (freshly squeezed or bottled)
2 bay leaves
2 sprigs fresh thyme
2 sprigs fresh oregano

Special Equipment: 1 large roasting pan, twine and skewers to truss the bird, 1 oven safe meat thermometer, aluminum foil, a blender or food processor for preparing the marinade


To make:

1. First, prepare the marinade. You will need a blender or a food processor with the largest bowl in place. Peel the onion and quarter it. Cut the pepper in half and remove the seeds and vein. Peel the garlic. Drop the onion, bell pepper, garlic, cilantro, and parsley into the food processor and blitz until completely blended. Add the smoked spanish paprika, orange juice, olive oil, black pepper, and salt, and continue to process until the mix is completely smooth like a sauce. Taste it for seasoning; the sauce should taste TOO salty. If you taste it and it’s still pleasant—like you could easily eat it as a salad dressing—add more salt. Note that this amount of salt will not be evident in the final turkey, but it’s going to be what makes the bird so flavorful so don’t be afraid to add more. Once it is ready, set the marinade aside.

2. Prepare the herb butter. In a small bowl, blend the soft butter with the thyme, oregano, and paprika. Set aside at room temperature.

3. Prepare the items for the turkey cavity. These will go inside the bird in lieu of stuffing (which should be cooked separately) and will provide even more flavoring for the bird. Peel and quarter the onion. Halve the lemon. Slice the to off the head of garlic. Set these aside.

4. Prepare the turkey: Unwrap the bird and rinse under the sink to remove any blood or liquid. Remove the giblets and turkey neck and set aside. Pat the bird dry and use your hands to separate the skin from the breast of the bird. Using your hands, scoop in small handfuls of the herb butter and massage into the bird under the skin and inside the bird cavity. Use the entire amount of the butter.

5. Now you are ready to pour on the marinade. Place the bird in the roasting pan where you will be cooking it, breast side up. Pour on the marinade by the cupful, making sure to get it all over the bird, inside the cavity. Use a spoon to scoop the marinade into the bird between the skin and the flesh. Be sure to also pour some inside the neck cavity.

6. Insert the onion, lemon, and garlic inside the bird cavity until it is filled. Scoop in a few tablespoons of the marinade.

7. Cover the bird with the top of the roasting pan or aluminum foil and place in the refrigerator for at least 24 hours and up to 48 hours (note that if you started late, that will be OK and it will still taste better than a plain old salt-and-pepper bird).

When you are ready to cook:

8. Preheat your oven to 350 degrees. Remove the bird from the refrigerator and let sit for 30-45 minutes until it loses some of the chill from the fridge.

9. Uncover the bird and use your hands to gently flip it over in the roasting pan so that the breast is on the bottom and facing the bottom of the pot. Use twine to tie the legs together and skewers to seal the skin over the breast and neck cavities. Insert a meat thermometer into the thickest part of the thigh being careful not to touch any bones.

10. Pour in the braising liquid: 1 bottle of soda (malta or coca cola—not diet!), 2 cups chicken broth, 1/2 cup orange juice. Scatter in the herbs. Cover with foil or the top tightly and place in the oven for the recommended amount of time based on the size of your bird. (You won’t need to worry about basting it!)

11. About 1 hour before it’s finished roasting, remove the cover and let it continue cooking uncovered.

12. When the meat thermometer reaches 165 degrees, remove from the oven. Cover with foil and let sit for 30 minutes until the temperature reaches 180 and the juices have all settled.
6

Fake-Thanksgiving was a Success!


As I mentioned the other day, I came up with the brilliant (and *very* last-minute) plan to throw an early Thanksgiving feast yesterday in order to prepare and photograph some of my favorite Thanksgiving recipes. I invited a bunch of friends over and got busy in the kitchen. The party was a success, and I can't wait to share the results. This week (and possibly some of next) is going to be "Thanksgiving Week" here on Always Order Dessert, with recipe ideas for your holiday table.

I'm editing and uploading the photos right now so you'll have to come back tomorrow for the details, but I've posted a little sneak peek of the turkey so you can see how lovely and golden it was. Careful observers might also notice that my bird is upside-down. That is Thanksgiving tip no. 1 around here! Birds are always better when they sleep (in the oven) on their bellies--it's the secret to a perfectly juicy and succulent breast every single time.

I can't wait to share the rest with you!
5

The Eggplant Song


My mom is a little bit obsessed with a singer named Michael Franks. I have no idea where this guy came from; I can't remember ever hearing one of his songs on the radio. And yet, anytime she cooks for a big meal or cleans the house or is just home alone working on a project, you can absolutely expect to hear this man's quirky jazzy music blasting throughout our house.

When I was in high school or came home from college during the holidays, it used to drive me a little bit crazy. Our house is on the large side with pretty fantastic acoustics, and my room happens to be right in the center of the house. I've nicknamed it the "chamber of sounds," because it's right next to the main vents and pipes for the central air, heating, vacuum, and water are. Which of course means that it is also where the sound of anything and EVERYTHING that goes on in the house (dish washing, laundry doing, showering, Michael Franks-blasting) congregates, thereby making it impossible to do anything but give up on trying to read or watch TV and instead spend the afternoon listening to the dish-washing, laundry doing, showering, and Michael Franks-blasting that is going on elsewhere.

It was on one of these afternoons that I, against my will, learned the lyrics to the Eggplant song. I just thought of them again recently when I asked my mom to send me along a specific recipe that I remembered her making. In the instructions she noted that she doesn't always make it the same way twice, "you know, like in the Michael Franks Eggplant song."

I'm totally the same way and thought I'd share the lyrics. You can check out the video here (please excuse the man's mullet and large 'stache. It was the early 90s.)

Eggplant
Michael Franks
From: The Art of Tea

Whenever I explore the land of Yen
I always take one on the chin
And now this lioness has almost made me tame.
I can't pronounce her name but
Eggplant is her game.

The lady sticks to me like white on rice.
She never cooks the same way twice.
Maybe it's the mushrooms. Maybe the tomatoes.
I can't reveal her name but Eggplant is her game.

When my baby cooks her Eggplant,
She don't read no book.
She's got a Giocanna kinda of dirty look

And my baby cooks her Eggplant,
Bout 19 different ways.
Sometimes I just have it raw with Mayonnaise.

Maybe its the way she grates her cheese,
Or just the freckles on her knees.
Maybe its the scallions. Maybe she's Italian.
I can't reveal her name but Eggplant is her game.

When my baby cooks her Eggplant,
She don't read no book.
She's got a Giocanna kinda of dirty look.

And my baby cooks her Eggplant,
Bout 19 different ways.
Sometimes I just have it raw with Mayonnaise.
1

Just a few I love

I'm in the middle of my mock-Thanksgiving party prepping craziness, but I thought it might be fun to tell you about a few blogs I've discovered recently. If you haven't seen them yet, they definitely deserve a gander. (They're not all food blogs, but they are all lovely.)

Mae Bird: I'm a little bit in love with the photography and sentiment on this blog. Each time my reader tells me that there's a new post, my belly does a little jump of excitement.

Not Drowning, Mothering: This blog is my absolute brand new favorite blog. It's so my favorite that I'm actually not sure why I listed it second. The blog itself isn't brand new; it was around for a while before I even found it, which meant that I once spent several hours (when I should have been writing) reading the archives and giggling. The writer, known as the NDM, has a brilliant voice and I have never once not loved a post or found myself laughing OUT LOUD (and for real, too. Not just that patronizing IM "LOL"). She's a mom with a clever husband, a gaggle of kids (both hers and her friend's), and a delightful turn of phrase. If you've ever read and loved Shirley Jackson's "Life Among the Savages," I think you'll like. (And even if you haven't, so don't let that be your excuse not to check it out.)

Honey & Jam: I'm so amazed by this young writer/photographer/baker's writing and photos. Something about it just makes my eyes and heart happy.

The British Larder: A recent afternoon I came across about a half-dozen photos on Tastespotting that really caught my eye. Each time I clicked on them, they brought me to this blog, which is written by a UK-based professional chef. Some truly gorgeous and inventive dishes here.


Pacing the Panic Room Floor
: Like NDM, this one is also not at all a food blog, but have you been? Have you seen the gorgeous photos and read the beautifully honest prose written by this new dad? He's a photographer and a (new) father who writes with such love about his family.

I'm off to the kitchen now (am already behind schedule, actually), but I hope that you go check out these sites. And maybe tell me about your own recent favorites in the comments below?

xoxo
4

Turkey on the fly


This is one of my absolute favorite photos. It was taken on a friend's iPhone late at night at one of the more raucous parties I hosted. You can tell from the state of the kitchen that things were definitely a little chaotic, but it was a blast.

And that bottle of Veuve? That was the 6th or 7th one I opened that night.

Earlier today I decided on a total whim that I was going to host a mock-Thanksgiving dinner on Sunday afternoon. I'd been meaning to write about some of my favorite Thanksgiving recipes, but without photos, I didn't think the post would do them justice. So I decided to throw a little party! It won't be as wild as the one above, but it will give me a chance to make all the dishes I've been meaning to share... and to post my pre-Thanksgiving feast menu on here just in time for your last-minute real-Thanksgiving feast planning.

I ran the idea past Eugene who was completely horrified, albeit supportive, and then I sent out a quick e-mail invite to a few awesome friends in the area. We have a nice little group coming AND I already went out and got myself a turkey (plus another four bags filled with ingredients).

I haven't entirely finalized my menu--and I probably won't until I actually start cooking--but I've got a lot of good ideas.

This, as I'm sure you've already guessed, is the kind of cooking (and hosting!) I like to do; creative, spontaneous, and totally risky.

It's going to be fantastic!
2

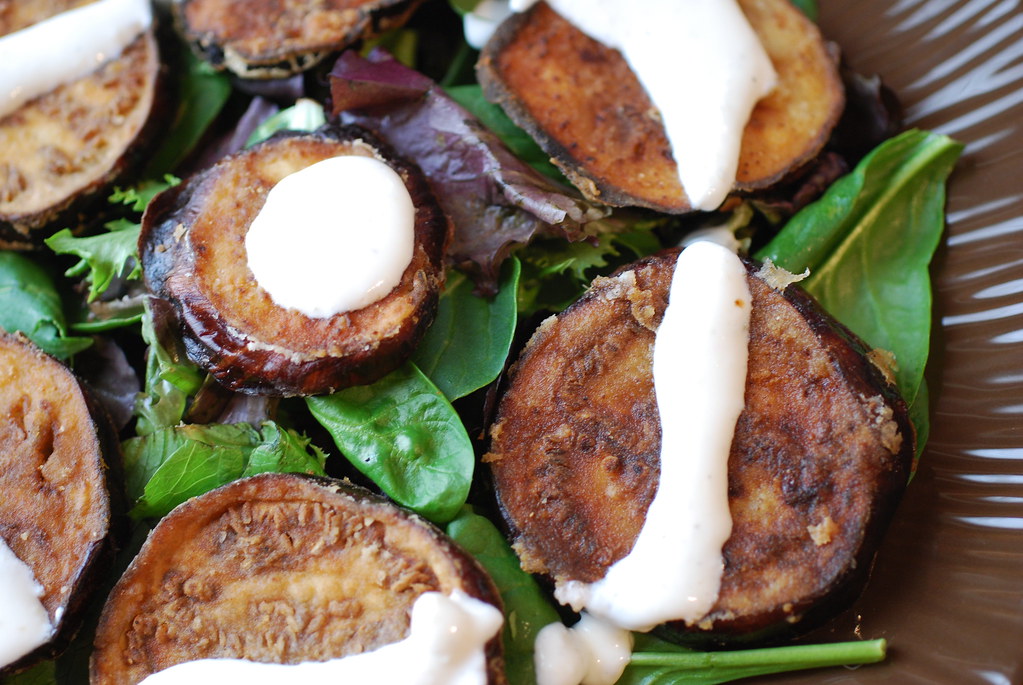
Pan-Fried Eggplant Salad with Garlic Yogurt Dressing


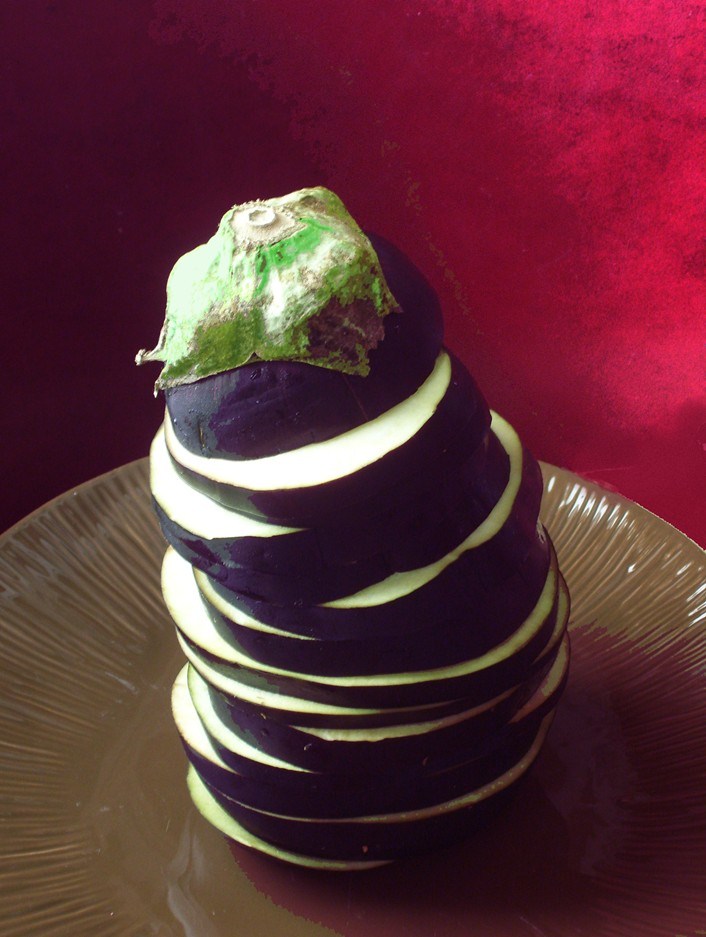
Eggplant dusted with flour and fried crisp in olive oil has always been one of my favorite appetizers. Served over mesclun greens and topped with a garlicky yogurt dressing it makes for a quick lunch or even a light dinner. I made this for lunch last Saturday after all the craziness with the interview and the photographer and it couldn't have been easier. Eugene also had the brilliant idea to add a dollop of hummus to the eggplant slices; a touch which I absolutely recommend.

When preparing eggplant in any kind of quick-cooking method such as frying, it's best to salt the fruit (yes, fruit!) to eliminate the natural bitter juices and excess moisture, which gives it a stronger and more firm texture after cooking. To salt an eggplant, slice it as directed in your recipe and sprinkle liberally with kosher or course salt. Let the salted slices sit until the liquid starts to bubble to the surface (I also like to like with paper towels above and below or leave the slices in a colander over a bowl). This typically takes about 20-30 minutes. Rinse the slices well (to remove the excess salt and bitter juices), and then pat dry with paper towels. You can then proceed with the recipe as directed.

For a longer explanation and tutorial on salting eggplants, read this post I wrote last year on the subject (it also features a recipe for a warm eggplant ricotta bake). It takes a little bit longer, but I think it results in a crisper and sweeter final dish.


Pan-Fried Eggplant Salad with Garlic Yogurt DressingThis will serve two to three as a lunch or light dinner. It can also work as a salad or appetizer course before an entree for 4-6.

Ingredients
For the eggplant:
1 globe eggplant (the conventional dark purple eggplant most often found in US grocery stores), sliced, salted, and rinsed (click here for more info on salting eggplants)
1.5 cups whole wheat or all-purpose flour
1 tablespoon Kosher salt
1 teaspoon ground black pepper
Olive Oil for frying

For the dressing:
1 cup plain Greek yogurt
3 cloves garlic
1 teaspoon kosher salt
1 tablespoon freshly squeezed lemon juice

5 cups loosely packed mesclun greens or baby spinach

To make

1. In a wide shallow dish, sift the flour, salt, and pepper until evenly combined

2. Gently goat each eggplant in the flour, using the eggplants natural moisture to adhere the flour. Set aside on a parchment paper lined cookie sheet.

3. In a large heavy-bottomed skillet, pour olive oil to coat the bottom and come up the side about 1/4 inch. Heat over medium-high heat until hot and slightly glistening (the oil will look like it is trembling slightly)

4. Fry the eggplant slices in batches, making sure not to crowd the pan. Fry until golden on each side, then remove and let drain on a paper towel-lined tray.

5. In a food processor or blender, combine the Greek yogurt, 3 garlic cloves, salt, and lemon juice. Blitz until well blended and the garlic is completely processed. Pour the dressing into a serving dish.

6. To serve, arrange the salad greens on a large platter and top with the slices of fried eggplant. Drizzle a bit of the dressing on top, plus more on the side.
5

Upland Cress: An Introduction


Look closely among the bins of greens at the farmer's market later this month, and you'll likely find a pile of tight, dark green bundles marked Upland Cress. In season from late fall through early spring, upland is similar in appearance to its better-known cousin, watercress, but boasts a deeper pungency that would be a shame to miss. A member of the mustard family, upland cress packs a sharp, peppery heat more akin in flavor to horseradish than the tea sandwich staple.

I chanced upon upland cress for the first time during a visit to the Union Square Greenmarket late last spring. It was at the very tail end of the season, when the cress was no longer at its peak, but the vibrancy and peppery flavor was unmistakable. Upland cress will come back into season in just a few short weeks, and this time, I'm determined not to miss it.

Those first few days after I tasted my first bite of upland, I was completely hooked. I dived online (as I am wont to do) and spent quite a while googling the elusive greens. I learned that, though rare in these parts, the greens are actually quite popular elsewhere in the country (and also, apparently, in the UK).

Below the Mason Dixon line, upland cress is known as "creasy greens" or "creasies," and when stewed with ham hocks, is as loved a dish as black-eyed peas or cornbread. Traditionally gathered by foragers in the Appalachian Mountains who started looking out for the hearty winter leaves while there was still snow on the ground, the leaves were believed to have medicinal benefits and used in many folk recipes to help heal wounds. Those claims may not be entirely far-fetched as the cress is indeed rich in vitamin C, vitamin A, iron, and calcium. Still commonly foraged, upland cress is now grown commercially--often hydroponically--and is available in many well-stocked supermarkets, usually live and with the root ball still attached. (Though I've noticed that the store variety is nowhere near as incredible as the kind I bought at the farmer's market. If you get the chance to try the real thing, please do and reserve your final decisions until then.)

For the simplest preparation, use upland cress the same way you would watercress. Left raw, the leaves can be chopped and mixed into a sald, tucked into a sandwich, or strewn over broiled fish as a garnish. Use a food processor to blend a handful of upland cress with a cup of Greek yogurt and a garlic clove or two for a lively accompaniment to grilled meats (I also love this as a spread on turkey sandwiches). Take note that the green's spicy bite may be too much for those with a more delicate palate. At the market one day, a man noticed me milling about the bin of creasies and asked me how I prepared them. I launched into an enthusiastic explanation complete with the above recipe suggestions, when he stopped me to say that he'd tried them in a salad but found them much too spicy. To tame the heat, I suggested he take a hint from southern chefs who cook upland cress like spinach or collards. Steamed, sauteed, or boiled, they make a particularly fitting pair to smoked turkey or ham.

Oh! And those with a green thumb should try adding upland cress to their backyard gardens. Unlike the aquatic watercress, which only grows in bogs or at the edges of freshwater ponds, upland cress will grow in almost any soil--provided it's cool and damp--and can even thrive indoors! (Take note, urban farmers!)

Plant the seeds in early summer for a fall crop, or in September to enjoy during the winter months. If harvesting or foraging your own, be sure to cut the leaves instead of uprooting them, and try to use them before the plants bloom, or you'll find the leaves have turned tough and acrid. Stop harvesting upland cress leaves once flower stalks form, since though pretty, the leaves will subsequently become much too bitter to eat (no matter how much ham you serve alongside it!)

You can tell that I'm a fan of these spicy greens, so if you have any tips or recipes, I'd love to hear them. Just writing this I'm already looking forward to the next time I spot the wooden crate filled with them.

P.S. If you do happen to buy a bunch of the hydroponic cress, I've found that it will keep on the counter for about a week, provided it's kept in plenty of fresh filtered or bottled water. I tuck a porcelain ramekin into an empty tomato can and pour a bit of water over the root ball each day. Stylish and functional, no?
1

Bamboo Charcoal Challah Bread


About five months ago, I came across a brief article about Bamboo Charcoal Bread by Monica Eng. The writer shared that a friend of hers had recently returned from a trip to China and brought her back a small loaf of the jet-black bread made with the powder of charred 5-year-old bamboo. The accompanying photo portrayed a squishy looking loaf of bread much more resembling of a lump of coal than something I'd want to eat for lunch.

And yet, I was intrigued.

It was in the description, which painted the bread as soft with a slight hint of sweetness that she thought could work perfectly in a French toast recipe. I think it was those last few words that grabbed me, because I proceeded to spend the next couple hours scouring the Internet for a local bakery that sold the loaf.

"This is New York City," I thought. "It must be here somewhere."

I found no mention local suppliers online, and though I popped into a couple Chinese bakeries I happened to pass that week, it was evident the mysterious loaf had yet to reach American shores.


So I decided to try and make it myself! I did a few searches for recipes online, but there weren’t any. I kept coming across random blog entries from bloggers in various Asian countries around the world who saw the bread in a local bakery and gave it a try. I e-mailed a few of them and left comments on the blogs of others, each time telling them about my little quest and asking them if they knew where I could find a recipe.

Soon, the responses started to roll in. The first blogger, a teenage girl in Malaysia, told me that she didn’t have a recipe, but suggested a few bakeries in her city where I could find the bread if I was ever in town. A second blogger from Singapore suggested that I look up recipes for Green Tea Bread and then simply replace the amount of green tea powder with an equal amount of bamboo charcoal powder. She cautioned that I should make sure to use bamboo charcoal powder as that it contains different properties than regular charcoal (more about that later).

I was about to take her advice when I received a third, and much more promising, message:

“I think I found what you’re looking for,” the writer told me. She included a link back to her post (where I’d left the initial comment) which she’d updated with a video of a Taiwanese cooking show about making bamboo charcoal French baguettes! It was completely in Chinese, but the blogger had helpfully included a rough English translation of the ingredients and recipe below the video and I was able to figure out the steps just by watching. She also advised that the bamboo charcoal powder could likely be used in any bread recipe but that I should add a little malt sugar along with it to enhance the flavor, as well as a little bit of additional water.


Armed with possible recipes and a new-found interest in Japanese manga,* I tackled my next challenge: finding bamboo charcoal powder.

This part was even harder than finding a recipe. The only online sources I found were international distributors who sell bulk to importers. Unless I wanted several thousand kilos of bamboo charcoal, that wasn’t going to work.

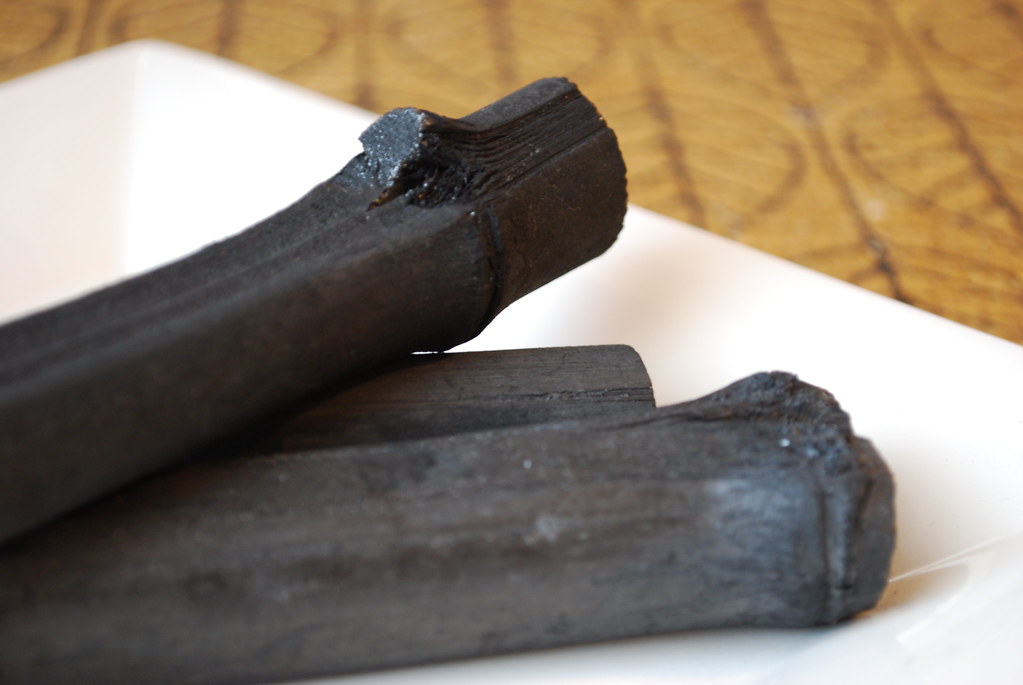
While researching, I learned that bamboo charcoal is very popular all over Asia because of its believed purification properties. The charcoal sticks are often used in water or can be placed in the refrigerator or in drawers to absorb odors and moisture much the way baking soda would be used. When used in the home (often displayed in a vase or basin) the charcoal helps to ionize and refresh the air. The fine powder is frequently used in face masks, soaps, and lotions since it is believed to detoxify and refresh the body and skin. And it is added to food for the same reasons: detoxification and to help eliminate harmful bacteria (such as in cases of mild food poisoning). The high mineral content also adds a subtle layer of flavor to the food and helps keep it fresher longer.

Naturally, the more and more I read about these amazing sticks, the more I couldn’t wait to try them. I finally found an eBay vendor in Singapore who sells whole sticks of bamboo charcoal for water purification so I bought a package or four sticks for ten dollars (including the shipping to NY from Singapore).


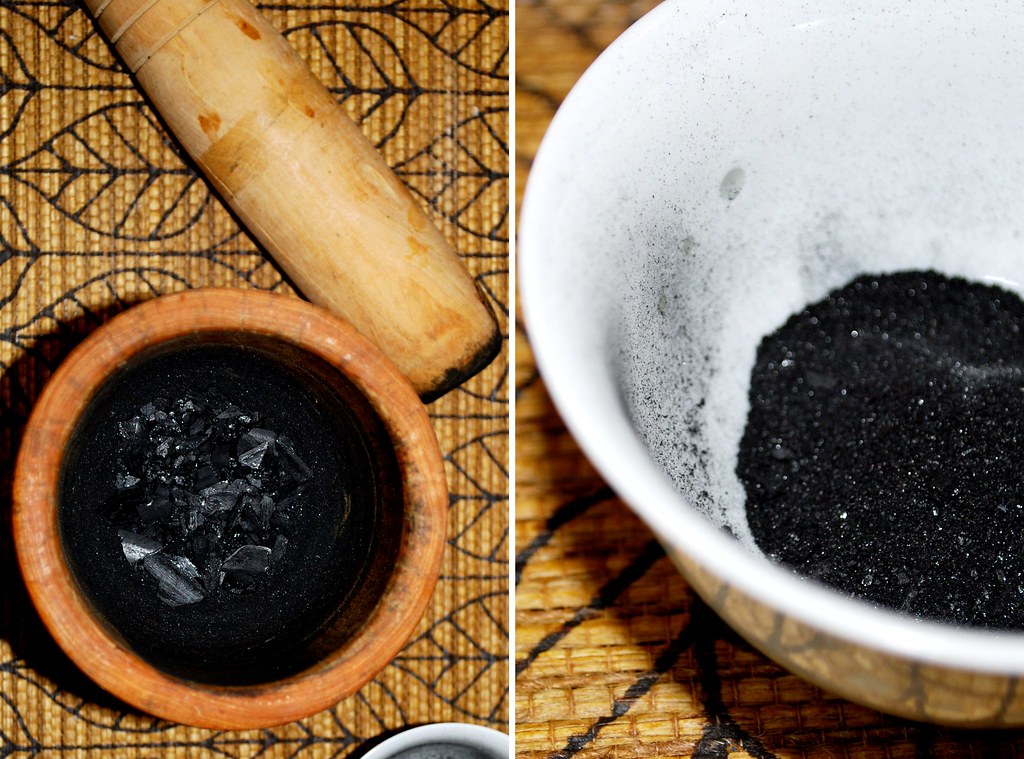
When they arrived, I was surprised by the texture of the sticks. They are very light and completely hollow, with a slightly brittle feel. When they hit against each other, they make an almost musical sound. On their own, they are completely odorless and tasteless. My plan was to grind one of the sticks down to a fine powder that I could then use in my bread recipe. From all that I’d read, I had decided to experiment with a basic challah recipe, since the soft egg-y sweetness seemed to best match the descriptions I’d read.

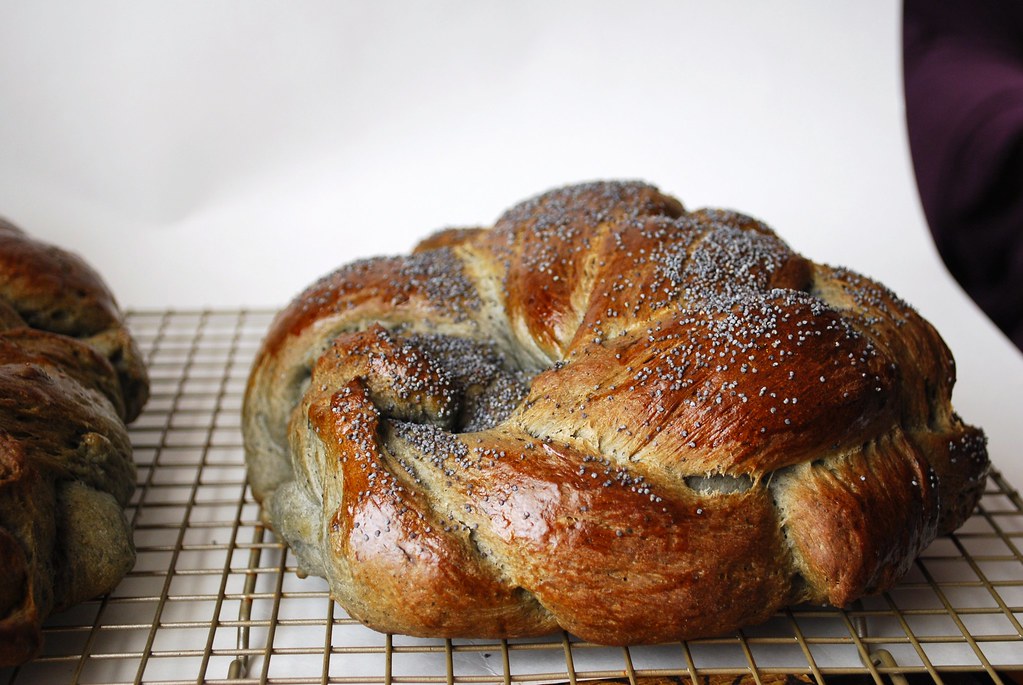
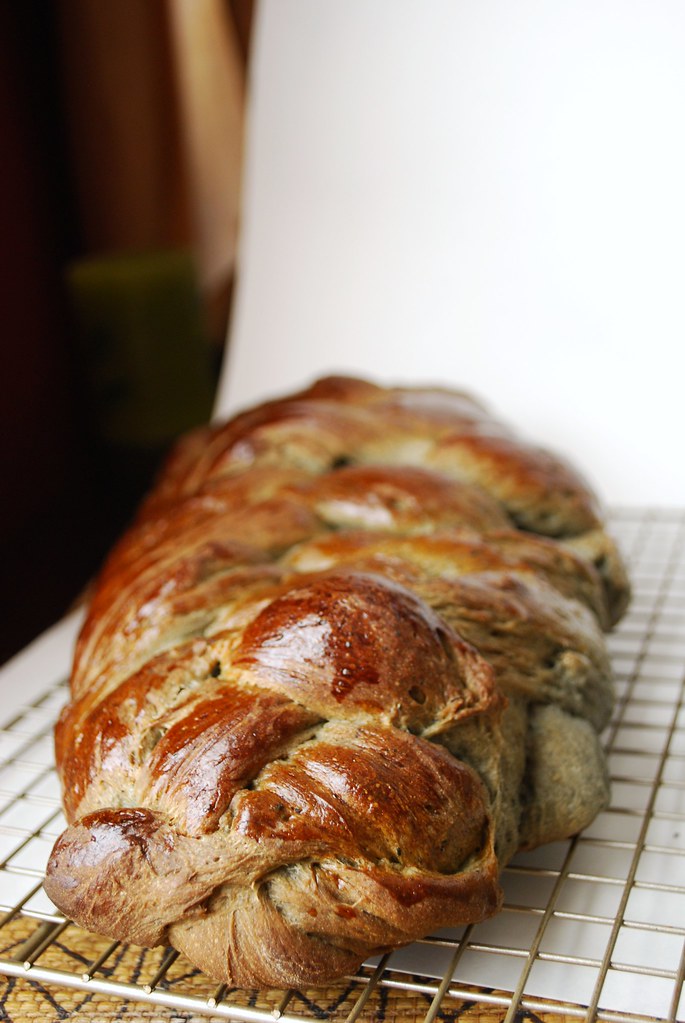
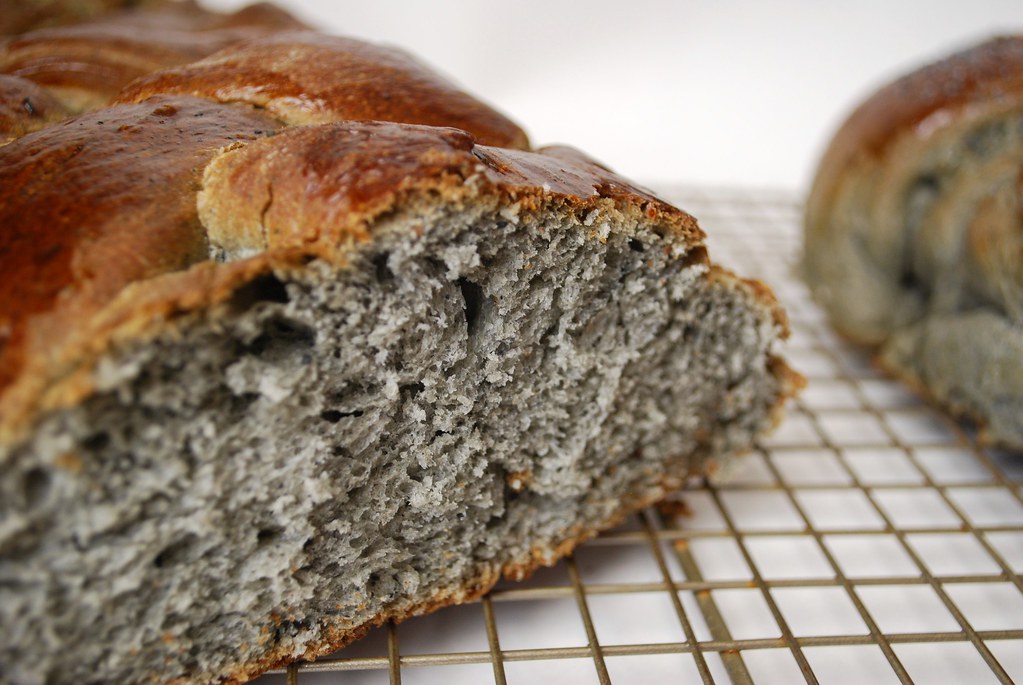
The results were exciting. The bread was chewy and slightly sweet, with a gorgeous charcoal gray color. I'd brushed the top with an egg wash, so it came out golden and glossy. I also sprinkled it with black poppy seeds since I thought they would complement the color (they did!). The most incredible part, was the way that the bread seemed to never get stale. We kept it loosely wrapped in plastic on the counter for about a week. Whereas my challah usually goes stale after 2 or 3 days, this bread was just as good the last day as the previous ones. I have no way if knowing it was a coincidence, but something definitely seems to suggest that it was the charcoal that kept it so fresh.


If you decide to try making this for yourself, I have a one important note: Make sure you grind the charcoal very, very finely. A coffee or spice grinder would be ideal for this and then it couldn’t hurt to go over it once again with a mortar and pestle. The charcoal doesn’t dissolve, so if it’s not incredibly fine, then your bread will end up with an unpleasant sandy texture.

And definitely let me know if you try it or if you have any more thoughts or knowledge about bamboo charcoal. Clearly, I’m a fan!

* Side Note: I actually ended up spending quite a bit of time on her site, which is a kind of Manga fangirl/boy site. The article that mentioned the charcoal bread was about a particular Manga series called Yakitate! Japan!, which translates to “Freshly Baked! Ja-pan!, with “pan” also meaning “bread” in Japanese” It’s a story about a boy on a mission to create a “Ja-pan” or a national bread of Japan that can rival the best breads of the world in international competitions. He travels to Tokyo to study with master bakers and there gets into all kinds of exploits. Each installment of the series features various kinds of quirky bread recipes, and the website I found was a collection of all the breads he made with links and suggestions so that actual fans of the show can recreate the breads at home. I think the series sounds brilliant so I’ll definitely have to check that out at some point.


Bamboo Charcoal Challah Bread

Makes one large braided loaf (can be doubled if you'd like to make more)

1 package active dry yeast
1 cup lukewarm water
1/2 cup sugar + 1 teaspoon sugar for the yeast proofing
1 tablespoon of molasses
1/4 cup olive oil, plus more for greasing the rising bowl
2 large eggs + 1 large egg for the egg wash
1/4 cup finely ground bamboo charcoal powder
1 teaspoon salt
4 to 4.5 cups all purpose flour
poppy seeds or black sesame seeds for sprinkling over top (optional)

In a large bowl, proof your yeast by whisking with 1 teaspoon of sugar in 1 cup of lukewarm water. Set aside and let sit until the yeast starts to foam.

Once it has foamed, pour into the base of an electric mixer and used the whisk attachment to mix in the olive oil, the two eggs (one at a time), sugar, and bamboo charcoal powder.

Switch to the dough hook and slowly add the salt and the flour, one cup at a time until it comes together and pulls away from the sides. Allow to knead in the mixer until smooth. (About 5 minutes.) If the dough seems too wet, add a little more flour, ¼ cup at a time.

Turn out the dough onto a floured surface and roll into a ball. Grease a large bowl well with olive oil and place the dough ball in. Turn once to cover the top and cover with plastic wrap.

Place in a warm place to rise for an hour or until doubled in size. (I use my turned-off oven as the heat from the pilot light is perfect temperature.) Use your fingers to gently poke the air out of the dough, roll back into a ball, grease, cover and let rise again for another 30-45 minutes.

Once the dough has finished the second rise, roll out onto a floured surface and gently knead into a smooth ball. Cut into six equal size balls and roll each one into a tapered snake shape, about 10 inches long each. Arrange the six rolls next to each other in a row and pinch the ends together. To braid, start from the right and go over two, under one, and over two. Tuck in closer and repeat again with the right-most piece of dough repeating until the entire loaf is braided. Set on a baking sheet lined with parchment paper.

Beat the last egg and use a pasty brush to lightly brush over the loaf. Let rise for another hour.

When you are ready to bake, preheat your oven to 375 degrees (if you are rising the dough in the oven please be sure to remove it first).

Once the oven is ready, brush the loaf again with egg wash and sprinkle on the poppy seeds if using. Place in the oven to bake for 30-40 minutes or until the top is glossy and golden brown.

Cool on a rack and serve.

To store leftover bread, wrap well with plastic wrap and keep in a cool dry place but outside of the fridge.

20

November Challenges


I didn't mention this yesterday, but I've embarked on the absolute madness that is NaBloPoMo. The quirky name is short for National Blog Posting Month and means that for the next 30 29 days, I will post on this blog every single day.

Those of you who’ve been here since the beginning will remember that last year I also gave NaBloPoMo a shot, only to toss my hands up in defeat sometime around the middle of the month when I just couldn't do it anymore.

This year, I'm going to do better. I realize now that set myself up for failure last time by making unreasonable demands on my creativity. I wanted to post fabulous photos, a complete original recipe, and an intriguing tale each day. Except that I forgot that I have a job to attend and a boyfriend (and self!) to feed and an apartment to take care of and that in November the sun has a tendency to set at, like, 3 in the afternoon so it's practically impossible to take decent photos of the food I make without having them come out looking shiny and orange.

So this year I'm taking it a bit easy. This, for example, counts as a post. As will the occasional gorgeous photo or perhaps a tip about cooking or a silly list of some kind. The goal is to relax a little and to just share those ideas that pop into my head with you...even if they're not always 100% complete, yet.

In addition to NaBloPoMo, I've also taken on a second and actually much more important challenge this month. I'm finally finally getting down to business on that book proposal of mine.

The truth is that I've been dilly-dallying on this for the past several months, but have finally realized that I just need to DO it. The problem is that without actual deadlines or accountability to keep me on track, I’m kind of hopeless getting things done. It’s why I really only clean the apartment top-to-bottom when I have company coming over or why I used to only ever start my term papers in college the evening before they were due.

So I signed up for proposal writing class that starts this Thursday. The syllabus indicated that we’ll get a concrete assignment each week and be led through it all by the teacher who is a literary agent, and a guest visiting editor or two. By the end of the six-week course, we are supposed to have a complete first draft. I figure that even if I were to only get through a handful of the assignments, I’ll still be that much closer to achieving my goal.

I’m excited about the amount of work I know I’ll be producing over the coming weeks although I may occasionally need a bit of encouragement from you all to keep me going. Many thanks in advance for coming along on this ride with me.
7

Salted Ginger Molasses Cookies (and a bit on Tonka Beans)


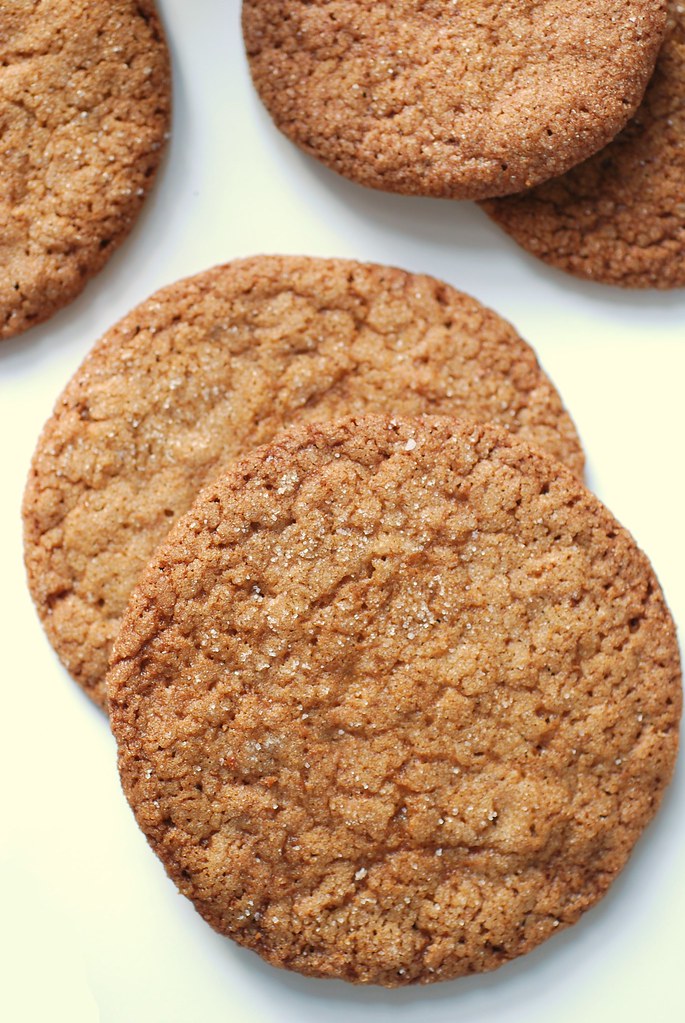
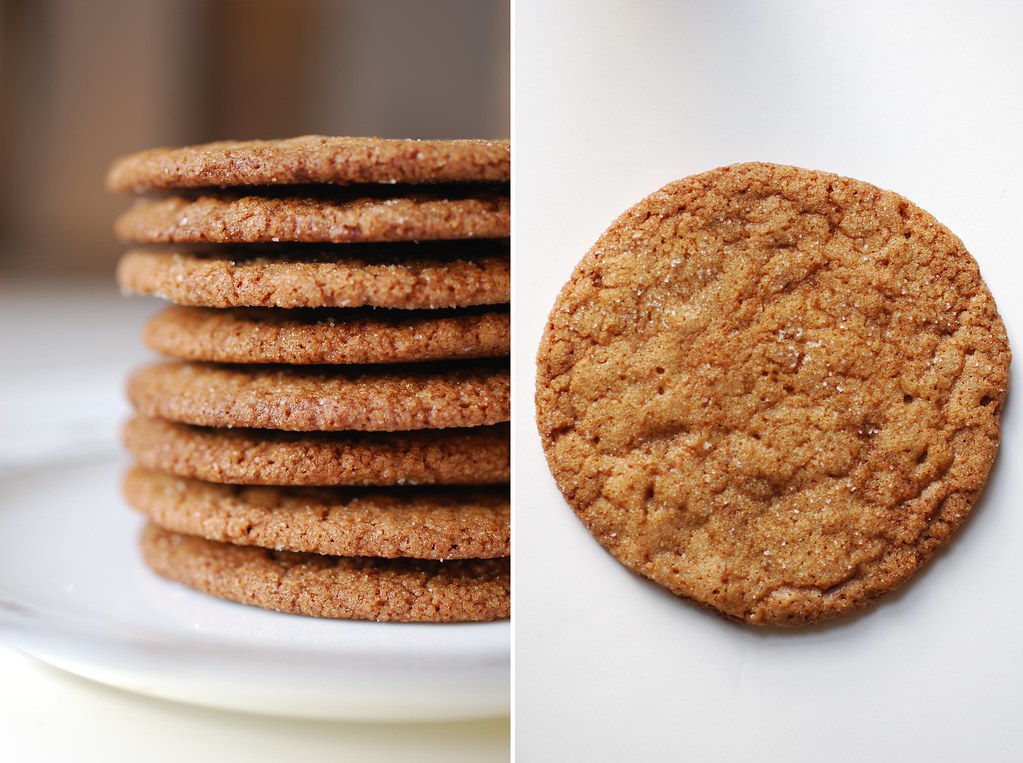
I don't have the exact numbers, but I think I've eaten nearly a dozen of these Salted Ginger Molasses cookies over the course of the past week...and several more during the past two days. They're almost perfect, really. Chewy and crisp. Salty and sweet. I promise you these delicately spiced cookies have the power to satisfy every possible craving at the same time. Unable to resist, I've been dipping into the cookie jar first thing in the morning on my way to the shower. Literally! The other morning I actually leaned in to the bath to turn on the shower with my right hand while still holding half a cookie with my left. I think it was only the realization that I was actually about to bring a cookie into the tub with me that made snap out of it.

In a vain effort to save myself, I slipped a few of them into a plastic baggie that I brought into work on Friday.

"Please," I told the girls as I set them out in the middle of our work table and pushed them away from me. "Eat these."

Marion, a fellow editor who is originally from Scotland, let me in on a little secret as she delicately cut one of the cookies into threes. She told me that the tradition where she grew up was to snap ginger cookies before eating them by using a quick jab of the elbow right down into the middle of the treat. If the cookie breaks into an even three pieces, it's supposed to be a sign of good luck. I loved that story, and noted that, if anything, it's certainly an invitation to share, something which on its own can always lead to happy times.


These are pretty straightforward as far as cookies go, but there is one secret ingredient. It's called a tonka bean and depending on where you live, you may have trouble finding it.

The thing is, these incredible little gems, which smell like cinnamon, nutmeg, cloves, and vanilla all rolled into one, are actually not legal to sell for consumption in the United States. The reason behind this is a long fascinating (although quite typical) story involving the FDA, but the thing to keep in mind is that everywhere else in the world, this spice is perfectly OK. In fact, a few of my (and your, I'm sure) favorite bloggers use them regularly and there are several big-time chefs around the country who include tonka bean flavored desserts in their menus.

If you're up for a challenge, just remember the for consumption part of the law. The beans are actually sold quite readily (and legally) by New Age and occult supply shops online. Witches, it seems, use the beans in their spells, although I try not to think about it too much since that kind of stuff just freaks me out and makes my good Christian girl tummy just feel a bit funny. It's nice to know there out there, though (tonka beans, not witches). European friends are also lovely in this regard; I know of a couple bloggers who get a few tucked into care packages every now and then. If and how you get them is totally up to you. A bit of cinnamon, clove, and vanilla tossed into the batter would also work (and quite masterfully at that!).


The only other thing I recommend is to let the cookie dough age before you bake with it. I made my dough in the evening on a Tuesday and then pressed a sheet of plastic wrap over it before letting it chill in the fridge overnight. I baked my first batch the following evening and they were perfect. If you can resist, I suggest definitely following my lead; it really does make a difference!

By the way, last night, in a stroke of sheer madness genius, I tucked a chocolate espresso truffle between two halves and pressed down hard to form a perfect little sandwich. One taste and I knew that I'd successfully combined every single flavor I've ever loved into one single bite. Anyway, that's just a suggestion... ;)

Salted Ginger Molasses Cookies

INGREDIENTS:

2 sticks of salted butter, softened at room temperature
1 cup dark brown sugar
1 cup white granulated sugar, plus more for topping
2 eggs, at room temperature
3 tbsp molasses
1 tbsp pure vanilla extract
1.5 tbsp freshly grated ginger
1 tonka bean, grated (or 1/4 tsp each of cinnamon, nutmeg, clove)
3 cups all-purpose flour, sifted
1 tbsp kosher salt, plus more for salting
2 tbsp cocoa powder
1 tsp baking soda
1 1/2 tsp baking powder


DIRECTIONS:

Cream together the butter and two sugars for 5 minutes until they are fluffy and light in color. Add the molasses, eggs, vanilla, tonka bean (or spices) and ginger, and continue to beat for an additional 3-5 minutes.

In a separate bowl, sift together the flour, salt, cocoa powder, baking soda, and baking powder. Add to the egg and butter mixture 1 cup at a time and beat until fully incorporated.

Remove the mixing bowl from the base and press a sheet of plastic wrap against the batter until it is completely covered. Refrigerate for at least one hour and up to 36 (ideal is 24).

When you are ready to bake, preheat your oven to 350 degrees. Use a medium cookie scoop or a spoon to roll out small balls about 1-2 tablespoons each. Roll into a smooth sphere then coat completely in granulated sugar (i like to just roll it around on a plate with the sugar). Place on a parchment lined cookies sheet about 2 inches apart.

Bake for 8-10 minutes keeping an eye to make sure the edges don't brown too much. When you remove them from the oven, immediately salt them with your kosher salt shaker just as you would a savory dish. Let rest for one minute and then transfer to a cooling rack for at least 3-4 minutes before serving.

*When cool, store cookies in an air-tight container at room temperature for up to 5 days.
4
Back to Top