Lemon Cake with Chocolate Frosting

I bought a book just because I liked the look of the cake pictured on the cover. Bright fluffy yellow cake layered with thick chocolate frosting. I bought--and read--that book just because I wanted to taste the cake.

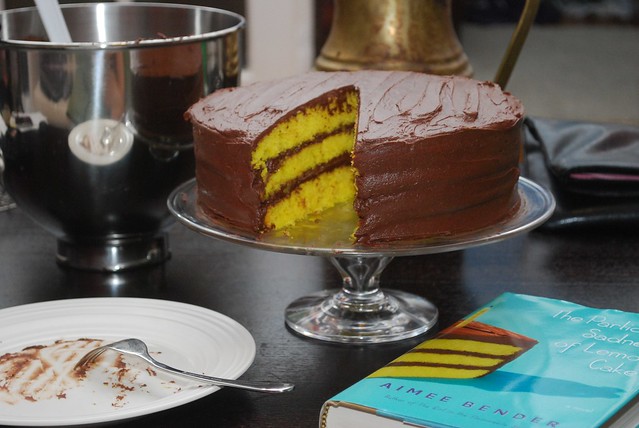
It's not a cookbook; there was no recipe, though I most enjoyed the few pages that described in detail the way the cake was made. The story ended up being stranger than I expected. Instead of sweetness and tea and cozy kitchen stories, it talked about a girl who tasted in everything she ate the secrets and emotions of the person who cooked it. She tasted her mother's sadness (the particular kind alluded to in the book's title), her brother's emptiness, the cold metallic behind factory-processed food. It is a plot with the potential for incredible things, but I was disappointed.


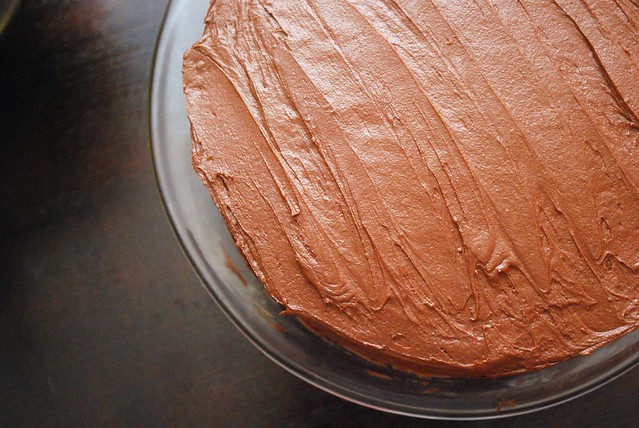
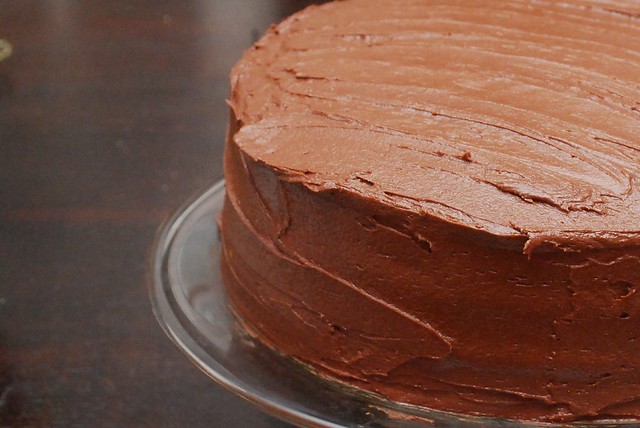
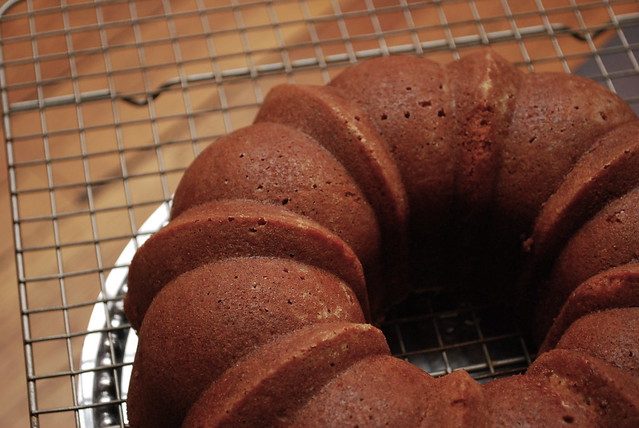
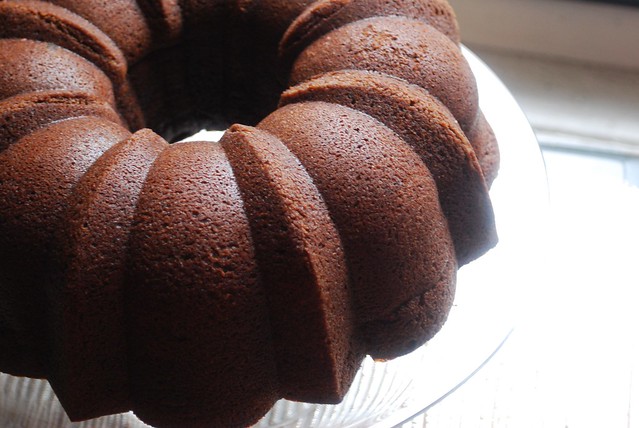
In the end, it was the picture of the cake that inspired me the most. I started with a basic lemon cake recipe, tweaking it as i went along. I added yellow food coloring until the batter matched the hue in the painting. The frosting was the simple one, learned from the back of the cocoa box 15 or so years ago.

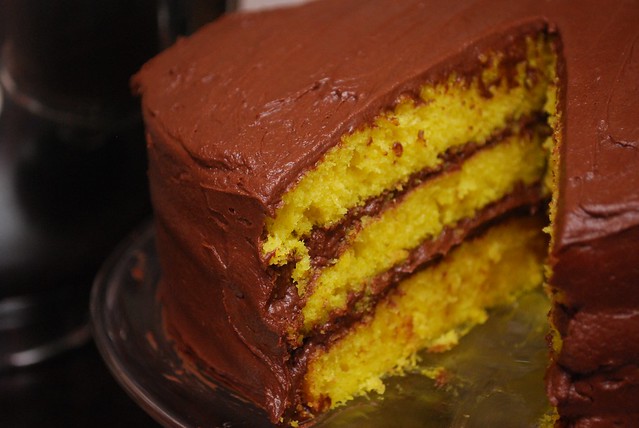
Chocolate and lemon is an unexpected combination, at least as far as cakes are concerned, but the final results are stunning. The tartness of the lemon cake is cool and bright against the sweet cocoa frosting. Next time I think I'll take it a bit further and add a thin layer of lemon curd right in the middle.

I frosted my pretty cake right on the coffee table, and was practically falling over myself in my eagerness to take a bite. There was no sadness in my cake; just bright, sweet joy.


****
New to Always Order Dessert? Consider subscribing to my RSS feed, follow me on Twitter, become a fan on Facebook, or sign up to receive my once-a-week e-mail updates by filling in your address in the box on the right. And if you ever need any entertaining or cooking advice, please don't hesitate to e-mail me. Thanks for reading!


Lemon Layer Cake
Makes one 3-layer 9" cake. Adapted from a recipe from Southern Living

Ingredients
3/4 cups butter, room temperature
1 cups granulated white sugar
8 egg yolks
zest and juice of 1 entire medium sized lemon
1 tablespoon vanilla extract
2.5 cups cake flour (you can also use all purpose though it will be a bit heavier)
1 tablespoon baking powder
1 teaspoon Kosher salt
3/4 cup whole milk
yellow liquid food coloring (optional)
Preheat oven to 375 degrees and grease and flour three 9" round baking pans. Set aside.

In the base of an electric mixer, combine the butter and sugar and beat until pale and fluffy. Add in the egg yolks and continue to beat at high speed for about 5 minutes. Add the lemon zest, juice, and vanilla and continue to beat for another minute.

While the egg mixture beats, combine the flour, baking powder, and salt. Lower the speed on the mixer (to keep the flour from flying all over your kitchen) and gently add to the butter mixture in thirds, alternating with the whole milk until all have been added and just until all have been combined. If using, gently stir in about a teaspoon of yellow liquid food coloring until evenly distributed. Use more if a brighter yellow color is desired.

Divide the batter evenly between the three cake pans and bake for about 12 to 15 minutes or until a tester inserted in the center comes out clean. Flip out onto wire racks and let cool completely before frosting with Basic Cocoa Frosting (recipe below).


Basic Cocoa Frosting
Adapted from the back of the Nestle cocoa box

Ingredients
3 cups confectioner's sugar
2/3 cups unsweetened cocoa powder
1/2 cup unsalted butter, room temperature
6 tablespoons whole milk
1 teaspoon Kosher salt
2 teaspoons vanilla extract

In the base of a stand mixer fitted with the paddle attachment, beat together about half of the confectioner's sugar, the 2/3 cups cocoa powder, 1/2 cup butter, half of the milk, the salt, and the vanilla extract until fully combined and creamy (about 5 minutes). Slowly beat in the remaining confectioner's sugar and milk, and continue to beat for about 5 more minutes until smooth and fluffy. Use immediately to frost cooled cake, or cover tightly with plastic wrap
0

Winter Wheatberry Salad

I tried wheat berries for the first time back in February at my friend Bethany's bridal shower. There was a selection of different salads and sandwiches for the girls to choose from and intrigued by the nutty looking dish, I served myself a tiny scoop to taste.

A few minutes later I found myself exclaiming, "What is this stuff?! This is so good!" The chewy, nutty little grains were wonderful and especially perfect paired with the sweetness of the dried fruit in the salad.

The following weekend, I headed to Whole Foods in search of wheat berries. I looked all over: in the grains, the bulk aisle, the pasta aisle, even the frozen section, but they were nowhere to be found. I repeated my search in vain a few times that year, always surprised that a place like Whole Foods would carry 5 different kinds of quinoa, but not a single wheat berry. I soon forgot about them and gave up my search.

It wasn't until a couple months ago, after seeing them served in my office cafeteria, that I became determined to find them again. I went to Whole Foods and searched package by package. I found nothing labled "Wheat Berries," but I did come across a bag of "Whole Grain Wheat" that looked incredibly familiar, though the word "berry" wasn't mentioned anywhere on the label. I turned it around and in the preparation instructions found that the grains were called "berries." "Aha!" I thought as I dropped the bag into my basket.

Wheat berries require a tiny bit of preparation before you can use them. The berries, which are essentially intact grain of wheat (the stuff you grind to make flour), are an incredible source of whole grain. They do, however, need to be cooked first. You can do this one of two ways: Either rinse and then combine with 3 cups of water for every cup of berries and let soak overnight or for at least 8 hours. Then drain, add a fresh 3 cups of water per cup of berries, and let simmer on low until most of the water is absorbed (about 20-30 minutes) OR you can just rinse and combine with 3 cups of salted water for every cup of berries and simmer for about an hour. It really depends on how much time you have.

You can eat wheat berries hot or cold; I prefer them cold in salads, but they can also be used with creamy sauces for a “risotto” type dish. You can also add to soups. This salad, made with a sweet and sour dressing and a combination of crunchy vegetables, is one of my favorites. The cheese on top at the end is what makes it so be generous!


****
Love Always Order Dessert? Let's connect! Follow me on Twitter or Pinterest, become a fan on Facebook, or sign up to receive my once-a-week e-mail updates. And if you ever need any entertaining or cooking advice, please don't hesitate to e-mail me. Thanks for reading!   
 

Winter Wheat Berry Salad
About 8 servings
Ingredients
6 cups water
salt (I prefer Kosher, but whatever you have on hand is fine!)
2 cups winter wheat berries (also sold as "Whole Grain Wheat")
1/2 cup extra virgin olive oil
3 tablespoons good sweet balsamic vinegar (I love using berry flavored balsamic for this)
Grated zest and juice of 1 whole large lemon
2 stalks of celery, finely diced
3 large shallots, finely diced
1 cup dried cranberries (can also use dried cherries or diced dried apricots)
Kosher salt
Freshly ground black pepper
1/4 cup shaved hard sharp cheese, such as Robusto, aged Gouda, Pecorino, Asiago, or Parmegiano-Reggiano

To prepare:
Heat the 6 cups of water over high heat until boiling. Generously salt the water (like you would for making pasta) and add the wheat berries. Stir until they’re completely submerged and then lower the heat to medium low. Cook uncovered for about 45 minutes, or until the wheat berries are soft and have the texture of cooked brown rice or farro. Drain off any remaining water (much will be absorbed) and spread the wheat berries out on a large baking sheet to cool. Set aside.

In a large bowl, combine the olive oil, vinegar, lemon juice and zest. Whisk well. Add the cooled wheat berries on top and toss to coat completely. Stir in the diced celery, diced shallots, and cranberries. Season with salt and pepper to taste. Top with shaved cheese (or serve in individual bowls and garnish with cheese).

This keeps in an air-tight container in the refrigerator for about 1 week. (Best if you save the cheese until just before serving.)
0

Hello there!

It's been making me a bit sad how quiet it's been around here. My brain has officially been taken over by the wedding. I tried to resist and insist that I could soldier on as normal with my full-time job and planning the wedding and posting delicious recipes and posts and ideas right up until the big day, but that does not seem possible anymore. I even admit that I haven't been doing much creating in the kitchen lately.

I have been cooking, but it's mostly simple things. Things that don't need recipes or that just seem to fall together in the pan while my brain heads off elsewhere counting tables, chairs, guests, stamps, minutes, dollars. This wedding, I've learned, is what grade school math was preparing me for. It wasn't for college or for my job or for the grocery store checkout line. Nope, it was so that one day I could stand in the middle of the ribbon department at Kate's Paperie and accurately calculate how many yards of red satin ribbon I would need to create belly bands that wrap one and a quarter times around 87 four and a quarter inch wedding invitations...without a calculator. (Just under 26, if you're wondering.)

So I found out that I'm a math genius, but dinner has consequently become secondary: whole wheat spaghetti tossed with pesto leftover from a summer bounty of fresh basil, roasted sweet potatoes served with Greek yogurt, giant bowls of peppery arugula dressed in lemon juice topped with sardines straight from the can, Honeycrisp apples and peanut butter, loaves of Balthazar bread served along hunks of Truffle Tremor and salami. Oh and one glorious night when I arrived home late and totally exhausted to find that Eugene had stopped at Di Paolo's and bought me a perfectly round ball of burrata, lush and plump with cream and stracciatella. I sat right on the couch and ate it all; a perfect dinner.

Fortunately for you (and this blog), I do have new recipes. Recipes that I created a while ago, but never quite got around to posting. Recipes that were apparently waiting for this moment. Stay tuned; I won't leave you hungry for too long...

xoxo

Alejandra
0

Peanut Butter Coconut Truffles


The other afternoon, Eugene came home from work to find me measuring things into a bowl. "Oh good," he said as he stopped to give me a kiss. "I'm just so hungry." Then, upon taking a closer look at the contents of my bowl, he stopped.

"Chocolate?! This isn't dinner food!"

"No," I admitted. "This is dessert, but there's a meatloaf in the oven."

There were no complaints later when, after the meatloaf, Eugene helped himself to several spoonfuls of the truffle ganache as I molded the rest into little treats. I tucked the results into an air-tight container and popped them in the fridge for future snacking.

Made with creamy peanut butter and good bittersweet chocolate, these taste a bit like grown-up Reese's Peanut Butter Cups. I added a bit of coconut oil and rolled them around in (unsweetened) desiccated coconut to add another interesting layer of flavor, though you could certainly use regular butter and roll them around in chopped salted peanuts instead, or in confectioner’s sugar or cocoa (or a mix of all of these!)

If you're looking for an interesting hostess or Christmas gift, consider pairing these with my espresso cocoa truffles and presenting in a pretty gift box or cellophane bag tied with ribbon.


****
Loved this recipe? Here are three other homemade truffle recipes you might like:
 

And let's connect so you can find out the next time I post! Follow me on Twitter, Instagram, or Pinterest, become a fan on Facebook, or sign up to receive my once-a-week e-mail updates.

Thanks so much for reading!


Peanut Butter Coconut Truffles
Yields 2 dozen truffles

Ingredients
12oz bittersweet chocolate chips
1/2 cup creamy peanut butter
2 tablespoons coconut oil
1 cup heavy cream
1/2 teaspoon kosher salt
1 teaspoon vanilla extract
1 cup shredded coconut

Directions
Combine chocolate chips, peanut butter, and coconut oil in a large bowl and mix well. (It will be lumpy.) Set aside.

In a small saucepan, combine heavy cream and salt. Set over low heat and bring just to a boil. Immediately remove from heat, stir in vanilla, and pour over the chocolate and peanut butter mixture.

Use a whisk or fork to stir until the chocolate and peanut butter is melted into a smooth thick ganache (chocolate sauce). Let the ganache cool in the bowl on a counter overnight or for 3-5 hours--this will depend on the weather. (Do not refrigerate--letting it cool slowly is important.)

Once it's firm to the touch, use a cookie scoop or tablespoon to scoop out balls of the ganache. Roll in your hand then drop into the shredded coconut and roll to coat. Place on a parchment lined tray or plate and repeat with rest. Chill one hour before serving. Store in the refrigerator or an air-tight container for up to 2 weeks. Can also be frozen.

0

Kitchen Tip: 5 Ways to Keep Your Cakes from Sinking

I occasionally get emails from readers asking me why their cake sank in the middle when baking. They always say something along the lines of: "I followed the recipe perfectly, but it still sank. What did I do?!"

While it's impossible for me to know exactly what happened in any specific occasion without my actually being there (Not even I'm not THAT awesome ;), these are the top 5 things you should look out for to keep your cake from sinking the next time you bake:

1. Old Baking Powder -- Baking powder may only account for a tiny percentage of your entire cake ingredients, but it can ruin the whole thing if you're not careful! Remember that baking powder only stays fresh for about 6 months to a year, so date them when you buy them, and toss and replace any containers that have been hanging around too long.

Not sure if yours is still good? Take 5 seconds to test it before you start baking by placing a teaspoon of baking powder in about a 1/2 cup of hot water. If still good, it should start to bubble rapidly. If nothing (or barely nothing) happens, it's time to head to the store.

2. Too Much Leavening
-- As counter-intuitive as it might sound, adding too much baking powder, baking soda, or yeast to a cake will cause it to sink as the amount of air that is created within the cake will be more than the structure can support and the whole thing will come crashing down.

Never add additional baking powder or other leaveners to self-raising flour or cake mixes (they already have it mixed in), and always be sure to read a recipe clearly and measure carefully.

When in doubt, remember that the average ratio for baking powder to flour is 1 to 1.5 teaspoons per cup of AP flour; so if you read a recipe that calls for something way above that, it's probably an error.

0

Sweet Blue Cornbread

I realize I'll probably be offending some people by posting this, but here goes anyway:

I like my cornbread sweet.

And I don't just mean "hint of sweet,"; I mean full-on cake sweet kind of sweet. Preferably served warm for breakfast, with a generous slice of cold salty sweet cream butter set right on top. What can I say? I grew up in New Jersey!

And I really do blame Jersey for my sweet Northern cornbread love. There is a little restaurant that my family and I always used to go to after church on Sundays. It's a tiny place with a big menu featuring big dishes.

Literally. I'm talking six-egg omelettes and bigger-than-the-plate-sized pancakes and about a quart of hash browns per person. Totally ridiculous portion sizes that invariably came home with us in a doggie bag to be snacked on for what felt like weeks, but the most memorable thing...my most favorite thing about this place was the equally generous basket of warm cornbread they'd serve as soon as you sat down.

Piping hot golden squares of cornbread in both plain and chocolate chip, so cakey-soft and so cakey-sweet and so cakey-perfect after having woken up late and skipped breakfast and sat through service with a rumbly tummy. I'd tear my way through that entire basket before even thinking about glancing at my menu--much to the chagrin of my father who then kept having to ask the waitress for "one more minute" before we could finally order.

It's been a few years since we've been back to that place (though I should probably get my dad to take us there one of these days as Eugene is quite the pancake fan and now I'm not going to be able to think about anything else), but every now and then I find myself craving some of that soft, sweet cornbread. Soon after first tasting it there, I started experimenting at home, making batch after batch of cornbread until I got it right.

The other night, while making a pot of chili and wondering what to serve along with it, I decided to give it a shot. I broke out my old high school recipe and dug through the pantry only to find a bag of blue cornmeal instead of the yellow. "This'll work!" I thought, and got to mixing.

The results were lovely! Soft, moist, and sweet, with just a hint of crust along the edges. The blue cornmeal added a lovely texture and beautiful color (just look at the specs of blue!). Plus, there is just something about blue cornmeal that makes it seem healthier. (Even when slathered in butter and sugar!) I served it hot along with the chili that night, and then heated the leftovers in the oven the next morning for breakfast. There was a square or two left on the third day and those came to work with me to enjoy with my morning tea, surprisingly still lovely and moist.

In addition to the blue cornmeal, I used whole wheat pastry flour  in this recipe. It's one of my favorites, and I highly recommend it if you haven't tried it yet; you won't be able to tell the difference from the all-purpose flour, but it's still a bit healthier. That said, you can definitely just use regular all-purpose!

I also used turbinado sugar, with its natural honey-like undertones for a bit of richer sweetness, plus an additional teaspoon of honey. You can also just sub regular white sugar, if you prefer.

I hope you enjoy, and for those of you who just can't wrap your heads around the idea of sweet cornbread, I suggest you just scratch off the "bread" and change it to "cake" before proceeding.


****
Loved this recipe? Here are three other cookie recipes you might like:
 
And let's connect so you can find out the next time I post! Follow me on Twitter, Instagram, or Pinterest, become a fan on Facebook, or sign up to receive my once-a-week e-mail updates.

Thanks so much for reading!


Sweet Blue Cornbread
Makes about 9 servings

Ingredients
1 cup finely ground blue cornmeal 
1 cup whole wheat pastry flour (you can sub all-purpose flour; do NOT use regular whole wheat)
3/4 cup turbinado sugar
2 teaspoons baking powder
1 teaspoon baking soda
1 teaspoon Kosher salt
1 egg, slightly beaten
1 teaspoon honey
1 cup full-fat Greek yogurt or buttermilk
1 teaspoon vanilla extract
1/3 cup vegetable oil


Preheat your oven to 400 degrees and position the rack right in the center. Butter and flour an 8" x 2" square baking pan and set aside.

In a large bowl, sift together the blue cornmeal, flour, sugar, baking powder, baking soda, and salt.

In a second large bowl, whisk together the egg, honey, yogurt, vanilla, and oil. Pour the flour mixture into the wet ingredients and gently mix until all completely combined. Pour the batter into the prepared pan and bake for approximately 20 to 25 minutes, or until a tester inserted into the center comes out clean.

Let cool for about 10 minutes before serving (but make sure it's still warm!). You can serve it and then store the leftovers right in the baking pan (just cover with plastic wrap & store in the fridge); any leftovers can be reheated in a 400 degree oven for about 5 minutes.
0

Hostess Cheat Sheet: Cheese Knife 101

While rifling through one of my kitchen drawers the other day, I realized that I own way too many decorative cheese knives. After digging out one that had somehow wedged itself in the back of the drawer, I decided to take them all out for an inventory of sorts. There were about 12 total, some purchased in advance of parties, others given as gifts--most rarely used.

Open up the latest (or just about any) kitchen store catalog, and you'll find an array of cheese knives for the "serious" entertainer. These little gadgets definitely do look pretty, but considering that they spend most of the year rolling around the kitchen drawer gathering dust, are they really necessary? I decided to break down my inventory and sort out which knife actually goes with which cheese...and which I can just go ahead and add to the Housing Works bin.

In case you're wondering...


Spreadable cheeses, like room temperature or baked brie, chevre, Camembert, and cheese spreads (think “Boursin”) are soft enough that they can be easily cut and spread with a regular butter knife. Decorative knives or "spreaders" [top left and all the way to the top right in the photo above] can also serve in this respect, but there really is no need to clutter your drawers with an additional knife just for this purpose when you already have a knife that will work well. (Note that in a pinch you can also serve these with a regular dessert spoon.)

Semi-firm and firm cheese, like Pecorino, Manchego, Parmigiano-Reggiano, or Asiago, require a good sharp knife to cut. Again, there is no need to buy a single-use sharp cheese knife; a good multi-use paring knife will work well for this purpose, and those are often small and attractive enough that they can be served along with your cheese plate when company is over. To serve, slice a few pieces ahead of time and then leave the paring knife close to the cheese on your cheese board so that guests can continue to cut other pieces for themselves.

Semi-soft cheeses like fontina, gouda, or a chilled brie are really the only kinds of cheese that should be cut and served with a proper cheese knife. You’ll easily recognize the one for the job as that knife with a sharp edge and those weird open holes along the blade. The tip will often be shaped a bit like a fork, which can be helpful for lifting the slices that you cut. The holes in the blade are there to keep the soft cheese from sticking to the knife or breaking as you slice.

Still wondering how to get those really thin shaved pieces of pecorino or parmigiano-reggiano that usually top salads in a restaurant? You don't need a special knife (often called "a cheese plane") for this either! Simply run a clean vegetable peeler run along the surface of the cheese and let the thin slices fall over your dish. (Note: this also works with a bar of chocolate to decorate a dessert!)
0

Saffron Walnut Bundt Cake

There is a certain kind of magic that seems unique to the Bundt cake. As frequently as I bake, I admit that I still gasp a little bit each time I pull up an inverted Bundt pan to reveal a perfectly--and beautifully--formed cake below. In fact, there are few other cakes that inspire me more.

For the past couple months, I've been recovering from a back injury (a "bulging disc") that has made going about my day a little bit more difficult that usual. The simplest movements--leaning over to brush my teeth, opening the oven, even putting on my shoes--have become an exercise in creativity and (at times) contortionism.

The first couple weeks after my "episode" I was in much too much pain to really do any serious cooking, let alone baking. Dinner became a bit of a slapped-together affair featuring a variety of sandwiches and salads and the occasional delivery from the nearby Italian restaurant that does dinner well, but dessert not so much.


After a couple weeks of this,  I'd had enough. I missed baking! I missed creaming together softened butter and sugar until it reaches that light and fluffy point. I missed sifting together a cloud of flour and baking powder and salt. I missed the familiar flow of running a spatula gently through the batter to combine the dry and wet ingredients. Most of all, I missed that moment, just a few minutes before the timer rings, when the scent of freshly baked cake seems to suddenly fill every nook in my home alerting anyone who is paying attention that it. is. ready.

I was still in quite a bit of pain, but I couldn't resist, and so one Monday afternoon, Eugene came home from the gym to find me cracking eggs in the kitchen. "What's going on here? Are you baking again?"

"I'm trying," I replied, moderating my response so as to not get his hopes up.
0

Inspired Living: 5 Fun Ways to Spice Up Your Cooking Life

As much as I love to cook, there are some weeks when even I find myself stuck in the middle of a total kitchen rut, with energy for little more than rifling through the take-out menu drawer. Inspired by the many "spice things up in the bedroom" articles that cross my desk as part of my (not-at-all-food-related) day job, I decided to create a similar list of quirky tips to help put the fun back in the other oh-so-important room in your house:

1. Make a Culinary Wish (list)
Sit down one day and write down anything (and everything!) that you've ever wanted to try making. Think dishes from restaurants you'd love to recreate at home, or something you love, but which has always seemed too daunting to try. (My own list includes things like "learn to bake fluffy and buttery homemade croissants" and "buy a real truffle and shave over scrambled eggs.") Don't edit yourself when making the list by worrying about cost or skill; just add every crazy and delicious thing you can think of--the details will work themselves out later. When you've got it all down, post the list somewhere conspicuous like the fridge or a pantry door where you're sure to spot it regularly. Whenever you start to feel a little bored or uninspired with cooking, take a peek at the list and pick one wild thing that really excites you...then give it a try!

2. Schedule a Play Date
Set aside one weekend a month where the cooking is just for fun...and just for you! If you have a family, arrange with your husband (or wife) so that they take care of food for themselves and the kids, or keep a back-up plan in place (read: phone number to the local pizza parlor)...then just play! Make whatever you want--an elaborate cake, homemade bread, a vegetarian meatloaf, liver pate...the sky is the limit! Don't worry about having to feed anyone or perfecting anything; just enjoy the time cooking. It it comes out fabulously, you can celebrate! If not, throw it in the trash and grab a slice of pizza with the kids. You just might surprise yourself!

3. Become a "Cheftestant"
Make your own "Top Chef" style challenges. On the popular cooking shows, the chef contestants are always being challenged to make delicious dishes with quirky obstacles. This could be a tight budget, having to buy all the ingredients in a 99 cent store, using only food of a certain color, or inspired by a particular film. Take a tip from those shows and create similar challenges for yourself. If you have friends or relatives who also love to cook, invite them to join in on the fun by setting a challenge for everyone to follow on the same weekend or even just within the same month. Then get creative and see what you come up with. You can host a potluck to share all the crazy dishes, or just share your pictures and results via a blog or e-mail chain. When you realize how much you can do when you let your creativity take over, you might find yourself a little more inspired on the other days of the week.

4. Talk to Strangers
In the market the other day, a woman asked me if I knew how to cook with a vegetable she had just noticed. She had no idea that I'm a food blogger and writer, but she saw me looking at them too so she gave it a shot. I gave her a couple ideas on how to prep the vegetable (sunchokes, in this case) and gave her my favorite recipe for a sunchoke soup. It might seem random, but why not follow that lady's lead and ask your butcher or another shopper at the store who is buying the same thing you're buying how they usually prepare it? If you go to a farmer's market, the farmers will usually be happy to talk to you about ways to use their produce. Or if you're in a small cafe or restaurant that you frequent, ask the owner or chef if he's willing to share the recipe for that dish you always order. You never know what you might find out!

5. Go Back in Time
Try to remember the first dish you successfully ever made by yourself. That could be a batch of back-of-the-box sugar cookies made with your mom looking over your shoulder when you were a little girl, or some simply sauteed chicken cutlets your second semester of college. Mine was a light and airy microwaved lemon pudding cake that I found in one of my mom's 80s "Microwave Cookery" books when I was about 10 and just starting to get curious about the kitchen. Whatever you early dish was, think back to the way it felt to make it, and (this part is key) make it again! Try and track down the original recipe (I spent a while hunting in my parent's house to find the exact sticky microwave book), or come up with the best approximation that you can. The mere act of thinking about that dish--and making and tasting it again--could be just enough to waken the excitement that the kitchen once held.

Your Turn: What tricks or ideas do you have for getting out of a kitchen rut?


****
New to Always Order Dessert? Consider subscribing to my RSS feed, follow me on Twitter, become a fan on Facebook, or sign up to receive my once-a-week e-mail updates by filling in your address in the box on the right. And if you ever need any entertaining or cooking advice, please don't hesitate to e-mail me.
 
Thanks for reading!

(photo credit in this post only: iStockphoto.com)
0

Always Order Dessert and The LAMP Finalists for "Most Creative" Fundraiser!

Some of you might remember that back in June of this year, Always Order Dessert (aka "I") teamed up with the awesome media literacy nonprofit The LAMP for a delicious bake-off to benefit their many incredible education programs for children, teens, and their parents. The event proved a success, and we just recently learned that the Classy Awards have named us one of the Top 5 finalists for the "Most Creative Fundraiser" in New York category.  Awesome, huh?

Your online vote could help us win the City Award, which would then bring us one step closer to winning the National Award of $10,000--all of which would go to The LAMP to help them continue the amazing work they've been doing in the community.

Now that would be the best dessert of all!

Click here to vote for us to win the Classy Award for "Most Creative Fundraiser."

Thank you for your continued support!!!
0

Kitchen Tip: How to Peel, Store & Cook with Fresh Ginger

ginger root

I'm a ginger fanatic! The first recipe I ever posted on this blog was for my favorite fresh ginger tea; a delicious cozy beverage that I crave constantly on chilly nights, sick days, and pretty much anytime I can use a little extra comfort. I also cook regularly with it (infusing the spicy flavor into both baked goods and savory dishes) so I always have one or two big knotty looking roots of it somewhere in my kitchen.

As flavorful as it can be, many people shy away from using fresh ginger simply because of how weird and tricky it looks. If you've been using dried or jarred ginger in place of fresh, I encourage you to give it a shot.

After the jump: the coolest ways to peel and store ginger (yes...I said "coolest").
0

Honey Peach Frozen Yogurt

After peach cake and peach pie, I was craving something a bit lighter that would better highlight the peaches in their natural state. Inspired by the breakfast ice cream I made a few weeks ago, I decided to make another version of it, this time starring peaches. Fresh fruit-topped Greek yogurt with a drizzle of honey is a regular breakfast of mine, so I figured the same idea would work as a frozen treat.

To make this, I simmered together some diced peaches (with the skins on--I  rarely peel fruit or vegetables that can be eaten whole; it's easier, healthier, and makes little-to-no difference in the final dish) with local honey and a bit of peach nectar (you can also use apple juice) just until the peaches cooked down a bit. I pureed the mixture and then let it chill before mixing with some thick Greek yogurt (full-fat, please!) and a touch of vanilla extract. I could have honestly just stopped there and been left with a delicious and thick peach smoothie.


0

Whole Wheat Lemon Peach Cake

Among the many reasons why Fall is my favorite season is that the lovely chill in the air makes it once-again possible to comfortably bake for hours and hours. Even better are these final weeks of summer, (the ones we basically shove out the door come Labor Day because school is back in session and Halloween decorations are on sale at the drugstore and the windows at the Gap are filled with mannequins in plaid flannel and wool) because we have both the early chill and the bounty of lush, late summer fruit to use.

Last week, in the days when white shoes were still acceptable, I purposely bought more peaches than Eugene and I could possible eat. About 50, to be exact. And when most folks packed up their cars and cases and headed out to the beach for one last final hurrah, I sat down an made a list that looked like this:
Alejandra's Labor Day Weekend Plans
peach pie
peach cake
peach preserve of some kind (jam, crock-pot butter, etc.)
peach frozen something (ice cream, yogurt, sorbet?)
pates de fruit (passion fruit, mango)
pomegranate-braised brisket

0

Four-Ingredient Potatoes au Gratin

For our engagement, Eugene's aunt and uncle gave us this excellent mandoline; a kitchen tool that I've been coveting for quite some time. So long in fact, that the minute I opened the box I knew EXACTLY what I was going to make first.

Potatoes au Gratin is one of those classic, spectacular French dishes that sounds terribly complicated, but which in reality is ridiculously--almost embarrassingly--easy. (Similar to the also awesome and also French potage parmentier.)  The only caveat being that you really do need a mandoline to get those perfect, paper-thin slices. Not necessarily an elaborate, expensive multi-function mandoline like the one we were given (though if you have a wedding registry to fill or a Christmas list to write, I do highly recommend it!); a simple $15 model like this will work perfectly and will make this dish that much easier to assemble.

I personally love my gratins bare-bones simple with just four ingredients (plus a bit of salt and pepper). Those four would be potatoes, garlic, butter, and cream. At this point you're probably thinking, "No cheese?!" But trust me...you don't need it. You also don't need herbs or breadcrumbs or bacon or any other things to muddy up the deliciousness.
0

Kitchen Tip: How to Cook Corn on the Stove

It's the height of corn season, and Eugene and I have been eating ears of sweet, local bi-color corn pretty several times a week. Earlier this summer, when the first lovely ears started showing up at market tables, Eugene brought a few home from the farmstand near his office and asked me to make them for him. I shucked the corn and dropped them into a pot with just an inch or so of water, covered it, and raised the flame to high. About 7 minutes later, I brought Eugene a plate with two ears rolling on top of it from side to side. "Do you want butter?" I asked.

He stared up at me in amazement. "It's already ready?!"

Turns out that when he was growing up, Eugene's mom used to prepare the corn by boiling it in a large pot filled with water. Waiting for that much water to boil was quite the process and so, like Eugene explained, it always took "forever" from the moment he asked until the cooked corn finally arrived on his plate.

0

Beet Goat Cheese Gnocchi in Rosemary & Sage Butter Sauce


This is the other recipe I made at my cooking demo last Saturday, and I figured it’s time that I share it with you guys, too!

Pureed roasted beets and creamy tangy goat cheese come together for one of the easiest homemade pasta dishes you’ll ever tackle (promise!).

Start with pureed roasted beets (make them yourself, buy them pre-roasted and peeled in those lovely little vacuum packs, or go ahead and use canned, if you’d like) and whisk in the cheese, an egg and some flour to bind it all together.

You only need about a half cup of the puree for a batch of pasta big enough to serve four. These freeze well, too, so even if it’s just you, I recommend making the whole thing and freezing the rest for easy meals the rest of the week.


The little dumplings are soft and cook up quickly once they’re done.

I boil them and then crisp them just a bit in a skillet of hot browned butter gently scented with fresh herbs (sage and rosemary in this case, but go ahead and use what you have and what you like) and a little dash of nutmeg.

Or you can skip the butter (though I never would) and just serve them with your favorite sauce...something creamy and cheesy perhaps, or savory and red and right out of a jar.


I first made these a while ago, back when Eugene and I started dating, but I’ve tweaked the recipe since and this is how I like it best.

The beauty of it all is that you can play around with it until you find the way that YOU like it best. So use cream cheese instead of goat or ricotta if you prefer. If you don’t have (or don’t like) beets, try the same recipe with pumpkin, butternut squash, or sweet potatoes.

Make it in advance and freeze it until you’re ready to cook (a great trick for dinner parties and busy weeknight dinners), and then when you sit down with your glass of wine and everyone is about to dive in just casually let it drop that you made these.

From scratch.


****
New to Always Order Dessert? Consider subscribing to my RSS feed, follow me on Twitter, become a fan on Facebook, or sign up to receive my once-a-week e-mail updates by filling in your address in the box on the right.

And if you ever need any entertaining or cooking advice, please don't hesitate to
e-mail me.
Thanks for reading!

Beet Goat Cheese Gnocchi in Rosemary & Sage Butter Sauce
Serves: 4

Ingredients

 
For the gnocchi:
1/2 cup goat cheese (chevre)
1/2 + 2 tablespoons cup roasted beat puree (approximately 1-2
large beets, roasted, peeled, and pureed in food processor or blender)
1.5 cups all purpose flour (plus more for flouring boards)
1 whole egg, slightly beaten
1 tablespoon kosher salt
1 teaspoon freshly ground black pepper
1 teaspoon nutmeg

For the sauce:
1 stick unsalted butter
1 bunch fresh sage
1 sprig fresh rosemary
salt & pepper


Steps:
1. In a large bowl, whisk the goat cheese until smooth. Add the beet puree and mix until evenly combined.
2. Whisk in the egg, followed by the salt, pepper, and nutmeg.
3. Slowly add the flour into the beet mixture, 1/4 cup at a time until it is all incorporated into the dough. If your dough seems a bit too wet, feel free to add an extra 1/4 – 1/2 cup of all-purpose flour.
4. Turn the dough out onto a heavily floured work surface and knead for a few minutes. The dough will still be fairly wet, but you should be able to handle it by keeping your hands and the surface floured.
5. Working with about a handful of dough at a time, roll out a long snake about an inch thick. Use a floured knife to cut out the gnocchi every 1 inch. Roll each gnocchi along the tines of a fork (or simply indent by gently pressing the back of the fork into the side of each nugget).
6. Place the formed gnocchi on a floured baking sheet. These can be frozen for later use or cooked right away.
7. When ready to cook, bring a large pot of salted water to a rolling boil and add the gnocchi in batches. Let cook until they bob to the surface and then cook for an additional 2 minutes. Use a slotted spoon to pull out of the pot and set aside.
8. While the gnocchi are boiling, heat a heavy skillet (cast iron is ideal) over medium heat and melt the 1/2 stick of butter. Tear 5-6 fresh sage leaves in thirds and drop into the hot butter along with a tablespoon of fresh rosemary. Saute the herbs in the hot butter, letting the sage leaves crisp slightly. When the gnocchi are finished boiling, add them in batches to the hot butter and toast on each side for about a minute each. Repeat with each batch, adding more butter and herbs as necessary.

Season with salt and pepper to taste, and serve immediately with a drizzle of the butter sauce and a few of the crisped sage leaves scattered on top.

Cook's Note: These same gnocchi can also be served with other kinds of
pasta sauce such as marinara.
0

Beet Chocolate Bundt Cake


I just got home from an exciting day of hosting two live cooking shows at the New York Botanical Garden where I showed two audiences how to prepare different recipes featuring delicious, in-season beets. It was the first time I ever cooked before an audience, and I think it went pretty well!

I'm pretty exhausted after spending the day on my feet cooking, but I promised the audience that I would post this recipe for the Beet Chocolate Bundt Cake that I made so for now, here it is. I'll be back tomorrow with more details about the event (and a few pix, too!)

xoxo

Alejandra

P.S. I realize this cake is a little unusual, but it's delicious; everyone in the audience tasted it and liked it (some were clamoring for 2nd and 3rd pieces!).
 
0

Come Watch Me Cook at New York Botanical Garden on Saturday

Alejandra at New York Botanical Garden (Not to scale.)


If you're in the NY/NJ/Connecticut (heck...even Pennsylvania!) area, I'd love for you to come to the New York Botanical Garden tomorrow (Saturday). I'm going to be hosting two LIVE cooking shows on their state of the art Conservatory Kitchen Stage at 1pm and 3pm.

This will be the first time I've ever cooked before an audience so it would be really great to have your support and see some familiar faces out in the audience!

I'm going to be making two delicious beet recipes. The first, for the 1pm show, is Roasted Beet and Goat Cheese Gnocchi with Sage Brown Butter Sauce. At the 3PM show I will be making Beet Chocolate Bundt Cake with Chocolate Truffle Glaze. I'll also be talking about eating seasonally, working with beets, ways to serve them to those pesky "i hate beets" people, and a few of my personal beet anecdotes (don't we all have those?!).

If you haven't been to NYBG before or have been meaning to go check it out, this is the perfect time to do so. It's absolutely gorgeous there right now and there are activities and exhibits for the whole family to check out! Tickets are just $15 for adults, $13 for students, and $8 for kids. (babies get in free) That's about the same as a movie ticket for a whole day of fun! (Fun AND personal beet anecdotes!)

New York Botanical Garden is located in the Bronx right next to the Bronx Zoo (so you can make a whole day out of it and go check out the cute baby animals next door after my show). It's about 20 minutes from midtown on metro-north and 25 minutes from the GWB if you're driving in from NJ. Visit www.nybg.org for more details on the park, directions, and to buy your tickets.

I hope to you there!

xoxo

Alejandra
0

Kitchen Tip: How to Roast Beets

It's prime beet season and the earthy (and incredibly affordable!) jewels are everywhere. While beets can be prepared in any manner of ways, my absolute favorite way is to roast them. Unlike boiling, which tends to wash them out, roasting preserves the gorgeous natural colors, keeps the tenderness intact, and deepens and enhances it's characteristic earthy sweetness.

The bonus is that roasted beets can be prepared in a large batch all at once, then stored in the fridge for a bevy of uses over the coming week. Think sliced into salads, paired with tangy goat cheese as an appetizer, sauteed in hot herbed butter, mashed into ravioli filling, or (my favorite) pureed and baked into chocolate cake. Roasted beets are in fact so versatile that they're actually sold that way at the grocery store, but there is no need to spend extra bucks to have someone do the work. With just a few quick steps, you can learn to roast a perfect beet every single time.


0

Peppadew, Peach, and Feta Side Salad

I've recently become smitten with Peppadew peppers. I had some a few days ago as part of a salad served in (of all places) my office cafeteria, and instantly fell in love. Sweet and (mildly) spicy with a perfect touch of acidity from the pickling, Peppadews are wonderful paired with cheeses like feta or goat, can be tucked into a sandwich or burger, or even used as a topping on pizza.

Similar to cherry tomatoes in appearance and size (though not flavor), Peppadews is actually the trademarked name of a variety of sweet piquante pepper native to South Africa. The name is a reference to the pickled version, and are sold stemmed and seeded with a tiny open cavity just perfect for stuffing.


For this salad, I was inspired by the one I had at work, and paired the peppadew peppers with a combination of salty Bulgarian feta and diced, broiled peaches that I first tossed in a simple dressing of lemon juice, olive oil, and black pepper before placing under the flame for a few minutes (I live in an apartment so grilling isn't an option, but if it is for you, by all means do!)

0

Reader Question: Do I have to refrigerate almond butter?

My friends and readers regularly send me e-mails with food and cooking questions, and I figured I might start sharing some of these here with you. This one is from my friend Matt (sometimes referred to as BFF Matt):

Alejandra-

You know I like to follow rules.  

So I got back from a run around Lake Merritt this morning and needed a nice scoop of almond butter before heading over to Blue Bottle for the latteIwouldorderifondeathrow.  My endorphin high was completely shuttered because I remembered that on the side of my freshly opened almond butter it told me to 'stir and refrigerate after opening' as it always does. 

Look, I hate refrigerating peanut and almond butter; the refrigerator sucks the life and creaminess out of an otherwise smooth treat.  I just don't want to have to 'defrost' my fucking almond butter before I eat it.

All I am saying is, what am I risking by not refrigerating my favorite post-run snack?

Ahhh...Matt. What an excellent question!

I feel the same way you do about peanut butter and almond butter (and, for that matter, cow butter). I only ever eat the organic unsweetened kind so when I refrigerate it, it gets extra hard and unmanageable which is just no fun.

0

Salted Honey Butter Caramels

A couple weeks ago, a few of the girls I work with and I took out our (now-former) coworker Dana for a good-bye lunch at nearby Landmarc restaurant. One of my favorite spots in the city, the food at Landmarc is reliably delicious, but even more so are the generous handfuls of homemade butter caramels that come out complimentary along with the check. Soft, chewy, with just a slight tinge of burnt sugar, these caramels are absolutely addictive. I usually gobble up a couple right at the table and tuck the extras away in my purse for a surprise treat at a later date.

The night after our lunch, I found myself laying in bed thinking about those caramels. I'd already eaten the extra one in my purse (it barely made it back to the office) and proceeded to spend the rest of the night plotting my next trip, wondering if I would be able to slip away during lunch the next day for a repeat meal.


Morning light made me realize just how impractical it would be to pay for an entire lunch simply for a handful of complimentary caramels, so I decided that I would just have to make them myself. Cobbling together various classic caramel recipes, I tweaked and stirred until I finally fell upon the one that seemed closest to the buttery, chewy treats I remembered.

This recipe is actually quite easy. You need a candy thermometer, of course, but other than that, it's really just a bit of occasional stirring and patience. The hard part comes at the end, once the caramel has been cooled and cut into (semi) uniform pieces; that's when you'll have to sit and wrap each individual piece for hours.

I made mine early on a Sunday evening and then proceeded to sit on the couch cutting and wrapping caramels straight through an episode of Rubicon (my new favorite), then Mad Men, then immediate encore of Mad Men, followed by the first half of the encore of Rubicon. Yes. That would be 3.5 hours of wrapping caramels.


It's easy, but tedious. Fortunately, you're guaranteed to consume every third piece (at least during the first hour) so you'll have enough of a sugar rush to get you through the whole batch. If possible, I recommend recruiting the aid of a friend or child (preferably not a diabetic one).

Another tip: cutting the caramel into pieces might seem impossible (and sticky) but I found that it's really easy if you use a pair of clean kitchen shears. Just snip and wrap! And don't worry if the pieces aren't all uniform; that, I think, is part of the charm.


****
New to Always Order Dessert? Consider subscribing to my RSS feed, follow me on Twitter, become a fan on Facebook, or sign up to receive my once-a-week e-mail updates by filling in your address in the box on the right.

And if you ever need any entertaining or cooking advice, please don't hesitate to
e-mail me.
Thanks for reading!

Salted Honey Butter Caramels
Makes about 60-75 individual pieces

Ingredients
6 tablespoons unsalted butter (plus a bit more for greasing the pan)
1.5 cups heavy cream
2 cups granulated white sugar
3/4 cup honey
2 heaping teaspoons Kosher salt

Special equipment: 9" square baking pan, candy thermometer, heavy pot or saucepan

1. Butter a 9" square baking pan well and set aside. Combine the butter, cream, sugar, honey, and salt in a heavy saucepan or skillet (I used my Dutch oven) and place of medium heat. Stir gently until the butter melts and sugar dissolves.

2. Let the sugar continue to cook, stirring it every so often (doesn't have to be continuous), until it darkens to a golden brown and the thermometer reads 245 degrees F. (This will take about 30-45 minutes or so, possibly longer depending on your stove and the size/type of pot you use; note that the temperature MUST reach 245 before you can pour the caramel out of the pot or it won't set)

3. Gently pour the caramel into the prepared pan and let cool at room temperature for about an hour or two until it is set and cool to the touch.

4. Use a spatula to release the sides of the caramel (it will be buttery) and flip out the slab of candy onto a cookie sheet. Use clean kitchen shears or a sharp knife to cut into small rectangles or cubes. Wrap each piece in parchment paper or wax paper.

Store at room temperature for up to a week or two (if they last that long), although I've found that these are best eaten within 2-3 days as temperature fluctuations in your home can make them a bit grainy. Note that these can also be refrigerated for weeks at a time.
0

Anise Biscotti


As part of my wedding planning, I’ve been spending quite a bit of time lately thinking about cookies and candies that can be made in advance. Though I haven’t really figured out the specifics yet, I’ll likely end up making several different kinds of these make-ahead treat to use either as favors or on a dessert table, or perhaps even served on platters of mignardises to be set on each table post-dinner along with the cake and coffee.

The latter solution made me think of the classic cantuccini that were served along with tiny cups of Vin Santo after dinner at nearly every restaurant in Florence. A classic Tuscan treat, the cantuccini are tiny, dry little biscotti-type cookies that are meant to be dipped in the sweet wine (or coffee) for a bit of sweetness after the meal. When I went back to New Jersey after my time in Florence (where I went to culinary school), I brought my dad a bag of the little hard cookies and a bottle of Vin Santo to try, and we ate them after our dinner for weeks after my return.


Cantuccini, and other types of biscotti, are perfect after a large meal, and convenient for the hostess as they can be made well in advance since they’re supposed to be stale to better soak up coffee. Anise biscotti, in particular, have always been of favorite of mine. I use pure anise oil instead of extract for a stronger flavor without as much moisture (you can use about half the amount of oil as you would extract; often even less than that) and add whole anise seeds for a little extra texture and flavor. If you prefer almond, you can substitute that extract instead.

This batch that I made lasted me nearly a full month, and I swear they were just as fragrant and delicious on week three. Note that this batter tends to spread so try to make the logs as narrow as possible (I made HUGE biscotti the first time I made them because my batter was a bit wide). Not that there is a problem with huge biscotti...

Oh and you should know that these turn out a little softer than the kind you’d get at the store (or by the Starbucks register). They’re hard, but not break-your-teeth hard—just dry and firm enough to be perfect for dipping. 


Anise Biscotti
Makes about 30-40 cookies

3 1/4 cups all purpose flour
1 tablespoon baking powder
1 teaspoon Kosher salt
2 teaspoons whole anise seeds
1 cup butter, melted
1 tablespoon extra virgin olive oil
1 1/4 cup granulated white sugar
1 tablespoon vanilla extract
3/4 teaspoon anise oil or 1.5 teaspoons anise extract (oil is stronger)
1 teaspoon lemon zest
3 large eggs, room temperature


Directions
Preheat your oven to 350 degrees and place the rack in the center of the oven. Line two large baking sheets with parchment paper or a silpat.

In a large bowl, sift together the flour, baking powder, salt, and anise seeds. Set aside.

In another bowl, combine the melted butter, olive oil, sugar, extract, anise oil, and zest. Whisk in the eggs one at a time until each is combined well.

Add the dry ingredients to the butter mixture and stir until completely combined and no dry bits remain (the anise seeds should be well distributed throughout the batter).

Dived the dough in half and shape each half into a long log down the center of the baking sheet. (don’t worry if it spreads a little bit, it’ll rise in the oven).

Bake each batch for 30 minutes (you can bake both at the same time if your oven is big enough). Pull the logs out of the oven and let cool for about 10 to 15 minutes before using a sharp knife to cut slices in the longs, each about 3/4 inch thick. Turn the slices over onto their sides and bake again for about 10 minutes then flip the slices to the other side and bake for another 10 minutes.

Remove from the oven and transfer to a rack to cool completely. Once cool, these can be stored in an air-tight container in a dry environment for up to 2 weeks (sometimes even longer).
0

I'm Going to Be on Mad Men!!!

My love of Mad Men (and all things retro) is a bit of a running theme here on Always Order Dessert, so I'm sure many of you are not the least bit surprised to hear that I'm currently vying for a role on this INCREDIBLE show.

AMC and Banana Republic are co-sponsoring a contest called the "Mad Men Casting Call" where fans of the show are invited to enter a photo of themselves showing their best "Mad Men Style." I decided to join the fun and entered a photo of myself taken during the swank Mad Men cocktail party I hosted last Christmas. People are asked to vote on the photos and 10 male and 10 female finalists will be chosen at the end of the voting period (in mid-September). From their, the director of the show will select one Male and one Female winner to win a walk-on role on an episode of Mad Men.

This, as I'm sure you can understand, would be an absolute DREAM for me. You can totally help me get on there! All you have to do is click the "VOTE" button under my photo. You can vote for me once a day every day (or even more if you have multiple computers). You can also help get the word out by posting the link to my photo on Facebook, Twitter, sending it to your friends via email, etc. It's super simple as it requires absolutely NO login info or registering.

Let's make this happen together!!!

Vote for me here: http://madmencastingcall.amctv.com/browse/detail/ZQJ33H

xoxo

Alejandra

P.S. I'm calling on the Law of Attraction to make the post title a reality. ;)
0

Spicy Shrimp & Avocado Salad Sandwiches

Last week I read the book Her Fearful Symmetry by Audrey Niffenegger (she of The Time Traveler's Wife fame). I ended up not really liking the book as much as I expected. In fact, I didn't really like it at all. The story was fine initially, but I expected something spookier and felt like many parts of it were left unexplained and unexplored. Even with suspension of disbelief, much of it just really didn't make any sense. The final third of the book, in particular, was stupid, and rushed, almost as if it had been written in haste just to get it over with or like she just grew bored.

To put it frankly, it was a huge waste of time.

But all was not lost!

It's a long book and once I put it down (once I got past just how bad it was), I found myself thinking over and over again about one particular scene. Just a few lines, really, where the main characters--a pair of 20-something American twins living in London--are taken on a picnic by a male neighbor. He brings along sandwiches and when they ask what kind they are, he says

"Prawn-mayonnaise sandwiches...[In America] you would call it a shrimp-salad sandwich, though I've never understood where the salad idea comes into."

I thought that was a pretty clever observation because it's true; we do seem to call just about everything a "salad" even though most barely are (think Ambrosia salad or classic tuna or egg or elbow macaroni salad; x-flavored mayo would definitely be more appropriate). That said, the thought of a creamy shrimp salad was officially stuck in my head and it wasn't long before I made it our dinner.

I used small hand-peeled Laughing Bird white Caribbean shrimp for mine. If you haven't tried them yet, I definitely urge you to seek them out. Humanely farm-raised in filtered sea water, they are fed a completely vegetarian diet (that keeps them 100% mercury free) and are chilled immediately after being caught (never frozen) so they are always fresh and sweet. Bonus points because the farm where they are raised has been given high marks and praise by the World Wildlife Fund.

Oh and at around $10 a pound, they brought me infinitely more pleasure than that lousy book.


****
New to Always Order Dessert? Consider subscribing to my RSS feed, follow me on Twitter, become a fan on Facebook, or sign up to receive my once-a-week e-mail updates by filling in your address in the box on the right.

And if you ever need any entertaining or cooking advice, please don't hesitate to
e-mail me.
Thanks for reading!

Spicy Shrimp and Avocado Salad Sandwiches
Makes 6-8 sandwiches

Ingredients
1.5 pounds clean and peeled small shrimp (I love Laughing Bird hand-peeled shrimp, which are humanely farmed shrimp completely free of mercury, sulfates, or other nasty things.)
2 teaspoons Old Bay seasoning
1 teaspoon smoked Spanish paprika
1 tablespoon cooking or olive oil

1 red onion, finely minced
1 large Florida avocado, diced into about 3/4" cubes
1 cup minced celery (about 2 stalks)
1 bunch roughly chopped watercress (or arugula)

1/2 cup mayonnaise
1/2 cup plain Greek-style yogurt
zest and juice of 1 large lemon
1 tablespoon grainy or Dijon mustard
2 teaspoons apple cider or red wine vinegar
2 garlic cloves, minced or pressed
1 teaspoon Oregano
1 teaspoon Cayenne pepper
Kosher salt
Ground Black pepper

Kaiser or Whole Grain buns for serving


In a large bowl, toss the clean and peeled shrimp with the Old Bay and paprika.

Over medium-high flame, heat the oil in a large dutch oven or skillet and add the shrimp. saute until cooked thoroughly. Remove the shrimp from the pot and place in a large clean bowl. Reserve the liquid from the pot.

To the bowl of shrimp, add the minced red onion, diced avocado, minced celery, and watercress.

In a smaller separate bowl, whisk together the mayonnaise, yogurt, lemon zest and juice, mustard, vinegar, garlic, oregano, and cayenne. If too thick, add a tablespoon or two from the reserved cooked shrimp liquid.

Pour the dressing over the shrimp and watercress mixtures and toss to coat well. Season with Kosher salt and freshly ground black pepper as desired.

Serve the salad piled into Kaiser or Whole Grain buns for serving as a sandwich or serve in small bowls as a salad.
0

Bagged Lunch Ideas: Cucumber Chickpea Salad


This is a simple salad for lazy days. Just chickpeas, diced cucumbers (lots of them), and big bright showers of cilantro and lemon zest. (OK...a little bit of diced onion too.) The dressing is just a bit of oil whisked with a bit of lemon juice and a splash of vinegar.

Make a big bowl because it develops the longer it sits and will taste better tomorrow than it does today. Left to soak in a bit, the cucumbers take on a slight pickled tasted and the chickpeas absorb mouthfuls of flavor until you find yourself sneaking forkfuls right out of the fridge.

I used canned chickpeas for these, but I made sure to give them a good rinse with fresh cold water first. It's not required, but it's something I always like to do to whisk away that slightly sludgy liquid and musty smell all canned beans seem to have. (This trick, by the way, also works wonders to get rid of the extra fishy smell of water-packed tuna.) Some brands package their beans with a bit of extra sugar or salt in the liquid so a quick rinse helps get rid of that and gives you more control over the flavor of your dish (and your nutritional intake).

(And you can, of course, soak and boil your own dried beans.)


****
New to Always Order Dessert? Consider subscribing to my RSS feed, follow me on Twitter, become a fan on Facebook, or sign up to receive my once-a-week e-mail updates by filling in your address in the box on the right.

And if you ever need any entertaining or cooking advice, please don't hesitate to
e-mail me.
Thanks for reading!

Cucumber Chickpea Salad


2 cans chickpeas, rinsed
2 large cucumbers, diced into 1/2" cubes
1 bunch cilantro, stems removed, leaves chopped finely
1/2 small red onion, diced
3 tablespoons Extra Virgin Olive Oil
Zest and juice of 1 large lemon
1 teaspoon Apple Cider or Red Wine Vinegar
1 teaspoon Kosher salt (more to taste)
1 teaspoon freshly ground black pepper

In a large bowl, combine the rinsed chickpeas, diced cucumber, cilantro, and red onion. In a separate bowl, whisk together the olive oil, lemon zest and juice, vinegar, salt, and pepper. Add the dressing to the chickpea mixture and toss to coat. Taste and adjust seasoning if necessary (depending on how much juice your lemon had, you may need a bit more vinegar or oil. This can be eaten right away or made up to 24 hours in advance.
0
Back to Top