Showing posts with label Butter. Show all posts

French Almond Paste Cake

I'm not sure if this is true for everybody, but my cake cravings tend to increase dramatically during the winter.

It's like all I want are warm mugs filled with tea and a slice of something sweet and simple. I'm not talking about elaborate layer cakes with fillings and swoops of frosting (though those are lovely, too). I mean simple cakes. Plain cakes with just a one lovely single layer and perhaps a simple garnish--some toasted nuts, a drizzle of honey, a sprinkle of sugar.

I like them dense and buttery, but not too sweet. The sort of thing that you could enjoy with tea or coffee in the middle of the afternoon, but then still go on with your day successfully. (Versus trapped in a sleepy sugar coma.)

It's what I had in mind when I made this beautiful French Almond Paste Cake. It's adapated from a recipe by David Lebovitz, although I played around with the amounts a bit. I doubled the almond paste, using two full tubes of the stuff, and cut down on the sugar.

For my version, I actually used coconut palm sugar, which is one of my favorite things ever. It's unrefined and nutty and not too sweet, and the thing that gives this cake this old fashioned shade of honey-brown.

Note that if you use regular sugar (which you absolutely can!), your cake will come out much lighter in shade. Both are delicious and recommended--it's really just up to what you prefer (or happen to have on hand).

This is one of those cakes that tastes better the next day, so I recommend making it at night and saving it for the next afternoon or morning, if you're impatient like I am.

It's just the thing for these dreary winter afternoons.

****
Loved this recipe? Here are three other almond cake recipes you might like:


And let's connect so you can find out the next time I post! Follow me on Twitter, Instagram, or Pinterest, become a fan on Facebook, or sign up to receive my once-a-week e-mail updates.

Thanks so much for reading!


French Almond Paste Cake
Makes one 9-inch cake

Adapted from David Lebovitz’s Almond Cake

Ingredients
1 cup coconut palm sugar OR granulated white sugar (if you like a sweeter cake, increase this to 1 1/4 cups)
14oz almond paste, cut into chunks
1 teaspoon kosher salt
1 cup all purpose flour, divided in half
1 cup unsalted butter, cut into small pieces
6 large eggs
1 teaspoon almond extract
1 teaspoon vanilla extract
1 1/2 teaspoons baking powder

1/2 cup sliced almonds, for garnish
2 tablespoons raw sugar, for garnish

Directions
Preheat oven to 325 degrees. Grease a springform pan and line the bottom with a circle of parchment paper.

In a food processor, combine sugar, almond paste, salt, and half the flour. Process until ingredients are combined and the texture of breadcrumbs or clumpy sand. Add the butter and process 2-3 minutes until creamy, then add the six eggs and both extracts, and puree for another 2-3 minutes until completely smooth (the batter will be loose). Add the remaining flour and baking powder, and pulse a few times, just until evenly combined.

Pour into the prepared baking pan, and cover with sliced almonds and raw sugar.  Bake 45 - 60 minutes, or until the cake has set in the center and risen, darkened to a golden brown, and developed a few cracks on top. You should be able to press gently on the cake and have it pop back up. Let cool in the tin for about 10 minutes, then use a knife to loosen the edges and remove the sides.

Let cool completely before transferring to a serving plate.
0

Cinnamon Vanilla Bean Rum Cake

cinnamon rum cake
It's no secret that when it comes to cake, rum cake is one of my favorites!

At its heart, this is a simple vanilla rum cake glammed it up with some spicy and super fragrant Vietnamese cinnamon and a decadent, booze, buttery Cinnamon Butter Rum Syrup to pour over the whole thing.

rum cake syrup
It takes a little patience to let the syrup soak in, but once it does, the resulting cake is absolutely luscious! Seriously SO worth the wait. (And I am not by nature a patient girl!)

I think this is a fantastic cake for the upcoming holiday season; one that most definitely would NOT be unwelcome on your Thanksgiving or Christmas table.

cinnamon rum cake

****
Loved this recipe? Here are three other cakes you might like:

And let's connect so you can find out the next time I post! Follow me on Twitter, Instagram, or Pinterest, become a fan on Facebook, or sign up to receive my once-a-week e-mail updates.

Thanks so much for reading! 

Cinnamon Vanilla Bean Rum Cake


Ingredients
For the cake:
1 1/2 cups all purpose flour
2 teaspoons baking powder
1/2 cup milk
1/4 cup light rum
2 vanilla beans, split lengthwise
3/4 cup butter softened
2 eggs, room temperature
1 egg yolk
3/4 cup granulated sugar
1/4 cup packed brown sugar

For the butter rum syrup:
1/2 cup unsalted butter
1/2 cup water
3/4 cup granulated white sugar
3 cinnamon sticks
1/2 cup rum

Directions
Preheat oven to 325 degrees. Grease and flour a 10-inch bundt pan. Whisk together flour and baking powder. Combine milk, rum, and vanilla bean seeds in a separate small bowl.

Beat butter, granulated sugar and brown sugar with an electric mixer about 10 minutes or until light and fluffy. Add eggs and yolk and beat 1 more minute. Add flour mixture and milk mixture to butter mixture, beating on low speed just until combined. Pour batter into the prepared pan.

Bake 45 minutes, or until a tester inserted in center comes out clean.

Remove cake from pan and let cool while you make the syrup.

Make the syrup: In  a large saucepan with high sides, combine butter, water, sugar, salt  and cinnamon sticks. Bring to a rapid boil for one minute, then lower  heat and let simmer until reduced by about 1/3, stirring occasionally  and keeping an eye on it so it doesn't boil over. Remove from heat and  stir in the rum (it will bubble!).
Return the cooled cake to the clean baking pan and pour syrup over the cake. Let it absorb 1-2 hours before turning out and serving.


0

Buttery Brioche Batter Rolls & The Morris-Jumel Mansion

One of my favorite places to take Hudson for his afternoon walk is the grounds of the Morris-Jumel Mansion, which is located just a few blocks away from my apartment.

The gorgeous white mansion is the oldest house in Manhattan, built in 1765 by British Colonel Robert Morris as a summer country home for his wealthy American wife, Mary.  The house then briefly served as Washington's headquarters during the Revolutionary War Battle of Harlem Heights, and was later purchased by a French wine merchant Stephen Jumel for his wife Eliza who was a fascinating lady in her own right!

Photo via the Morris-Jumel website


The story (in my own words) goes like this: Eliza was born in Rhode Island to a prostitute named Phebe and her lover, an American sailor. As a young woman she apparently also worked as a prostitute, until she met Stephen Jumel, who was unaware of her career history. The two married, but she was rejected by New York society (though they didn't know she was a former prostitute, just of low birth), so he bought the house to try to get in the good graces of the local socialites.

It kind of worked--they wanted to come dine at the grand house, but she still wasn't very accepted, so they traveled frequently to France where she was warmly accepted and even became the darling of Napoleon himself (he gave her many gifts of furniture still seen in the mansion today). That apparently didn't last very long as her opinions soon got her scorned among French society, and she was asked to leave. Upon returning to New York, Eliza started using Stephen's money to buy her way up the social ladder (a la Becky Sharp in Vanity Fair).

Stephen eventually learned of her questionable past--and that she was spending all his money--and the relationship deteriorated, he staying in France while she ran about New York. He died (some claim she actually let him bleed to death!), leaving her what was left of his fortune.

She then went on to marry controversial former VP/murderer, Aaron Burr, in what was meant to be a mutually beneficial arrangement (he would bring her status; she would provide him with money).

Unfortunately, that only lasted about 4 months, because Eliza soon realized that Aaron's debts and terrible investments were eating through her fortune. Not one to shy away from scandal, she filed for divorce and kicked his butt to the curb.

Once the divorce was finalized (incidentally on the day of Burr's death), she proceeded to spend the rest of her life traveling between New York and Europe, all the while maintaining the mansion as her permanent residence.

She died at age 90 and is buried in the cemetery across the street from my apartment (along with Ed Koch). It is said that her ghost still haunts the mansion (and I would like to meet it because she sounds like she has some stories to tell!)

The Mansion itself sits upon a hill surrounded by gated yard and gardens in the middle of the Jumel Historic District--a tiny area of cobblestone streets, townhomes, and perfectly preserved colonial rowhouses (the latter of which are regularly used in movie shoots since they're seriously like a snapshot from another era). The mansion is now a museum, open to the public, and regularly hosts cultural events, musical performances, art exhibits, and talks on the property.

I find it endlessly fascinating that this mini historic village exists a mere 5 minute walk from my apartment in the middle of what is generally a pretty urban neighborhood of bodegas and Dominican restaurants.

What does this have to do with those delicious looking rolls up there? I shall explain!

Being a dog, Hudson could care less about the storied history of the place; he just likes to nose around in the grass, collecting a tangle of burrs in his fuzzy white belly hair. While he rolls around, I let my mind wander and usually end up daydreaming about floor-length dresses and old fashioned tea parties. Upon returning home from our walks, I usally start Googling things about the house and old fashioned recipes that people back then would have eaten.

Which is how I came across the entire concept of batter breads, which were popular among 18th century cooks.

Just as it sounds, batter breads (the most popular kind is called Sally Lunn bread) were yeasted breads with a very wet, liquid dough that is stirred in a bowl like a cake rather than turned out and kneaded.

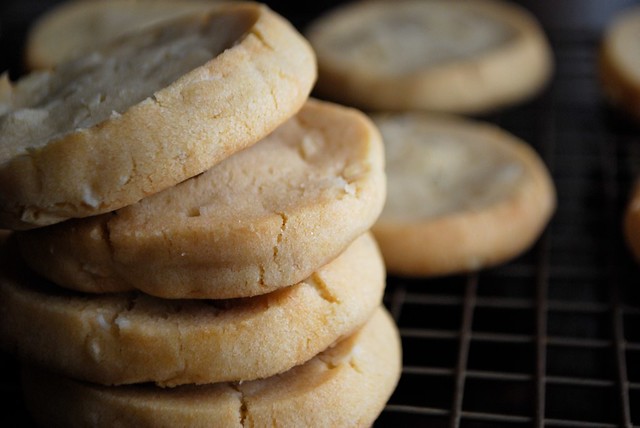
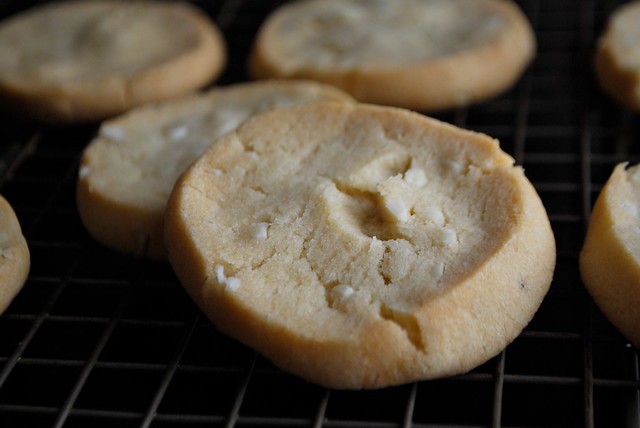
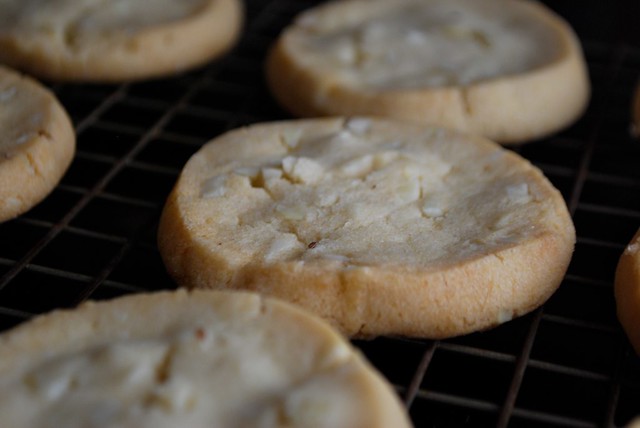
The resulting bread is light and airy, and perfect for serving at breakfast or tea with an assortment of jams or soft cheeses. Rich with eggs, good butter, and just a touch of sugar, these lush little rolls are just the sort of thing that would perhaps have been served at a fine house like Morris-Jumel.

Upon learning this, I immediately had to try them, so I played around with recipes and made one batch, then another, and another, until Eugene came home and found in a bit of an 18th century bread coma.

It was well worth it, I assure you. And once you try these, I think you'll agree.

****
Love Always Order Dessert? Let's connect! Follow me on Twitter or Pinterest, become a fan on Facebook, or sign up to receive my once-a-week e-mail updates. And if you ever need any entertaining or cooking advice, please don't hesitate to e-mail me. Thanks for reading!  


Buttery Brioche Batter Rolls
Makes 12 rolls

Ingredients
2 1/2 cups all purpose flour
2 tablespoons granulated sugar
1 teaspoon kosher salt
1 1/4 teaspoons active dry yeast
1 cup whole milk
6 tablespoons unsalted butter, cut into 1" pieces
1 large egg + 1 egg yolk

Directions
Generously grease a standard 12 muffin tin with butter and set aside.
In the base of a mixing bowl with the paddle attached, combine the flour, sugar, salt, and yeast, mixing until evenly combined.

In a small saucepan over low heat, combine the milk and butter, and stir just until the milk is heated and the butter is melted. Let cool 5 minutes, or until you can dip a finger in and hold it in the warm milk for 10 seconds.

Pour the milk into the flour mixture and beat 3 minutes until smooth. Add the egg and egg yolk, and beat 3 more minutes until the batter is thick and smooth--it should look like a sticky pancake batter. Cover the mixing bowl with plastic wrap and let rise in a warm spot for 45 minutes or until doubled in size. Return to the mixer and beat again for 3 more minutes, then use an ice cream scoop to divide the batter evenly among 12 greased muffin tins (they should fill it up about 1/2 to 2/3 of the way). Let rise again for 30 minutes while you preheat the oven to 350 degrees.

Bake 25 minutes, or until rolls are puffed and golden on top. Let cool in the tins for 15 minutes, then transfer to a rack. Serve warm with butter or jam. Best served the first day.
0

Chewy Almond Farmer Cookies

Almond Farmer Cookies


I don't remember exactly how or when it started, but Eugene and I somehow got into the habit of bringing each other little treats for no particular reason. His gifts are usually sweet and edible--like a handful of salted caramels or a little box of fancy chocolates; mine are usually a little more weird and useless--like a 99-cent wind-up baby chicken toy or a thimble-sized "I Love NY" mug.

[Reading that last sentence over again I realized that it sounds like his gifts are better than mine, but I should note that those fancy chocolates tasted bad (he agreed), and that the wind-up baby chicken has provided us with endless seconds of amusement, so we've basically come out even.]

In keeping with this tradition, Eugene came home recently with a little crumpled white bag and handed it to me. "This is for you," he said excitedly.

I pulled out a thick, round shortbread cookie, and after inspecting it a bit, took a bite. It was awesome! Simply-flavored, with a slight chew in the center, and a subtle almond and anise flavor.

Almond Farmer Cookies


"It's called a farmer cookie," he told me.  He'd bought it at a Swedish bakery located near his office, where he and his friends occasionally have lunch.

I immediately started researching Swedish farmer cookies, and found a few recipes. Called Bondkakor, these cookies are a Scandinavian treat usually served around Christmas time, but delicious year-round. The bakery Eugene went to, Fika, has these on their permanent menu and charges a whopping TWO DOLLARS per cookie. (Incidentally, THIS.)

Personally, I'm of the opinion that normal-sized cookies should never be sold individually. Three is the minimum cookie serving size. Three is better for sharing, too. (As in, "one for you, TWO for me!")

I baked my first batch of these a few weeks ago, but Eugene didn't like them. Not even when I gave them to him for free. "They're not good. They don't taste right."

I blame the butter, which wasn't all that new and smelled kind of fridge-y. Also, I used walnuts instead of almonds, and added orange zest and cinnamon. I actually don't think they were bad (except for the fridge-y butter part); they were just a totally different cookie. It's like taking a sip of Dr. Pepper when you ordered a Coke.

Almond Farmer Cookies


So I tabled that recipe (trust me; it will be back), and went back to the original, using almonds for almonds, and keeping my hands away from the microplane.

And this time, Eugene liked them. "What did you do differently to make them good?" he asked midway through his third cookie.

"I didn't add weird stuff," I replied.

The awesome thing about these cookies is that they have all the buttery richness of shortbread, but with a slight chewy part in the center. It's not ooey-gooey chewy, more of a soft little give. This comes from the addition of molasses or golden syrup (molasses, which lives in brown sugar, is also what gives chocolate chip cookies their chew). I tell you this so that you don't go skipping it.

Also, don't add weird stuff.

Almond Farmer Cookies


****
New to Always Order Dessert? Consider subscribing to my RSS feed, follow me on Twitter, become a fan on Facebook, or sign up to receive my once-a-week e-mail updates by filling in your address in the box on the right. And if you ever need any entertaining or cooking advice, please don't hesitate to e-mail me. Thanks for reading!


Almond Farmer Cookies (bondkakor)
makes 2 dozen cookies

Ingredients
3/4 cup unsalted butter (1 1/2 sticks), room temperature
1 cup granulated white sugar
2 tablespoons Golden Syrup or Molasses
2 teaspoons almond extract
1 teaspoon fennel seeds, crushed (optional but adds a lovely licorice undertone to the cookie, can also sub anise seeds)
2 1/4 cups all purpose flour
3/4 cup slivered almonds, roughly chopped
1 1/2 teaspoons baking soda


Directions

Cream the butter, sugar, and golden syrup or molasses in the base of an electric mixer for 5 minutes until light, fluffy, and doubled in volume. Mix in the almond extract.

Sift together the fennel seeds if using, flour, chopped almonds, and baking soda.

Add flour mixture to the butter mixture and mix only until fully and evenly combined. Turn dough out into a floured surface and divide in half, shaping each half into a log, 1 1/2 to 2 inches in diameter. Wrap tightly in plastic wrap and chill for at least three hours (up to 3 days).

When ready to bake, preheat oven to 350 degrees and line cookie sheets with parchment paper. Slice rolls into 1/2 inch slices and bake in batches on lined cookie sheets, keeping each cookie about 1 1/2 inches apart. Bake for 12 minutes, until the cookies puff up and start to get a bit of color around the edges. Remove from the oven and let cool on baking sheets for 10 minutes before transferring to wire racks. Eat immediately or store in an air-tight container for up to 5 days. (Taste best when fresh.)

This batch makes about two dozen cookies, depending how thick you cut them.
0

Beet Goat Cheese Gnocchi in Rosemary & Sage Butter Sauce


This is the other recipe I made at my cooking demo last Saturday, and I figured it’s time that I share it with you guys, too!

Pureed roasted beets and creamy tangy goat cheese come together for one of the easiest homemade pasta dishes you’ll ever tackle (promise!).

Start with pureed roasted beets (make them yourself, buy them pre-roasted and peeled in those lovely little vacuum packs, or go ahead and use canned, if you’d like) and whisk in the cheese, an egg and some flour to bind it all together.

You only need about a half cup of the puree for a batch of pasta big enough to serve four. These freeze well, too, so even if it’s just you, I recommend making the whole thing and freezing the rest for easy meals the rest of the week.


The little dumplings are soft and cook up quickly once they’re done.

I boil them and then crisp them just a bit in a skillet of hot browned butter gently scented with fresh herbs (sage and rosemary in this case, but go ahead and use what you have and what you like) and a little dash of nutmeg.

Or you can skip the butter (though I never would) and just serve them with your favorite sauce...something creamy and cheesy perhaps, or savory and red and right out of a jar.


I first made these a while ago, back when Eugene and I started dating, but I’ve tweaked the recipe since and this is how I like it best.

The beauty of it all is that you can play around with it until you find the way that YOU like it best. So use cream cheese instead of goat or ricotta if you prefer. If you don’t have (or don’t like) beets, try the same recipe with pumpkin, butternut squash, or sweet potatoes.

Make it in advance and freeze it until you’re ready to cook (a great trick for dinner parties and busy weeknight dinners), and then when you sit down with your glass of wine and everyone is about to dive in just casually let it drop that you made these.

From scratch.


****
New to Always Order Dessert? Consider subscribing to my RSS feed, follow me on Twitter, become a fan on Facebook, or sign up to receive my once-a-week e-mail updates by filling in your address in the box on the right.

And if you ever need any entertaining or cooking advice, please don't hesitate to
e-mail me.
Thanks for reading!

Beet Goat Cheese Gnocchi in Rosemary & Sage Butter Sauce
Serves: 4

Ingredients

 
For the gnocchi:
1/2 cup goat cheese (chevre)
1/2 + 2 tablespoons cup roasted beat puree (approximately 1-2
large beets, roasted, peeled, and pureed in food processor or blender)
1.5 cups all purpose flour (plus more for flouring boards)
1 whole egg, slightly beaten
1 tablespoon kosher salt
1 teaspoon freshly ground black pepper
1 teaspoon nutmeg

For the sauce:
1 stick unsalted butter
1 bunch fresh sage
1 sprig fresh rosemary
salt & pepper


Steps:
1. In a large bowl, whisk the goat cheese until smooth. Add the beet puree and mix until evenly combined.
2. Whisk in the egg, followed by the salt, pepper, and nutmeg.
3. Slowly add the flour into the beet mixture, 1/4 cup at a time until it is all incorporated into the dough. If your dough seems a bit too wet, feel free to add an extra 1/4 – 1/2 cup of all-purpose flour.
4. Turn the dough out onto a heavily floured work surface and knead for a few minutes. The dough will still be fairly wet, but you should be able to handle it by keeping your hands and the surface floured.
5. Working with about a handful of dough at a time, roll out a long snake about an inch thick. Use a floured knife to cut out the gnocchi every 1 inch. Roll each gnocchi along the tines of a fork (or simply indent by gently pressing the back of the fork into the side of each nugget).
6. Place the formed gnocchi on a floured baking sheet. These can be frozen for later use or cooked right away.
7. When ready to cook, bring a large pot of salted water to a rolling boil and add the gnocchi in batches. Let cook until they bob to the surface and then cook for an additional 2 minutes. Use a slotted spoon to pull out of the pot and set aside.
8. While the gnocchi are boiling, heat a heavy skillet (cast iron is ideal) over medium heat and melt the 1/2 stick of butter. Tear 5-6 fresh sage leaves in thirds and drop into the hot butter along with a tablespoon of fresh rosemary. Saute the herbs in the hot butter, letting the sage leaves crisp slightly. When the gnocchi are finished boiling, add them in batches to the hot butter and toast on each side for about a minute each. Repeat with each batch, adding more butter and herbs as necessary.

Season with salt and pepper to taste, and serve immediately with a drizzle of the butter sauce and a few of the crisped sage leaves scattered on top.

Cook's Note: These same gnocchi can also be served with other kinds of
pasta sauce such as marinara.
0

Salted Honey Butter Caramels

A couple weeks ago, a few of the girls I work with and I took out our (now-former) coworker Dana for a good-bye lunch at nearby Landmarc restaurant. One of my favorite spots in the city, the food at Landmarc is reliably delicious, but even more so are the generous handfuls of homemade butter caramels that come out complimentary along with the check. Soft, chewy, with just a slight tinge of burnt sugar, these caramels are absolutely addictive. I usually gobble up a couple right at the table and tuck the extras away in my purse for a surprise treat at a later date.

The night after our lunch, I found myself laying in bed thinking about those caramels. I'd already eaten the extra one in my purse (it barely made it back to the office) and proceeded to spend the rest of the night plotting my next trip, wondering if I would be able to slip away during lunch the next day for a repeat meal.


Morning light made me realize just how impractical it would be to pay for an entire lunch simply for a handful of complimentary caramels, so I decided that I would just have to make them myself. Cobbling together various classic caramel recipes, I tweaked and stirred until I finally fell upon the one that seemed closest to the buttery, chewy treats I remembered.

This recipe is actually quite easy. You need a candy thermometer, of course, but other than that, it's really just a bit of occasional stirring and patience. The hard part comes at the end, once the caramel has been cooled and cut into (semi) uniform pieces; that's when you'll have to sit and wrap each individual piece for hours.

I made mine early on a Sunday evening and then proceeded to sit on the couch cutting and wrapping caramels straight through an episode of Rubicon (my new favorite), then Mad Men, then immediate encore of Mad Men, followed by the first half of the encore of Rubicon. Yes. That would be 3.5 hours of wrapping caramels.


It's easy, but tedious. Fortunately, you're guaranteed to consume every third piece (at least during the first hour) so you'll have enough of a sugar rush to get you through the whole batch. If possible, I recommend recruiting the aid of a friend or child (preferably not a diabetic one).

Another tip: cutting the caramel into pieces might seem impossible (and sticky) but I found that it's really easy if you use a pair of clean kitchen shears. Just snip and wrap! And don't worry if the pieces aren't all uniform; that, I think, is part of the charm.


****
New to Always Order Dessert? Consider subscribing to my RSS feed, follow me on Twitter, become a fan on Facebook, or sign up to receive my once-a-week e-mail updates by filling in your address in the box on the right.

And if you ever need any entertaining or cooking advice, please don't hesitate to
e-mail me.
Thanks for reading!

Salted Honey Butter Caramels
Makes about 60-75 individual pieces

Ingredients
6 tablespoons unsalted butter (plus a bit more for greasing the pan)
1.5 cups heavy cream
2 cups granulated white sugar
3/4 cup honey
2 heaping teaspoons Kosher salt

Special equipment: 9" square baking pan, candy thermometer, heavy pot or saucepan

1. Butter a 9" square baking pan well and set aside. Combine the butter, cream, sugar, honey, and salt in a heavy saucepan or skillet (I used my Dutch oven) and place of medium heat. Stir gently until the butter melts and sugar dissolves.

2. Let the sugar continue to cook, stirring it every so often (doesn't have to be continuous), until it darkens to a golden brown and the thermometer reads 245 degrees F. (This will take about 30-45 minutes or so, possibly longer depending on your stove and the size/type of pot you use; note that the temperature MUST reach 245 before you can pour the caramel out of the pot or it won't set)

3. Gently pour the caramel into the prepared pan and let cool at room temperature for about an hour or two until it is set and cool to the touch.

4. Use a spatula to release the sides of the caramel (it will be buttery) and flip out the slab of candy onto a cookie sheet. Use clean kitchen shears or a sharp knife to cut into small rectangles or cubes. Wrap each piece in parchment paper or wax paper.

Store at room temperature for up to a week or two (if they last that long), although I've found that these are best eaten within 2-3 days as temperature fluctuations in your home can make them a bit grainy. Note that these can also be refrigerated for weeks at a time.
0

Bay Scallops in Brown Butter Cream Sauce

There are some nights when I come home from work feeling so exhausted that I tell Eugene, "I'm tired. I don't think I'm going to cook tonight." He'll nod and simply say, "OK, do you want to order something? Should I just make a sandwich?" No," I reply as I get up and walk into the kitchen. "I'll figure something out."

A little while later, I'll walk back out holding a couple plates that look like the one above. Eugene will roll his eyes and say, "Man...I'm SO glad you didn't cook tonight."

I realize that this sounds kind of ridiculous, but the point is just to show that there are dishes--even ones as pretty-looking as this one--that are pretty pain-free to make. Even (or especially!) on those days when you feel like you just don't have it in you. The trick is just making sure you have the right ingredients on hand.

Last week, I did an interview for a magazine during which I confessed to the reporter that one of my secrets for getting weekday meals on the table quickly is frozen seafood. Not, mind you, those oddly rectangular pieces of pre-flavored fish "filets", but rather the large bags of frozen raw shrimp or bay scallops that you can usually find at warehouse stores like BJs or Costco.

I like to keep a bag or two of these in the freezer so that on those evenings when I get home late from work, I can still quickly throw together a satisfying meal with very little effort. I like to think of them as my kind of convenient foods. Not processed and loaded with scary unfamiliar ingredients, but rather foods that even in their natural state are simply and naturally convenient.

The beauty of frozen shrimp or bay scallops is that you can always keep them on hand, but you don't ever have to plan ahead. While most other meats and fish freeze are wonderful to have in the freezer, they still require a bit of advanced planning. I, for example, ALWAYS forget to pull the steaks or pork chops out of the freezer the morning (or night) before I want to cook them. Often this will happen to me 2-3 days in a row before I manage to get my act together. I think it must be hereditary; while we were growing up, my mother regularly would call home from the office asking someone to "please take the chicken out of the freezer," so that it would be defrosted by the time she got home from work.

Hence these wonderful little bay scallops! Which don't need to be thawed, and which cook so quickly that they can literally just be stirred into a simmering sauce or hot pan while still frozen.

I came up with this particular recipe on a night when both groceries and patience were in dangerously low supply. A stick of butter, simmered on the stove until nutty and brown became the basis for the sauce. A few herbs, a splash of cream, and a few generous handfuls of the sweet little bay scallops where all I needed to round out the dish, which I served on a bed of whole wheat spaghetti (because I firmly believe the whole wheat cancels out all that naughty butter and cream).

You know I love when you play around with my recipes and make them your own, so if you're not a scallop fan, remember that you can easily substitute shrimp, or even small pieces of chicken (adjust the cooking time to make sure the latter is fully cooked if you go that route). The sauce is also lovely on seared bay scallops. Heck! It's actually even good without any kind of meat or fish over the pasta.


****
New to Always Order Dessert? Consider subscribing to my RSS feed, follow me on Twitter, become a fan on Facebook, or sign up to receive my once-a-week e-mail updates by filling in your address in the box on the right. And if you ever need any entertaining or cooking advice, please don't hesitate to e-mail me. Thanks for reading!


Bay Scallops in Brown Butter Cream Sauce
Serves 2, can be doubled

Ingredients
1 stick (1/2 cup) butter
12 oz dry whole wheat linguine or spaghetti
2 garlic cloves, smashed
3/4 cup heavy cream or half & half
1/4 cup sherry or white wine
1 lb frozen or fresh bay scallops
1 cup parsley, roughly chopped
Kosher salt
freshly ground black pepper


Place a large pot of water to boil.

Place stick of butter in small saucepan over medium heat. Let butter cook until golden brown with a nutty aroma. Typically at this point I would ask you to strain the butter so that the solids are removed, leaving you with a nice clear browned butter. I find, however, that for a quick meal like this, it's perfectly OK to just pour off the top 3/4 of the butter into the skillet you'll be cooking the sauce in; the solids will have sunk to the bottom anyway and won't get in the final dish.

Season the boiling water and add the whole wheat pasta. Cook for 7-8 minutes or until al dente as directed.

While the pasta cooks, in a separate large skillet over medium heat, pour in the top 3/4 of the brown butter as described above, and add the garlic cloves. Let cook for two minutes before adding the 3/4 cup of cream and the 1/4 cup of sherry.

Stir together and bring up to a simmer. Add the bay scallops and stir until well coated in the sauce. Stir in the chopped parsley and season with salt and black pepper.

Let cook for 2-3 more minutes or until the bay scallops are all cooked (they will look opaque and crackle a bit at the sides). Serve the scallops and accompanying sauce immediately over the cooked and drained pasta.
0
Back to Top