Showing posts with label Caramel. Show all posts

Pecan Dulce de Leche Banana Bread

It felt brisk and chilly when I woke up this morning. While I admit that I have mixed feelings about this since summer is my one true love, there are a few things I appreciate about the new season.

Chief among those is the fact that cooler days are wonderful for baking cozy and decadent desserts like this Pecan Dulce de Leche Banana Bread.

A dense, moist banana bread topped with a shower of chopped pecans and plenty of dulce de leche caramel drizzled and swirled throughout seems like a nice way to start out this new season.

The basic bread is just as simple as any other banana bread: you mash and stir, but then you get a little wild with the toppings.

Chopped pecans--which I recommend actually chopping by hand for the best texture--form a gorgeous crust on the top of the bread. I prefer this to baking them into the batter because then you get that contrast of soft cake and crunchy nuts on top.

And then there is the dulce de leche, which is the best part. You can make it homemade if you prefer, but I actually just used a jarred one I got at the grocery store (it's usually near the condensed milk and other baking supplies). The trick here is to layer it into the cake. You want some mixed into the batter, then some swirled in on top. Then a bit drizzled on with the pecans just before baking, and then...when it comes out of the oven?

That's when you go wild.

Drizzle it on all over. Let it drip and ooze down the sides. Get messy with it!

(You can even add a bit more to each slice as you serve it.)

 This isn't an austere, breakfast-like banana bread. This is rich, gooey, decadent, go-to-town-and-enjoy-it kind of banana bread.

(Which, does NOT mean that you can't have it for breakfast, mind you!)

****
Loved this recipe? Here are a few other banana bread recipes you might like:


And let's connect so you can find out the next time I post! Follow me on Twitter, Instagram, or Pinterest, become a fan on Facebook, or sign up to receive my once-a-week e-mail updates.

Thanks so much for reading!

Pecan Dulce de Leche Banana Bread
Makes 1 loaf (about 8 servings)

Ingredients
3 ripe bananas, peeled
1/2 cup granulated sugar
4 tablespoons butter, melted
1 large egg
1 1/2 cups dulce de leche (homemade or store-bought)
2 teaspoons vanilla extract
1 1/2 cups all-purpose flour
1 teaspoon kosher salt + more for garnish
1 teaspoon baking soda
2 cups pecans, roughly chopped


Directions 
Preheat oven to 350 degrees and grease or line a 4x8” loaf pan and set aside.

In a mixing bowl or the base of a mixer, beat together the bananas, sugar, melted butter, egg, vanilla, and 1/2 cup of the dulce de leche (don’t use all of it!). Add the flour, baking soda, an salt, and stir just until evenly combined.

Pour into your prepared baking dish, and drizzle in about 1/4 cup of the remaining dulce de leche. Add the pecans and press in slightly with your hands, then drizzle on another 1/4 cup of dulce de leche (again…don’t use it all!)

Bake about 1 hour, or until a tester inserted in center comes out clean. Remove from loaf pan and let cool completely. Drizzle with all the remaining dulce de leche just before serving.

0

Cinnamon Dulce de Leche & Poached Pear Chopped Bread

One of the things I didn't mention last week when I told you about the Pie Party and my Braised Pork Mofongo Tart, is that I initially meant to make two pies to bring to the party--my savory pie, and a second sweet banoffee pie with dulce de leche, bananas, and whipped cream. I made the dulce de leche the night before, but ended up running out of time and never finished the pie.

So you know what that means...

Extra dulce de leche!

I decided I wanted to use the caramel in some kind of bread. I was thinking a monkey bread, but while browsing around on Tastespotting I came across a gorgeous photo of a Caramel Apple Chopped Bread by the blogger Seasons & Suppers.

The photo pulled me in, but I was particularly intrigued by the method of "chopping" the dough after stuffing it--basically attacking it with a knife and hacking it into multiple small chunks that are then tossed into the loaf pan and allowed to bake into themselves.

So exciting and a little bit crazy! Totally my kind of cooking...

Especially when the result is a gorgeous loaf with a craggy top, just perfect for slicing or (my favorite) pulling apart in warm, delicious nuggets.

I was sold! I had to try the bread right away and decided to give it a shot with my dulce de leche and poached pears. I changed the recipe around a bit, too, using warm milk to bloom my yeast and adding sugar and cinnamon to make the bread itself a bit sweet.

The PERFECT breakfast bread recipe!

I took photos of the process to give you a better idea of how it goes.

You start off pretty normally by letting the dough rise. While the dough is rising, take the time to poach your pears and make your dulce de leche (or just use your favorite storebought caramel sauce--I LOVE this goat's milk caramel from Fat Toad Farm).

You can then roll out the dough and top it with the dulce de leche and diced poached pears. (It helps to warm it up the dulce de leche a bit for easier drizzling.)

And fold the dough over once.

Then twice.

Then again into a chubby little package.

And now you CHOP!!! This part gets a little messy.

A LOT messy.

Now toss all those lovely chunks of dough and caramel and pears into your parchment-lined loaf pans. Only fill them about 2/3 of the way full so the bread has room to rise.

You can make two large loaves or four mini ones. I made one large loaf and two mini ones. (We ate the mini ones almost immediately after they came out of the oven.) Let the dough rise until it reaches the top, then brush with an egg wash and bake about 45 minutes.

Let it cool in the pan a bit before pulling it out.

This is best served just a little bit warm, but it's also lovely sliced and just a little bit toasted. (I recommend salted butter.) I love how the poached pears become all soft and jammy, and the dulce de leche adds little bits of toffee-like sweetness throughout.

I'm going to be making this again very VERY soon. (I think I'll be using chocolate next time...)


****
New to Always Order Dessert? Consider subscribing to my newsletter, follow me on Twitter, become a fan on Facebook, or sign up to receive my once-a-week e-mail updates by filling in your address in the box on the right.


Cinnamon Dulce de Leche & Poached Pear Chopped Bread Recipe
Adapted from a recipe by Seasons & Suppers

Ingredients

For the dough:
2 1/4 teaspoons active dry yeast (1 packet)
1 cup warm milk (120° F)
4 tablespoons granulated sugar
3 1/4 cups all purpose flour
1/3 cup butter, melted
2 rounded tablespoons ground cinnamon
2 teaspoons kosher salt

For the filling
3-4 ripe pears, diced (about two cups)
3 cups water
1 1/2 cups granulated sugar
2 cinnamon sticks
1 vanilla bean, split
juice and zest from 1 large lemon
1 1/2 cups dulce de leche (click here for a homemade recipe or use your favorite store-bought brand)

1 egg
2 tablespoons water

2 9x5" loaf pans (or 4 mini loaf pans)
Parchment paper

Directions
Make the dough: Whisk together the yeast, milk, and sugar in the base of your electric mixer and let sit 5 minutes. Add the flour, cinnamon, melted butter, and salt and combine with the dough hook. Let knead for 5 minutes until the dough is smooth and not sticky. If the dough is too dry, add another splash or two of milk. If it is too wet, sprinkle in a little bit more flour. Form the dough into a ball and place in a greased bowl. Cover with plastic wrap or a clean towel and let rise 1 hour or until doubled in size.

While the dough rises, combine the pears, water, sugar, cinnamon sticks, vanilla, and lemon juice and zest in a large saucepan over medium-high heat. Bring to a boil and then lower the heat let simmer 20 minutes, or until the pears are tender. Turn off heat and let pears cool in the poaching liquid.

Once the dough completes its first rise, dust flour on the counter and turn out the dough. Roll into a large rectangle, about 1/2" thick. Spread the dulce de leche (warm it slightly for easier spreading) over the surface of the dough. Remove the pears from the poaching liquid (Save the liquid! It's fantastic for cocktails!) and sprinkle over the dulce de leche.

Fold the bottom half of the dough towards the center, then fold the top over the bottom two folds so that it forms one long rectangle. Fold in thirds again from left to right.

Preheat oven to 350 degrees. Spray or grease the baking pans and line each with a piece of parchment paper that overhangs on the sides (so that you can pull the bread out easily once it's baked).

Use a pastry cutter or a large chef's knife to chop the folded dough haphazardly into chunks (yes, this part will be messy!). Scoop the chunks of dough and pear into the prepared loaf pans, filling them each up to 2/3 of the way. Scrape up any remaining sauce and pears and pour them into the pans. Cover each pan lightly with plastic wrap and let rise 30 to 40 minutes, or until the dough rises above the top of the pan. Whisk together the egg and water and brush each loaf then place in the oven to bake for 45 minutes. Check the bread at 25 minutes and loosely tent each loaf with a piece of foil to prevent burning on the top edges.

Let the loaf cool in the pan for 15 minutes, then gently pull out using the parchment paper, and let cool completely. If desired, serve drizzled with a bit more warm dulce de leche.
0

Chocolate, Pecan, and Butterscotch Topped Cheesecake for Fox News iMag

As I mentioned last week, I recently taped a few holiday dessert segments for Fox News iMag showing some fun and easy ways to personalized store-bought treats (the segments were done in conjunction with Sara Lee Desserts). The second of these segments has just been posted so I'm sharing it with you today!

Of the three recipes I did that day, this one is my favorite. I took a plain cheesecake and created a delicious chocolate ganache and homemade butterscotch topping--basically a twist on the classic "turtle" dessert. When I initially got the details for this shoot, the recipe idea Sara Lee sent over called for jarred chocolate and caramel sauces, but I was like "Oh no, that's not my thing" and asked if it would be OK to just make the sauces from scratch since they only take a few minutes each to make and taste SO much better than anything you can find at the grocery store. Thankfully, they agreed!

These sauces make a fabulous topping for any type of cake, but can also be used to top ice cream or yogurt, as a dip for fruit, and to fill cookies. Both keep really well in the fridge for a couple weeks (if you can keep your spoon away from the jar long enough!).

Click below to watch the video.


To get the written recipe, visit iMag's Food Page
0

Roasted Pears with Maple Syrup Caramel

The other day, I found myself in possession of a large amount of very ripe pears. These were the pears that were leftover from the women's retreat and which had traveled in a basket in the back of a bus from Vermont down to New York City, sustaining a few bumps and bruises along the way.

When I got home, I placed all the pears (about 8 of them) in a large zipped bag and popped them in the fridge to both delay the ripening and keep the fruit flies away from the juicy gashes it had picked up in travel.

My plan initially had been to make a pie or tart of some kind, but the truth is that, much to Eugene's chagrin, I hate making pie. I don't enjoy eating it (I'm a cake girl, all the way) and so I have little desire to invest the time in making the crust. I'd much rather just slice things up and throw them in the oven.

So that's what I did.

I quartered and cored the pears (didn't even bother peeling them, as usual) and nestled them all into a baking pan. In a separate bowl, I wisked together maple syrup, vanilla extract, melted butter, brown sugar, cinnamon, and kosher salt, and then drizzled it all over the pears.

This went into an oven where I let them roast until tender. The maple syrup dressing created a kind of gooey caramel laced with just a hint of cinnamon and a touch of salt; absolutely perfect with the roasted pears!

Honestly, there is just something incredible and positively ambrosial that happens when pears combine with heat. I know some may disagree, but I think it's leagues beyond baked apples or really just about any other fruit.

I ate a few of these right out of the pan, then tossed the rest over a few scoops of tangy Greek yogurt. I had to stop myself from finishing the entire batch so that I could share with Eugene, who was also a fan. Later that night, I went back into the kitchen and attacked the pear-and-cinnamon scented caramel sauce that remained on the pan with a spoon. It had cooled and turned into a chewy, buttery, glorious treat practically worthy of its own post.

The next day while watching television Eugene randomly looked up and asked, "Any plans to roast some more pears today?"

Always the sign of a recipe well done.

*****
Did you enjoy this post? Be sure to share it with your friends on Facebook, Stumble, and Twitter! Consider subscribing to my RSS feed, follow me on Twitter (@nandita), become a fan on Facebook, or sign up to receive my once-a-week e-mail updates by filling in your address in the box on the right.


Roasted Pears with Maple Syrup Caramel
Serves 6

Ingredients
6 very ripe pears, quartered or cut into eighths (don't peel)
1/2 cup pure maple syrup
1/2 cup butter, melted
Juice of 1 lemon (about 2 tablespoons)
1 tablespoon pure vanilla extract
1 rounded teaspoon ground cinnamon
1 teaspoon kosher salt

Directions
Preheat oven to 400 degrees. Butter an 8" baking pan.

Arrange the quartered pears skin-side up on the buttered baking pan. In a separate bowl, whisk together the maple syrup, melted butter, lemon juice, vanilla, cinnamon, and kosher salt. Pour over the pears.

Place in the oven and roast for about 20 minutes. Remove pan from oven, use a spoon or tongs to flip the pears, then return to the oven for another 10 minutes.

Serve immediately while still hot over yogurt or vanilla ice cream. Also wonderful with cake or alongside cheese.

0

Banoffee Pie

The first time I heard the word "banoffee" was in the movie Love Actually, in the scene when Kiera Knightly's character Juliet shows up at her new husband's best friend's house in the hopes of getting her hands on the video he shot during their wedding. She thinks he hates her, because he's always been rude and standoffish, and so brings along banoffee pie as a bribe. There is some joking about the pie being a terrible choice, and it's revealed that it's not hate he feels, but rather a deep and hopelessly unrequited love.


Then he runs off, but not before he zippers his sweater with great force while Dido's voice soars in the background.


No exaggeration, this is one of my top 5 all time favorite movie scenes. (Watch the full scene here when you're done reading this post. The zipper bit starts at 5:10)

Not because of the tension and storyline, but because of the purpose with which he zippers that sweater, and because of the way the zippering was so perfectly timed with the soaring bit in the Dido song. And also because of the way the random Christmas shopper is frightened when he gives a frustrated jump a few seconds after zippering his sweater.


And I love it even MORE since my trip to Scotland because I now know that banoffee pie, which along with the zipper played such an important role in this love story, is delicious.

Juliet, you don't have terrible taste in pie at all!

Also spelled "banoffi," Banoffee (so fun to say!) is a clever portmanteau (also fun to say!) made up of the words "banana" and "toffee."

The pie itself is like a much better (and British!) version of banana cream pie. A slightly salty shortbread tart crust is filled with condensed milk caramel (aka dulce de leche) then topped off with slices of fresh bananas and finished off with a cloud of lightly sweetened whipped cream. There are lots of versions, of course, some with chocolate syrup swirled in or cocoa or chocolate shavings dusted all over the top. Some forgo the shortbread crust for one made of butter and crushed biscuits.

My favorite version was the one served at afternoon tea on our second to last day in Edinburgh; it was a mini version in a tiny sweet tart filled with chocolate ganache and a fat disc of fresh banana with a thick caramel piped over the top. It was perfection! See:


I read up a bit on this pie and found that it was invented in the early 70s at a restaurant in East Sussex, England, called "The Hungry Monk" by chef Ian Dowding and owner Nigel Mackenzie based on an American pie, which sounds pretty good in its own right, made of a layer of caramel topped with coffee-flavored whipped cream. The pie grew in popularity and can now be found just about anywhere in the UK.

I got back from our Scottish vacation with a fierce craving for the things I'd eaten while away and a long list of dishes I plan to recreate. This pie was at the top of my list and so here it is.

The toffee in the pie is a simple caramel, known more commonly here as dulce de leche. It's made by cooking condensed milk slowly until it thickens into a silky, almost custardy, caramel cream. There are several methods for doing this, most involving water baths or double boilers, but I chose to do it the "dangerous" way, by boiling a can of condensed milk in a large pot of water for two hours. It's "dangerous" because if the water level drops, the can can explode causing severe burns, property damage, and a very sticky mess. But as long as the water in the pot is kept at least a few inches higher than the can (by adding more hot water every 15 minutes or so) it's just fine. I've included both this and a somewhat saner safer way, below.

For my crust, I made a basic shortbread tart crust (recipe below) and baked it until golden. Then I filled it up with the still hot caramel (that fuzzy paw in the photo is my hand wrapped in a washcloth as the can was very hot and my oven mitts were in the wash).


I really liked the addition of chocolate to the banoffee (even though it isn't part of the original recipe), so I swirled in a little bit of melted ganache I had in the fridge).


I then sliced two bananas, then ate half of one dipped in caramel while layering the rest into the plate, and topped it all off with a huge pile of freshly whipped and very lightly sweetened whipped cream.


I found that the pie kept really well in the fridge for the 3 days it lasted in our home. It's a fairly hardy crust so it really holds the pie well and the flavors inside just started to meld together beautifully.

I plan on playing around with these flavors again to make more delicious things. (I really want to recreate those tiny tarts we ate at the tea house.)


*****
Did you enjoy this post? Be sure to share it with your friends on Facebook and Twitter! Consider subscribing to my RSS feed, follow me on Twitter (@nandita), become a fan on Facebook, or sign up to receive my once-a-week e-mail updates by filling in your address in the box on the right. I also offer custom menu planning services, group cooking classes, and offer a variety of culinary workshops in the NYC area. Click here to find out more!

And if you ever need any entertaining or cooking advice, please don't hesitate to
e-mail me.
Thanks for reading!


Banoffee Pie Recipe
Makes one 9" pie/tart

Print this Recipe

Ingredients
1 can condensed milk
1 cup all purpose flour
1/3 cup + 2 tablespoons confectioners sugar, divided
Pinch of kosher salt
1 teaspoon cinnamon
1/2 cup cold butter, cut into 1/2" pieces
1/4 cup + 1/2 cup heavy cream, divided
1/4 cup chocolate chips
2 ripe bananas
Cocoa powder, for dusting

Directions
First make the caramel. (Choose your preferred method)

Method #1 (dangerous way): Fill a large and deep pop with water and place the can of condensed milk at the bottom. Make sure the water covers the can by at least 3 inches (preferable more). Bring the water to a boil, then lower to a rapid simmer. Let boil for 2 hours, adding more water every 15-20 minutes to keep the water level at least 3 inches above the can.

Method #2 (safe way): Preheat oven to 425 degrees. Pour one can of sweetened condensed milk into a shallow baking dish. Set the dish within a larger pan, such as a roasting pan, and add hot water until it reaches halfway up the sides of the baking dish. Cover the condensed milk dish tightly with foil and bake for about 1 hour, adding more water to the pan as needed. Once caramel is browned, remove from oven, whisk and let cool.


While the caramel cooks, prepare the crust. Preheat oven to 425 degrees (conveniently the same as the caramel oven temp!) Combine the flour, sugar, salt, and butter in a large bowl and use your fingers or a pastry cutter to cut the butter into the flour until it resembles coarse crumbs. Press the dough into a 9" tart pan, pushing it into the bottoms and sides. Use a fork to poke holes in the bottom of the tart and place in freezer to chill for 15 minutes (this will prevent shrinking). Bake for about 20 minutes or until golden brown. Let cool at room temperature.

Once the caramel is ready, pour it into the baked tart crust and spread evenly (you may not need to use the whole can.

Make the chocolate ganache. Heat 1/4 cup of cream and pour it over the 1/4 cup of chocolate chips. Stir until smooth and then drizzle over the caramel in the crust, using a spoon to swirl it in. (You may leave a bit to drizzle over the pie at the end.)


Slice the banana into 1" pieces and spread on top of the caramel and chocolate, pressing in slightly.


Whip the remaining heavy cream and 2 tablespoons confectioner's sugar until it forms stiff peaks. Spread over the pie and dust with cocoa or drizzle on remaining chocolate. Serve immediately or let chill. Store leftovers wrapped in plastic wrap in the refrigerator. 


0

Salted Honey Butter Caramels

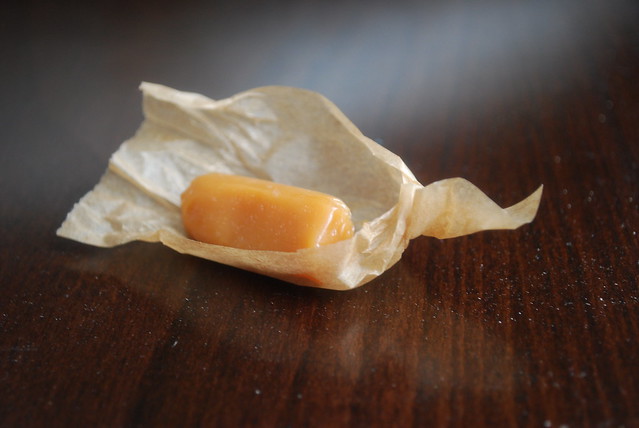
A couple weeks ago, a few of the girls I work with and I took out our (now-former) coworker Dana for a good-bye lunch at nearby Landmarc restaurant. One of my favorite spots in the city, the food at Landmarc is reliably delicious, but even more so are the generous handfuls of homemade butter caramels that come out complimentary along with the check. Soft, chewy, with just a slight tinge of burnt sugar, these caramels are absolutely addictive. I usually gobble up a couple right at the table and tuck the extras away in my purse for a surprise treat at a later date.

The night after our lunch, I found myself laying in bed thinking about those caramels. I'd already eaten the extra one in my purse (it barely made it back to the office) and proceeded to spend the rest of the night plotting my next trip, wondering if I would be able to slip away during lunch the next day for a repeat meal.


Morning light made me realize just how impractical it would be to pay for an entire lunch simply for a handful of complimentary caramels, so I decided that I would just have to make them myself. Cobbling together various classic caramel recipes, I tweaked and stirred until I finally fell upon the one that seemed closest to the buttery, chewy treats I remembered.

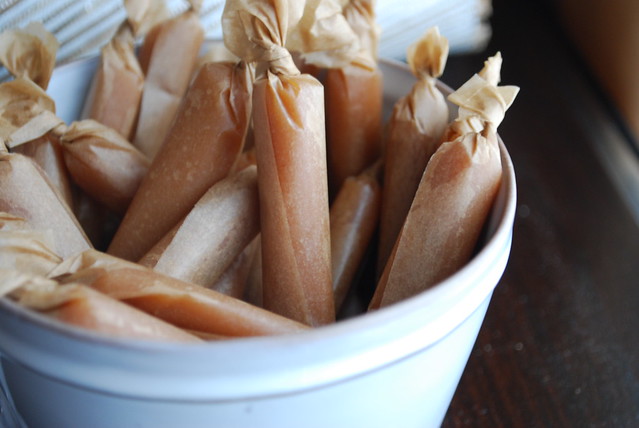
This recipe is actually quite easy. You need a candy thermometer, of course, but other than that, it's really just a bit of occasional stirring and patience. The hard part comes at the end, once the caramel has been cooled and cut into (semi) uniform pieces; that's when you'll have to sit and wrap each individual piece for hours.

I made mine early on a Sunday evening and then proceeded to sit on the couch cutting and wrapping caramels straight through an episode of Rubicon (my new favorite), then Mad Men, then immediate encore of Mad Men, followed by the first half of the encore of Rubicon. Yes. That would be 3.5 hours of wrapping caramels.


It's easy, but tedious. Fortunately, you're guaranteed to consume every third piece (at least during the first hour) so you'll have enough of a sugar rush to get you through the whole batch. If possible, I recommend recruiting the aid of a friend or child (preferably not a diabetic one).

Another tip: cutting the caramel into pieces might seem impossible (and sticky) but I found that it's really easy if you use a pair of clean kitchen shears. Just snip and wrap! And don't worry if the pieces aren't all uniform; that, I think, is part of the charm.


****
New to Always Order Dessert? Consider subscribing to my RSS feed, follow me on Twitter, become a fan on Facebook, or sign up to receive my once-a-week e-mail updates by filling in your address in the box on the right.

And if you ever need any entertaining or cooking advice, please don't hesitate to
e-mail me.
Thanks for reading!

Salted Honey Butter Caramels
Makes about 60-75 individual pieces

Ingredients
6 tablespoons unsalted butter (plus a bit more for greasing the pan)
1.5 cups heavy cream
2 cups granulated white sugar
3/4 cup honey
2 heaping teaspoons Kosher salt

Special equipment: 9" square baking pan, candy thermometer, heavy pot or saucepan

1. Butter a 9" square baking pan well and set aside. Combine the butter, cream, sugar, honey, and salt in a heavy saucepan or skillet (I used my Dutch oven) and place of medium heat. Stir gently until the butter melts and sugar dissolves.

2. Let the sugar continue to cook, stirring it every so often (doesn't have to be continuous), until it darkens to a golden brown and the thermometer reads 245 degrees F. (This will take about 30-45 minutes or so, possibly longer depending on your stove and the size/type of pot you use; note that the temperature MUST reach 245 before you can pour the caramel out of the pot or it won't set)

3. Gently pour the caramel into the prepared pan and let cool at room temperature for about an hour or two until it is set and cool to the touch.

4. Use a spatula to release the sides of the caramel (it will be buttery) and flip out the slab of candy onto a cookie sheet. Use clean kitchen shears or a sharp knife to cut into small rectangles or cubes. Wrap each piece in parchment paper or wax paper.
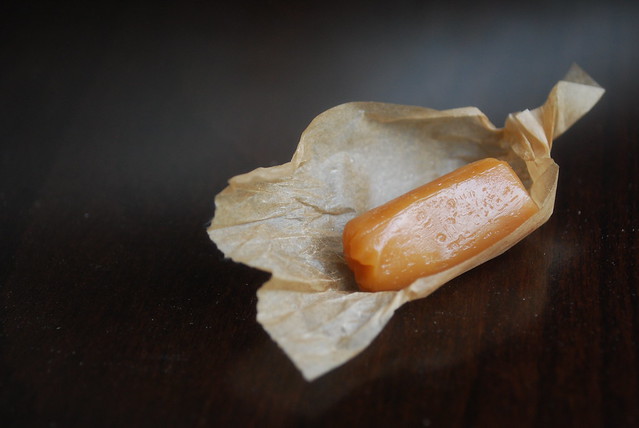
Store at room temperature for up to a week or two (if they last that long), although I've found that these are best eaten within 2-3 days as temperature fluctuations in your home can make them a bit grainy. Note that these can also be refrigerated for weeks at a time.
0
Back to Top