
Showing posts with label Low Carb. Show all posts
Showing posts with label Low Carb. Show all posts
April 9, 2019
Flourless Keto Microwave Lemon Pudding Cake
July 12, 2017
Warm Brussels Sprouts Caesar Salad with Chicken and Crispy Bacon "Croutons"

April 10, 2017
Flourless Orange Cauliflower Cake

This flourless orange cauliflower cake was one of the recipes I featured on a TV cooking segment about cauliflower recipes that I did on PIX11 Morning News here in NYC earlier this month. On the show, I covered everything from Cauliflower Fried Rice and Cauliflower Buffalo Wings, to this sweet cake.
Needless to say, the cake was the hit.
March 28, 2017
Low-Carb Cauliflower Fried “Rice”

March 25, 2016
Keto Mint Chip Protein Shake

That was the inspiration behind this Low Carb Mint Chip Protein Shake. I've seen versions of it around for a while (especially earlier this month around St. Patrick's Day), and have been meaning to try my hand at it.
April 8, 2014
Raw Zucchini Noodles with Lemon-Parmesan Dressing

A spiralizer, which is used to make noodles and long ribbons out of vegetables and fruit.
I'd had it on my wish list for a while, and with the rapid succession of Christmas, our anniversary, my birthday, and Valentine's Day, I was convinced the spiralizer would appear in my hands at some point.
But, strangely, it did not!

Well...because there is no quicker way to get me to do something, than to tell me "no," I pulled it up on Amazon, hit the one-click button, and had it out of the box and ready to use within 2 days!

I LOVE this little machine! It's super lightweight and easy to use--simply insert whatever vegetable you'd like, turn the crank et voilà! Fresh healthy low-carb noodles!

Even Eugene has turned into a believer, happily gobbling up giant bowls of veggie noodles with nary a complaint.
P.S. Want to get your own spiralizer? Click here for the one that I own, which is by the brand Paderno. It's just $33 on Amazon. FYI that this is an affiliate link, which means I'll get a few cents if you buy it...not enough to quit my day job, but hey...it all helps! :)
****
Love Always Order Dessert? Let's connect! Follow me on Twitter or Pinterest, become a fan on Facebook, or sign up to receive my once-a-week e-mail updates. And if you ever need any entertaining or cooking advice, please don't hesitate to e-mail me. Thanks for reading!
Raw Zucchini Noodles with Lemon-Parmesan Dressing
Serves 2
Ingredients
2 medium zucchini, ends trimmed
1 large lemon, juiced
2 tablespoons extra virgin olive oil
1/4 cup grated parmesan cheese
Kosher salt and black pepper, to taste
Directions
Pass both zucchini through your spiralizer according to manufacturer directions (if you don't have a spiralizer, you can also julienne or slice the zucchini by hand).
In a large bowl, whisk together lemon and olive oil.
Add the zucchini and toss to coat. Top with the cheese, and toss again. Season to taste with kosher salt and black pepper.
Serve immediately, or within 24 hours (the zucchini will soften a bit as it sits in the lemon dressing).
April 3, 2014
Cauliflower Dirty Rice with Andouille Sausage (Paleo)

One of everyone's favorite dishes ended up being this Cauliflower Dirty "Rice" with Andoille Sausage.
The dish contains absolutely no grains, because the rice is actually made from cauliflower florets that have been ground up into fine little pieces that resemble rice or couscous.

It's a great way to enjoy a starchy-like dish if you're following a grain-free or low-carb diet.
This inspiration from this particular dish came from the sausage.
Whenever I'm up in Vermont, I buy a few packages of this delicious local pork sausage in a variety of flavors (generally chorizo and andouille) to use in my recipes. I wanted to feature the spicy andouille in something, and so the dirty rice was conceived!

The vegetables and spicy sausage cook together in a bit of broth, then are mixed with the cauliflower to create a filling savory dish.
(Another bonus is that, unlike real rice, which can be subpar on the second or third day--cauliflower rice reheats beautifully, so you can enjoy it all week long!)

Fun Stuff: Want to join me in Vermont next time? Click here to read about my upcoming culinary retreat this summer--and how YOU can snag a spot!
****
Love Always Order Dessert? Let's connect! Follow me on Twitter or Pinterest, become a fan on Facebook, or sign up to receive my once-a-week e-mail updates. And if you ever need any entertaining or cooking advice, please don't hesitate to e-mail me. Thanks for reading!
Cauliflower Dirty Rice with Andouille Sausage
A paleo recipe for cauliflower dirty rice with andouille sausage. A great low-carb and grain-free side dish or main course.
Prep time: 10 min
Cook time: 35 min
Total time: 45 min
Yield: 4-6 servings
Ingredients
Directions
- 1 head cauliflower, thick core removed and chopped into florets
- 1/2 Spanish onion, diced
- 2 tablespoons olive oil
- 3 garlic cloves, chopped
- 2 stalks celery, diced
- 1 bell pepper, diced
- 1 pound smoked andouille sausage, sliced
- 1 teaspoon kosher salt
- 1 teaspoon ground black pepper
- 1/4 teaspoon ground cayenne
- 1 tablespoon smoked spanish paprika (sweet)
- 1 teaspoon dried thyme
- 1 tablespoon dried oregano
- 2 cups chicken or vegetable broth
- 1/2 cup fresh parsley, chopped
- 1 bay leaf
1. Place 1/3 of the cauliflower florets in food processor with blade attached, and pulse until florets are finely ground about the size of cous cous. Pour ground cauliflower into large bowl, and repeat with rest of cauliflower, in batches. Set aside.
2. Heat 1 tablespoon oil in a medium skillet over medium heat, and add the onion. Saute until translucent, then add the garlic, celery, and peppers. Saute for 5 minutes, then add the sausage, and continue to cook for about 10 minutes, until the vegetables are tender and the sausage is browned.
3. Stir in the spices, seasoning, and broth, and add the bay leaf. Reduce heat to low, and let simmer 10 minutes, until the liquid is reduce by 3/4.
4. While the vegetables simmer, heat the rest of the oil over high heat in a second large skillet and add the cauliflower. Cook for 5 minutes, stirring occasionally until it is cooked, but still firm (no mushy cauliflower!).
5. Transfer cooked cauliflower to a large bowl, and add the vegetable and sausage mixture (minus the bay leaf!). Mix well to coat, stir in the parsley, and season with salt and pepper, to taste.
July 8, 2013
Strawberries & Cream Protein Powder Crumble

As much as I love to cook, there are some days when things are so bonkers that I barely have time for a proper meal. To get through those days, I used to make a point of stopping at the nearest Starbucks and picking up one of their banana chocolate protein shakes. They used to be called "Vivanno," although they don't call them that anymore, and they were good. REALLY good.
May 29, 2013
Savory Cucumber Herb Sangria

The reason? Sugar.
I've mentioned it before, but I much prefer to eat my carbs than drink them. Given the choice between cake and a sugary drink, I will always choose the cake.
Unfortunately, sangria doesn't give me much control in that respect. The recipes vary widely, but typically include ingredients like fruit juices, sugar sodas, simple syrups, sweet liqueurs or any combination of the above--all of which raise the sugar count of this fruity punch to levels beyond what I'm comfortable drinking.

And THAT was when I got the idea:
Wouldn't it be great to make a savory sangria inspired by spa water?
Crisp, dry white wine infused with herbs, citrus, and cucumber, with no sugar added. The drink would be refreshing and just as playful as sangria, but much healthier and lighter. A naturally low carb sangria.
It would even pair well with food!

The result is fresh, light, and just a little bit tart--perfect for summer!

****
Love Always Order Dessert? Let's connect! Follow me on Twitter or Pinterest, become a fan on Facebook, or sign up to receive my once-a-week e-mail updates. And if you ever need any entertaining or cooking advice, please don't hesitate to e-mail me. Thanks for reading!
Savory Cucumber Herb Sangria Recipe (No Sugar Added)
Serves 2-4
Ingredients
2 lemons, washed and sliced
3 limes, washed and sliced
1 large green cucumber, sliced
1 cup fresh mint leaves, washed and patted dry
1 cup fresh basil leaves, washed and patted dry
1 750ml bottle dry white wine
2 cups sparkling water
2 cups ice
Directions
Combine the sliced lemons, limes, cucumber, mint, and basil in a large pitcher. Use a wooden spoon to muddle slightly to release some of the juices and natural herb oils. Pour in the wine. Stir and chill about 20 minutes, letting the flavors meld. Stir again, then add ice and top off with sparkling water. Serve immediately.
January 22, 2013
Low Carb Flourless Clementine Almond Cake

Because it is good!
This whole clementine cake is a classic Sicilian recipe, which I learned about by way of the incredible Nigella Lawson. Much like my whole orange bundt cake, this cake is made using whole clementines that have been boiled until tender and slumpy, then pureed into a smooth, intoxicatingly flavored paste.
Eggs, ground almonds, baking powder, and (in the original) sugar are added, then the whole thing bakes up into a moist, slightly spongy, and incredibly fragrant cake.

Noting the lack of flour in this cake, I figured I could easily adjust it to be low-carb by replacing the sugar with a mix of erythritol and granulated Splenda. Erythritol is a naturally occurring sugar alcohol with a scale of 0 on the glycemic index (my favorite brand is Zero by Wholesome Sweeteners); this means it has the equivalent of no effect on your blood sugar levels. Wonderful for baking, it's best when paired with another sweetener in order to create a synergistic effect that is most pleasant in the final dish. (If you already have a preferred sweetener alternative you use for baking, feel free to use that instead--I'm sure it would be lovely with sucanat or coconut palm sugar, too; this is a very forgiving recipe as long as the volume stays about the same.)

While the cake baked, the aroma of citrus and almonds wafted out of the oven and filled our apartment like some kind of delicious, intoxicating room perfume. I spent the last few minutes of baking time dancing around in front of the oven as I impatiently waited for the timer to buzz.
The results were even better than I'd imagined. (Hence my aforementioned disciplinary measure.)

I absolutely agree.
This is a lovely everyday cake, best eaten straight out of hand while cuddled on the couch with a mug of something hot. And it is a stunning cake to serve company--particularly if you know your guests prefer subtle sweets.
I think it would also be a perfectly acceptable breakfast cake. As it contains no flour, it is also a lovely gluten-free cake recipe.
If you're not watching your sugar, you can of course stick to the original recipe; I share both options below.

****
New to Always Order Dessert? Consider subscribing to my RSS feed, follow me on Twitter, become a fan on Facebook, or sign up to receive my once-a-week e-mail updates by filling in your address in the box on the right. And if you ever need any entertaining or cooking advice, please don't hesitate to e-mail me. Thanks for reading!
Flourless Clementine Almond Cake Recipe
Adapted from a recipe by Nigella Lawson
Serves 10
Ingredients
4 clementines (about 13 oz)
6 large eggs
1/2 cup erythritol + 1/2 cup granulated Splenda OR 1 cup Swerve sweetener OR for a regular not-low-carb version, you can also use 1 cup granulated sugar
2 1/4 cups of ground almond meal (or 9oz of almonds finely ground)
2 teaspoons pure almond extract
1/2 teaspoon kosher salt
1 heaping teaspoon baking powder
Directions
Place the clementines in a pot and cover with water. Bring to a boil and let simmer 1 1/2 hours, until very tender. Remove from water, then chop and remove seeds. Add the remaining boiled clementine (everything but the pits) to a food processor or blender and puree until smooth.
Preheat oven to 350 degrees. Butter and line a springform baking pan (this is a sticky cake; you NEED a springform pan).
In a mixer with a whisk attachment, beat the eggs for 5 minutes until very light and frothy. Add the sweetener or sugar, clementine puree, ground almonds, almond extract, salt, and baking powder and beat again for 5 more minutes until very light. Pour into the prepared baking pan and bake 50 minutes to 1 hour or until set. Let cool in the pan, then unmold and serve. I sprinkled it with some powdered sugar before serving, but it's also lovely plain.
Nutritional Info:
Calories: 220
Fat: 16.3g
Protein: 10.4g
Carbs (using Swerve): 10g (total) and 6g (net)
Carbs (using Splenda): 13g (total) and 9g (net)
Fiber: 4g
May 5, 2012
Jalapeño Poppers with Bacon (Low Carb Recipe)

It's here in the US where Cinco de Mayo has become a holiday, and an opportunity to celebrate Mexican heritage (and food!).
All that to say that I feel entirely justified sharing these not-in-the-least-bit Mexican jalapeño poppers with you today.
Totally American and perhaps even just a little bit cheesy (both literally and figuratively!), they're still a great party food and will go perfectly with your favorite margarita (yet another slightly-Mexican thing that became bigger than the original when it hit the US--we just really like to run with things here).

Like all my entertaining recipes, these can be prepared several hours in advance and kept in the fridge until your guests arrive, and then simply baked for about 20 minutes. MUCH better than the high-maintenance fried recipes, which require you to hover over a fryer or pot of hot oil.
When you make these, I recommend that you either wear latex gloves OR coat your hands with some vegetable or olive oil before you start working with the peppers in order to keep from burning yourself with the natural oils of the pepper. And wash your hands well when you finish!

New to Always Order Dessert? Consider subscribing to my newsletter, follow me on Twitter, become a fan on Facebook, or sign up to receive my once-a-week e-mail updates by filling in your address in the box on the right. If you're in the NYC area, be sure to check out my NYC dinner party style cooking classes. Thanks for reading!
Low-Carb Jalapeño Poppers
Makes 24 poppers
Ingredients
1 8-oz package full-fat cream cheese, softened
1 tablespoon smoked Spanish paprika
12 jalapeño peppers
4 strips thick-cut bacon (preferably nitrate free), cut into 1/4" pieces
Directions
Preheat oven to 375 degrees. Whisk together the softened cream cheese and smoked paprika until smooth and evenly combined.
Cut each pepper in half lengthwise, and use a spoon to scoop out the center veins and seeds. Discard the seeds.
Fill the cavity in each jalapeño pepper half with a teaspoon or two of the cheese mixture and place cheese side-up on a baking sheet. Top each pepper with 3 or 4 pieces of the cut bacon.
Bake for 20-25 minutes, or until the bacon is crisp and the jalapeño peppers are fully roasted. Let cool 5 minutes before serving.
Tip: To protect your skin from the natural oils in the jalapeño pepper, which can burn or irritate, rub your hands with a tablespoon olive or vegetable oil as you would hand lotion before you begin working with the peppers.
April 13, 2012
Spinach & Goat Cheese Frittata Ham Cups


A note on the ham: You can use any kind of ham you'd like (from regular deli ham to prosciutto), but my FAVE for this and all ham-uses is this fancy ham I get from Schaller & Webber, called "Bauernschinken." It's very similar to prosciutto, but smokier and a little thicker--less delicate. If you're in NYC, they sell it on Fresh Direct, so definitely check it out. I order about a pound of it every time I do groceries (much to Eugene's chagrin--he calls it "that expensive ham."). Whatev.

Spinach & Goat Cheese Frittata Ham Cups
Makes 12 ham cups (about 4-6 servings)
Ingredients
12-14 slices ham
8 cups fresh baby spinach (or 2 cups frozen chopped spinach, thawed)
4oz goat cheese (chevre)
9 large eggs
1/2 teaspoon kosher salt
1/2 teaspoon freshly ground black pepper
1/4 cup heavy cream or milk
Directions
Preheat oven to 400 degrees. Spray or brush a muffin tin with oil, then line each cup with a slice of ham being sure to seal it up as much as possible (sometimes it helps to cut the ham slightly). Don't worry if there is overlap on the sides.
Combine fresh spinach with a few tablespoons of water in a large covered pot over medium heat. Let steam a minute or two, or until the spinach is completely wilted (skip this step if using frozen spinach). While the spinach wilts, whisk together the 9 eggs in a large bowl. Drain spinach & squeeze off excess liquid, then add to the eggs.
Crumble the goat cheese into the spinach and egg mixture, then add the salt, pepper, and cream. Stir until combined, then divide the mixture into the 12 ham-lined cups, filling all the way to the top.
Bake for approximately 20 minutes, or until the eggs are puffed and slightly golden on top. Remove from oven and use a fork and knife to carefully remove each egg cup from the muffin tin. Serve immediately, or let chill and serve as a cold dish.
Leftover egg cups will keep well for 3-5 days when wrapped individually and refrigerated.
November 2, 2011
Cauliflower and Butternut Squash Gratin

We went there to represent Good Commons at Edible Escapes, a food and travel fair hosted by Edible Manhattan magazine.

Since there were so many goodies on offer, we took turns manning the table to go check out the other treats. One of my favorites was a creamy cauliflower gratin served by the folks representing Organic Valley dairy. In fact, the gratin was so good, that I found myself craving it for days after.

I gave it a shot and was pleased to find that it worked beautifully!
Even my butternut squash-hating husband loved the results!

Cauliflower and Butternut Squash Gratin
Ingredients
1 3lb head cauliflower, cut into florets (cut stems into smaller pieces and include them, too)
1 1lb butternut squash, peeled and cut into cubes (about 3 cups)
Kosher salt
1/2 cup heavy cream
1 teaspoon ground mustard powder
1 teaspoon smoked Spanish paprika
1/4 teaspoon cayenne pepper (more if you'd like additional heat)
Freshly ground black pepper
1/2 pound extra-sharp cheddar cheese, grated (can also use gruyere, fontina, or other semi-soft cheese)
1/2 cup panko bread crumbs (or regular plain bread crumbs)
1/2 cup freshly grated parmesan cheese
2 tablespoons butter, melted
Directions
Preheat oven to 375 degrees.
Bring a large pot of salted water to boil and add the cauliflower and butternut squash. Let boil for about 6 minutes or until the squash and cauliflower are fork tender. Drain and divide the squash and cauliflower (you can also cook them separately, but this saves water).
Spread the cauliflower out on a baking sheet, pat dry, and place in the oven for 2-3 minutes, just to remove some of the excess moisture. Remove from oven and set aside.
Puree the cooked butternut squash in a blender or food processor, then add to a large pot over medium heat. Add the heavy cream, mustard powder, paprika, cayenne, and black pepper and stir to combine. Let simmer for a few minutes, then add the grated cheese and stir until fully melted.
Pour half the sauce in an 8x11" baking or gratin dish, and then add the cauliflower, spreading it out in an even layer. Top with the rest of the cheese sauce, making sure everything is covered.
Combine the panko, melted butter, and parmesan cheese, then spread over the baking dish. Bake for 20 minutes or until the top is golden (you can also pop under a broiler for a few minutes). If you prefer, you can bake this in individual ramekins or bowls.
August 16, 2011
Mini Egg Muffins with Zucchini and Chorizo

Think of the recipe below as just a formula and feel free to improvise. Replace the chorizo with diced ham or leftover cooked chicken or turkey. Replace the vegetables with whatever is in season or on sale; add onions, garlic, chives, or scallions for more flavor. You can even add other spices and herbs to change the flavor. Use different kinds of cheese Experiment with things like chili powder, cayenne, smoked paprika, curry, or Asian five spice to come up with new combinations.

****
New to Always Order Dessert? Consider subscribing to my RSS feed, follow me on Twitter, become a fan on Facebook, or sign up to receive my once-a-week e-mail updates by filling in your address in the box on the right. I also offer pantry and kitchen makeovers, custom menu planning services, group cooking classes, and offer a variety of culinary workshops in the NYC area. Click here to find out more!
And if you ever need any entertaining or cooking advice, please don't hesitate to e-mail me.
Thanks for reading!
Mini Egg Muffins with Zucchini and Chorizo
Servings: 6
Print this Recipe
Ingredients
10 large eggs
1/2 cup whole milk
1 teaspoon Kosher salt
1/2 teaspoon ground black pepper
1 tablespoon ground turmeric (optional, but adds great flavor, color, and health benefits)
1 tablespoon olive oil
1/2 onion, diced
1/2 cup diced fully cooked chorizo sausage (you can substitute: diced cooked ham, chicken, turkey, shrimp, or other protein)
2 cups raw zucchini, diced into 1/2" pieces (you can substitute an equal amount or mix of another vegetable such as squash, spinach, mushrooms, sweet potato, tomatoes, peas, carrots, kale, potato, etc.)
1/2 cup parsley, roughly chopped (you can also use chives, scallions, cilantro, tarragon, or other herbs)
1/2 cup grated Parmigiano Reggiano (you can substitute any other cheese you'd like)
Directions
Preheat the oven to 350 degrees. Generously grease a muffin tin with olive oil or spray well with oil spray. Set aside.
Whisk together the eggs, milk, salt, black pepper, and turmeric until well combined and light and frothy (about 1 minute). Set aside.
Heat the oil in a medium skillet over medium high heat. Add the diced onion and saute just until soft, about 2 minutes. Add the chorizo and zuccini and saute for 3 minutes. Remove from heat and stir in the parsley. Let the vegetable mixture cool for 1 minute before adding to the eggs. Stir to distribute and add the grated cheese.
Use a ladle to scoop the egg mixture into the muffin cups until each reaches almost to the top. Place in the oven and bake for about 12-15 minutes or until the muffins puff up high and are fully set in the center. Remove from the oven and run a butter knife around each muffin then remove and let cool completely on a plate. Serve immediately or if using later, wrap in plastic wrap and store in the refrigerator for up to one week. (These can also be frozen for longer storage.)
Can be eaten cold, at room temperature, or reheated in a microwave.
May 26, 2010
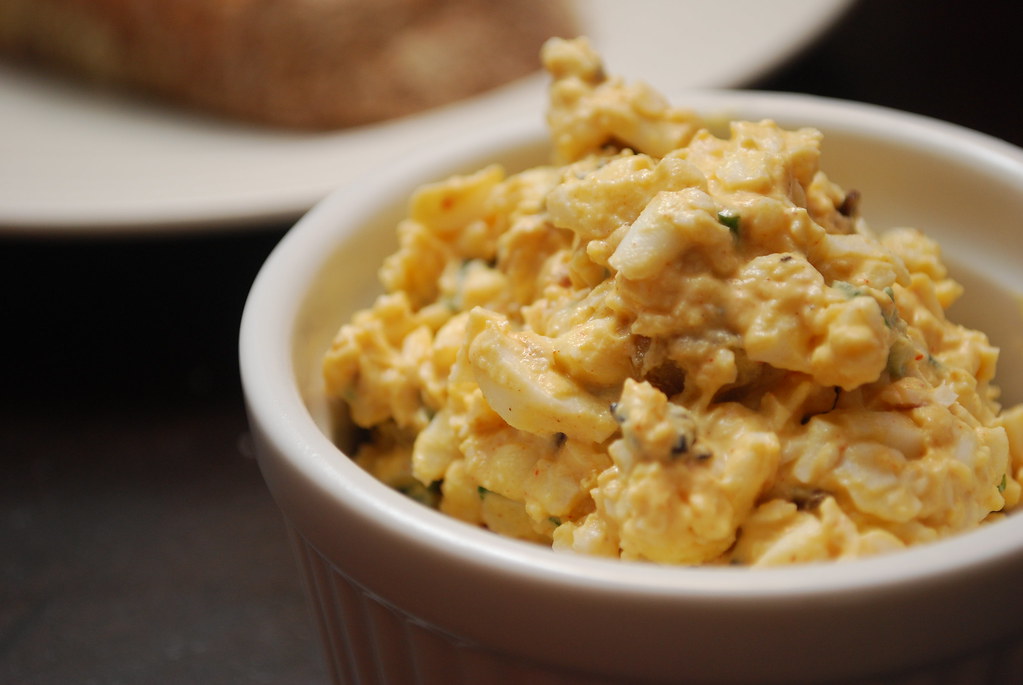
Bagged Lunch Ideas: Egg Salad w/ Caramelized Shallots & Chives
Like a wacky sitcom neighbor who pops in unannounced, summer has been arriving in New York in tiny sporadic bursts these past few weeks. It's too soon, people cry, as they pull off the jackets and cardigans they cautiously grabbed before leaving the house that same morning. The train ride home each night is either a mass of huddled girls shivering in prematurely ambitious shorts or steaming commuters, fanning themselves with their coats bundled in a pile on their laps.
The excessively hot days--today it's already hit 90!--make me sleepy, and when I finally get in the door and drop my piles and bags and heels on the floor (yes, the floor), the last thing on my mind is standing in front of my stove for an hour. Instead, my cravings these days have turned toward the cool and salad-like. I made this herby tuna salad one day, and a similar version with showers of lemon zest another (my mercury levels are likely through the roof at this point). There were two nights of simply pan-fried chicken breasts served on a big mess of greens with this embarrassingly easy Caesar dressing.
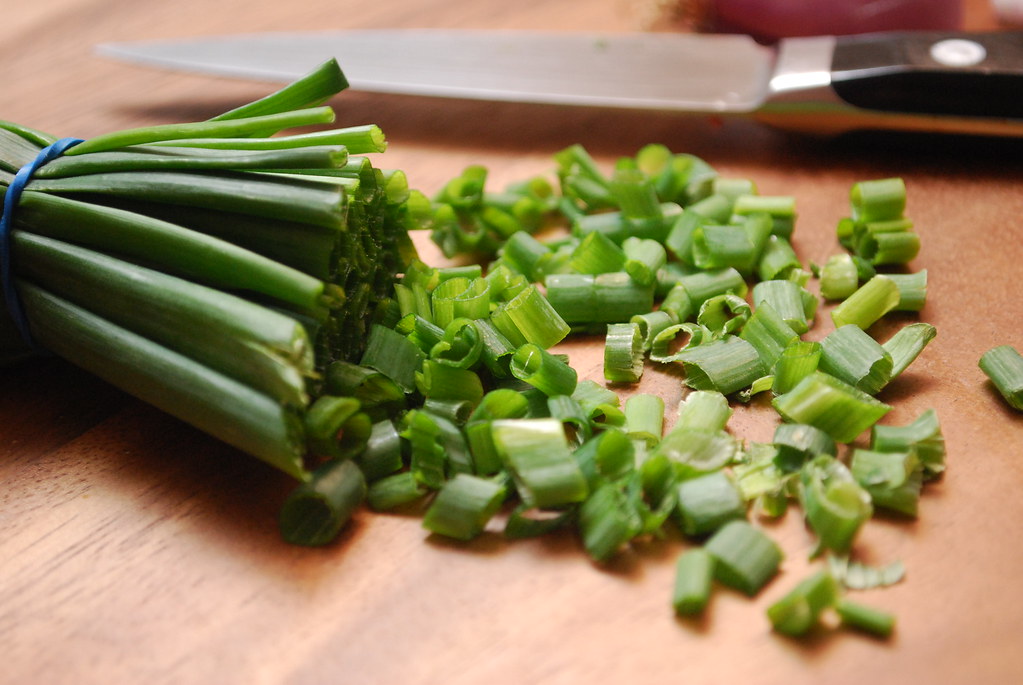
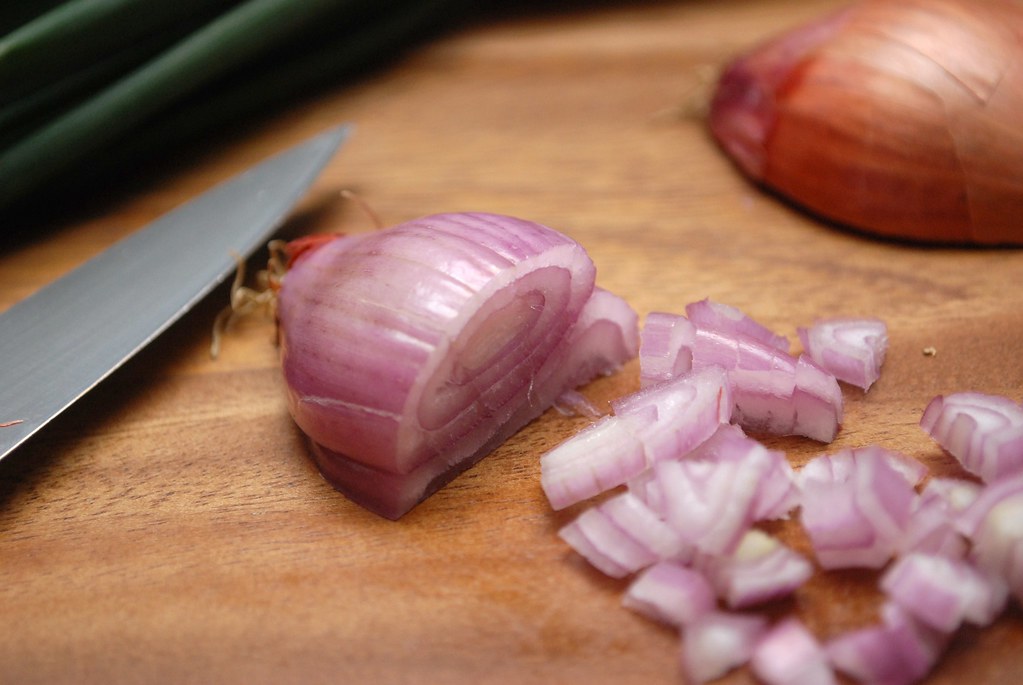
Last night, I just wanted egg salad. That's egg salad my way, with diced caramelized shallots, finely chopped onion chives, and generous dashes of both cayenne and smoked Spanish paprika. The resulting salad is simultaneously smoky, creamy, and spicy, with tiny bits of sweet. If you *really* want to make it my way, let the shallots caramelize just a bit too long until they're a little crisp. Let them hit that cusp just before burned, for a little extra smoke that I find irresistible.
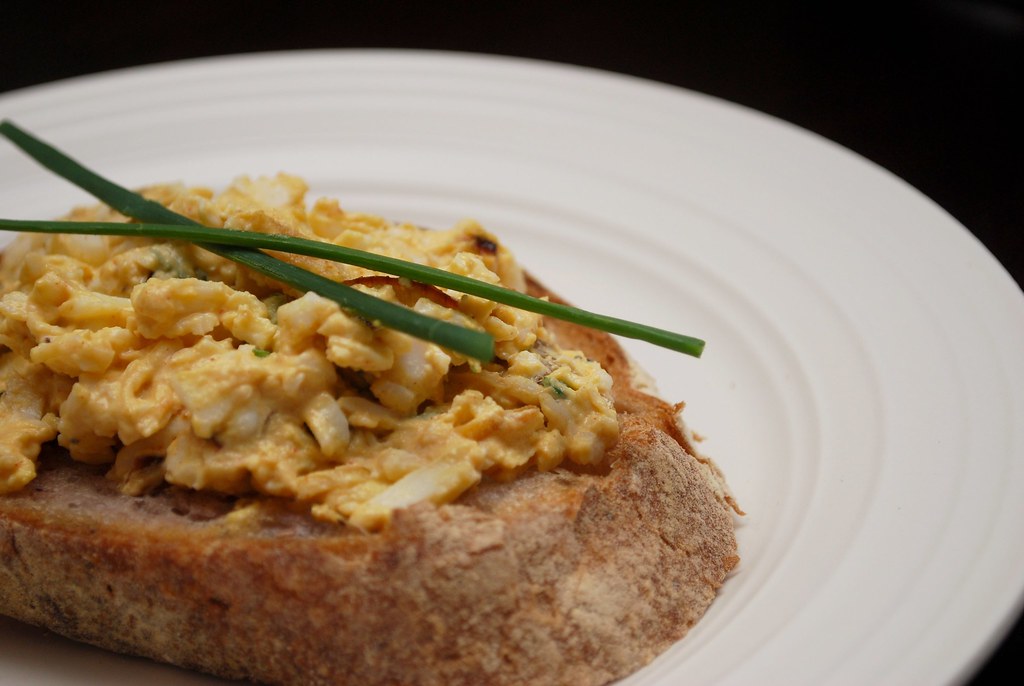
Eugene likes his egg salad on big slices of freshly baked olive bread from the farmer's market. I take it straight up, spoonful after spoonful right from the bowl I make it in. It's my favorite bagged lunch, and so I always make just enough so that I can bring a few scoops with me to work the next day. Occasionally, it's all I can do to not eat it for breakfast! ;)
Everyone has their own methods and tweaks for making an ideal egg salad, but below is my style. To get the eggs fluffy and evenly sized, I grate them on the larger side of a box grater. If I'm making a lot of egg salad (usually for a brunch party), I just toss them into my food processor with the largest grating wheel in place. As impatient as I am, I also find it's best to wait until the next day to have it. An evening in the fridge does wonders for the texture and flavors, which is why it's an ideal dish to prepare to bring to work the next day.
No matter how many eggs I start with, I always find myself wishing I'd made more. This recipe calls for 8 eggs and makes enough for dinner for two, plus one more lunch tomorrow (you guys can fight over it!). It can, of course, be easily doubled or halved.
A Tip: If you prefer it in sandwich form for lunch, just pack it in a container with the two slices of bread in a separate baggy or wrapped in paper, and assemble the sandwich at the office. This will keep the bread from getting soggy (and you can keep the bread room temperature while you refrigerate the eggs).
Now tell me, how do YOU like your egg salad?
Egg Salad with Caramelized Shallots & Chives
Makes about 3 cups.
Ingredients
8 large eggs
1 large shallot, diced
1 tablespoon butter
1/2 cup mayonnaise
1 teaspoon smoked spanish paprika
1/2 teaspoon cayenne
Kosher salt
Black Pepper
1/4 cup onion chives, chopped
Place eggs in a medium saucepan and cover with cold water. Place over high heat just until the water reaches a rapid boil. Turn off heat and let cool to room temperature (about 10 minutes). Shake pan gently to crack shells and place under cold running water for about 15 minutes (refilling with fresh cold water every so often).
While the eggs are cooking, heat a heavy-bottomed skillet over medium heat. Add the butter and the shallots and saute until caramelized (about 7-10 minutes).
When the eggs are cool, peel and grate using the large side of a box grater. Combined in a large bowl with mayonnaise, paprika, cayenne, salt, and pepper. Fold in the caramelized onions and chopped chives.
Serve immediately, or chill in the fridge. Can be made up to 24 hours in advance.
September 22, 2009
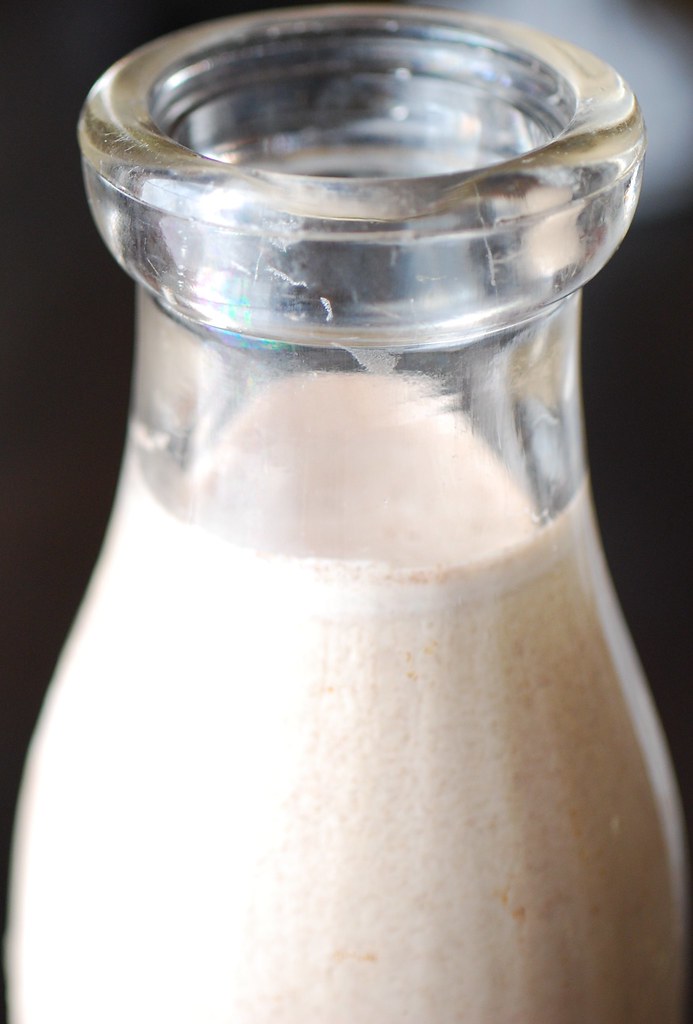
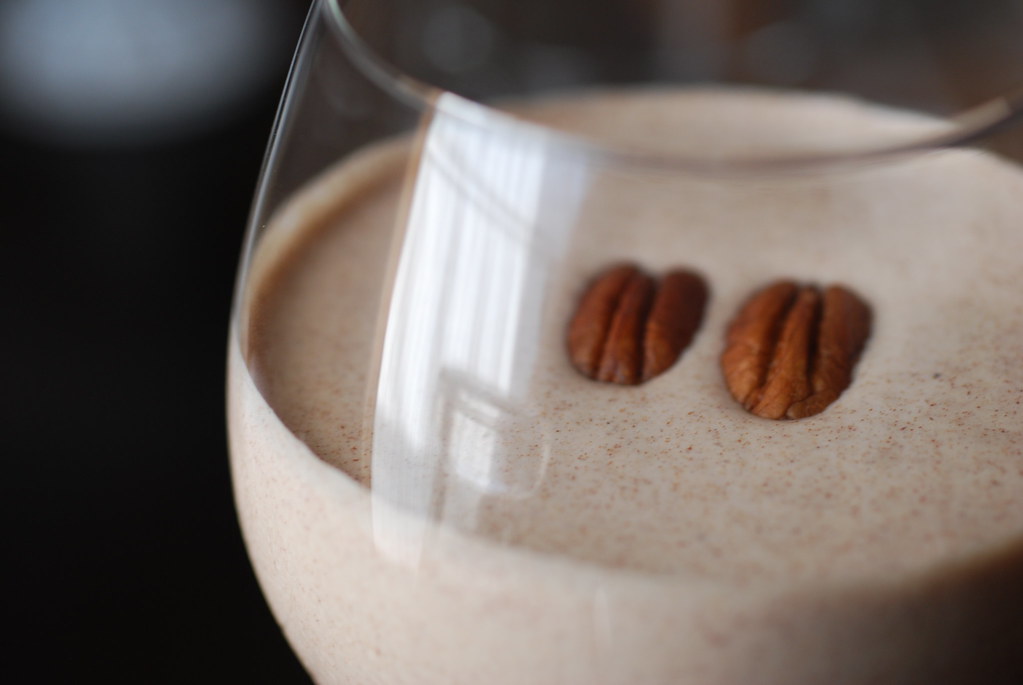
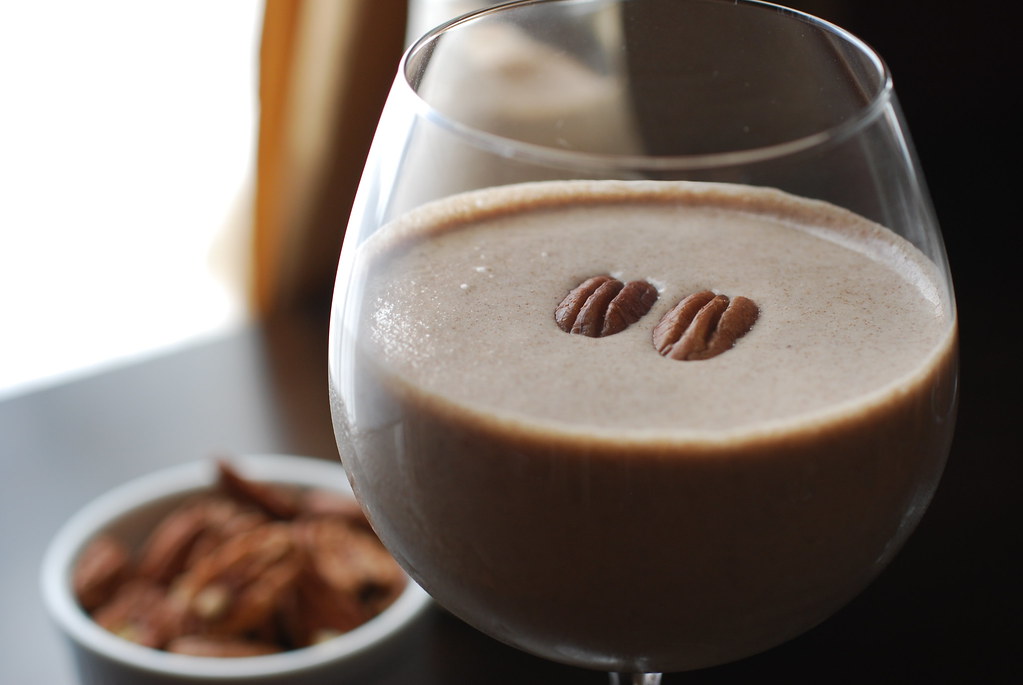
Homemade Pecan Milk
I am so impatient. Really. I have the hardest time making things that actually require me to start the day ahead. Mostly because I only realize this right at that moment when I'm going to start my baking (it's usually baking) and read that the first step requires something to sit or soak or proof or whatever overnight.
Overnight?! No way! Because when I bake it's because I want cake or bread now, or at least 2 or 3 hours from now, but definitely not tomorrow.
This is why I never make sourdough, and why I shamelessly dropped out of the Bread Baker's Apprentice challenge before the first week even finished. Forget proofing, I'm more than happy with challah, which everybody knows is Jewish for "The World's Most Perfect and Delicious Bread," and which I (and you too!) can make, start-to-finish, in less time than it takes me to watch Forrest Gump for the 87th time on AMC.
And yet, despite all these truths, I'm about to share with you a recipe that you won't be able to taste until tomorrow. Or at least until very, very late tonight. I know. I'm awful, but read on...
So the recipe is for homemade Pecan Milk, which is a dairy-free "milk" similar to almond or rice milk, but better. Better because it's lusciously creamy and tastes kind of like an amazing nutty milkshake, except that it's actually healthy. According to ILovePecans.org (that's an actual website although I suspect it *might* be a little biased), pecans contain more than 19 vitamins and minerals -- including vitamin A, vitamin E, folic acid, calcium, magnesium, phosphorus, potassium, several B vitamins and zinc. They're also a great source of fiber, and have been shown to control weight and possibly even prevent heart attacks.
So basically here I'm giving you a recipe for life-granting elixir. A life-granting elixir that tastes like a milkshake. Aren't I awesome?
You can drink pecan milk (aka life-granting elixir) straight, over ice, or even in your coffee in place of regular milk or soy milk. Pour it over your cereal. Warm it up and drink a big mug of it while sitting on your bed wearing pajamas and listening to your Kindle read you a bed-time story in her sexy robotic Kindle voice. It's the future, kids. And in the future we have talking paper and milk made out of nuts. And pajamas. It's like the Jetsons.
So the only problem that I see is trying to figure out what to do with the eight hours you have to let the nuts soak. You probably already have plenty of things to do, but if no, here are a few suggestions:
First, you should make this perfect for Fall Pumpkin Spice Challah.
That only took three hours, so now you should make this Vanilla Bean Challah so that you don't have to share the pumpkin one.
It's now been six hours and you're probably craving a little protein, so why not make yourself a bowl of this Pumpkin Chili.
And now it's time for the milkshake.
Oh and by the way, this recipe also works fantastically with cashews or, if you love luxury and want to lavishly celebrate the end of the recession, macadamia nuts. (Gasp!)
It's the future, kids. Enjoy it.
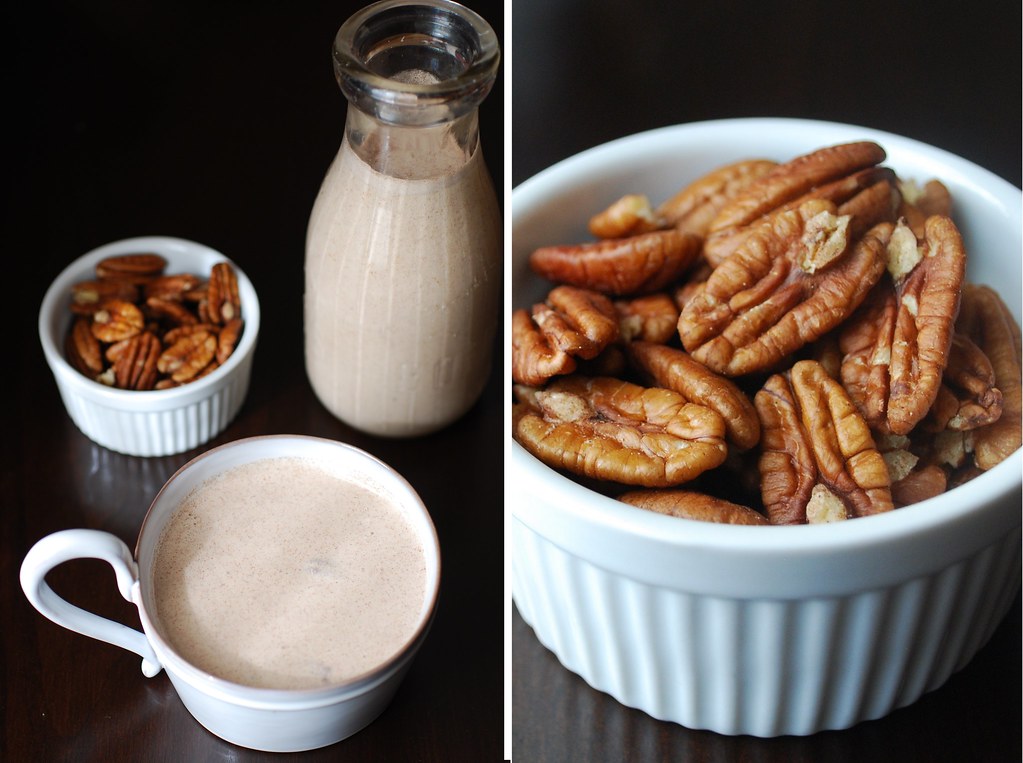
Pecan Milk
1 1/4 cups raw or roasted pecans (unsalted)
4 cups filtered or spring water
1/4 cup raw honey (can substitute maple syrup)
1/3 cup coconut milk
1 teaspoon ground cinnamon
1/4 teaspoon freshly grated nutmeg
1/2 teaspoon celtic sea salt (or Kosher salt)
Additional honey or sugar for sweetening.
1.)Combine the pecans, salt, and water in an air-tight container. Seal and leave to soak in the refrigerator for at least 8 hours or overnight.
2.) Pour the soaked pecans and the water mixture into a blender (note that the water will have turned slightly golden from the nuts). Add the honey, coconut milk, cinnamon, and nutmeg. Process on high for two minutes or until the mixture is well combined and smooth. Sweeten to taste and store in the refrigerator. This will last one week refrigerated in an air-tight container.
Note: If you'd like a smoother beverage, pour the pecan milk through a sieve lined with cheesecloth.
June 16, 2009
Creamy Asparagus Soup w/ Bacon & Asparagus Tip Garnish

When we got back from Aruba a few weeks ago, there wasn't much in our fridge. Just before leaving I'd dutifully cooked my way through the majority of what we had then tossed out anything I suspected would spoil before we got back. Had it not been for the work farmer's market they hold in our cafeteria every Wednesday, our first dinner back would have likely been scrambled eggs. But fortunately, I was able to snag a beautiful (and huge!) bunch of local purple asparagus to turn into delicious soup.
Soup might seem like an odd choice for a summer meal, but this Creamy Asparagus Soup is actually quite perfect. It comes together easily and requires minimal time in front of the stove. Even better, it travels well and reheats even better, so you can make a batch early in the week for quick lunches or meals, or bring the leftovers into work. (Also, when you think about it, it really hasn't been much of a summer, has it?)

I started this soup with bacon. OK, ok, I confess. I start just about *every* soup with bacon. Just a few strips snipped into small pieces with scissors or a knife and browned at the bottom of my Dutch oven. I scooped out the crispy pieces and set them aside and added minced onion, garlic, and shallots to the bacon fat to saute for a few minutes. (Feel free chop coarsely instead of mincing. This soup will soon be pureed, and the beauty of a pureed soup is that you can be really lazy and haphazard with your chopping. No one cares. It will cook just the same and you'll blend it all up anyway.) Then in went the asparagus pieces (with tips reserved for garnish). I topped it off with some chicken stock and let it cook for a bit just until the asparagus was softened. I pureed everything with my immersion blender (I love that thing so much, I just might make it my maid of honor when the time comes!). A generous glug of cream to round things out and some salt and pepper to season. And that's it! Serve in these ridiculously adorable bowls with handles and top with generous sprinkles of bacon and asparagus tips.
Mmmm...don't you love summer soup?
Creamy Asparagus Soup
Ingredients:
3 tablespoons olive oil
3 Strips bacon, cut into 1/2" pieces
2 pounds asparagus
1 medium onion, chopped
1 large shallot, chopped
6 cups chicken or vegetable broth
1/2 to 3/4 cup heavy cream
Kosher salt
Freshly ground pepper
Directions:
1. Heat the olive oil in a medium sized dutch oven. Add the bacon pieces and let cook over medium heat until crisp. Remove the bacon pieces and reserve, leaving the bacon fat and oil in the pot.
2. Add the chopped onions and shallots. Saute for about 5 - 10 minutes or until the onions and shallots turn slightly caramelized.
3. While the onions are cooking, prepare your asparagus. Trim and discard the fibrous portion of the asparagus (about 1 inch at the base). Cut the asparagus tips and set them aside. Cut the asparagus stalks into 1-inch segments and reserve.
4. Add the asparagus stalks to the onions and saute for one minute.
5. Pour in the vegetable or chicken broth and let simmer for about 15 minutes.
6. While the asparagus simmers, small saucepan with a few cups of water to boil and quickly blanch the asparagus tips by dropping into the boiling water and letting cook for 2 minutes. Drain and immediately rinse with cold water and set aside. (This can also be done in the microwave)
7. Use an immersion (or regular) blender to puree the soup until creamy. Add the cream to your taste and season with salt and pepper.
8. To serve, ladle the soup into bowls and garnish with generous sprinkles of the reserved asparagus tips and the crisped bacon bits.
January 15, 2009
Flourless Chocolate-Orange Almond Torte

I was home alone tonight. Eugene went out with a few friends and though I was invited, I opted for the quiet evening at home. These solo nights are rare, and I looked forward to having a few hours to read and write and watch multiple episodes of Law & Order. I'd previously bought some salmon for tonight and decided to go ahead and make it anyway. Glazed with an easy miso dressing, broiled, and served on a bed of watercress, it made for a decadent solo dinner. But while incredibly tasty, I found myself with a creeping, but very distinctive craving: chocolate.
I went back and forth over my options. There was a bar of 70% chocolate in the fridge waiting to be attacked. Or I could go the virtuous route with a mug of hot, unsweetened chocolate-flavored almond milk. But I know myself, and I knew that neither of those choices would satisfy.
What I really wanted was something moist, with deep chocolate flavor. My mouth watered as seemingly every commercial on NBC showed peanut butter cups and those silky Dove squares. The crave was getting stronger and I knew that if I didn't act on it soon, I might end up doing something really naughty, like whipping up another German Chocolate Cake.

Luckily, I remembered the flourless chocolate hazelnut torte I first made last year. It's a low-carb treat that uses ground nuts instead of flour and Splenda instead of sugar, but which tastes deceptively sinful. A smaller version made in one of my mini springform pans, using ground almonds and a hint of orange zest seemed more and more like the only viable option.
Into the kitchen I went, haphazardly dumping everything into a bowl and mixing by hand. I didn't even bother to beat the eggs separately. I poured the batter into the tiny baking dish, and about 25 minutes or so later I had THE perfect little cake. It puffed up nicely, (almost like a souffle!) and the inside was simultaneously moist and light, with just a hint of molten filling at the very center. And the magical thing is that somewhere between the mixing and the baking, the orange and almonds combined to give the cake a practically ambrosial flavor.

This is the perfect cake when you're home alone, and it's easy enough that you won't feel guilty about making it just for yourself. If you have someone to share it with, well then, all the better! Add a dab of whipped cream and a handful of berries, and this just might make a perfect Valentine's Day dessert. I only finished about a third of the cake, but even if you do manage to get down to the crumbs, it's small enough that I won't allow you to feel guilty about (just look how tiny it looks next to my 8"--it's practically a muffin!).

Flourless Chocolate-Orange Almond Torte
Serves 2 (or 1, if you don't feel like sharing)
Ingredients
2/3 cup ground almond meal (you can also use hazelnut or pecans)
3 tablespoons good unsweetened cocoa powder
1/3 cup sugar or equivalent substitute (such as granulated Splenda)
1 teaspoon orange zest, finely grated
1/2 teaspoon baking powder
1/4 teaspoon Kosher salt
2 medium eggs
3 tablespoons olive oil
3 tablspoons water
1/4 teaspoon vanilla extract (optional)
1/4 teaspoon almond extract (optional)
To make:
1.Preheat your oven to 350 degrees and grease a 4" mini springform pan or ramekin
2. Combine the dry ingredients and the zest in a bowl, followed by the eggs, oil, water, and extracts. Stir until well combined.
3. Pour into your greased pan and place in the oven. The baking time will vary depending on your oven and the humidity in the environment. Start checking it about 25 minutes into baking. It will be ready when the batter is set and the cake puffs up and cracks slightly. (Avoid inserting a tester)
Once it's ready, remove from the oven and let cool slightly. Remove the sides of the springform pan or serve right in the ramekin. Dust with confectioner's sugar or top with whipped cream to serve.
Subscribe to:
Posts (Atom)
