Showing posts with label Salt. Show all posts

Thin Chocolate Bark with Coconut, Almonds & Smoked Salt

Have you ever tried barkTHINS? I added them to my grocery basket the other day all the while fully knowing it was probably a mistake.

I generally avoid store-bought treats and snacks (OK...OK...apart from the occasional bar of dark chocolate or pickle-flavored potato chips) in an effort to protect myself from my own lack of self-control.

My job involves making lovely decadent things (like cake!) and going to events and trips where they serve lovely decadent things (like cocktails!) AND it also involves going on television, where I naturally want to look my best.

I mean...I'm not a skinny girl. I never have been, nor have I ever wanted to be. I dig my curves, but I also fully understand the point where I look best. For me, sticking to that point generally involves saying no to the bread basket, and avoiding bags filled with crunchy snacking chocolate thins.

But whatever. I bought those damn barkTHINS "snacking choclates" anyway, and sure enough. They are amazing!

It's basically just thin chocolate bark (duh) filled with different things. The ones I got were filled with almonds and sea salt. They are good, though I did want more salt. (I always want more salt.)

And maybe more almonds.

And I remembered that the store also had a version made with coconut, but the coconut was sweetened which meant the carb count was higher, so I didn't buy them, but in my head I was totally like "I'M GOING TO MAKE THIS MYSELF WITH UNSWEETENED COCONUT!"

And so I did!
0

DIY Coffee, Sugar, and Spice Grinders

The other day, my lovely friend Moe posted a picture of an interesting product she found on the shelves at Trader Joe's--their "Sugar, Chocolate, and Coffee Bean Grinder." It was a little plastic pepper mill filled with coffee beans, bits of chocolate, and sugar meant for grinding over coffee or other foods. Pretty great idea, she commented, but would be better with perhaps a little bit of salt added.

As soon as I saw the post on her page I realized that this would be SUCH a great (and very easy) item to make at home rather inexpensively. It would be a great and totally unique gift idea, and would also lead to some fun experimentation to see what other foods and beverages would benefit from a little sprinkle.

And so I present to you my DIY Flavor Grinders (or "Sugar and Spice Grinders")--inexpensive pepper mills (I found these at Target for $7, but you could probably find them even cheaper elsewhere, or use ones you already have at home!) filled with a mixture of espresso beans, cacao nibs, raw sugar, coarse sea salt, and crushed cinnamon sticks. They take just a couple minutes to assemble, and you can then start experimenting by grinding them over fun treats.

Need some ideas? Try grinding these over:
  • buttered toast (like cinnamon toast to the 10th degree!)
  • oatmeal or cream of wheat
  • ice cream
  • yogurt
  • buttered popcorn (one of my favorites!)
  • coffee
  • hot chocolate or cocoa
  • steamed milk
  • cocktails like eggnog, coquito, white russians, hot toddy, etc.
  • fresh ginger tea
  • a bowl of cereal or granola and milk
  • warm chocolate cake  
  • brownies
  • a peanut butter sandwich
  • sliced fruit like bananas or pears
  • apple pie
  • cinnamon buns and/or coffee cake
  • vanilla cupcakes
  • and more!
These keep really well for months, and can be customized to your liking. Substitute any of the ingredients for other whole spices or flavors you like. Some alternatives include: dried coconut flakes, star anise, cardamom pods, dried ginger, dried orange or lemon peel, crushed red pepper or even black pepper for a bit of heat, etc. I would avoid using vanilla beans as they are too moist and would cause the other ingredients to cake up.

This would be a great project to make with kids, too! Let me know if you end up trying it out. The recipe is below. I've also included the PDF label below for you if you'd like to make and give these as an easy last-minute holiday gift.


*****
Did you enjoy this post? Be sure to share it with your friends on Facebook, Stumble, and Twitter! Consider subscribing to my RSS feed, follow me on Twitter (@nandita), become a fan on Facebook, or sign up to receive my once-a-week e-mail updates by filling in your address in the box on the right. I also offer custom menu planning services, group cooking classes, and offer a variety of culinary workshops in the NYC area. Click here to find out more!

And if you ever need any entertaining or cooking advice, please don't hesitate to
e-mail me. Thanks for reading!        


DIY Flavor Grinders (Coffee, Sugar, and Spice Grinders)
The size of your pepper mill will determine the amount of filling you need. I've provided amounts for a medium sized mill that holds about 1 cup of the spice mix. Multiply as necessary.

Ingredients
5 tablespoons roasted whole coffee beans (use plain or pick out your favorite flavor such as hazelnut or vanilla)
4 cinnamon sticks 
4 tablespoons cacao nibs (available at well-stocked supermarkets like Whole Foods, gourmet markets, or online--can't find them? substitute 3 tablespoons of unsweetened cocoa powder.)
2 rounded tablespoons coarse sea salt
4 tablespoons raw sugar or rock candy sugar
Equipment: 1 new or cleaned, empty pepper mill. It's OK if the mill previously held pepper in it--the coffee will eliminate any pepper flavor.
Directions
Combine the coffee beans and cinnamon sticks in a large zipped bag and use a meat tenderizer, rolling pin, or other heavy object a few times to crush coarsley (the coffee beans should break into 2 or 3 pieces and the cinnamon sticks into about 1" slivers). You can also do this with a pestle in a mortar.

Pour coffee and cinnamon in a bowl and add the cacao nibs, coarse sea salt, and raw sugar. Stir well to mix up and combine, then pour into your pepper mill, filling it to the top. Seal and shake to evenly distribute the ingredients inside. Set the pepper mill grinder to the coarsest setting for best results.
0

Salted Honey Butter Caramels

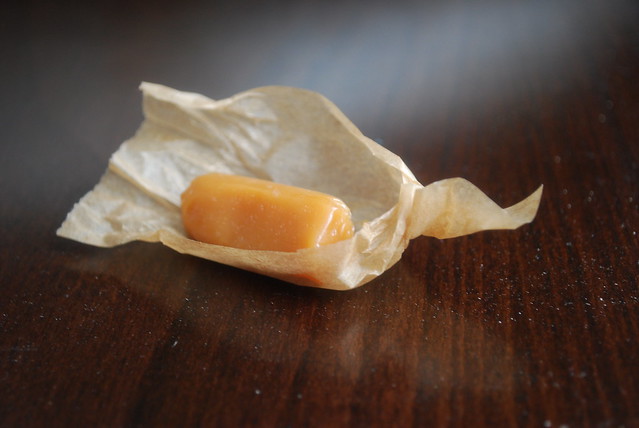
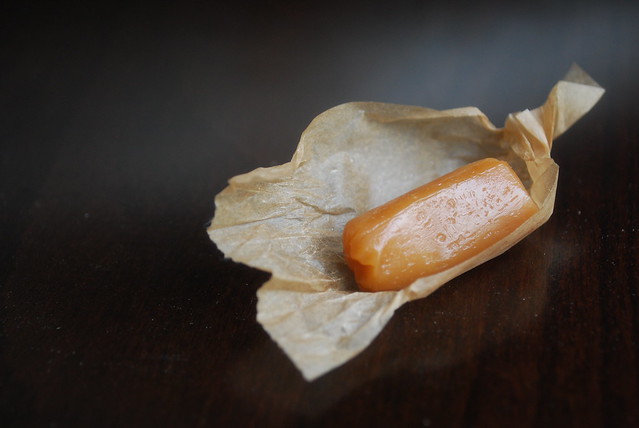
A couple weeks ago, a few of the girls I work with and I took out our (now-former) coworker Dana for a good-bye lunch at nearby Landmarc restaurant. One of my favorite spots in the city, the food at Landmarc is reliably delicious, but even more so are the generous handfuls of homemade butter caramels that come out complimentary along with the check. Soft, chewy, with just a slight tinge of burnt sugar, these caramels are absolutely addictive. I usually gobble up a couple right at the table and tuck the extras away in my purse for a surprise treat at a later date.

The night after our lunch, I found myself laying in bed thinking about those caramels. I'd already eaten the extra one in my purse (it barely made it back to the office) and proceeded to spend the rest of the night plotting my next trip, wondering if I would be able to slip away during lunch the next day for a repeat meal.


Morning light made me realize just how impractical it would be to pay for an entire lunch simply for a handful of complimentary caramels, so I decided that I would just have to make them myself. Cobbling together various classic caramel recipes, I tweaked and stirred until I finally fell upon the one that seemed closest to the buttery, chewy treats I remembered.

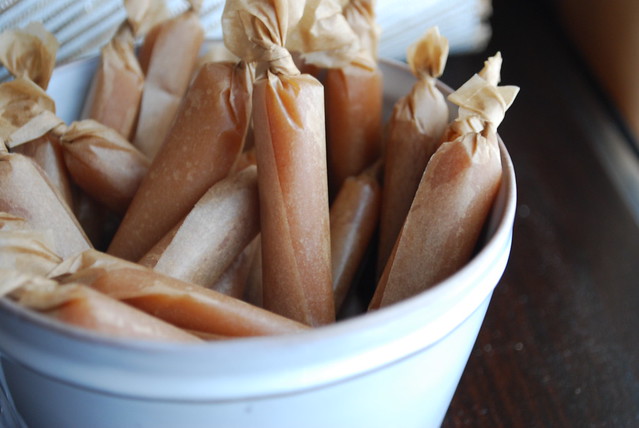
This recipe is actually quite easy. You need a candy thermometer, of course, but other than that, it's really just a bit of occasional stirring and patience. The hard part comes at the end, once the caramel has been cooled and cut into (semi) uniform pieces; that's when you'll have to sit and wrap each individual piece for hours.

I made mine early on a Sunday evening and then proceeded to sit on the couch cutting and wrapping caramels straight through an episode of Rubicon (my new favorite), then Mad Men, then immediate encore of Mad Men, followed by the first half of the encore of Rubicon. Yes. That would be 3.5 hours of wrapping caramels.


It's easy, but tedious. Fortunately, you're guaranteed to consume every third piece (at least during the first hour) so you'll have enough of a sugar rush to get you through the whole batch. If possible, I recommend recruiting the aid of a friend or child (preferably not a diabetic one).

Another tip: cutting the caramel into pieces might seem impossible (and sticky) but I found that it's really easy if you use a pair of clean kitchen shears. Just snip and wrap! And don't worry if the pieces aren't all uniform; that, I think, is part of the charm.


****
New to Always Order Dessert? Consider subscribing to my RSS feed, follow me on Twitter, become a fan on Facebook, or sign up to receive my once-a-week e-mail updates by filling in your address in the box on the right.

And if you ever need any entertaining or cooking advice, please don't hesitate to
e-mail me.
Thanks for reading!

Salted Honey Butter Caramels
Makes about 60-75 individual pieces

Ingredients
6 tablespoons unsalted butter (plus a bit more for greasing the pan)
1.5 cups heavy cream
2 cups granulated white sugar
3/4 cup honey
2 heaping teaspoons Kosher salt

Special equipment: 9" square baking pan, candy thermometer, heavy pot or saucepan

1. Butter a 9" square baking pan well and set aside. Combine the butter, cream, sugar, honey, and salt in a heavy saucepan or skillet (I used my Dutch oven) and place of medium heat. Stir gently until the butter melts and sugar dissolves.

2. Let the sugar continue to cook, stirring it every so often (doesn't have to be continuous), until it darkens to a golden brown and the thermometer reads 245 degrees F. (This will take about 30-45 minutes or so, possibly longer depending on your stove and the size/type of pot you use; note that the temperature MUST reach 245 before you can pour the caramel out of the pot or it won't set)

3. Gently pour the caramel into the prepared pan and let cool at room temperature for about an hour or two until it is set and cool to the touch.

4. Use a spatula to release the sides of the caramel (it will be buttery) and flip out the slab of candy onto a cookie sheet. Use clean kitchen shears or a sharp knife to cut into small rectangles or cubes. Wrap each piece in parchment paper or wax paper.

Store at room temperature for up to a week or two (if they last that long), although I've found that these are best eaten within 2-3 days as temperature fluctuations in your home can make them a bit grainy. Note that these can also be refrigerated for weeks at a time.
0

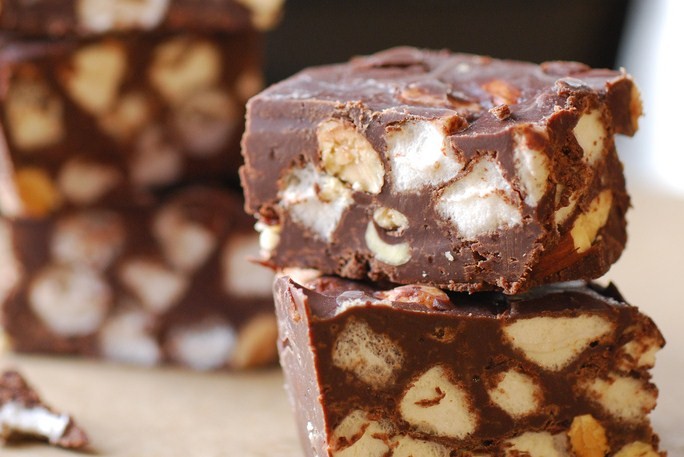
Salted Rocky Road Fudge


I know that for many, fudge is a holiday treat usually indulged in during those sugary weeks between Thanksgiving and New Year's. I, however, have always associated it with the warmer months.

I blame this on my dad who has always been a fan of weekend trips, and who would often bundle us into the station wagon and drive us off to some random little town he'd read about in a guide book or magazine casually perused in a doctor's office waiting room. These towns--places like Piermont, NY, or Ocean Grove, NJ--were a haven for tourists with their little restaurants and main streets lined shops selling rosewater lotions and embroidered throw pillows.

Inevitably, there would also be a fudge shop. And this, I'm sure you already know, was always my favorite.

No matter where you are, if there is fudge shop nearby, you'll know it. The aroma of chocolate fudge has this way of wafting out its quaint little shop--or more likely shoppe--doors and down the cobblestone paths crowded with weekend visitors.

As a child, I'd follow the familiar scent out of the candle stores and down the street stopping only when I reached the candy-filled windows. With my parents still a block or two behind, I'd barrel in, and walk right up to the front case where the fudge lay stacked in multi-hued slabs like some kind of magical candy quarry.

My dad would eventually wander in, and together we'd ooh and ahh and argue about what flavors to bring home. He always preferred the maple and cinnamon flavored treats; I always demanded the sweet and salty Rocky Road.

I admit that we rarely finished the box we brought home. As wonderful as six pounds of fudge sounds in theory, the reality is quite terrifying. My mother, blessed (or perhaps cursed) without a sweet tooth, would quietly dispose of the leftovers a day or two after the enthusiasm wore off. I'd fuss when I finally figure it out, but not much since the truth is that one can really eat that much fudge.


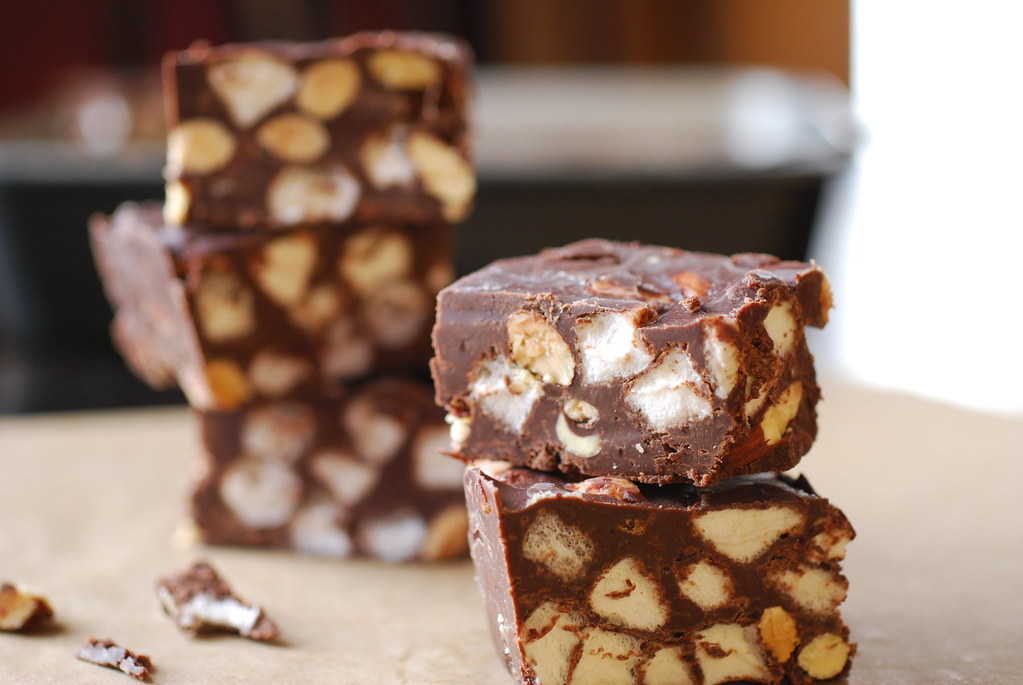
There are many methods for making fudge, but I'm fond of the classic condensed milk version. It's straightforward and can be assembled with just a few minutes of stirring on the stovetop. To cut the cloying sweetness of the original, I used a combination of semi-sweet and bittersweet chocolate, and added a generous tablespoon of Kosher salt. I prefer the roasted salted almonds, but you can substitute just about any nut you prefer. I think next time I'll give it a go with toasted hazelnuts!

****
New to Always Order Dessert? Consider subscribing to my RSS feed, follow me on Twitter, become a fan on Facebook, or sign up to receive my once-a-week e-mail updates by filling in your address in the box on the right. And if you ever need any entertaining or cooking advice, please don't hesitate to e-mail me. Thanks for reading!

Salted Rocky Road Fudge
The extra salt in this classic recipe cuts the sweetness and makes this fudge utterly dangerous.

6 oz good quality bittersweet chocolate, chopped (I used Guittard discs)
8 oz semi-sweet chocolate, chopped (I used Ghirardelli)
14oz (1 can) sweetened condensed milk
2 tablespoons butter
1 teaspoon vanilla extract
1-2 teaspoons flaky Kosher salt (use more or less, depending on how sensitive you are to salt)
2 cups miniature marshmallows
1.5 cups roasted salted almonds, whole

Special equipment: 1 9" square baking pan

Directions
Coat bottom and sides of baking pan with butter or cooking spray and line with a long sheet of parchment paper that overlaps the sides. Set aside.

In a medium sized saucepan, combine the two kinds of chocolate, the condensed milk, and the butter. Set over medium-low heat, and stir until the chocolate is melted. Add the extract and salt, and then fold in the marshmallows and almonds.

Pour the warm mixture into the prepared baking pan and spread evenly. I like to use my hands to press down into the pan until it is all pressed in and relatively even.

Cover with a sheet of parchment paper and let chill in the fridge for 2 hours.

Remove from fridge and lift parchment paper to remove from pan. Use a sharp knife to cut into desired-sized portions before serving. Can be stored in an air-tight container at (cool) room temperature for 7-10 days.
0

Salted Ginger Molasses Cookies (and a bit on Tonka Beans)


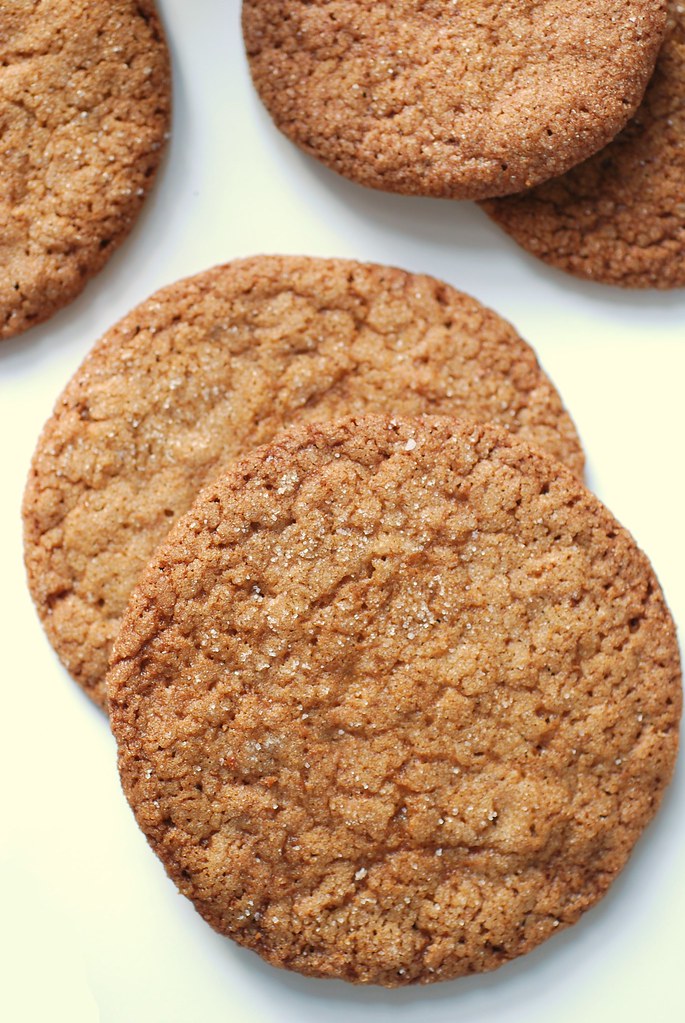
I don't have the exact numbers, but I think I've eaten nearly a dozen of these Salted Ginger Molasses cookies over the course of the past week...and several more during the past two days. They're almost perfect, really. Chewy and crisp. Salty and sweet. I promise you these delicately spiced cookies have the power to satisfy every possible craving at the same time. Unable to resist, I've been dipping into the cookie jar first thing in the morning on my way to the shower. Literally! The other morning I actually leaned in to the bath to turn on the shower with my right hand while still holding half a cookie with my left. I think it was only the realization that I was actually about to bring a cookie into the tub with me that made snap out of it.

In a vain effort to save myself, I slipped a few of them into a plastic baggie that I brought into work on Friday.

"Please," I told the girls as I set them out in the middle of our work table and pushed them away from me. "Eat these."

Marion, a fellow editor who is originally from Scotland, let me in on a little secret as she delicately cut one of the cookies into threes. She told me that the tradition where she grew up was to snap ginger cookies before eating them by using a quick jab of the elbow right down into the middle of the treat. If the cookie breaks into an even three pieces, it's supposed to be a sign of good luck. I loved that story, and noted that, if anything, it's certainly an invitation to share, something which on its own can always lead to happy times.


These are pretty straightforward as far as cookies go, but there is one secret ingredient. It's called a tonka bean and depending on where you live, you may have trouble finding it.

The thing is, these incredible little gems, which smell like cinnamon, nutmeg, cloves, and vanilla all rolled into one, are actually not legal to sell for consumption in the United States. The reason behind this is a long fascinating (although quite typical) story involving the FDA, but the thing to keep in mind is that everywhere else in the world, this spice is perfectly OK. In fact, a few of my (and your, I'm sure) favorite bloggers use them regularly and there are several big-time chefs around the country who include tonka bean flavored desserts in their menus.

If you're up for a challenge, just remember the for consumption part of the law. The beans are actually sold quite readily (and legally) by New Age and occult supply shops online. Witches, it seems, use the beans in their spells, although I try not to think about it too much since that kind of stuff just freaks me out and makes my good Christian girl tummy just feel a bit funny. It's nice to know there out there, though (tonka beans, not witches). European friends are also lovely in this regard; I know of a couple bloggers who get a few tucked into care packages every now and then. If and how you get them is totally up to you. A bit of cinnamon, clove, and vanilla tossed into the batter would also work (and quite masterfully at that!).
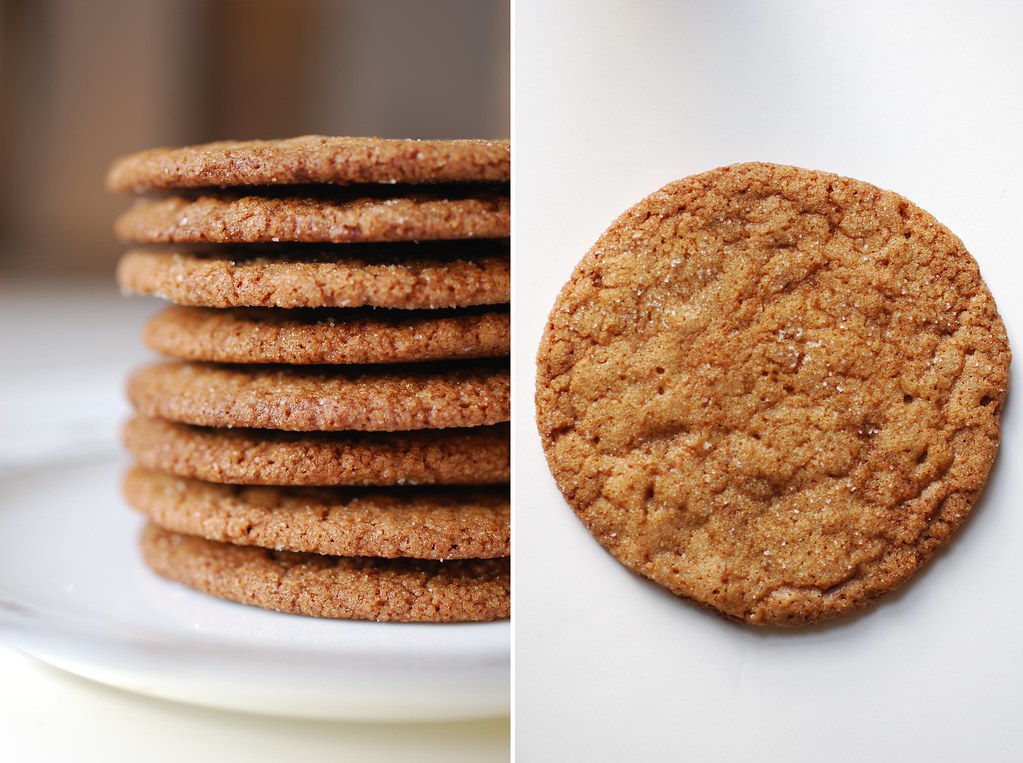

The only other thing I recommend is to let the cookie dough age before you bake with it. I made my dough in the evening on a Tuesday and then pressed a sheet of plastic wrap over it before letting it chill in the fridge overnight. I baked my first batch the following evening and they were perfect. If you can resist, I suggest definitely following my lead; it really does make a difference!

By the way, last night, in a stroke of sheer madness genius, I tucked a chocolate espresso truffle between two halves and pressed down hard to form a perfect little sandwich. One taste and I knew that I'd successfully combined every single flavor I've ever loved into one single bite. Anyway, that's just a suggestion... ;)

Salted Ginger Molasses Cookies

INGREDIENTS:

2 sticks of salted butter, softened at room temperature
1 cup dark brown sugar
1 cup white granulated sugar, plus more for topping
2 eggs, at room temperature
3 tbsp molasses
1 tbsp pure vanilla extract
1.5 tbsp freshly grated ginger
1 tonka bean, grated (or 1/4 tsp each of cinnamon, nutmeg, clove)
3 cups all-purpose flour, sifted
1 tbsp kosher salt, plus more for salting
2 tbsp cocoa powder
1 tsp baking soda
1 1/2 tsp baking powder


DIRECTIONS:

Cream together the butter and two sugars for 5 minutes until they are fluffy and light in color. Add the molasses, eggs, vanilla, tonka bean (or spices) and ginger, and continue to beat for an additional 3-5 minutes.

In a separate bowl, sift together the flour, salt, cocoa powder, baking soda, and baking powder. Add to the egg and butter mixture 1 cup at a time and beat until fully incorporated.

Remove the mixing bowl from the base and press a sheet of plastic wrap against the batter until it is completely covered. Refrigerate for at least one hour and up to 36 (ideal is 24).

When you are ready to bake, preheat your oven to 350 degrees. Use a medium cookie scoop or a spoon to roll out small balls about 1-2 tablespoons each. Roll into a smooth sphere then coat completely in granulated sugar (i like to just roll it around on a plate with the sugar). Place on a parchment lined cookies sheet about 2 inches apart.

Bake for 8-10 minutes keeping an eye to make sure the edges don't brown too much. When you remove them from the oven, immediately salt them with your kosher salt shaker just as you would a savory dish. Let rest for one minute and then transfer to a cooling rack for at least 3-4 minutes before serving.

*When cool, store cookies in an air-tight container at room temperature for up to 5 days.
4
Back to Top