Showing posts with label tutorial. Show all posts

Inspired Entertaining: DIY Puff Pastry Shells

The other day, I went to three different grocery stores looking for frozen puff pastry shells. I needed them for an appetizer I wanted to make, but couldn't find them anywhere!

Finally, I decided to just grab a regular package of puff pastry dough with the intention of making my own shells.

Here's how you can do it, too:


Step 1. Prep the puff pastry:

NOTE: You want to start off with completely thawed puff pastry. 

  • If your box comes with two sheets of pastry (like the Pepperidge Farm kind), roll them out, lightly moisten one sheet, and then layer the second one on top, pressing down slightly with your hands and then a rolling pin to combine them a bit.
  • If your box comes with a single large sheet that's been folded up (like Dufour or other all-butter pastry) you want to unfold it, roll it out, moisten half of it, and fold it in half

Step. 2. Cut out rounds: 
  • Use a 2 1/2" round biscuit or cookie cutter to cut out as many circles as you can. Arrange on the prepared baking sheet, one inch apart. 
  • NOTE: This size is great for 1 or 2-bite hors d'oeuvres. If you want to make larger shells for desserts or appetizers, use a larger cutter to make bigger rounds.
  • Reroll any scraps and repeat until you use up all the pastry.

Step 3. Make the well:
  • Use a small cookie cutter OR a small round cap from a spice bottle (something approximately 1" in diameter) to make a circle impression in the center of each dough round. 
  • Go in as far as you can without cutting all the way through.

Step 4. Pierce the dough:
  • Use a fork to polk holes in the center circle. The idea is that this circle can easily be pressed down or removed to make a well to fill for your appetizer or dessert.

Step 5. Bake
  • Bake at 400 degrees for about 15-20 minutes, or until shells are puffed and golden.

Step 6. Remove the center:
  • Let cool for a couple minutes, then use a muddler or the end of a spatula to press down the centers. 
  •  If you prefer, you can pull the centers out completely (I did a mix of both as some will come out more easily than others).

Step 7. Fill and serve
  • Now you can fill the shells with your preferred sweet or savory filling, and serve. Note that at this point you can only add a cooked filling (or one meant to be eaten raw).
****
Loved this post?
I'd love if you'd share it with your friends on Pinterest or Facebook! And let's connect so you can find out the next time I post! Follow me on Twitter, Instagram, or Pinterest, become a fan on Facebook, or sign up to receive my once-a-week e-mail updates. 


Thanks so much for reading!     

 
0

DIY Chalkboard Gift Tins

I don't know about you, but around this time of year, I usually find that I have a bunch of empty cake or cookie tins laying around the house. Here is an easy way to use chalkboard spray paint to recycle those tins into pretty containers that can be used for gifting or storage.

I started off with a few leftover cake tins (these held some amazing cakes from the company Daisy Cakes, which is owned by a friend).  The tins had designs printed on top, but plain sides so I just painted the tops. If yours are printed all around, you can paint the entire container.

Step 1. Wash the tins to remove and oils and dry well.

Step 2. Spread a drop cloth or newspaper (I used leftover bubble wrap) to protect your floors. Make sure you're working outdoors or in a well-ventilated area with open windows. I did none of the above because it was raining, and I ended up with a headache and an apartment that smelled like a meth lab. So...don't do that. Open the window.

Step 3. Spray with a thin coat of chalkboard paint (I use Krylon Chalkboard Spray Paint), then let dry for 10 minutes. Repeat with 2nd and 3rd coats, letting dry 10 minutes in between. Now you're basically done. Just let dry 24 hours to seal and you're ready to use.

I think these are perfect for gifting baked treats like cookies or cake, but you can also use them as storage tins. The chalkboard surface can be erased and reused so the recipients of your gift can use the empty tins all year long (or regift them!).

****
New to Always Order Dessert? Consider subscribing to my RSS feed, follow me on Twitter, become a fan on Facebook, or sign up to receive my once-a-week e-mail updates by filling in your address in the box on the right. And if you ever need any entertaining or cooking advice, please don't hesitate to e-mail me. Thanks for reading!


0

Grill Pan Waffles! (How to make waffles without a waffle iron)

Get excited, because I'm about to teach you how to make waffles without a waffle iron.

Yup, it's totally possible!

I don't own a waffle iron. I don't have the room for it, and even if I did, I suspect it's the sort of gadget I would never pull out as I remember that they can be a bit of a pain to clean (we had one growing up--it's probably still laying unused in one of my mom's cabinets).

But, I do like waffles! Those crispy nooks and crannies filled with butter and syrup--amazing! A few months ago, I heard someone mention that Jamie Oliver has a recipe for "griddle pan waffles."

This totally blew my mind. "You can make waffles on a griddle pan?!"

I immediately started searching online in an effort to find the much-lauded recipe. All I could find were links referencing it, but no actual recipe. Not even a photo!

It turns out that Channel 4 (the network in the UK that airs Jamie's program) apparently only has the rights to post Jamie Oliver recipes for about 30 days after his show originally airs, then they have to remove it from the site.

At which point, all his recipe links take you to this:
 I'm sorry, Channel 4, but that's just ridiculous; just remove the link all-together if you can't show it!

Or they could have at least found a photo of Jamie looking a bit less smug and slightly more disappointed. Something like this:

  Or this:


Clearly they've missed an opportunity there.

Anyway, I decided that I didn't need Jamie's recipe. I would figure it out on my own.

I started out by asking myself an important question:

"Alejandra, what is the difference between a pancake and a waffle?"

The answer? Crispy ridges!

Think about it---the batter is typically the same, the center is soft and airy, it's the final shape that makes it different. A waffle is nothing if not a celebration of crispy edges, which I figured could easily be achieved on a stove-top grill pan. (Not a griddle--I don't know what the heck Jamie had in mind, but I'm pretty sure his super-top-secret recipe just makes waffle-batter pancakes.)

But I digress...

I made a simple buttermilk waffle batter and got to work testing methods. Here is how you do it:

Step 1.
Prepare your waffle batter (recipe below): you want something a bit thicker than pancake batter.

Step 2.
Preheat your grill pan on medium heat until it gets nice and hot. Brush the center of the pan where you will cook your waffle with a good high-heat oil. I recommend coconut oil, but grapeseed or canola oil also works well. You can also use clarified butter.

Step 3.
Pour a 1/2 cup of batter in the center of your pan, letting it spread into a circle.  Lower the heat on your grill pan and let it cook on low for about 3-4 minutes. This part is key--you can't rush the cooking so that the waffle has time to develop the crisp ridges and cook the center without burning. DON'T RUSH THIS PART! If you rush them, you're just going to get weird pancakes and weird pancakes is not what we're after here.

Step 4.
Once the edges start to look dry and the bottom has turned golden and crispy (lift an edge to take a peek), you can flip it. The easiest way I've found is to bring your spatula in from the side so that its edge is parallel to the ridges in the grill pan (see photo above). Bring it under the edge, lift, and slowly work the spatula under the entire waffle.

Step 5.
Flip it and press down slightly with your spatula. You would never do this with a pancake, but here you really want to get those nice ridges. Let cook another 2-4 minutes before removing from pan to a wire rack.

The wire rack is key as it will let the waffle rest and cool without creating steam that will soften the crispy edges (again, it's all about the crisp!).

Continue with the rest of your batter making as many waffles as you need.

Serve immediately topped with butter, powdered sugar, and syrup (or whatever you usually serve on your waffles!).

READ THIS! 
Are these going to be exactly like the waffles you get out of the waffle iron? No, of course not.  I'm not a crazy magician lady! BUT...they really do taste like waffles, and you do get enough of that crispy edge to satisfy any cravings. Just be patient and let them crisp up. It takes a bit of trial and effort, but I promise they're totally worth it!

And yes, you can use whatever your favorite waffle recipe is with this method. Including Bisquick. I won't judge.

That's a lie.

I will judge you a little bit if you use Bisquick, but I'll keep it to myself.

Now go! Waffle on!


****
Like this recipe? Share the photo and link with a friend on Facebook or Pinterest so that more folks can enjoy it! I'd also love if you'd consider subscribing to my newsletter, follow me on Twitter, become a fan on Facebook, or sign up to receive my once-a-week e-mail updates by filling in your address in the box on the right. If you're in the NYC area, be sure to check out my NYC dinner party style cooking classes. 

Thanks for reading & sharing! 


Grill Pan Waffles Recipe
Makes 5 6-inch grill pan waffles. (this batter recipe also works for pancakes)

Ingredients
1 cup all purpose flour
1/2 cup whole wheat flour (or just use all all-purpose)
1/2 teaspoon baking soda
1 1/2 teaspoon baking powder
1 teaspoon kosher salt
2 tablespoons raw sugar (or substitute granulated white sugar)
2 large eggs
2 teaspoons vanilla extract
1 1/4 cups buttermillk or plain yogurt
1/2 teaspoon apple cider or white vinegar
Coconut, grapeseed, canola, or clarified butter, for cooking.

Directions
Preheat your grill pan on medium heat. Prepare a wire cooling rack on the side.

Whisk together the flours, baking soda, baking powder, kosher salt, and sugar. In a separate container (I just do it right in my measuring cup for ease!) whisk together the eggs, vanilla, buttermilk, and vinegar. Pour the wet into the dry and stir gently until fully combined and no dry spots remain (you will have some lumps; that's good.)

Brush your grill pan with the oil, and ladle half a cup of batter into the center. Lower heat to low. Let cook 3-4 minutes until crisp, then gently use a spatula to life and flip (see method as described in the post above). Cook an additional 3 minutes, then remove and let cool on a wire rack. Repeat with rest of batter.

Serve immediately.

0

Video: How to Make Spanish Tapas Style Garlic Mushrooms

I love to gather a bunch of my friends together over wine and lots of small plates filled with delicious tapas. It's a perfect way to entertain, because everyone gets the choice to taste a little bit of everything or pick and choose what they'd like.

In today's video, I teach you how to make Mushrooms in Garlic Olive Oil--one of my absolute FAVORITE Spanish tapas dishes. Also known as "champiñones al ajillo," it's a super quick recipe with just a few ingredients, but a LOT of flavor. Serve them with lots of crusty bread for dipping, or even use it as a side with steak or chicken. (These mushrooms also make a great burger topping!)


Enjoyed this video? Be sure to click "LIKE" and share it with a friend on Facebook or Twitter!


Want to throw a whole tapas party? Try some of my other favorite tapas recipes below:


Bacon-Wrapped Dates with Spanish Olive Dip (#2 on this list)


Tortilla Espanola


Pan-Fried Shishito Peppers


Mini Crab Cakes with Cilantro-Lime Aioli


Cold Roasted Asparagus


****
Like this post? Share it with a friend on Facebook or Pinterest so that more folks can see it. I'd also love if you'd consider subscribing to my newsletter, follow me on Twitter, become a fan on Facebook, or sign up to receive my once-a-week e-mail updates by filling in your address in the box on the right. If you're in the NYC area, be sure to check out my NYC dinner party style cooking classes. Thanks for reading & sharing!    
0

Video: Dark Chocolate & Espresso Pots de Crème

These ridiculously easy little creamy chocolate desserts have become my new favorite thing. I've made them about six times over the past couple months, most recently at the Mother's Day lunch I made for our mothers last week. Just a few ingredients blitzed together in the blender and you end up with something absolutely incredible (and never-fail impressive).

I filmed a quick 5-minute video demonstrating the recipe so you can see just how easy it really is. Take a look and give it a try! You can easily customize the recipe to your tastes, using liqueur in place of the espresso, milk or semi-sweet chocolate instead of the dark, and different types of extract (orange or peppermint, for example) to alter the flavor. Tomorrow I'm going to show you a fun variation for this recipe made with coconut and white chocolate.

Let me know what you think about the video!

0

Video: How to Make Rocky Road Fudge

I've been wanting to add more video content to the blog, but it's been tricky as I work solo (or sola, rather) 98% of the time so there hasn't really been anyone who can handle the camera work for me.

This weekend I decided to just go for it, with Eugene handling the camera, which I rented from Adorama here in the city. We basically just figured it out as we went along with fairly decent results and filmed footage for 5 different videos that I will edit and post over the coming weeks. I'm still getting the hang of the editing (I'm using iMovie), but it's always fun learning a new skill! I look back at the first photos I posted on this blog and see how far I've come so I know first-hand the value of just diving right in. I hope you enjoy!


P.S. The Rocky Road Fudge recipe I made here is actually an older one from last year, which you can find here: http://www.alwaysorderdessert.com/2010/03/salted-rocky-road-fudge.html

0

Kitchen Tip: How to Roast Beets

It's prime beet season and the earthy (and incredibly affordable!) jewels are everywhere. While beets can be prepared in any manner of ways, my absolute favorite way is to roast them. Unlike boiling, which tends to wash them out, roasting preserves the gorgeous natural colors, keeps the tenderness intact, and deepens and enhances it's characteristic earthy sweetness.

The bonus is that roasted beets can be prepared in a large batch all at once, then stored in the fridge for a bevy of uses over the coming week. Think sliced into salads, paired with tangy goat cheese as an appetizer, sauteed in hot herbed butter, mashed into ravioli filling, or (my favorite) pureed and baked into chocolate cake. Roasted beets are in fact so versatile that they're actually sold that way at the grocery store, but there is no need to spend extra bucks to have someone do the work. With just a few quick steps, you can learn to roast a perfect beet every single time.


0

The Healthy Way to Deep Fry


I know some people shy away from frying food, but the truth is that when done correctly, frying is actually not as unhealthy a cooking method as you might think!

Back when I was in high school, my friends and I took a public speaking class where we each had to give presentations. I (big surprise) did a cooking demo, and showed the class how to make a homemade egg cream. My friend Nick, who at the time was working part-time in the kitchen of a pizza parlor, gave a demo about the "healthy" way to deep-fry that was probably one of the most useful things I ever learned in high school.

First, you should understand what actually happens when you drop a piece of food into the hot oil. All food, as you know, contains water. So whether it's a chicken wing, a shrimp, or a piece of broccoli, there is naturally occurring water inside of it. As soon as you drop it into the hot oil, that water is converted into steam (from the heat). As you know, oil and water don't mix, so this steam comes out of the food and forms a kind of barrier that prevents the oil from penetrating it.

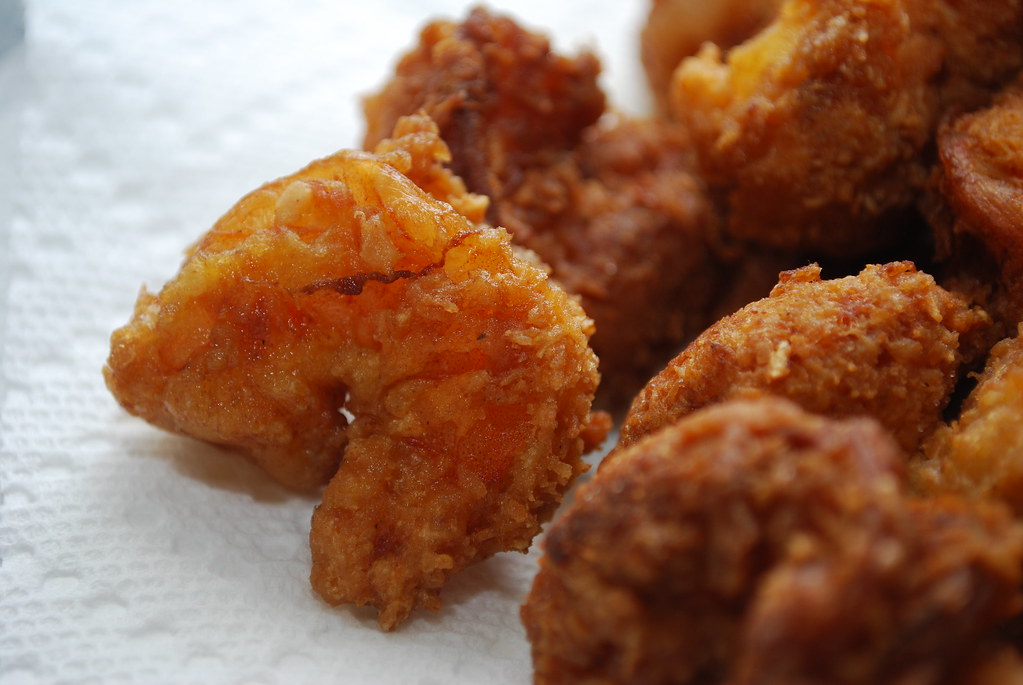
In those seconds when that steam is surrounding the food and keeping the oil out, the food is quickly browning and creating that crisp delicious exterior that we love about fried food. This crust then takes over protection duties, and keeps the oil out while the rest of the food continues to cook on the inside due to the high heat. (Think of it like a mini oven inside the crisp exterior.)


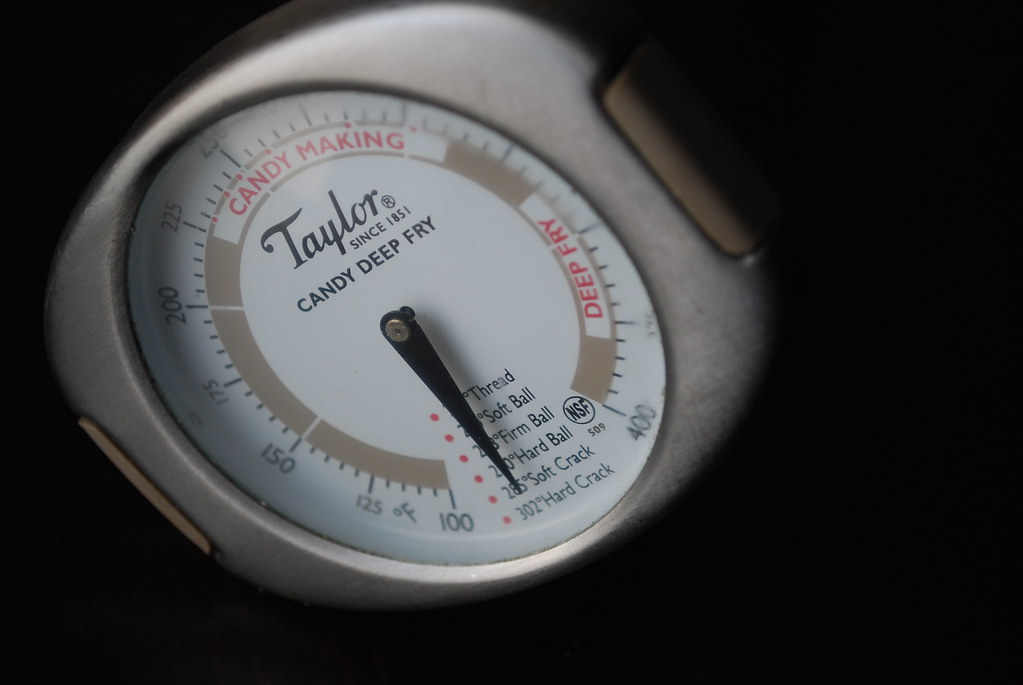
The magic ingredient to make this all run smoothly? Temperature. Specifically, a temperature between 350 and 375 degrees F. (about 177-190 Celcius).

That's why whenever you read a recipe for a fried dish it's going to tell you to fry it at this temperature; because this is the perfect temperature in which this process can take place. Any hotter than 375, and the steam will evaporate quickly, the exterior will crisp and brown too fast, and the food on the inside won't cook completely. Any lower than 350, and exterior of the food won't be able to develop in time to protect the inside before the steam evaporates, so you'll end up absorbing way more oil (and calories) than you would have if it were cooked properly.

Makes sense, right?

I remember being totally fascinated by this explanation when I was 17, and 10 years later, I still think about it every single time that I fry. (Actually, I should probably send Nick this link as soon as I post it. I wonder if he even remembers this!) And in case you're skeptical of something I learned from another 17-year-old, I'll note that this same lesson was essentially repeated by my chef instructor when I went to culinary school a few years later.

So that said, there are some other things to keep in mind when frying. Here are my tips (please feel free to add your own in the comments):


1. Use a heavy-bottomed pot that will help retain the heat from the burners and conduct it evenly. If the pot is too thin, the oil will heat up too fast and the food will burn. I usually use my dutch oven or my cast iron skillet. If I'm only frying a couple things, I'll use a smaller saucepan (seen above). If all my wedding registry dreams come true, I'll soon have some even better pots that I can use.

2. Get a thermometer. Seriously, you have to do it. They're 10-20 dollars and will give you that much more confidence when dealing with the oil. You can also use them for candy or jam making if you're so inclined.

3. Use clean oil to fry. I know some people like to strain their oil and reuse, but I'm not really a fan of that because the properties of the oil break down a bit each time you use it. Reused oil is more likely to smoke and burn your food. It can also absorb flavors that will ruin the taste of your food. (If you feel bad throwing it out after one use, you can look for centers that recycle used cooking oil.)

4. Man the controls. Sometimes I feel like I'm flying a plane when I fry. The reason? You need to use the burners to regulate the temperature of the oil. When you add food to the pot, the heat will drop quickly, so raise the flame to get it back where you want it. If it gets too hot, lower it. (If you own a deep fryer, this is moot, but I know most of you don't.)


5. Don't add everything to the pot at once or the temperature will drop. This isn't like boiling. You can only fry a few things at a time; how many determines on the size of what you're cooking and how big your pot is. Fry them in batches; it'll still go quickly.

6. Fried leftovers don't reheat well, but if you must, I suggest you freeze them and then reheat in a 400 degree oven for about 5 minutes. Don't even think about microwaving them.

7. Salt *after* you fry. Salt will pull moisture to the food's surface and make it splatter when you add it to the oil. It will also lower the smoking point of the oil. Adding it to the food after it's fried will prevent this.

8. Use a good metal or heat-resistant silicon slotted spoon to take things out of the oil, and sift out any bits of breading or food after each batch. Never use wooden utensils; they tend to retain moisture which will make your oil splatter and spit. Plastic will melt.

Finally, what kind of oil you cook with is up to you. Personally, I only ever use virgin coconut oil (which I buy in bulk from this store) or grapeseed oil, both for health and taste reasons. Coconut oil is one of my absolute favorite things to cook with, and I may delve into why in a future post.


But for now, you're ready to fry! Here are some recipes you can now guilt-lessly (well, almost!) try:

Fried Macaroni & Cheese

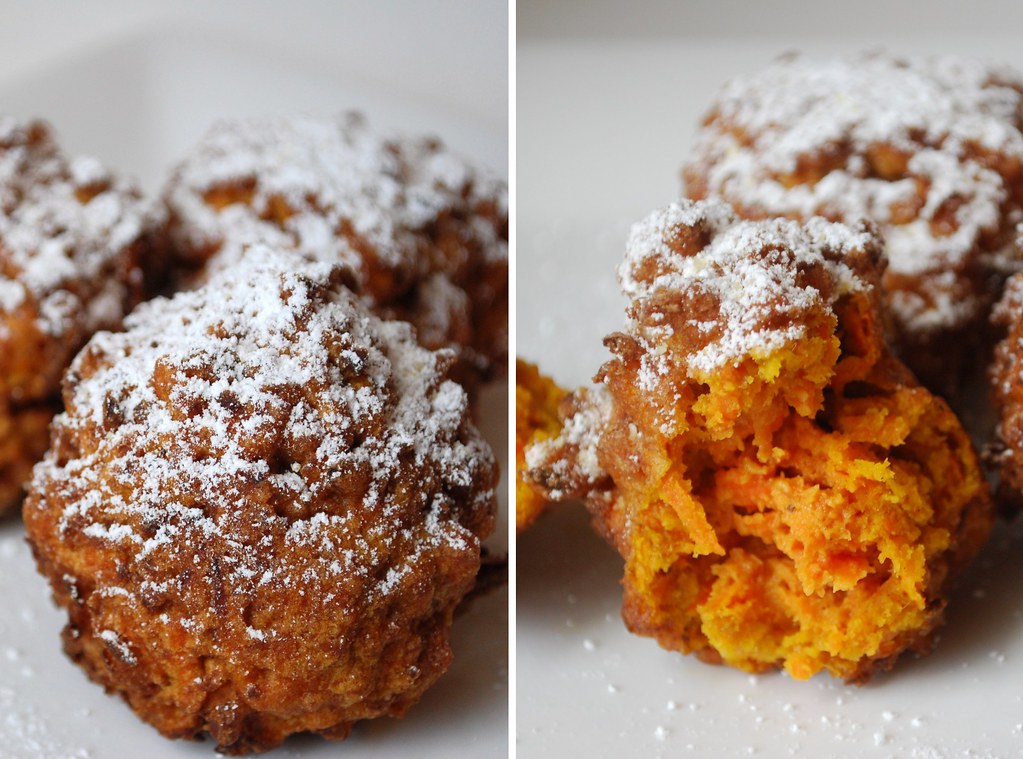
Sweet Carrot Zeppole

Smokey Jalapeno Poppers

Arancini di Riso
0

How to Peel a Kiwi (A Video Tutorial)

One of my many plans for the upcoming year, is to incorporate video tutorials and podcasts here on the blog. I'm starting this today with my very first video tutorial.

It's a quick, two-minute video where I show you my favorite technique for peeling a kiwi fruit. You don't need any special equipment and it's a great way to perfectly peel a whole bowl of kiwis for use in a salad, a fruit plate, or in a recipe like my Kiwi Sorbet.

I hope you enjoy my first video, and please let me know what you think! Also, if you have any special requests for similar tutorials, please let me know in the comments.

4
Back to Top